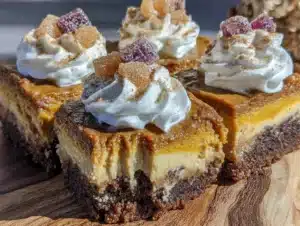
Love this? Save it for later!
Share the inspiration with your friends
This was supposed to be a pumpkin pie. A classic, no-fuss, deep-dish pumpkin pie for a friend’s Thanksgiving potluck. I had my grandmother’s recipe memorized, the one with the slightly burnt edge she always got because she refused to set a timer. I was feeling confident, maybe too confident. I grabbed the block of cream cheese thinking it was the block of butter for the crust. By the time I realized my mistake, the cream cheese was already softening in the microwave, and I was running late with a sink full of dishes. I stood there, staring at the sad, lonely pie crust I had made and the bowl of creamy, spiced pumpkin mixture that now had a very distinct cheesecake tang. I almost threw the whole thing out. Honestly, I was this close. But I had no time to start over, so I poured the strange hybrid filling into a waiting gingersnap crust I’d whipped up on a whim the day before. What came out of the oven was nothing like the plan—and better. It was the first time a kitchen disaster made me feel like a genius.
I slid those bars onto the dessert table, fully expecting polite smiles and a lot of untouched plates. Instead, the pan was empty in twenty minutes. People kept asking for the recipe, and I had to explain that it was a happy accident involving a distracted moment and a misread label. Maybe you’ve been there, staring at a culinary mistake that feels like a total loss, only to realize you’ve stumbled onto something amazing. These Pumpkin Cheesecake Bars are that story in dessert form. They have the spiced, familiar soul of pumpkin pie but the creamy, tangy richness of cheesecake, all held together by a crunchy, buttery gingersnap crust.
That first bite had this unexpected lightness. The pumpkin didn’t weigh it down, and the cheesecake wasn’t too heavy. It was the perfect middle ground. I kept making them, tweaking the spice blend, testing the bake time, and perfecting the swirl. Now, I make them every fall, not because of a mistake, but because they are genuinely the best thing I’ve ever baked. They are the recipe that stayed with me, the one that turned a moment of panic into a tradition. It’s the kind of dessert that makes you slow down, take a deep breath, and just enjoy the season.
Why You’ll Love This Recipe
These Pumpkin Cheesecake Bars aren’t just another holiday dessert. They are the result of many, many test batches (and one very fortunate error). I’ve tested this with full-fat cream cheese, low-fat cream cheese, and even a dairy-free version for a friend. I’ve burned the crust and under-baked the center. I’ve learned exactly what works, so you don’t have to. Here is why this version is the one you’ll come back to year after year:
- Quick & Easy: No water bath, no complicated steps. You can have the filling mixed in under 15 minutes. It’s perfect for a busy weeknight when you need a dessert for tomorrow’s potluck or just a cozy treat for yourself.
- Simple Ingredients: You probably have most of these in your pantry right now. Canned pumpkin, cream cheese, eggs, sugar, and spices. No need for a special trip to a fancy grocery store.
- Perfect for Fall Gatherings: These bars are the star of any Thanksgiving table, Friendsgiving, or cozy dinner party. They are easy to slice and serve, so no one is fighting over the last piece of pie.
- Crowd-Pleaser: I’ve served these to kids who “don’t like pumpkin” and adults who “aren’t dessert people.” They always disappear. The tangy cream cheese mellows out the pumpkin, making it incredibly approachable.
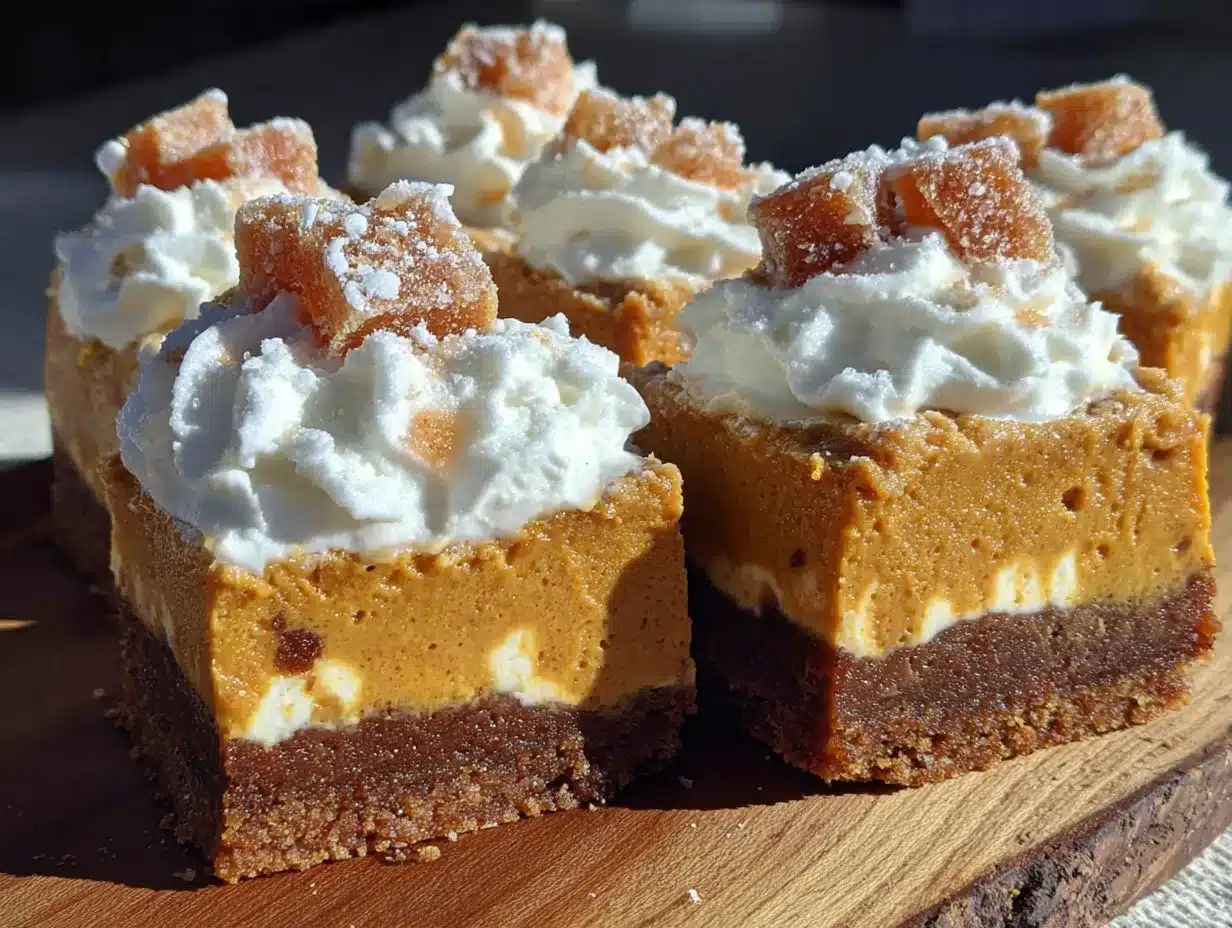
- Unbelievably Delicious: The texture is the real star. You get a crunchy, buttery gingersnap crust, a silky, smooth pumpkin cheesecake layer, and a creamy, tangy top. It’s a textural dream.
What makes this recipe different from the rest? It’s the balance. So many pumpkin cheesecake bars are either too dense or too sweet. This one uses a specific ratio of pumpkin to cream cheese that creates a light, almost mousse-like texture. The gingersnap crust isn’t just a base; it’s a flavor partner. The molasses and ginger in the cookies complement the pumpkin spice without overpowering it. It’s not just another version—it’s the best version. It’s the kind of dessert that makes you close your eyes after the first bite, a little moment of pure, cozy satisfaction.
What Ingredients You Will Need
This recipe relies on simple, wholesome ingredients to create that perfect fall flavor. Most of these are pantry staples, especially if you do a lot of fall baking. The key is using quality ingredients where it counts, like a good brand of cream cheese and fresh spices.
- For the Gingersnap Crust:
- 2 cups (240g) gingersnap cookie crumbs: You can buy them pre-crushed or crush your own. I recommend using a food processor for the finest, most even crumb. The brand Nabisco works perfectly. The molasses flavor is essential here.
- 6 tablespoons (85g) unsalted butter, melted: Make sure it’s melted but not hot. This binds the crumbs together. You can use salted butter, just reduce the added salt if you use it.
- 2 tablespoons (25g) granulated sugar: This adds a little extra sweetness and helps the crust set.
- 1/4 teaspoon salt: A tiny pinch balances the sweetness of the cookies and the butter.
- For the Pumpkin Cheesecake Filling:
- 16 ounces (452g) cream cheese, softened: This is non-negotiable. Use full-fat, block-style cream cheese (like Philadelphia). Do not use the spreadable kind in a tub, as it has too much water and will make your bars runny. Let it sit on the counter for at least 30 minutes before you start.
- 1 cup (200g) granulated sugar: Just regular white sugar. It dissolves perfectly into the cream cheese.
- 1 cup (245g) canned pumpkin puree: Make sure you buy pumpkin puree, not pumpkin pie filling. The pie filling has sugar and spices already added, which will throw off the balance. I always use Libby’s 100% pure pumpkin.
- 2 large eggs, room temperature: Room temperature eggs blend into the batter more smoothly, creating a silkier texture. Take them out of the fridge at the same time as the cream cheese.
- 1 teaspoon vanilla extract: Pure vanilla extract adds a warm, deep flavor. Avoid imitation vanilla if you can.
- 1 tablespoon pumpkin pie spice: You can use a store-bought blend or make your own. It’s the heart of the fall flavor.
- 1/2 teaspoon ground cinnamon: For an extra layer of warmth.
- 1/4 teaspoon ground nutmeg: Freshly grated is amazing, but ground works perfectly.
- For the Cream Cheese Swirl (Optional but Recommended):
- 4 ounces (113g) cream cheese, softened: This is for the top swirl. It creates that beautiful marbled look and adds an extra tangy kick.
- 2 tablespoons (25g) granulated sugar: Just a little to sweeten the swirl.
- 1/2 teaspoon vanilla extract: For flavor.
- 1 tablespoon milk or cream: This thins the swirl just enough to make it easy to dollop and swirl.
Equipment Needed
You don’t need a professional bakery setup for these bars. Most of these tools are standard kitchen items. Here’s what you’ll need to make the process smooth and easy.
- 9×13-inch baking pan: This is the perfect size for these bars. A metal pan will give you a crispier crust, while a glass pan will work fine, but you may need to add 5 minutes to the bake time.
- Parchment paper: This is your best friend. It makes lifting the entire block of bars out of the pan a breeze. Leave some overhang on the long sides.
- Food processor or rolling pin: For crushing the gingersnaps. A food processor is faster and gives a finer crumb, but a sturdy zip-top bag and a rolling pin will work in a pinch. I’ve done it both ways, and the rolling pin method is a great arm workout!
- Medium mixing bowls: You’ll need one for the crust, one for the pumpkin filling, and one for the cream cheese swirl.
- Electric hand mixer or stand mixer: A hand mixer is perfect for this. It’s easier to control and less cleanup than a stand mixer. You want to beat the cream cheese until it’s smooth and fluffy.
- Rubber spatula: For scraping down the bowls and folding the ingredients. A good spatula is worth its weight in gold.
- Measuring cups and spoons: Accurate measurements are key for baking.
- Sharp knife: For cutting clean, neat bars. A chef’s knife or a long serrated knife works best.
Preparation Method
Follow these steps carefully, and you’ll have perfect Pumpkin Cheesecake Bars every single time. I’ve added little notes and cues that I’ve learned from my own trial and error.
- Preheat and Prep (10 minutes): Preheat your oven to 350°F (175°C). Line your 9×13-inch baking pan with a long sheet of parchment paper, leaving about 2 inches of overhang on the two long sides. This will be your “handle” to lift the bars out later. Lightly spray the parchment with non-stick cooking spray for good measure.
- Make the Gingersnap Crust (10 minutes): In your food processor, pulse the 2 cups of gingersnap cookies until they become fine crumbs. You should have about 2 cups. Pour the crumbs into a medium bowl. Add the 2 tablespoons of sugar and 1/4 teaspoon of salt. Pour in the 6 tablespoons of melted butter and stir with a fork until all the crumbs are moistened. The mixture should look like wet sand and clump together when you squeeze it in your fist.
- Press the Crust (5 minutes): Pour the crumb mixture into your prepared pan. Use the bottom of a flat measuring cup or a glass to press it down firmly and evenly. Don’t just pat it; really press it into a solid, even layer. This prevents the crust from crumbling when you cut the bars. Bake the crust for 10 minutes. It should be fragrant and just slightly darker. Set it aside to cool while you make the filling. Leave the oven on.
- Make the Pumpkin Filling (15 minutes): In a large mixing bowl, beat the 16 ounces of softened cream cheese with an electric hand mixer on medium speed until it’s completely smooth and fluffy. This takes about 2 minutes. Scrape down the sides of the bowl with your spatula. Add the 1 cup of sugar and beat until combined. Add the 2 eggs, one at a time, beating on low speed just until each yolk disappears. Don’t overmix! Overmixing incorporates too much air and can cause cracks. Add the 1 cup of pumpkin puree, 1 teaspoon of vanilla, 1 tablespoon of pumpkin pie spice, 1/2 teaspoon of cinnamon, and 1/4 teaspoon of nutmeg. Mix on low speed until everything is just combined and a beautiful, creamy orange color. The batter will be thick and luscious.
- Make the Cream Cheese Swirl (5 minutes): In a small bowl, beat the remaining 4 ounces of softened cream cheese with 2 tablespoons of sugar and 1/2 teaspoon of vanilla until smooth. Add the 1 tablespoon of milk or cream and beat until it’s a smooth, pourable consistency. This swirl adds a beautiful tang and a professional look.
- Assemble the Bars (10 minutes): Pour the pumpkin cheesecake filling over the pre-baked crust. Use your spatula to spread it into an even layer. Drop small spoonfuls of the cream cheese swirl mixture all over the top of the pumpkin filling. I usually do about 12 to 15 dollops. Use a butter knife or a toothpick to gently swirl the cream cheese into the pumpkin. Don’t over-swirl or you’ll lose the distinct pattern. Just a few figure-eight motions will do.
- Bake to Perfection (45-55 minutes): Place the pan in the preheated oven and bake for 45 to 55 minutes. The edges should be set and slightly puffed, but the center will still have a slight jiggle when you gently shake the pan. This is the sign of a perfectly baked cheesecake. If the center is still very liquidy, give it another 5 minutes. The top should not be browned. If it starts to brown too quickly, tent the pan loosely with aluminum foil.
- Cool and Chill (4 hours minimum): This is the hardest part! Remove the pan from the oven and place it on a wire rack to cool completely to room temperature. This usually takes about 1 to 2 hours. Once it’s cool, cover the pan with plastic wrap and place it in the refrigerator for at least 4 hours, but preferably overnight. Chilling is essential for the bars to set properly and for the flavors to meld. Do not rush this step.
- Slice and Serve (10 minutes): Once the bars are fully chilled, use the parchment paper overhang to lift the entire block of cheesecake out of the pan. Place it on a cutting board. Use a sharp, clean knife to slice into bars. For the cleanest cuts, wipe the knife clean with a damp paper towel between each slice. I like to cut them into 24 small squares, but you can do 16 larger ones if you prefer.
Cooking Tips & Techniques
Over the years, I’ve made every mistake you can imagine with these bars. I’ve had a crust that crumbled into a million pieces, a filling that cracked like a desert floor, and a top that was so brown it looked like a chocolate bar. Here’s how to avoid my kitchen disasters.
- The Softened Cream Cheese Secret: This is the single most important tip. Cold cream cheese will give you a lumpy batter. Let it sit on the counter for at least 30 to 60 minutes. If you forget, you can cut it into small cubes and microwave it in 10-second bursts on low power until it’s soft to the touch. Don’t melt it, just soften it.
- Don’t Overmix the Batter: I know it’s tempting to keep beating until it’s perfectly smooth, but overmixing incorporates too much air. Those air bubbles expand in the oven and then collapse, causing cracks. Mix on low speed and stop as soon as the ingredients are combined.
- The Water Bath Shortcut: Traditional cheesecakes use a water bath to prevent cracking. These bars are so forgiving that you don’t need one. The key is the low baking temperature and not overbaking. The slight jiggle in the center is your best friend.
- Getting Clean Slices: A warm knife is the secret to clean, bakery-style slices. Run your knife under hot water, dry it off, and make your cut. Wipe the knife clean with a damp paper towel between each cut. It makes a world of difference.
- Patience is a Virtue: I know it’s hard, but do not cut into these bars while they are warm. The filling needs time to set up in the fridge. If you cut them too early, you’ll end up with a gooey mess. Trust the process. The wait is worth it.
Variations & Adaptations
One of the best things about this recipe is how easy it is to adapt. I’ve played around with different flavors and dietary needs, and here are a few of my favorite variations.
- Gluten-Free Version: This is incredibly easy! Simply use gluten-free gingersnap cookies for the crust. Everything else in the recipe is naturally gluten-free. I’ve tested this with several brands, and they all work beautifully. Just make sure your pumpkin puree and spices are certified gluten-free if you are highly sensitive.
- Maple Pecan Twist: For a deeper, more autumnal flavor, add 1/4 cup of pure maple syrup to the pumpkin filling, reducing the sugar by 2 tablespoons. Then, sprinkle 1/2 cup of chopped pecans over the top of the cream cheese swirl before baking. The nuts get toasty and add a wonderful crunch. I did this for a Friendsgiving last year, and it was the first thing to disappear.
- Chocolate Gingerbread Lover’s Version: For a truly decadent treat, add 1/2 cup of mini chocolate chips to the pumpkin filling. The combination of chocolate, ginger, and pumpkin is surprisingly amazing. You can also drizzle melted dark chocolate over the top after the bars have cooled for an extra layer of indulgence.
- Dairy-Free Adaptation: This one takes a little more work, but it’s possible. Use a high-quality dairy-free cream cheese alternative (like Kite Hill or Violife). Use a vegan butter stick for the crust. The texture will be slightly less firm, but the flavor is still fantastic. Be sure to let the dairy-free cream cheese soften completely.
Serving & Storage Suggestions
These bars are incredibly versatile. They are perfect for a casual weeknight treat or a fancy holiday dessert table. Here’s how to serve and store them like a pro.
- Serving Temperature: These bars are best served cold, straight from the refrigerator. The filling is firm and creamy, and the crust is perfectly crunchy. If you let them sit out for more than 30 minutes, they will start to soften.
- Presentation Ideas: For a beautiful presentation, dust the top of the bars with a little bit of ground cinnamon or pumpkin pie spice right before serving. A dollop of lightly sweetened whipped cream and a sprinkle of candied ginger takes them over the top. For a holiday party, cut them into small, bite-sized squares and serve them on a beautiful platter.
- Complementary Dishes: These bars are rich enough to stand on their own, but they pair beautifully with a cup of hot coffee, a spiced chai latte, or a glass of cold milk. For a dessert spread, they go perfectly with a classic apple crisp or a slice of pumpkin bundt cake.
- Storage Instructions: Store any leftover bars in an airtight container in the refrigerator. They will stay fresh for up to 5 days. The crust will soften slightly over time, but the flavor will continue to develop. I actually think they taste even better on the second day.
- Freezing for Later: These bars freeze beautifully! Once the bars are fully chilled and sliced, place them on a baking sheet in a single layer and freeze for 1 to 2 hours, or until they are solid. Then, transfer the frozen bars to a freezer-safe bag or container. They will keep for up to 3 months. To thaw, simply place them in the refrigerator overnight.
Nutritional Information & Benefits
While these are definitely a treat, they do have some surprising nutritional benefits, especially compared to a traditional pumpkin pie. Here’s a quick look at what you’re getting.
- Estimated Nutritional Values (per bar, based on 24 servings):
- Calories: 220
- Fat: 14g
- Carbohydrates: 22g
- Protein: 4g
- Sugar: 16g
- Fiber: 1g
- Health Benefits of Key Ingredients:
- Pumpkin: It’s packed with Vitamin A (beta-carotene), which is great for your eyes and immune system. It’s also a good source of fiber.
- Ginger: The gingersnaps provide a dose of ginger, which is known for its anti-inflammatory properties and can help with digestion.
- Cinnamon: This spice is full of antioxidants and can help regulate blood sugar levels.
- Dietary Considerations: This recipe can be easily adapted for gluten-free diets. It is not low-carb or keto-friendly due to the sugar and crust. It contains dairy and eggs, so it’s not suitable for vegan diets without significant modifications.
- Personal Wellness Perspective: I believe in balance. Desserts like these are part of a happy, healthy life. They are meant to be enjoyed on a cozy fall evening, shared with loved ones, and savored without guilt. One bar is perfectly satisfying.
Conclusion
These Pumpkin Cheesecake Bars are more than just a dessert. They are a little piece of autumn happiness, a warm hug on a plate, and a testament to the fact that sometimes the best things in life come from happy accidents. They are easy enough for a beginner baker to master and impressive enough to serve at a holiday feast. I honestly can’t imagine a fall season without them now.
I encourage you to make this recipe your own. Add your favorite spices, try a different nut in the crust, or drizzle them with caramel. The beauty of a good base recipe is that it invites creativity. Please, don’t be afraid to experiment. And when you do, I’d love to hear about it! Leave a comment below and tell me how your bars turned out. Did you try a fun variation? Share a photo on social media and tag me.
Thank you for stopping by and spending a little time in my cozy corner of the internet. I hope these bars bring you as much warmth and comfort as they’ve brought me. Happy baking, and here’s to a season filled with delicious, accidental discoveries!
Frequently Asked Questions (FAQs)
Can I use a different crust?
Absolutely! While the gingersnap crust is a classic pairing, you can easily use a graham cracker crust, a shortbread crust, or even a crushed vanilla wafer crust. Just keep the butter and sugar ratios the same. A chocolate wafer crust would also be a delicious, decadent twist.
Why did my cheesecake crack?
Cracks usually happen from overbaking or a sudden change in temperature. Make sure you take the bars out when the center still has a slight jiggle. Also, let them cool completely to room temperature on the counter before you put them in the fridge. A slow, gradual cool-down is key.
Can I make these bars ahead of time?
Yes! This is one of the best things about this recipe. You can make them 2 to 3 days in advance. In fact, they taste even better after a day or two in the fridge because the flavors have time to meld together. They are the perfect make-ahead dessert for a holiday party.
Can I use fresh pumpkin instead of canned?
You can, but I don’t recommend it for this recipe. Canned pumpkin has a consistent, thick texture that is perfect for cheesecake. Fresh pumpkin puree can be much more watery, which can make your bars runny. If you must use fresh, you’ll need to strain the puree through a cheesecloth for several hours to remove the excess liquid.
My crust is too crumbly! What went wrong?
This usually happens when there isn’t enough butter to bind the crumbs. Make sure you are measuring your crumbs accurately (2 cups, packed) and that you are using the full 6 tablespoons of melted butter. Also, pressing the crust down firmly is crucial. Use the bottom of a measuring cup to really compact it into the pan.
Pin This Recipe!
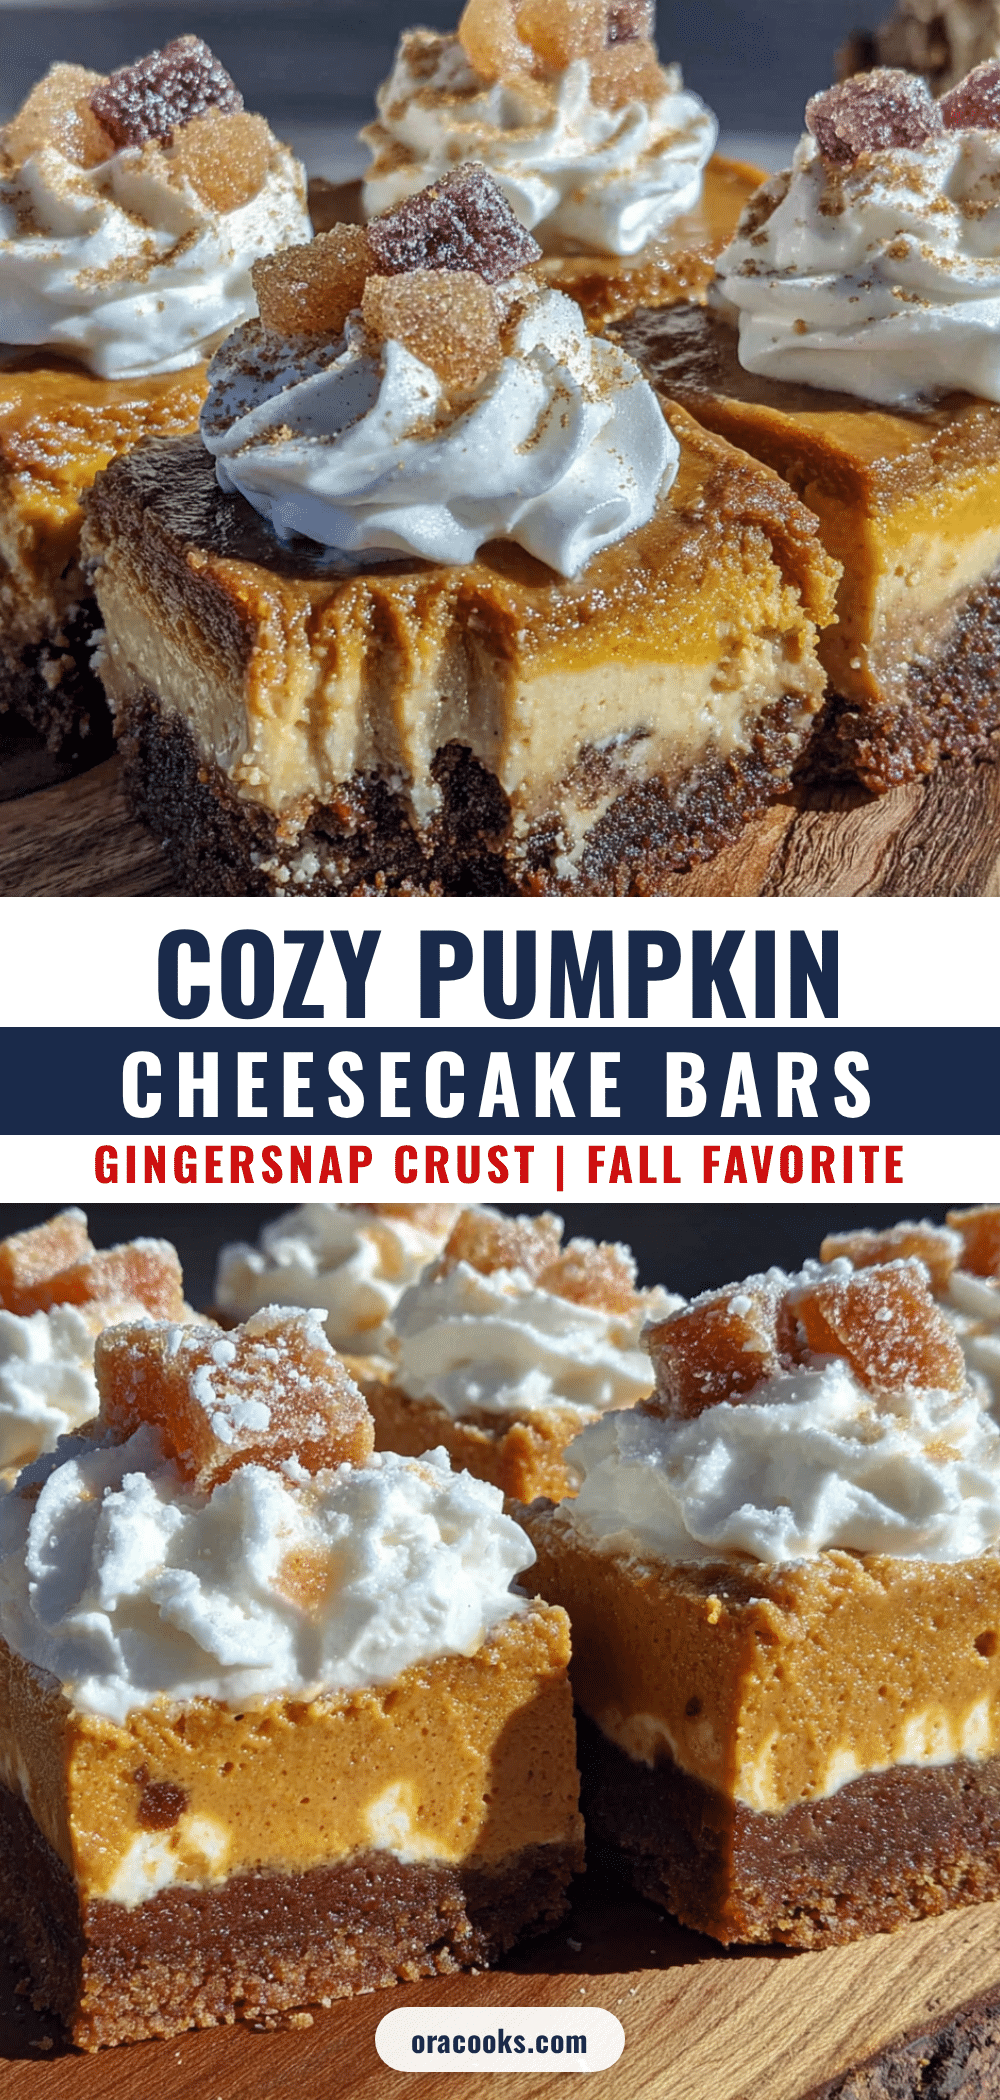
Perfect Pumpkin Cheesecake Bars with Gingersnap Crust
These Pumpkin Cheesecake Bars are a happy accident turned tradition, featuring a crunchy gingersnap crust, a silky pumpkin cheesecake filling, and a tangy cream cheese swirl. They’re the perfect easy fall dessert for any gathering.
- Prep Time: 15 minutes
- Cook Time: 55 minutes
- Total Time: 5 hours 10 minutes (includes chilling)
- Yield: 24 servings 1x
- Category: Dessert
- Cuisine: American
Ingredients
- 2 cups (240g) gingersnap cookie crumbs
- 6 tablespoons (85g) unsalted butter, melted
- 2 tablespoons (25g) granulated sugar
- 1/4 teaspoon salt
- 16 ounces (452g) cream cheese, softened
- 1 cup (200g) granulated sugar
- 1 cup (245g) canned pumpkin puree
- 2 large eggs, room temperature
- 1 teaspoon vanilla extract
- 1 tablespoon pumpkin pie spice
- 1/2 teaspoon ground cinnamon
- 1/4 teaspoon ground nutmeg
- 4 ounces (113g) cream cheese, softened (for swirl)
- 2 tablespoons (25g) granulated sugar (for swirl)
- 1/2 teaspoon vanilla extract (for swirl)
- 1 tablespoon milk or cream (for swirl)
Instructions
- Preheat oven to 350°F (175°C). Line a 9×13-inch baking pan with parchment paper, leaving overhang on the long sides. Lightly spray with non-stick cooking spray.
- In a food processor, pulse gingersnap cookies into fine crumbs. In a medium bowl, combine crumbs, 2 tablespoons sugar, and 1/4 teaspoon salt. Pour in melted butter and stir until all crumbs are moistened and clump together.
- Press crumb mixture firmly and evenly into the prepared pan using the bottom of a flat measuring cup. Bake for 10 minutes until fragrant and slightly darker. Set aside to cool. Keep oven on.
- In a large bowl, beat 16 ounces softened cream cheese with an electric mixer on medium speed until smooth and fluffy (about 2 minutes). Add 1 cup sugar and beat until combined. Add eggs one at a time, beating on low just until each yolk disappears. Add pumpkin puree, 1 teaspoon vanilla, pumpkin pie spice, cinnamon, and nutmeg. Mix on low until just combined.
- In a small bowl, beat remaining 4 ounces cream cheese with 2 tablespoons sugar and 1/2 teaspoon vanilla until smooth. Add milk or cream and beat until pourable.
- Pour pumpkin cheesecake filling over the pre-baked crust and spread evenly. Drop small spoonfuls of cream cheese swirl mixture over the top (12-15 dollops). Use a butter knife or toothpick to gently swirl into the pumpkin filling.
- Bake for 45-55 minutes. Edges should be set and slightly puffed; center should still have a slight jiggle. If top browns too quickly, tent loosely with aluminum foil.
- Remove from oven and cool completely on a wire rack (1-2 hours). Cover with plastic wrap and refrigerate for at least 4 hours, preferably overnight.
- Once fully chilled, use parchment overhang to lift the block out of the pan. Place on a cutting board and slice into bars using a sharp knife. Wipe knife clean between cuts for neat slices.
Notes
For best results, use full-fat block cream cheese (not spreadable). Let cream cheese and eggs come to room temperature before starting. Do not overmix the batter to avoid cracks. The bars are best served cold. They can be stored in the refrigerator for up to 5 days or frozen for up to 3 months.
Nutrition
- Serving Size: 1 bar
- Calories: 220
- Sugar: 16
- Sodium: 180
- Fat: 14
- Saturated Fat: 8
- Carbohydrates: 22
- Fiber: 1
- Protein: 4
Keywords: pumpkin cheesecake bars, gingersnap crust, fall dessert, Thanksgiving dessert, easy cheesecake bars