Love this? Save it for later!
Share the inspiration with your friends
I was elbow-deep in suds at my kitchen sink last November, scrubbing a casserole dish that had seen better days, when my next-door neighbor, a retired electrician named Pete who I’d only ever seen tending his rose bushes, knocked on the door. He was holding a foil-covered dish and a handwritten note on a scrap of brown paper bag. “My wife used to make this for the kids every Thanksgiving,” he said, almost apologetically. “It’s sweet potato casserole, but the kind even picky eaters fight over.” I wiped my hands on my jeans, took the warm dish, and honestly, I wasn’t expecting much—Pete was more known for his prize-winning hydrangeas than his cooking. But that night, my family devoured it. My youngest, who usually treats orange vegetables like a personal insult, asked for seconds.
The recipe turned out to be a total game-changer for our busy household. It’s a make-ahead sweet potato casserole that you can prep the night before, or even two days before, and just pop in the oven when you’re ready. No last-minute mashing, no frantic searching for marshmallows while the turkey rests. It’s creamy, just sweet enough, and has that irresistible buttery crumb topping that makes everyone forget they’re eating a vegetable. I tweaked Pete’s original a bit—added a touch of cinnamon, swapped in some brown sugar for depth, and figured out the perfect make-ahead timeline so it works for real families with real schedules.
Maybe you’ve been there, staring at a pile of sweet potatoes on Thanksgiving morning, wondering how you’ll find the time to peel, boil, and mash them between the chaos of the day. Or maybe you just want a side dish that actually gets eaten by the kids without a negotiation session. This easy sweet potato casserole is the answer. I’ve been making it for three years now, and it’s become our go-to for holiday dinners and even random Tuesday nights when we need a little comfort. Let me tell you, there’s something magical about a dish that comes together ahead of time and still tastes like you spent hours on it.
Why You’ll Love This Recipe
This isn’t just another sweet potato casserole recipe. I’ve tested this thing more times than I care to admit, tweaking the sweetness level, the texture of the topping, and the make-ahead timing until it was absolutely foolproof. Here’s why it’s become a staple in my kitchen and why I think it’ll become one in yours too.
- Make-Ahead Magic: Assemble it up to two days in advance. On the big day, just bake it while your turkey rests. No stress, no mess.
- Kid-Approved Sweetness: It’s sweet enough to win over little ones but not cloying. The natural sweetness of the potatoes shines through, with just a hint of brown sugar and cinnamon.
- Simple Pantry Ingredients: You probably have most of these items in your kitchen right now. No trips to specialty stores or weird ingredients.
- Budget-Friendly: Sweet potatoes are one of the cheapest vegetables around, especially in the fall. This dish feeds a crowd without breaking the bank.
- Picky Eater Tested: My own kids went from pushing sweet potatoes around their plate to asking for this casserole for their birthday dinners. That’s a win in my book.
- Leftovers That Reheat Beautifully: This is not a dish that gets sad in the fridge. The flavors meld together, and it reheats like a dream for lunch the next day.
What makes this version different from the dozens of others out there? It’s the balance. I spent a lot of time figuring out the right ratio of sweet potatoes to topping so you get that creamy, smooth base with a crunchy, buttery crust in every single bite. Plus, the make-ahead method doesn’t compromise the texture—the topping stays crisp, and the filling stays luscious. Honestly, it’s comfort food at its finest, but with a practical twist that makes your life easier. That’s the kind of recipe I get excited about.
What Ingredients You Will Need
This recipe uses simple, wholesome ingredients that work together to create a dish that’s both comforting and delicious. Most of these are pantry staples, especially during the fall and winter months. Let me walk you through each one and share a few tips I’ve picked up along the way.
- Sweet Potatoes (3 pounds, about 4-5 medium): The star of the show. Look for firm, smooth-skinned sweet potatoes without any soft spots. I prefer the orange-fleshed variety (often labeled as “garnet” or “jewel”) because they’re naturally sweeter and creamier. You can peel them or leave the skin on if you’re planning to mash them really well—I peel them for a smoother texture, especially for the kids.
- Unsalted Butter (1/2 cup, melted, divided): We use half in the sweet potato mixture and half in the topping. I recommend using a good-quality unsalted butter so you can control the salt level. If you only have salted butter on hand, just reduce the added salt in the recipe by a pinch.
- Brown Sugar (1/2 cup, packed, divided): Half goes into the sweet potato mixture, and half goes into the crumb topping. Light or dark brown sugar both work here—dark brown sugar will give a slightly deeper, molasses-like flavor. I’ve used both, and honestly, they’re both delicious.
- Large Eggs (2): These help bind the sweet potato mixture and give it a richer, custard-like texture. Make sure they’re at room temperature so they incorporate smoothly. If you forget to take them out of the fridge, just place them in a bowl of warm water for 5 minutes.
- Milk (1/4 cup): Whole milk adds the most creaminess, but 2% or even oat milk work perfectly fine. I’ve also used evaporated milk in a pinch, and it made the casserole extra velvety.
- Vanilla Extract (1 teaspoon): A little vanilla enhances the natural sweetness of the potatoes and rounds out the flavors. Use pure vanilla extract if you have it, but imitation works in a bind.
- Ground Cinnamon (1 teaspoon): Warm, aromatic, and essential for that classic sweet potato casserole flavor. I like to use Ceylon cinnamon for a milder taste, but regular cassia cinnamon is perfectly fine.
- Salt (1/2 teaspoon): Don’t skip this! Salt balances the sweetness and makes all the flavors pop. I use fine sea salt for even distribution.
- All-Purpose Flour (1/2 cup): This forms the base of the crumb topping. For a gluten-free version, you can substitute with a 1:1 gluten-free baking flour blend.
- Chopped Pecans (1/2 cup): These add a wonderful crunch and nutty flavor to the topping. If you’re feeding kids who are wary of nuts, you can leave them out or pulse them in a food processor until they’re very fine. Toasting the pecans beforehand really brings out their flavor—just spread them on a baking sheet and bake at 350°F for 5-7 minutes.
- Mini Marshmallows (optional, 1 cup): I know, I know, this is controversial. Some people swear by marshmallows on top, and others prefer the crumb topping. My solution? I do both. I add the marshmallows in the last 5 minutes of baking for a gooey, toasted finish. But the recipe is absolutely perfect without them too.
One ingredient tip I’ve learned: if your sweet potatoes are on the smaller side, just use an extra one to make sure you have enough. The 3-pound measurement is forgiving—a little more or less won’t ruin the dish. Also, if you’re buying pecans, check the bulk bins at your grocery store. They’re often cheaper than the pre-packaged ones, and you can buy exactly the amount you need.
Equipment Needed
You don’t need any fancy gadgets for this recipe, which is one of the reasons I love it. Here’s what you’ll need to have on hand.
- Large Pot: For boiling the sweet potatoes until tender. A 6-quart pot is ideal, but any large pot will work. Make sure it’s big enough that the potatoes have room to move around.
- Colander: For draining the cooked sweet potatoes. A standard mesh or plastic colander is fine.
- Potato Masher or Electric Mixer: You can mash the sweet potatoes by hand with a potato masher for a more rustic texture, or use a hand mixer for an ultra-smooth, creamy consistency. I prefer the hand mixer because it gets the potatoes perfectly smooth, which is key for picky eaters who might notice lumps.
- Large Mixing Bowl: For combining all the sweet potato mixture ingredients. A standard 4-quart bowl works well.
- Medium Mixing Bowl: For making the crumb topping.
- 9×13-inch Baking Dish: This is the perfect size for this recipe. A 2.5-quart or 3-quart dish works best. If you only have an 8×8-inch dish, you can use it, but the casserole will be thicker and may need a few extra minutes of baking time.
- Measuring Cups and Spoons: For accurate measurements. I cannot stress this enough—baking is a science, and precise measurements make a difference.
- Rubber Spatula: For scraping every last bit of the sweet potato mixture into the baking dish. Waste not, want not!
- Foil or Plastic Wrap: For covering the dish if you’re making it ahead of time.
If you don’t have a hand mixer, don’t worry. You can absolutely mash the sweet potatoes by hand. It’ll just take a bit more elbow grease, and the texture will be slightly chunkier, which some people actually prefer. I’ve made this recipe both ways, and honestly, it’s delicious either way.
Preparation Method
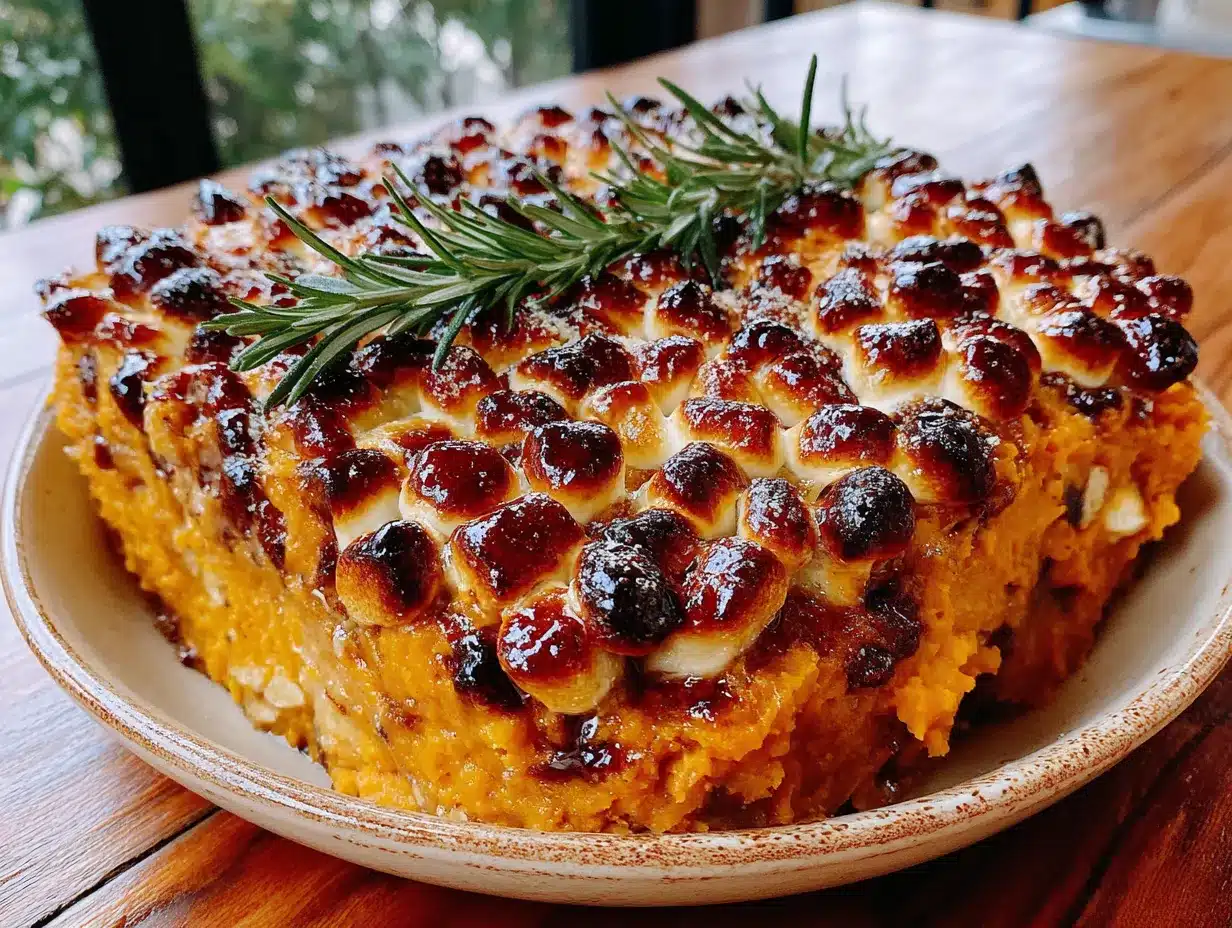
Alright, let’s get cooking! This recipe is straightforward, but I’ll walk you through each step with all the little tips and tricks I’ve learned along the way. The total active time is about 30 minutes, and then you’ll need about 45 minutes of baking time (or just 30 minutes if you’re baking it right away).
- Preheat your oven to 375°F (190°C). If you’re making this ahead of time, you can skip this step for now and just preheat when you’re ready to bake. But if you’re baking it right away, get that oven going.
- Peel and chop the sweet potatoes. Peel 3 pounds of sweet potatoes and cut them into 1-inch cubes. This might seem like a lot of work, but cutting them into uniform cubes ensures they cook evenly. I usually do this while my pot of water is coming to a boil to save time.
- Boil the sweet potatoes. Place the cubed sweet potatoes in a large pot and cover them with cold water by about an inch. Add a generous pinch of salt to the water. Bring to a boil over high heat, then reduce the heat to medium and simmer for 15-20 minutes, or until the potatoes are fork-tender. You should be able to easily pierce a cube with a fork without resistance. Don’t overcook them, or they’ll become waterlogged.
- Drain and mash. Drain the sweet potatoes in a colander and let them sit for a minute or two to steam off excess moisture. Transfer them to a large mixing bowl. Mash them with a potato masher or beat them with a hand mixer until smooth. If using a hand mixer, start on low speed to avoid splattering, then increase to medium. You want a silky, lump-free consistency.
- Add the wet ingredients. To the mashed sweet potatoes, add 1/4 cup of the melted butter, 1/4 cup of the packed brown sugar, 2 large eggs (room temperature), 1/4 cup of milk, 1 teaspoon of vanilla extract, 1 teaspoon of ground cinnamon, and 1/2 teaspoon of salt. Mix everything together until well combined. The mixture will be smooth, creamy, and slightly thick. Taste it—it should be sweet but not overpowering, with a warm hint of cinnamon.
- Prepare the crumb topping. In a separate medium bowl, combine the remaining 1/4 cup of melted butter, the remaining 1/4 cup of packed brown sugar, 1/2 cup of all-purpose flour, and 1/2 cup of chopped pecans. Use a fork or your fingers to mix until the mixture resembles coarse crumbs. It should clump together slightly when you squeeze it. If it seems too dry, add a teaspoon more melted butter. If it’s too wet, add a tablespoon more flour.
- Assemble the casserole. Spread the sweet potato mixture evenly into a greased 9×13-inch baking dish. Sprinkle the crumb topping evenly over the top. If you’re using mini marshmallows, don’t add them yet—wait until the last 5 minutes of baking.
- Bake (if serving immediately). Bake the casserole, uncovered, at 375°F (190°C) for 25-30 minutes, or until the filling is hot and bubbly around the edges and the topping is golden brown. If you’re adding marshmallows, sprinkle them on top during the last 5 minutes of baking and keep a close eye on them—they can go from perfectly toasted to burnt in a matter of seconds.
- Make-ahead instructions. If you’re making this ahead of time, cover the assembled (unbaked) casserole tightly with foil or plastic wrap and refrigerate for up to 2 days. When you’re ready to bake, remove it from the refrigerator and let it sit on the counter for about 30 minutes to take the chill off. Then bake as directed above, adding about 10-15 minutes to the baking time since you’re starting from cold. The topping should be golden and the filling should be hot all the way through.
One thing I learned the hard way: don’t skip the step of letting the casserole sit at room temperature before baking if it’s been in the fridge. I once put a cold casserole straight into the oven, and the outside was hot while the center was still lukewarm. That extra 30 minutes on the counter makes a huge difference in even cooking.
Cooking Tips & Techniques
Over the years, I’ve made this sweet potato casserole more times than I can count, and I’ve definitely had my share of mishaps. Here are some tips to help you avoid the same mistakes and get perfect results every time.
- Don’t Overcook the Sweet Potatoes: This is the most common mistake I see. If you boil the sweet potatoes too long, they absorb too much water, and your casserole will end up watery instead of creamy. Test them with a fork at the 15-minute mark. They should be tender but not falling apart.
- Room Temperature Eggs Are Key: Cold eggs can seize up the butter in the mixture, leading to a lumpy texture. Take your eggs out of the fridge about 30 minutes before you start cooking. If you forget, place them in a bowl of warm (not hot) water for 5 minutes.
- Toast Your Pecans: This is a small step that makes a huge difference. Toasting the pecans before adding them to the topping brings out their natural oils and nutty flavor. Just spread them on a baking sheet and bake at 350°F for 5-7 minutes, watching carefully so they don’t burn.
- Make the Topping Right Before Baking: If you’re making this ahead of time, I recommend mixing the crumb topping separately and storing it in the fridge. Sprinkle it on just before you bake. If you add it too early, the flour will absorb moisture from the filling, and the topping won’t be as crispy.
- Use a Glass or Ceramic Baking Dish: These materials conduct heat more evenly than metal, which helps prevent the edges from burning before the center is cooked through. If you only have a metal pan, reduce the oven temperature by 25°F and bake a little longer.
- Let It Rest: After the casserole comes out of the oven, let it rest for 5-10 minutes before serving. This allows the filling to set up slightly, making it easier to scoop out clean portions. I know it’s tempting to dig in right away, but trust me on this one.
I once forgot to add the eggs to the mixture. I know, rookie mistake. I was rushing because the turkey was almost done, and I just dumped everything together without thinking. The casserole came out more like a dense pudding than a fluffy side dish. It was still edible, but not nearly as good. Now I always double-check my ingredients before I start mixing.
Variations & Adaptations
One of the best things about this recipe is how adaptable it is. Whether you’re cooking for dietary restrictions, seasonal ingredients, or just different taste preferences, there’s a version for you.
- Vegan Version: Replace the butter with a plant-based alternative (I like Miyoko’s or Earth Balance), use flax eggs (1 tablespoon ground flaxseed mixed with 3 tablespoons water per egg), and substitute the milk with unsweetened almond or oat milk. The topping works well with vegan butter and a little extra flour to help it bind. I’ve made this for a vegan friend, and she couldn’t tell the difference.
- Gluten-Free Version: Simply swap the all-purpose flour in the topping with a 1:1 gluten-free baking blend. I recommend one that contains xanthan gum for the best texture. The filling itself is naturally gluten-free, so you’re only changing the topping.
- Lower Sugar Option: You can reduce the brown sugar by half in both the filling and the topping. The sweet potatoes are naturally sweet, so the casserole will still be delicious. You might also try using a sugar substitute like monk fruit or erythritol, but keep in mind that this will change the texture slightly.
- Savory Twist: Skip the brown sugar and cinnamon, and instead add 1 teaspoon of smoked paprika, 1/2 teaspoon of garlic powder, and a pinch of cayenne pepper. Top with a mixture of breadcrumbs, Parmesan cheese, and fresh thyme. This version is fantastic alongside roasted chicken or pork chops.
- Add Some Crunch: If you’re not a fan of pecans, you can substitute them with walnuts, sliced almonds, or even crushed cornflakes for a different kind of crunch. I’ve used crushed graham crackers in a pinch, and it was surprisingly good (though a bit sweeter).
- Make It a Main Dish: Turn this into a hearty vegetarian main by adding a can of drained and rinsed black beans and a cup of cooked quinoa to the sweet potato mixture. Top with the crumb topping and bake as directed. Serve with a side salad for a complete meal.
My personal favorite variation is the one I make for Thanksgiving: I add a tablespoon of bourbon to the sweet potato mixture and use dark brown sugar in the topping. It gives the whole dish a warm, grown-up flavor that pairs perfectly with the turkey and gravy. Just a little something extra for the adults at the table.
Serving & Storage Suggestions
This sweet potato casserole is incredibly versatile when it comes to serving and storing. Here’s everything you need to know to get the most out of it.
Serving: Serve this casserole warm, straight from the oven. It’s the perfect side dish for Thanksgiving, Christmas, Easter, or any holiday gathering. But don’t limit it to special occasions—it’s also wonderful alongside weeknight meals like roasted chicken, pork chops, or even a simple grilled sausage. The sweetness pairs beautifully with savory, salty dishes. For a fun presentation, you can also scoop the casserole into individual ramekins before baking for personal-sized portions that look extra special.
Storage: Leftovers can be stored in an airtight container in the refrigerator for up to 5 days. The flavors actually meld and deepen overnight, so it might taste even better the next day. To reheat, simply microwave individual portions for 1-2 minutes, or reheat the entire casserole in a 350°F oven for 15-20 minutes, covered with foil to prevent the topping from burning. If the topping gets a little soft during storage, you can sprinkle a few extra toasted pecans on top before reheating to restore some crunch.
Freezing: This casserole freezes beautifully, which is a lifesaver for busy holidays. Assemble the casserole completely (including the topping) but do not bake it. Wrap the dish tightly in a layer of plastic wrap, then a layer of foil. Freeze for up to 3 months. When you’re ready to bake, thaw it in the refrigerator overnight. Remove the plastic wrap and foil, and bake as directed, adding about 15-20 minutes to the baking time since it’s starting from cold. You can also freeze baked leftovers in individual portions for quick lunches or side dishes later on.
How Flavors Develop: One thing I love about this recipe is how the flavors come together over time. The cinnamon and brown sugar meld with the sweet potatoes, creating a deeper, more complex sweetness. The topping, while best when freshly baked, still retains some of its crunch even after a day or two in the fridge. Honestly, I sometimes make this casserole specifically so I can have leftovers for lunch the next day.
Nutritional Information & Benefits
While this is definitely a comfort food dish, it does have some redeeming nutritional qualities, especially when compared to other holiday sides. Here’s a breakdown of what you’re getting in each serving.
Estimated Nutritional Values (per serving, based on 12 servings):
Calories: 285 | Fat: 14g | Saturated Fat: 6g | Cholesterol: 55mg | Sodium: 220mg | Carbohydrates: 38g | Fiber: 5g | Sugar: 18g | Protein: 4g
Health Benefits: Sweet potatoes are a nutritional powerhouse. They’re packed with beta-carotene, which your body converts into vitamin A—essential for eye health and immune function. They’re also a great source of fiber, which aids digestion and helps keep you feeling full. The pecans add healthy monounsaturated fats and a dose of magnesium, which is important for muscle and nerve function. Even the cinnamon has benefits—it’s been shown to help regulate blood sugar levels.
Dietary Considerations: This recipe can easily be made gluten-free (by using a gluten-free flour blend in the topping) and vegan (by using plant-based butter, flax eggs, and non-dairy milk). It’s naturally nut-free if you omit the pecans from the topping. However, it does contain dairy and eggs in its standard form, so keep that in mind if you’re cooking for someone with allergies.
I’m not a nutritionist, but I do think about what I’m feeding my family. This casserole is a way to get my kids to eat a vegetable that’s actually good for them, without any complaints. The butter and sugar make it feel like a treat, but the sweet potatoes are doing some heavy lifting in the nutrition department. It’s a balance I’m happy with.
Conclusion
This easy make-ahead sweet potato casserole has become a non-negotiable part of my holiday menu, and for good reason. It’s the kind of recipe that makes you look like a hero in the kitchen without actually requiring much effort. The make-ahead convenience means you can actually enjoy the holiday instead of being stuck in the kitchen. The kid-approved sweetness means there’s no begging, no bargaining, just empty plates and happy faces. And the simple, budget-friendly ingredients mean you can feed a crowd without a trip to the bank.
I love this recipe because it represents everything I value in cooking: practicality, flavor, and the ability to bring people together. That first bite, with the creamy sweet potato and the crunchy, buttery topping, still makes me smile every single time. It’s comfort food at its finest, and it’s a reminder that sometimes the best recipes come from the most unexpected places—like a retired electrician named Pete who just wanted to share a little bit of his wife’s love with the world.
I’d love to hear how this recipe turns out for you. Did your kids love it? Did you try any fun variations? Drop a comment below and let me know. And if you’re looking for more family-friendly, make-ahead holiday recipes, be sure to check out my easy homemade dinner rolls and my no-fuss green bean casserole—they’re both lifesavers during the busy season. Happy cooking, and remember: a little prep work now means a lot more peace later!
Frequently Asked Questions
Can I use canned sweet potatoes instead of fresh?
Yes, you can use canned sweet potatoes in a pinch. Drain them well and mash them as you would fresh. However, the texture will be slightly softer and less firm, and the flavor won’t be as vibrant. I recommend using fresh sweet potatoes for the best results, but canned will work if you’re in a hurry.
Can I make this casserole in a slow cooker?
Absolutely! To make this in a slow cooker, prepare the sweet potato mixture as directed and pour it into a greased slow cooker. Cover and cook on low for 3-4 hours or on high for 1.5-2 hours. For the topping, I recommend making it separately and baking it in the oven at 375°F for 10-12 minutes, then sprinkling it on top just before serving. This keeps the topping crispy.
How do I prevent the topping from getting soggy?
The key to a crispy topping is to add it just before baking, not when you’re assembling the casserole ahead of time. If you’re making the casserole in advance, store the topping separately in the refrigerator and sprinkle it on right before you put the dish in the oven. This prevents the flour from absorbing moisture from the sweet potato mixture.
Can I use marshmallows instead of the crumb topping?
Of course! If you prefer a classic marshmallow topping, simply omit the crumb topping and sprinkle 2-3 cups of mini marshmallows over the sweet potato mixture during the last 10 minutes of baking. Keep a close eye on them—marshmallows can go from golden to burnt very quickly. I actually love doing a combination of both toppings for the best of both worlds.
Is this recipe freezer-friendly?
Yes, it freezes wonderfully. Assemble the casserole completely (with the topping) but do not bake it. Wrap it tightly in plastic wrap and then foil, and freeze for up to 3 months. When you’re ready to bake, thaw it in the refrigerator overnight, then bake as directed, adding about 15-20 minutes to the baking time. You can also freeze baked leftovers in individual portions for quick meals later.
Pin This Recipe!
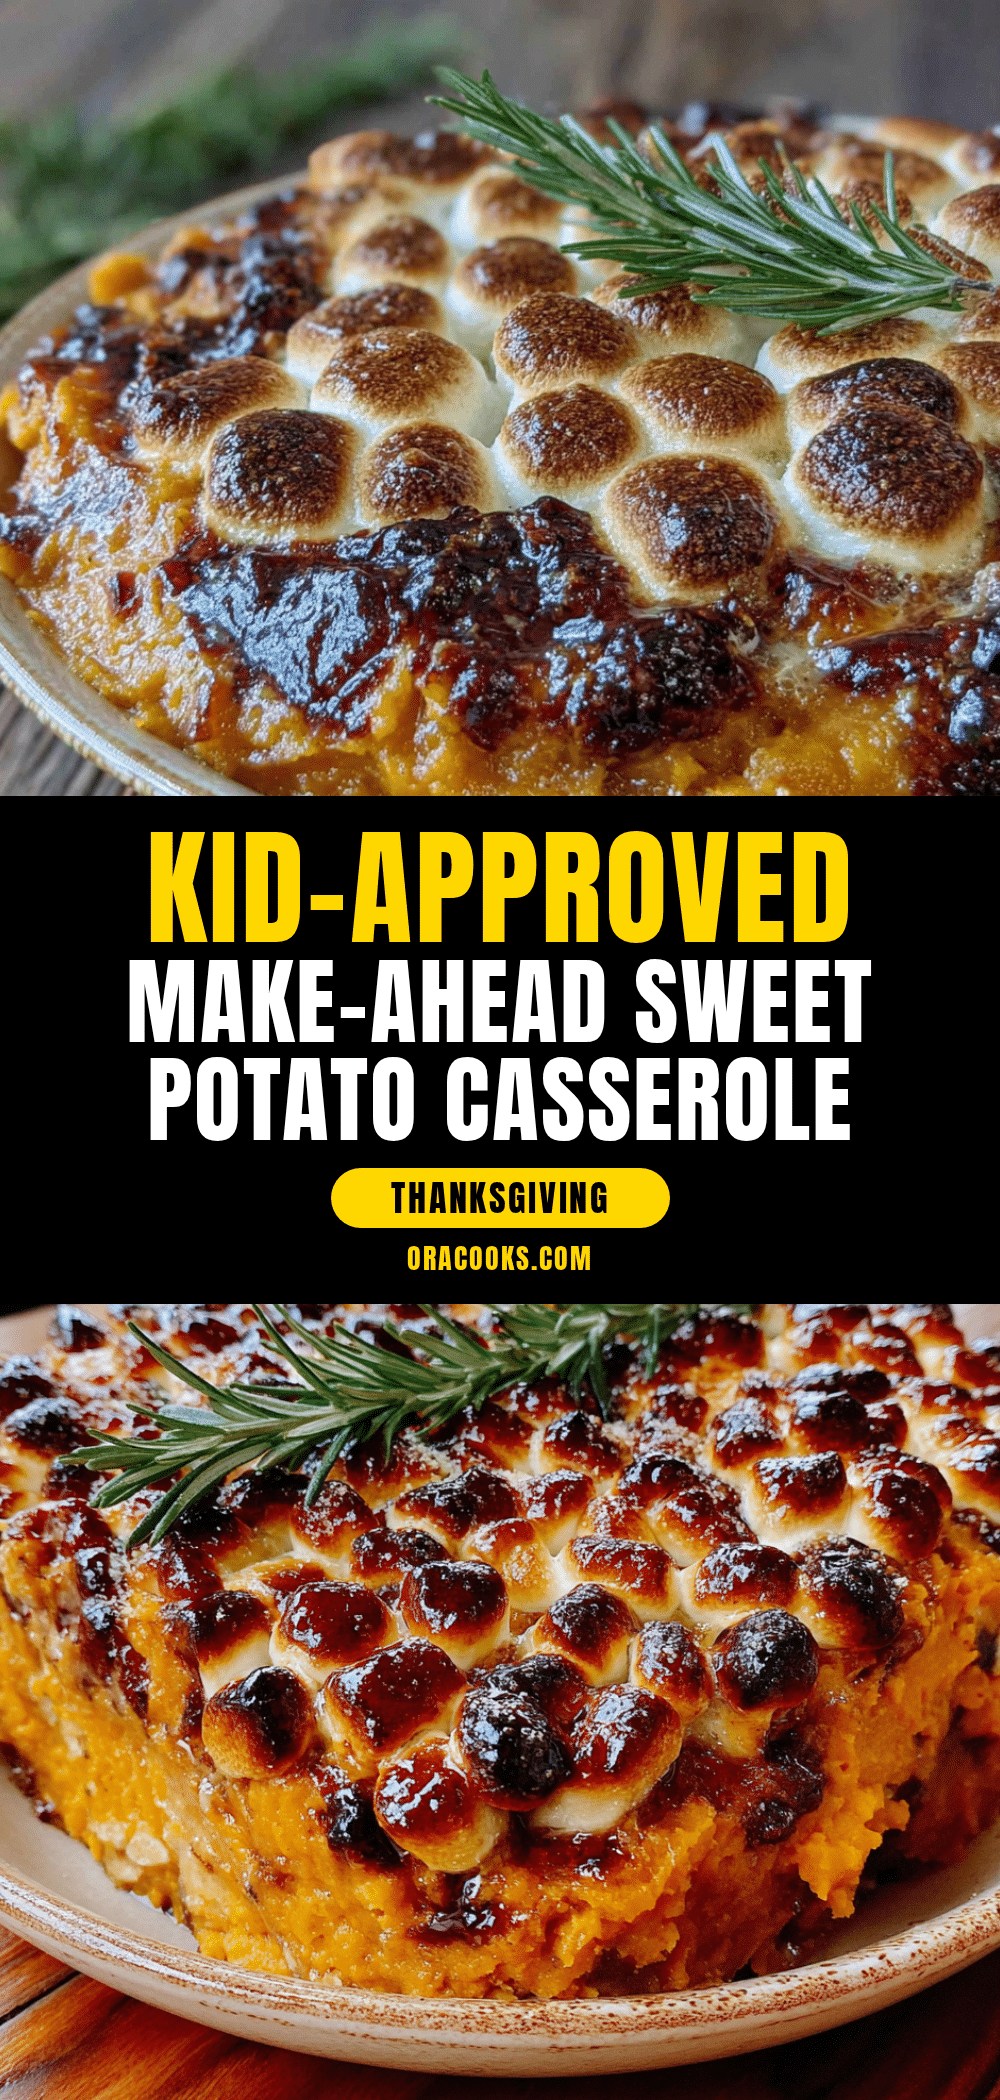
Easy Make-Ahead Sweet Potato Casserole for Kids

A creamy, kid-approved sweet potato casserole that can be prepped up to two days in advance. With a buttery crumb topping and just the right sweetness, it’s the perfect stress-free side dish for holidays or weeknight dinners.
- Prep Time: 30 minutes
- Cook Time: 45 minutes
- Total Time: 1 hour 15 minutes
- Yield: 12 servings 1x
- Category: Side Dish
- Cuisine: American
Ingredients
- 3 pounds sweet potatoes (about 4–5 medium), peeled and cubed
- 1/2 cup unsalted butter, melted, divided
- 1/2 cup packed brown sugar, divided
- 2 large eggs, room temperature
- 1/4 cup milk (whole, 2%, or oat milk)
- 1 teaspoon vanilla extract
- 1 teaspoon ground cinnamon
- 1/2 teaspoon salt
- 1/2 cup all-purpose flour
- 1/2 cup chopped pecans
- 1 cup mini marshmallows (optional)
Instructions
- Preheat oven to 375°F (190°C) if baking immediately.
- Peel and chop sweet potatoes into 1-inch cubes. Place in a large pot, cover with cold water by 1 inch, and add a pinch of salt. Bring to a boil, then simmer for 15-20 minutes until fork-tender.
- Drain sweet potatoes and let steam off for 1-2 minutes. Transfer to a large bowl and mash with a potato masher or hand mixer until smooth.
- Add 1/4 cup melted butter, 1/4 cup brown sugar, eggs, milk, vanilla, cinnamon, and salt to the mashed sweet potatoes. Mix until well combined and creamy.
- In a separate bowl, combine remaining 1/4 cup melted butter, remaining 1/4 cup brown sugar, flour, and chopped pecans. Mix with a fork until crumbly.
- Spread sweet potato mixture evenly into a greased 9×13-inch baking dish. Sprinkle crumb topping evenly over the top.
- If baking immediately: Bake uncovered for 25-30 minutes until hot and bubbly, and topping is golden brown. If using marshmallows, add them during the last 5 minutes of baking.
- If making ahead: Cover assembled unbaked casserole with foil or plastic wrap and refrigerate for up to 2 days. Before baking, let sit at room temperature for 30 minutes. Bake as directed, adding 10-15 minutes to baking time.
- Let casserole rest for 5-10 minutes before serving.
Notes
For best results, use room temperature eggs to prevent the butter from seizing. Toast pecans before adding to the topping for enhanced flavor. If making ahead, store the crumb topping separately and sprinkle on just before baking to keep it crispy. Let the casserole rest 5-10 minutes after baking for cleaner slices.
Nutrition
- Serving Size: 1 serving (1/12 of c
- Calories: 285
- Sugar: 18
- Sodium: 220
- Fat: 14
- Saturated Fat: 6
- Carbohydrates: 38
- Fiber: 5
- Protein: 4
Keywords: sweet potato casserole, make-ahead, kid-friendly, Thanksgiving side dish, easy sweet potato casserole, holiday side dish, comfort food