Love this? Save it for later!
Share the inspiration with your friends
Let me tell you something funny. My brother-in-law Mark swore he hated chicken pot pie for fifteen years. Fifteen years! Every Thanksgiving, every family dinner, every time someone mentioned the words “chicken” and “pie” in the same sentence, he’d make this face like he’d just bitten into a lemon. Then last Christmas, I made this puff pastry version “just for the rest of us” and found him standing over the kitchen island at 11 PM, eating cold leftovers straight from the dish with a soup spoon. He didn’t even look ashamed. Honestly, that moment made my whole holiday.
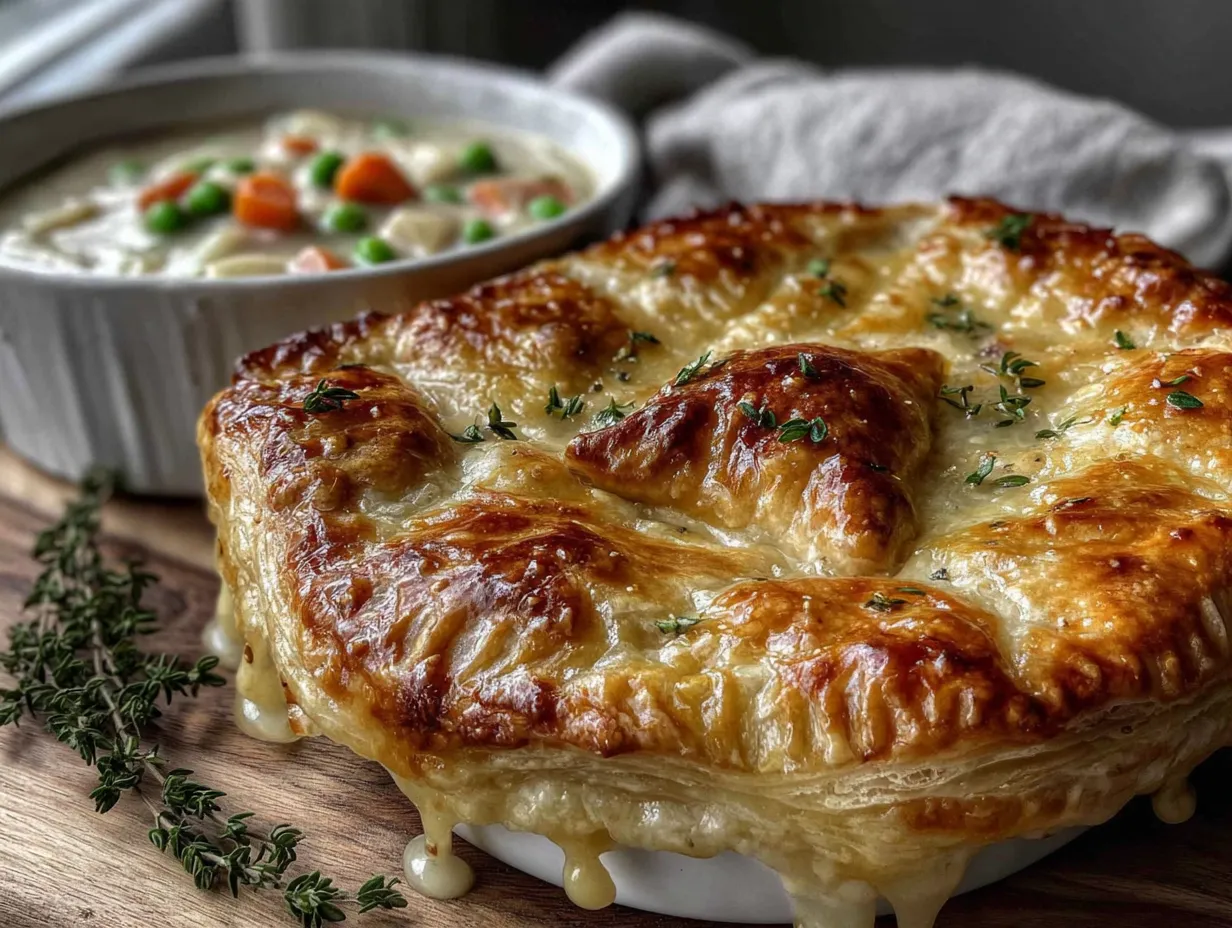
This isn’t your grandma’s pot pie—though I love her too. This is the version that makes people close their eyes on the first bite. The one that disappears before you’ve even sat down. And the best part? It looks like you spent hours in the kitchen when really, you’re just smart about using frozen puff pastry and a few clever shortcuts.
- Crowd-Pleasing Magic: This dish feeds a hungry crowd and gets rave reviews every single time. I’ve brought it to three different potlucks this year alone, and I’ve never brought home leftovers.
- Stress-Free Hosting: You can prep the filling a day ahead. Just assemble and bake before guests arrive. That means you get to enjoy the party too.
- Simple Ingredients: No weird fancy stuff. Just chicken, vegetables, cream, and store-bought puff pastry that bakes up golden and flaky like you made it from scratch.
- Unbelievably Delicious: The contrast between that buttery, crispy puff pastry and the rich, creamy filling underneath? It’s the kind of comfort food that makes you forget about calories for one glorious evening.
- Perfect for Gatherings: Whether it’s a casual Sunday dinner with friends or a full-blown holiday feast, this pie holds its own and then some.
I’ve tested this recipe six times to get the filling just right—not too thick, not too runny, with vegetables that still have a little bite. Trust me, this is the version you’ll come back to again and again.
What Ingredients You Will Need
This recipe uses simple, honest ingredients that you can find at any grocery store. No hunting down specialty items or spending a fortune. Here’s what you’ll need to pull this together:
For the Filling
- 2 tablespoons unsalted butter (I use Kerrygold for the richness, but any good butter works)
- 1 medium yellow onion, diced (about 1 cup)
- 3 medium carrots, peeled and diced (about 1 ½ cups)
- 2 celery stalks, diced (about 1 cup)
- 3 cloves garlic, minced (adds that savory depth you can’t skip)
- 1 teaspoon dried thyme (or 1 tablespoon fresh if you have it)
- 1 teaspoon dried rosemary (crush it between your fingers to release the oils)
- ½ teaspoon black pepper (freshly ground is always better)
- 1 teaspoon salt (plus more to taste)
- ⅓ cup all-purpose flour (this thickens the sauce)
- 2 cups chicken broth (low-sodium, so you control the salt)
- 1 cup whole milk (or half-and-half for extra richness)
- ½ cup heavy cream (trust me on this one)
- 3 cups cooked chicken, shredded or diced (rotisserie chicken is your best friend here)
- 1 cup frozen peas (no need to thaw them first)
- ½ cup frozen corn kernels (optional, but I love the sweetness)
- 1 tablespoon fresh lemon juice (brightens everything up)
- 2 tablespoons fresh parsley, chopped (for color and freshness)
For the Topping
- 1 sheet frozen puff pastry, thawed (I prefer Pepperidge Farm—it’s reliable and widely available)
- 1 large egg (for the egg wash)
- 1 tablespoon water
- Flaky sea salt (for sprinkling on top—makes a difference!)
Ingredient Tips from My Kitchen: Look for puff pastry that’s all butter if you can find it. The flavor difference is noticeable. For the chicken, I almost always use a rotisserie chicken from the store. It saves time and adds a little extra seasoning to the filling. If you’re cooking your own chicken, poach it in the broth you’ll use for the sauce—double flavor bonus.
Substitution Notes: You can swap the whole milk for 2% or even unsweetened oat milk in a pinch, but the filling won’t be quite as luscious. For a gluten-free version, use a gluten-free all-purpose flour blend for the roux and skip the puff pastry (try a gluten-free biscuit topping instead).
Equipment Needed
You don’t need a fancy kitchen to pull this off. Here’s what I use every time:
- Large Dutch oven or heavy-bottomed pot (5-6 quart size is perfect—I love my Le Creuset, but a Lodge enameled one works great too)
- 9×13-inch baking dish (or a 10-inch cast iron skillet if you want to go from stovetop to oven)
- Sharp chef’s knife (dull knives make dicing vegetables feel like a workout)
- Cutting board
- Wooden spoon or silicone spatula
- Measuring cups and spoons
- Small bowl (for the egg wash)
- Pastry brush (a silicone one is easiest to clean)
- Rolling pin (optional, but helpful if your puff pastry needs a little encouragement)
- Pizza cutter or sharp knife (for cutting the pastry)
Budget-Friendly Tip: Don’t have a Dutch oven? A large deep skillet or even a regular pot will work. You just need something wide enough to cook the vegetables and make the sauce without crowding. And if you don’t have a pastry brush, use the back of a spoon to spread the egg wash—it’s not pretty but it works.
Preparation Method
Alright, let’s get cooking. I’ve broken this down so you can follow along without stress. Take your time, and remember—cooking is supposed to be fun, not a test.
Step 1: Prep Your Ingredients (10 minutes)
Before you turn on the stove, dice your onion, carrots, and celery. Mince the garlic. Measure out your spices. Having everything ready makes the process so much smoother. I learned this the hard way after burning garlic while frantically chopping an onion. Not my finest moment.
Step 2: Cook the Vegetables (8-10 minutes)
Melt the butter in your Dutch oven over medium heat. Add the diced onion, carrots, and celery. Cook, stirring occasionally, until the onions turn translucent and the carrots start to soften—about 6-7 minutes. You want them tender but not mushy. Add the minced garlic, thyme, rosemary, salt, and pepper. Cook for another minute until the garlic smells amazing. Your kitchen should smell like a cozy restaurant by now.
Step 3: Make the Roux (2 minutes)
Sprinkle the flour over the cooked vegetables. Stir constantly for about 1-2 minutes. This cooks the raw flour taste out and starts the thickening process. The mixture will look dry and pasty—that’s exactly what you want. Keep stirring so it doesn’t burn on the bottom.
Step 4: Build the Sauce (5-7 minutes)
Slowly pour in the chicken broth while whisking continuously. I say “whisk” but honestly, a wooden spoon works fine. Keep stirring until the mixture is smooth and starts to thicken, about 2-3 minutes. Then pour in the milk and heavy cream. Stir and let it come to a gentle simmer. You’ll see it thicken up nicely—like a creamy soup. Let it bubble gently for 2 minutes, stirring occasionally.
Step 5: Add the Chicken and Peas (2 minutes)
Stir in your cooked chicken, frozen peas, and corn if using. Let everything heat through for about 2 minutes. The peas will thaw in the hot sauce. Squeeze in the lemon juice and stir in the fresh parsley. Taste the filling and adjust salt and pepper if needed. This is your moment to get it right.
Step 6: Cool the Filling (15-20 minutes)
Here’s a trick I learned after one too many soggy-bottomed pot pies: let the filling cool for at least 15-20 minutes before adding the puff pastry. If it’s too hot, the pastry will steam instead of puff, and you’ll end up with a sad, flat top. Pour the filling into your 9×13 baking dish and spread it evenly. Set it aside while you preheat the oven to 400°F (200°C).
Step 7: Prepare the Puff Pastry (5 minutes)
On a lightly floured surface, gently roll out your thawed puff pastry sheet just enough to smooth the creases. You want it about ¼-inch thick. Cut it to fit your baking dish with about ½ inch overhang on all sides. I use a pizza cutter for clean edges, but a knife works fine.
Step 8: Assemble and Bake (25-30 minutes)
Carefully lay the puff pastry over the cooled filling. Tuck the overhang under itself slightly and press it against the edges of the dish. Cut 3-4 small slits in the top for steam to escape—otherwise you’ll have a pastry explosion in your oven. In a small bowl, whisk the egg with 1 tablespoon of water. Brush the egg wash all over the pastry. Sprinkle with flaky sea salt. Bake at 400°F (200°C) for 25-30 minutes, until the pastry is puffed up and deep golden brown. The filling should be bubbling up around the edges. Let it rest for 10 minutes before serving. This is the hardest part, I know.
Cooking Tips & Techniques
I’ve made this recipe enough times to have a few disasters under my belt. Here’s what I learned so you don’t have to repeat my mistakes.
Don’t Skip Cooling the Filling: I know you’re hungry. I know the house smells incredible. But if you put hot filling under that delicate puff pastry, you’ll get a soggy, sad top instead of a golden, flaky one. Trust the process. Let it cool.
Thaw Puff Pastory Properly: Take it out of the freezer and let it thaw in the fridge overnight. If you’re in a hurry, leave it on the counter for 30-40 minutes. But don’t microwave it—that melts the butter layers and ruins the puff. I learned this when I was 22 and in a hurry. The pastry turned into a dense, greasy biscuit. Never again.
Watch Your Oven: Every oven runs differently. Start checking at 20 minutes. If the pastry is browning too fast, tent it loosely with foil for the last 5-10 minutes. If it’s pale, give it a few more minutes. You want that deep, golden color.
Make Extra Sauce: The filling is always the first thing to run out. I sometimes double the sauce part and keep extra on the side for people who want to drown their serving. No judgment here.
Multitasking Tip: While the filling cools, prep any side dishes or set the table. That 15-minute window is perfect for tossing a salad or opening a bottle of wine. You’re welcome.
Variations & Adaptations
This recipe is a fantastic starting point, but don’t be afraid to make it your own. Here are some ways I’ve played with it over the years:
Vegetarian Version: Skip the chicken and double the vegetables. Add 8 ounces of cremini mushrooms, sliced and sautéed with the onions. Stir in a can of drained chickpeas for protein. The filling is still creamy and satisfying—my vegetarian sister-in-law asks for this version every time she visits.
Herb and Mushroom Twist: Add 1 cup of sautéed wild mushrooms (chanterelles if you’re feeling fancy, cremini if you’re not) and swap the thyme for tarragon. Tarragon and mushrooms are a match made in heaven. This version feels a little more elegant, perfect for a dinner party.
Individual Pot Pies: Use 4-6 oven-safe ramekins or small baking dishes. Divide the filling among them and cut the puff pastry into circles slightly larger than each dish. Bake for 20-22 minutes instead. Everyone gets their own little golden dome of pastry—so cute and great for portion control.
Spicy Kick: Add ½ teaspoon of smoked paprika and a pinch of cayenne pepper to the sauce. Stir in some chopped andouille sausage along with the chicken. It gives the whole dish a Louisiana-inspired vibe that’s unexpected and delicious.
Dairy-Free Adaptation: Use olive oil instead of butter for the vegetables. Swap the milk and cream for full-fat coconut milk (the flavor is subtle, I promise). Use a dairy-free puff pastry—many brands are accidentally vegan. The filling will be a little less rich, but still very good.
Serving & Storage Suggestions
This pie is a showstopper right out of the oven, but it’s also surprisingly forgiving. Here’s how to serve and store it like a pro.
Serving Temperature: Let the pie rest for 10 minutes after baking. This lets the filling set up so it doesn’t turn into a soupy mess on plates. Serve it warm, not piping hot. The flavors actually deepen as it cools slightly.
Presentation Tips for Hosting: Place the baking dish on a wooden board or a trivet in the center of the table. Let people serve themselves. The golden puff pastry is the star—don’t hide it. Garnish with a sprinkle of fresh parsley or thyme right before serving for a pop of green.
What to Serve Alongside: A simple green salad with a lemon vinaigrette cuts through the richness beautifully. Roasted asparagus or green beans work well too. For a truly comforting meal, serve with mashed potatoes or crusty bread to soak up every last drop of sauce.
Storage Instructions: Leftovers keep in the refrigerator for up to 3 days. Cover the dish tightly with foil or transfer individual portions to airtight containers. The pastry will soften overnight, but the flavor gets even better. I actually love the leftovers cold, straight from the fridge—don’t judge me.
Reheating: The best way to reheat is in the oven at 350°F (175°C) for 15-20 minutes, covered with foil. This brings back some of the pastry’s crispness. The microwave works in a pinch, but the pastry will be soft. If you’re reheating individual portions, an air fryer at 350°F for 5-7 minutes works wonders.
Freezing: You can freeze the unbaked assembled pie for up to 3 months. Assemble everything in a freezer-safe dish, but don’t add the egg wash. Wrap tightly in plastic wrap and then foil. To bake, thaw overnight in the fridge, add the egg wash, and bake as directed, adding 10-15 minutes to the cooking time.
Nutritional Information & Benefits
Let’s be real—this is comfort food, not health food. But it’s made with real ingredients, and that counts for something. Here’s the estimated breakdown per serving (based on 8 servings):
| Nutrient | Amount Per Serving |
|---|---|
| Calories | 485 |
| Total Fat | 28g |
| Saturated Fat | 14g |
| Cholesterol | 115mg |
| Sodium | 720mg |
| Total Carbohydrates | 35g |
| Dietary Fiber | 4g |
| Sugars | 6g |
| Protein | 28g |
Health Highlights: The carrots and celery provide vitamin A and fiber. Chicken is a great source of lean protein. The peas add a little extra fiber and vitamin C. And honestly, sharing a meal like this with people you love? That’s good for the soul, and I stand by that.
Dietary Considerations: This recipe contains dairy and gluten. For a gluten-free version, use a gluten-free flour blend and a biscuit topping instead of puff pastry. For a dairy-free version, see the variations section above. It’s not a light recipe, but it’s a satisfying one that fills you up without feeling heavy.
Frequently Asked Questions
Can I use pie crust instead of puff pastry?
Absolutely. A traditional pie crust will work, but the texture will be different—more sturdy and less flaky. If you use a bottom crust, blind bake it first for 10 minutes at 400°F to avoid a soggy bottom. I’ve done both, and honestly, the puff pastry version feels more special for company.
How do I keep the puff pastry from getting soggy?
The number one trick is cooling the filling before adding the pastry. Hot filling creates steam that softens the dough before it has a chance to puff. Also, make sure your egg wash seals the edges well, and don’t skip the steam vents. A hot oven (400°F) helps the pastry set quickly.
Can I make this ahead of time for a party?
Yes! Make the filling up to 2 days ahead and keep it in the fridge. When you’re ready to bake, let the filling come to room temperature for about 20 minutes, then top with pastry and bake. You can also assemble the whole pie (without egg wash) and refrigerate for up to 24 hours before baking. Add the egg wash right before it goes in the oven.
What’s the best way to cook the chicken for this recipe?
Rotisserie chicken is my go-to—it’s already seasoned and cooked perfectly. If you’re cooking your own, poach 1 ½ pounds of boneless, skinless chicken breasts in the chicken broth you’ll use for the sauce. Simmer for 15-18 minutes until cooked through, then shred or dice. The broth becomes extra flavorful for the sauce.
Can I add other vegetables to the filling?
Of course. This recipe is very flexible. Try adding diced potatoes (parboil them first so they cook through), sliced mushrooms, green beans, or even chopped broccoli. Just keep the total vegetable volume similar to what’s listed so the sauce ratio stays balanced. I’ve added leftover roasted root vegetables before, and it was fantastic.
Conclusion
You know, I still think about Mark standing over that kitchen island at 11 PM, spoon in hand, trying to act casual while he scraped the last bits of filling from the dish. He never admitted I was right. He didn’t have to. The empty dish said everything.
This puff pastry chicken pot pie is that kind of recipe. It’s the one that converts skeptics, fills bellies, and makes you look like a hero with minimal effort. It’s forgiving enough for a Tuesday night and impressive enough for a holiday table. And honestly? It just tastes like home.
I hope you make this for your next gathering. I hope someone at your table has that same moment of quiet surrender. And when they do, just smile and hand them another spoonful. That’s what this recipe is all about.
If you try this recipe, I’d love to hear about it. Drop a comment below, tag me in your photos, or tell me about the person at your table who couldn’t stop eating. Happy cooking, friends!
Pin This Recipe!

Easy Homemade Puff Pastry Chicken Pot Pie

This isn’t your grandma’s pot pie—this is the version that makes people close their eyes on the first bite. With a golden, flaky puff pastry top and a rich, creamy filling, it’s the ultimate comfort food that looks like you spent hours in the kitchen but comes together with simple ingredients and clever shortcuts.
- Prep Time: 20 minutes
- Cook Time: 30 minutes
- Total Time: 1 hour 10 minutes
- Yield: 8 servings 1x
- Category: Main Course
- Cuisine: American
Ingredients
- 2 tablespoons unsalted butter
- 1 medium yellow onion, diced (about 1 cup)
- 3 medium carrots, peeled and diced (about 1 ½ cups)
- 2 celery stalks, diced (about 1 cup)
- 3 cloves garlic, minced
- 1 teaspoon dried thyme
- 1 teaspoon dried rosemary
- ½ teaspoon black pepper
- 1 teaspoon salt
- ⅓ cup all-purpose flour
- 2 cups chicken broth, low-sodium
- 1 cup whole milk
- ½ cup heavy cream
- 3 cups cooked chicken, shredded or diced
- 1 cup frozen peas
- ½ cup frozen corn kernels (optional)
- 1 tablespoon fresh lemon juice
- 2 tablespoons fresh parsley, chopped
- 1 sheet frozen puff pastry, thawed
- 1 large egg
- 1 tablespoon water
- Flaky sea salt, for sprinkling
Instructions
- Prep your ingredients: Dice the onion, carrots, and celery. Mince the garlic. Measure out the spices.
- Cook the vegetables: Melt the butter in a Dutch oven over medium heat. Add the onion, carrots, and celery. Cook, stirring occasionally, until the onions are translucent and carrots start to soften, about 6-7 minutes. Add the garlic, thyme, rosemary, salt, and pepper. Cook for 1 more minute until fragrant.
- Make the roux: Sprinkle the flour over the cooked vegetables. Stir constantly for 1-2 minutes until the mixture looks dry and pasty.
- Build the sauce: Slowly pour in the chicken broth while whisking continuously. Stir until smooth and starting to thicken, about 2-3 minutes. Pour in the milk and heavy cream. Stir and let it come to a gentle simmer. Let it bubble gently for 2 minutes, stirring occasionally.
- Add the chicken and peas: Stir in the cooked chicken, frozen peas, and corn (if using). Let everything heat through for about 2 minutes. Squeeze in the lemon juice and stir in the fresh parsley. Taste and adjust salt and pepper if needed.
- Cool the filling: Pour the filling into a 9×13-inch baking dish and spread evenly. Let it cool for 15-20 minutes before adding the puff pastry.
- Preheat the oven to 400°F (200°C).
- Prepare the puff pastry: On a lightly floured surface, gently roll out the thawed puff pastry sheet to about ¼-inch thick. Cut it to fit your baking dish with about ½ inch overhang on all sides.
- Assemble and bake: Lay the puff pastry over the cooled filling. Tuck the overhang under itself and press against the edges of the dish. Cut 3-4 small slits in the top for steam to escape. In a small bowl, whisk the egg with 1 tablespoon of water. Brush the egg wash all over the pastry. Sprinkle with flaky sea salt.
- Bake at 400°F (200°C) for 25-30 minutes, until the pastry is puffed and deep golden brown and the filling is bubbling around the edges.
- Let it rest for 10 minutes before serving.
Notes
Don’t skip cooling the filling—hot filling will make the pastry soggy. Thaw puff pastry in the fridge overnight for best results. Rotisserie chicken is a great time-saver. For a gluten-free version, use a gluten-free flour blend and a biscuit topping instead of puff pastry. For a dairy-free version, use olive oil instead of butter, full-fat coconut milk instead of milk and cream, and a dairy-free puff pastry.
Nutrition
- Serving Size: 1 serving (1/8 of re
- Calories: 485
- Sugar: 6
- Sodium: 720
- Fat: 28
- Saturated Fat: 14
- Carbohydrates: 35
- Fiber: 4
- Protein: 28
Keywords: chicken pot pie, puff pastry, comfort food, easy dinner, chicken pie, pot pie recipe, homemade pot pie