Love this? Save it for later!
Share the inspiration with your friends
There used to be a tiny diner off Route 9 in Connecticut called The Copper Kettle that made a pumpkin pie so good it felt like a secret. When they closed without warning in 2018, I actually drove past the spot three times hoping I’d misread the “For Lease” sign. After twelve tries — twelve pies, some so sad they went straight in the trash — I finally got it. And honestly, this quick homemade pumpkin pie from scratch is better than what I remember from that sticky red vinyl booth.
I know, I know. Making pumpkin pie from scratch on a weeknight sounds like a joke. You’re tired, you’ve got maybe forty-five minutes between work and dinner, and the last thing you want is a project. But let me tell you — this recipe is not a project. It’s a shortcut that doesn’t taste like one. The crust comes together in one bowl with butter you don’t even have to keep ice-cold. The filling uses canned pumpkin (yes, really, and I’ll explain why that’s fine) but builds flavor with brown sugar and spices you probably already own. From start to oven, it takes about twenty minutes of active time. That’s less time than you’d spend arguing with a store-bought crust.
I still think about that diner sometimes — the cracked salt shaker, the waitress who called everyone “hon.” But I don’t miss the pie anymore. I’ve got this one now. And maybe you’ve been there too, chasing a taste from somewhere that doesn’t exist anymore. If so, keep reading. This one’s for both of us.
Why You’ll Love This Recipe
This isn’t just another pumpkin pie recipe. I’ve tested this thing six ways from Sunday — different fats in the crust, different sugar ratios, different baking temperatures — and this version won every single time. Here’s why it works for a busy weeknight:
- Quick & Easy: Active time is about 20 minutes. Total time is under two hours, including baking and cooling. That’s fast for a scratch pie.
- Simple Ingredients: You need butter, flour, sugar, pumpkin puree, eggs, cream, and spices. That’s it. No weird specialty items.
- Perfect for Weeknights: This pie comes together after work with zero stress. It’s impressive enough for guests but easy enough for a Tuesday.
- Crowd-Pleaser: Every single person I’ve served this to has asked for the recipe. Kids love it. Adults fight over the last slice.
- Unbelievably Delicious: The crust is flaky without being fussy. The filling is silky and spiced perfectly — not too sweet, not too heavy.
What makes this recipe different is the technique. I use a hot water and butter method for the crust that creates steam and flakiness without needing ice water or a food processor. For the filling, I bloom the spices in melted butter before adding them to the pumpkin — it wakes up the flavors in a way that dry spices just can’t match. This is comfort food reimagined: faster, simpler, but with the same soul-soothing satisfaction as that diner pie I spent years chasing.
What Ingredients You Will Need
This recipe uses simple, wholesome ingredients that come together to deliver that classic pumpkin pie flavor without any fuss. Most of these are pantry staples, and I’ve included substitution notes where they actually work.
For the Crust
- 1 ¼ cups all-purpose flour (160 grams) — I use King Arthur Flour for consistent results. Spoon and level your measuring cup, don’t scoop.
- ½ teaspoon salt — Fine sea salt works best. It balances the sweetness of the filling.
- 1 tablespoon granulated sugar — Just a hint of sweetness in the crust.
- ½ cup unsalted butter (1 stick, 113 grams), cut into small cubes and chilled — I leave mine in the freezer for 10 minutes before cutting. It makes a difference.
- 3 tablespoons ice water — But here’s the trick: I actually use hot water for this method. See the notes below.
For the Filling
- 1 can (15 ounces) pumpkin puree — NOT pumpkin pie filling. Make sure the label says 100% pumpkin. Libby’s is my go-to because it’s consistently thick and not watery.
- ¾ cup packed brown sugar (150 grams) — Light or dark works. Dark gives a deeper, molasses-like flavor that I love.
- 2 large eggs — Room temperature if you remember. If not, place them in a bowl of warm water for 5 minutes.
- 1 cup heavy cream (240 ml) — Or half-and-half for a lighter texture. Do not use milk; the pie won’t set properly.
- 2 tablespoons unsalted butter — For blooming the spices. This is a game-changer.
- 2 teaspoons pumpkin pie spice — Or make your own: 1 teaspoon cinnamon, ½ teaspoon ginger, ¼ teaspoon nutmeg, ¼ teaspoon cloves, and a pinch of allspice.
- 1 teaspoon vanilla extract — Pure, not imitation. It rounds out the flavors.
- ¼ teaspoon salt — Don’t skip this. Salt makes the sweetness pop.
Equipment Needed
You don’t need a fancy kitchen for this pie. Here’s what you’ll actually use:
- 9-inch pie dish — Glass or ceramic works best. Metal can cause uneven browning. I use a Pyrex dish that’s older than I am.
- Mixing bowls — One for the crust, one for the filling.
- Rolling pin — If you don’t have one, a wine bottle works. I’ve done it. No judgment.
- Parchment paper — For rolling the crust without sticking. Also useful for blind baking.
- Pie weights or dried beans — For blind baking the crust. I keep a bag of cheap dried beans in my pantry just for this.
- Whisk — For the filling. A fork works in a pinch.
- Small saucepan — For melting the butter and blooming the spices.
- Measuring cups and spoons — For accuracy.
Budget-friendly tip: Skip the pie weights. Use a roll of aluminum foil pressed into the crust and fill with pennies or dried beans. Works exactly the same.
Preparation Method
- Make the crust (10 minutes active, 30 minutes chill): In a medium bowl, whisk together the flour, salt, and sugar. Add the cold butter cubes. Using your fingertips or a pastry cutter, work the butter into the flour until the mixture looks like coarse meal with pea-sized butter pieces. Don’t overwork it. Now for the trick: instead of ice water, use 3 tablespoons of very hot tap water. Drizzle it over the dough and stir with a fork until the dough just comes together. It should look shaggy, not smooth. Turn it out onto a piece of plastic wrap, shape into a disk, and refrigerate for at least 30 minutes. The hot water creates steam during baking, which gives you a flaky crust without the fuss of keeping everything ice-cold.
- Blind bake the crust (15 minutes): Preheat your oven to 375°F (190°C). On a lightly floured surface, roll the chilled dough into a 12-inch circle. Transfer to your pie dish and crimp the edges however you like — I do a simple pinch with my thumb and forefinger. Line the crust with parchment paper and fill with pie weights or dried beans. Bake for 15 minutes. Remove the parchment and weights, then bake for another 5-7 minutes until the bottom looks dry and slightly golden. Set aside to cool while you make the filling. This step is non-negotiable — a soggy bottom crust ruins the whole pie.
- Make the filling (10 minutes): In a small saucepan over medium heat, melt 2 tablespoons of butter. Add the pumpkin pie spice and stir for about 30 seconds until it smells amazing. This blooming step wakes up the essential oils in the spices. Remove from heat and let it cool for a minute. In a large bowl, whisk together the pumpkin puree, brown sugar, eggs, heavy cream, vanilla extract, salt, and the spiced butter mixture. Whisk until smooth and fully combined — about 1 minute. Don’t over-whisk or you’ll incorporate too much air, which can cause cracks.
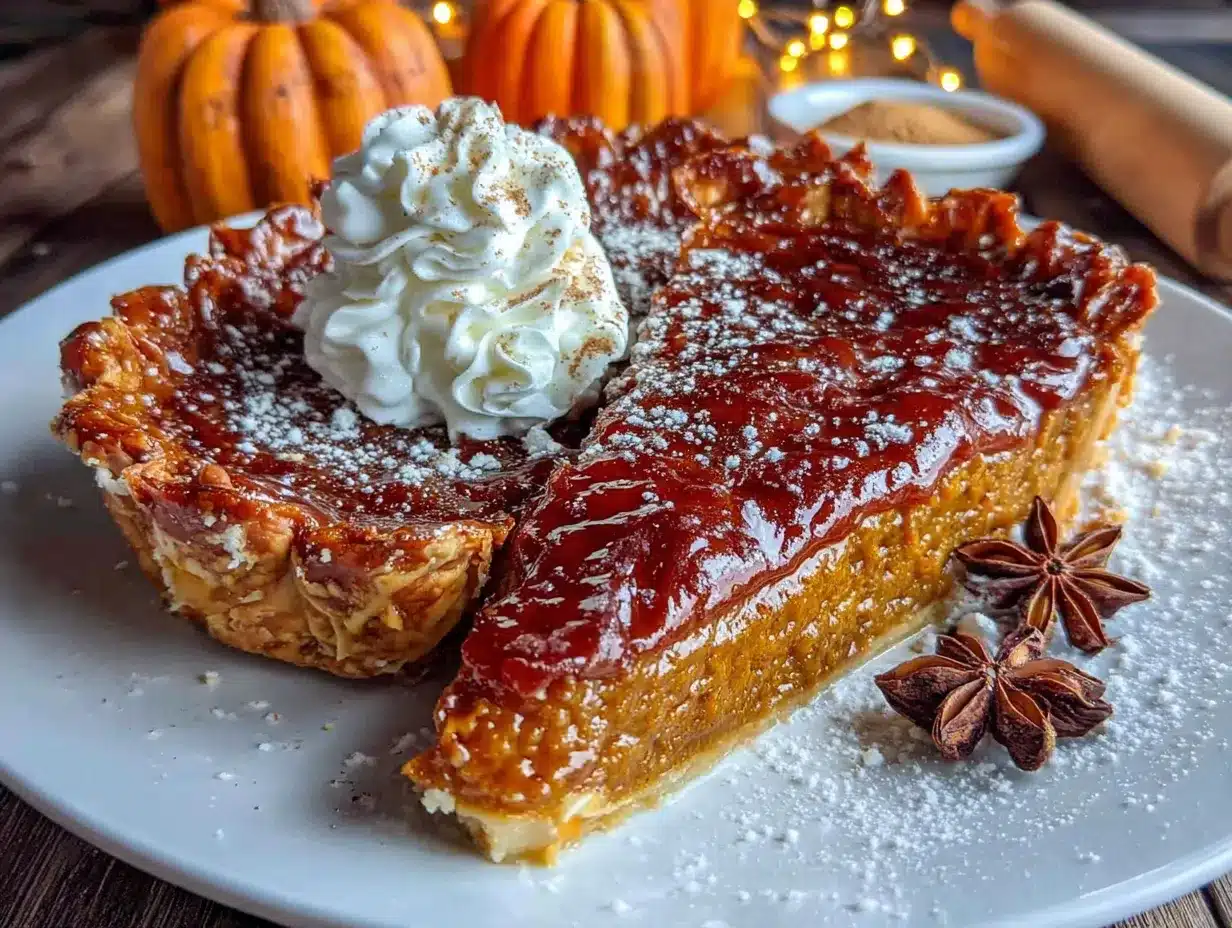
- Assemble and bake (45-50 minutes): Pour the filling into the pre-baked crust. It should fill the crust nearly to the top. Bake at 375°F (190°C) for 45-50 minutes. The pie is done when the edges are set but the center still jiggles slightly — like Jell-O, not like soup. If the crust edges are browning too quickly, tent them with foil strips. Let the pie cool completely on a wire rack — at least 2 hours. The filling continues to set as it cools. Do not rush this step. I learned this the hard way after slicing into a warm, runny pie and crying into it.
Cooking Tips & Techniques
I’ve made this pie roughly thirty-seven times, and I’ve messed it up in almost every way possible. Here’s what I learned:
Don’t overwork the crust. The first few times I made this, I kneaded the dough like bread. The result was a tough, sad crust that tasted fine but felt like cardboard. Mix until it just comes together. Lumps are your friends.
Watch the oven temperature. My oven runs hot, so I actually bake at 365°F (185°C). If your pie is browning too fast on top but isn’t set in the middle, lower the temperature by 10-15 degrees. Every oven is a liar. Get to know yours.
The jiggle test is real. I used to poke the pie with a knife to check doneness, which left ugly cracks. Now I gently shake the pie dish. The center should wobble like a wave, not slosh like liquid. That wobble will set as the pie cools.
Multitask like a pro: While the crust chills, measure your filling ingredients. While the crust blind bakes, make the filling. While the pie bakes, clean up your kitchen. This whole thing takes about 20 minutes of active time spread across the process.
Room temperature matters. Cold eggs and cold cream can make the filling lumpy. If you forgot to take them out ahead of time, place the eggs in warm water for 5 minutes and microwave the cream for 10 seconds. Problem solved.
Variations & Adaptations
This recipe is a great base, and I’ve played around with it quite a bit. Here are some variations that actually work:
- Gluten-Free Version: Swap the all-purpose flour for a 1:1 gluten-free baking flour blend. I’ve used Bob’s Red Mill with good results. Add an extra tablespoon of water to the crust since gluten-free flours absorb more liquid.
- Dairy-Free Version: Use a stick of vegan butter (I like Miyoko’s) in the crust and full-fat coconut cream in the filling instead of heavy cream. The coconut flavor is subtle but adds a nice layer. Do NOT use light coconut milk — the pie won’t set.
- Spice It Up: Add ½ teaspoon of black pepper to the filling. It sounds weird, but pepper amplifies the warmth of the other spices. I learned this from a chef friend and now I do it every time.
- Maple Pumpkin Pie: Replace the brown sugar with ½ cup maple syrup. Reduce the cream to ¾ cup since the syrup adds liquid. The flavor is more delicate and less sweet — perfect if you prefer a more grown-up dessert.
- No-Bake Version: Use a store-bought graham cracker crust and skip the blind baking. Make the filling as directed but add 1 tablespoon of cornstarch. Pour into the crust and refrigerate for at least 4 hours. It won’t be as firm as baked, but it’s creamy and delicious for when you just can’t turn on the oven.
Serving & Storage Suggestions
This pie is best served at room temperature. If you’ve refrigerated it, let it sit on the counter for about 30 minutes before slicing. The texture and flavor really come alive when it’s not straight from the fridge.
For serving, I love a generous dollop of lightly sweetened whipped cream. The contrast between the rich, spiced filling and the cool, airy cream is pure magic. If you want to get fancy, sprinkle a little cinnamon or candied pecans on top. A scoop of vanilla ice cream works beautifully too — especially if the pie is still slightly warm.
Storage: Cover the pie loosely with foil or plastic wrap and refrigerate for up to 4 days. The crust will soften slightly, but the flavor actually improves after a day or two as the spices meld.
Freezing: You can freeze the fully baked and cooled pie for up to 3 months. Wrap it tightly in plastic wrap, then foil. Thaw overnight in the refrigerator and serve at room temperature. I’ve also frozen the unbaked crust (wrapped tightly) for up to 2 months. Just thaw in the fridge overnight and blind bake as directed.
Reheating: If you want warm pie, place individual slices on a baking sheet and warm in a 300°F (150°C) oven for 10 minutes. Do not microwave — it turns the crust into a soggy mess.
One more thing: this pie tastes even better the next day. The spices settle and the texture firms up perfectly. I honestly prefer day-old pumpkin pie. Plan ahead and make it the night before your gathering.
Nutritional Information & Benefits
Here’s the honest truth: this is dessert, not health food. But it’s made with real ingredients, and there are some bright spots. Pumpkin is packed with vitamin A (over 200% of your daily needs per serving), fiber, and antioxidants. The eggs add protein, and the butter and cream provide fat that helps your body absorb the fat-soluble vitamins in the pumpkin.
Per slice (1/8 of the pie):
- Calories: approximately 380
- Fat: 24g
- Carbohydrates: 38g
- Fiber: 3g
- Sugar: 22g
- Protein: 6g
If you’re watching your sugar, you can reduce the brown sugar to ½ cup. The pie will be less sweet but still delicious. For a lower-fat option, use half-and-half instead of heavy cream. The texture will be slightly less rich but still very good.
This recipe is vegetarian and can be made gluten-free and dairy-free with the substitutions above. It contains wheat, dairy, and eggs in its standard form.
Conclusion
This quick homemade pumpkin pie from scratch is the kind of recipe that makes you feel like you’ve pulled off something special, even on a busy Tuesday night. It’s not fussy. It’s not complicated. It’s just honest, good pie that tastes like fall and reminds you why homemade is always better.
I still think about The Copper Kettle sometimes, but not with the same ache. This pie is my closure. And honestly, I think my version is better. The crust is flakier, the filling is more flavorful, and I don’t have to drive forty-five minutes to get it.
I’d love to hear how yours turns out. Did you try a variation? Did you add that pinch of black pepper? Let me know in the comments below. And if you share it on social media, tag me — I want to see your beautiful pie.
Now go preheat that oven. You’ve got a pie to make.
Frequently Asked Questions
Can I use fresh pumpkin instead of canned?
Yes, but I don’t recommend it for this recipe. Fresh pumpkin has more water than canned, which can make the filling runny. If you want to use fresh, roast and puree the pumpkin, then drain it in a cheesecloth-lined strainer for at least an hour to remove excess moisture. You’ll need about 2 cups of drained puree.
Why did my pie crust shrink during baking?
This usually happens when the dough is overworked or not chilled enough. The gluten tightens up in the oven and pulls the crust down. Make sure your butter is cold, handle the dough as little as possible, and always chill the formed crust for at least 30 minutes before baking.
How do I know when the pie is fully baked?
Use the jiggle test. The edges should be set and slightly puffed, while the center should wobble like Jell-O when you gently shake the pie dish. The center will continue to set as it cools. If you insert a knife near the center and it comes out clean, you’ve overbaked it.
Can I make this pie ahead of time?
Absolutely. This pie actually tastes better the next day. Bake it fully, let it cool completely, then cover and refrigerate. Bring it to room temperature before serving. You can also make the crust dough up to 3 days ahead and keep it wrapped in the fridge.
My pie cracked on top. What went wrong?
Cracks usually happen from overbaking or sudden temperature changes. The filling expands as it bakes, and if it sets too firmly, it cracks when it contracts during cooling. Bake until the center is just barely set (still jiggly), and let it cool slowly on a wire rack away from drafts. A cracked pie still tastes perfect — just cover it with whipped cream and no one will know.
Pin This Recipe!
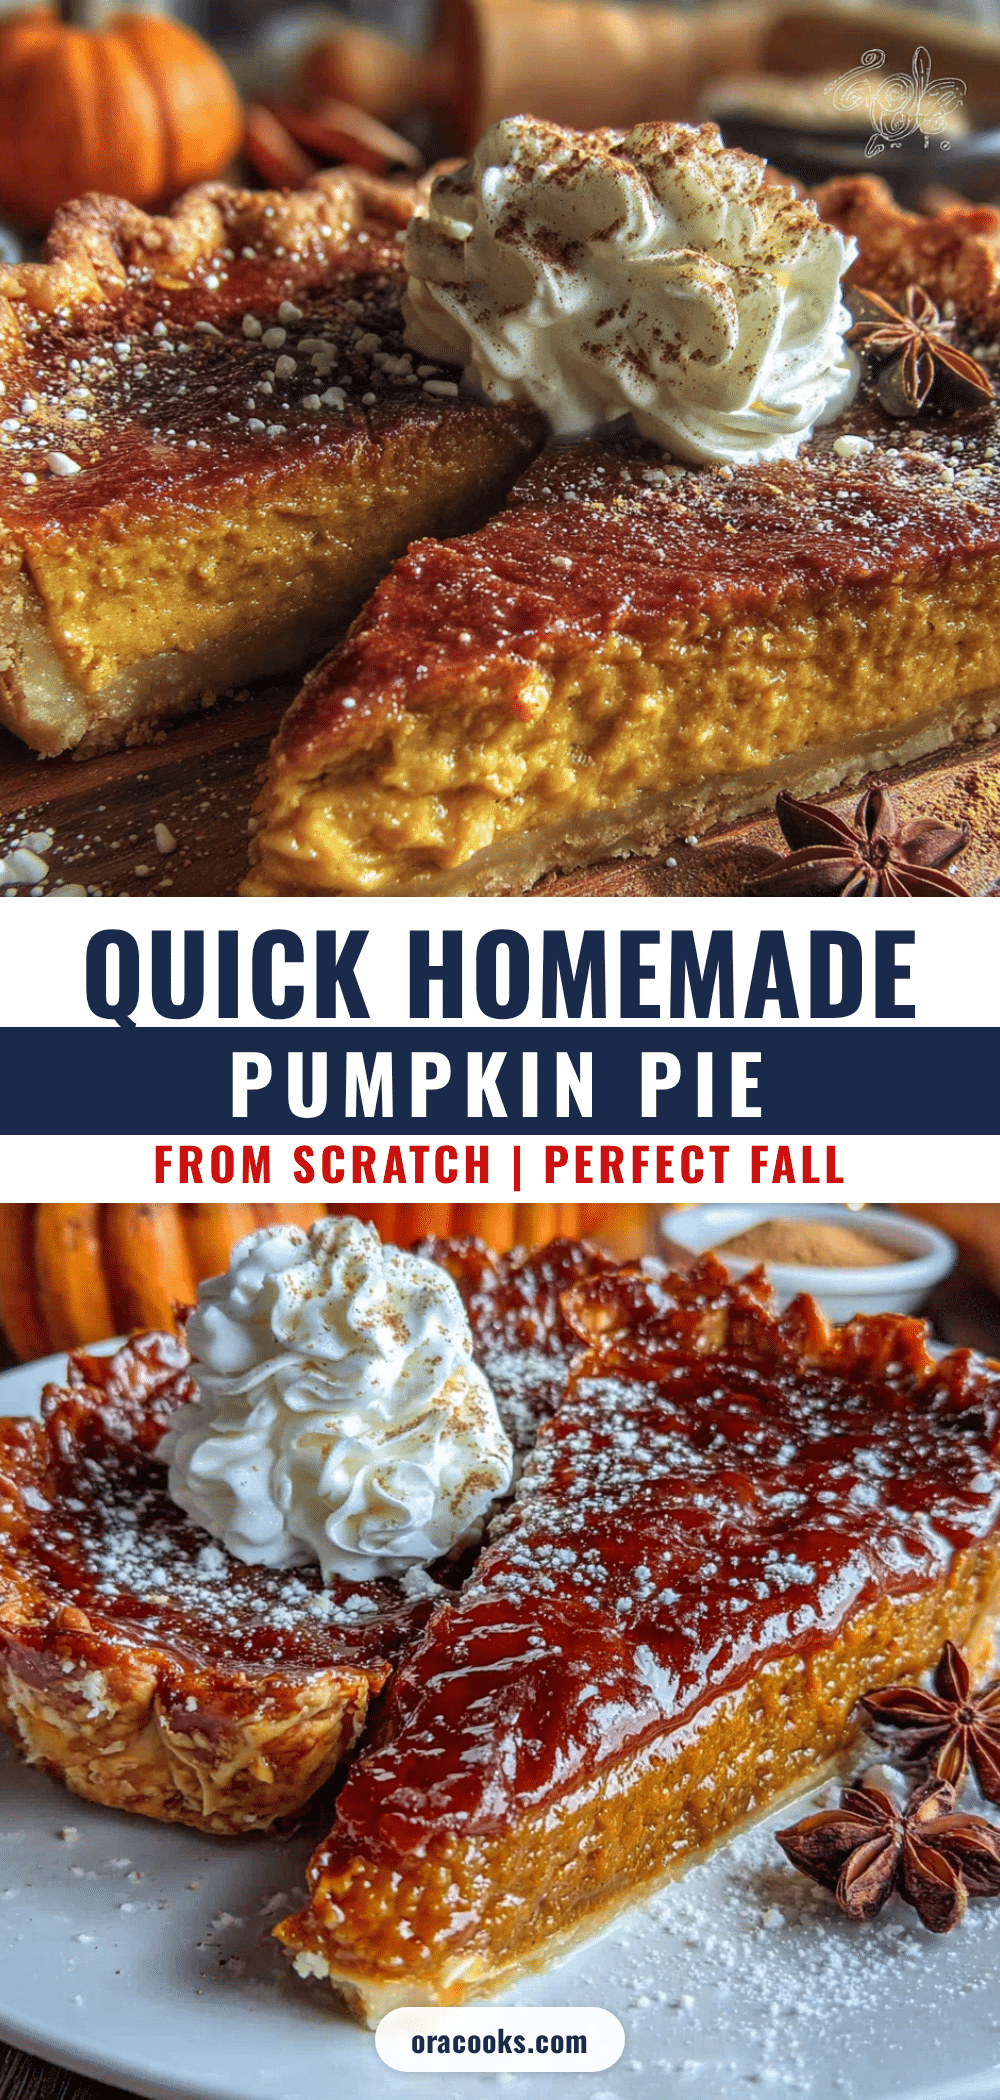
Best Homemade Pumpkin Pie Recipe from Scratch

A quick and easy homemade pumpkin pie from scratch with a flaky crust and silky spiced filling. Perfect for weeknights, this recipe uses simple ingredients and a clever hot water method for the crust.
- Prep Time: 20 minutes
- Cook Time: 50 minutes
- Total Time: 1 hour 10 minutes (plus cooling)
- Yield: 8 servings 1x
- Category: Dessert
- Cuisine: American
Ingredients
- 1 ¼ cups all-purpose flour (160 grams)
- ½ teaspoon fine sea salt
- 1 tablespoon granulated sugar
- ½ cup unsalted butter (1 stick, 113 grams), cut into small cubes and chilled
- 3 tablespoons ice water (or hot water for the trick)
- 1 can (15 ounces) pumpkin puree (not pumpkin pie filling)
- ¾ cup packed brown sugar (150 grams), light or dark
- 2 large eggs, room temperature
- 1 cup heavy cream (240 ml)
- 2 tablespoons unsalted butter
- 2 teaspoons pumpkin pie spice (or homemade blend)
- 1 teaspoon vanilla extract
- ¼ teaspoon salt
Instructions
- Make the crust: In a medium bowl, whisk together flour, salt, and sugar. Add cold butter cubes. Using fingertips or a pastry cutter, work butter into flour until mixture resembles coarse meal with pea-sized butter pieces. Drizzle 3 tablespoons very hot tap water over dough and stir with a fork until just combined. Turn out onto plastic wrap, shape into a disk, and refrigerate for at least 30 minutes.
- Blind bake the crust: Preheat oven to 375°F (190°C). On a lightly floured surface, roll chilled dough into a 12-inch circle. Transfer to a 9-inch pie dish and crimp edges. Line with parchment paper and fill with pie weights or dried beans. Bake for 15 minutes. Remove parchment and weights, then bake for another 5-7 minutes until bottom looks dry and slightly golden. Set aside to cool.
- Make the filling: In a small saucepan over medium heat, melt 2 tablespoons butter. Add pumpkin pie spice and stir for about 30 seconds until fragrant. Remove from heat and let cool for a minute. In a large bowl, whisk together pumpkin puree, brown sugar, eggs, heavy cream, vanilla extract, salt, and the spiced butter mixture until smooth and fully combined (about 1 minute).
- Assemble and bake: Pour filling into pre-baked crust. Bake at 375°F (190°C) for 45-50 minutes, until edges are set but center still jiggles slightly. If crust edges brown too quickly, tent with foil strips. Let pie cool completely on a wire rack for at least 2 hours.
Notes
For a flakier crust, use hot water instead of ice water. Bloom spices in butter for deeper flavor. Let pie cool completely before slicing to avoid runny filling. Pie tastes even better the next day.
Nutrition
- Serving Size: 1 slice (1/8 of pie)
- Calories: 380
- Sugar: 22
- Sodium: 320
- Fat: 24
- Saturated Fat: 14
- Carbohydrates: 38
- Fiber: 3
- Protein: 6
Keywords: pumpkin pie, homemade pumpkin pie, easy pumpkin pie, weeknight dessert, fall dessert, Thanksgiving pie