Love this? Save it for later!
Share the inspiration with your friends
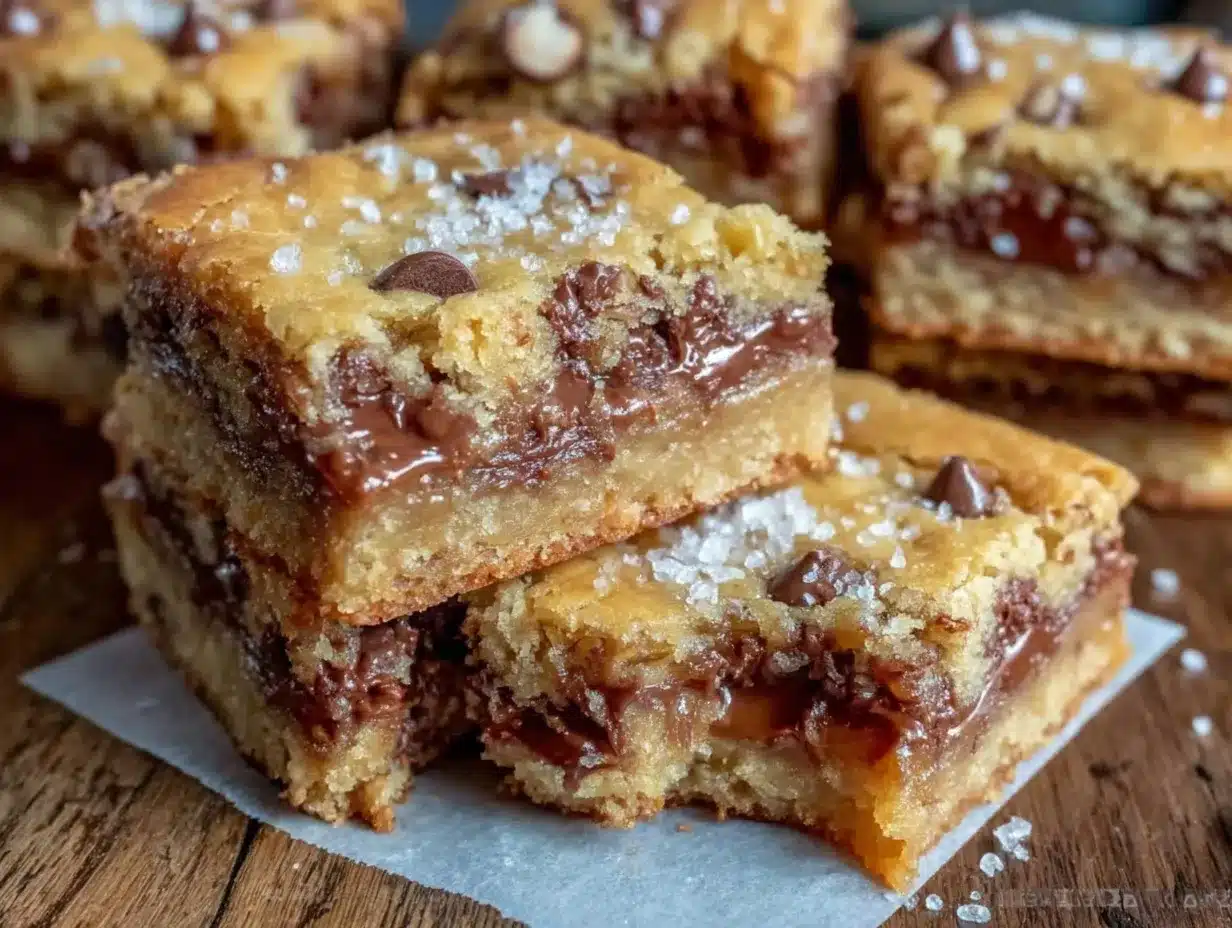
Last Tuesday, my colleague watched me wrestle with my usual lunchbox dilemma—how to pack something sweet, satisfying, and, honestly, not too crumbly. She didn’t say a word at first, just slid a worn recipe card across the counter with a smile. It was her go-to for her kids’ lunches, something she whipped up on hectic mornings without breaking a sweat. The recipe? Chewy brown butter chocolate chip cookie bars. Simple, no fuss, and packed with that deep, nutty flavor only brown butter can bring.
I remember that cracked mixing bowl I grabbed hurriedly from my cluttered shelf, half expecting the batter to be a mess. But honestly, it came together smoother than I thought. The smell of the browned butter melting into the batter filled my kitchen like a warm hug, and I couldn’t help but think—this is exactly the kind of treat I want slipping into my kid’s lunchbox each day. Maybe you’ve been there, staring at rows of cookies and wondering if there’s a better way to keep that perfect chewy texture without crumbs taking over the bag.
This recipe stayed with me because it’s more than just a cookie bar. It’s a little conversation starter—like the one I had with my colleague—where flavors and stories mingle, making everyday lunches a bit more special. So, let me tell you how these chewy brown butter chocolate chip cookie bars can quietly become your new lunchbox hero.
Why You’ll Love This Recipe
After multiple kitchen tests and lunchtime trials, I can confidently say these chewy brown butter chocolate chip cookie bars tick all the boxes. Crafted with care and a few tricks, this recipe isn’t just another cookie bar; it’s the kind that makes people pause and smile.
- Quick & Easy: Ready in under 45 minutes, perfect for busy mornings or last-minute baking urges.
- Simple Ingredients: Uses pantry staples you likely already have—no need for specialty shopping trips.
- Perfect for Lunchboxes: Sturdy enough to stay chewy but soft enough to enjoy anytime during the day.
- Crowd-Pleaser: Kids and adults rave about these bars; they’re a universal hit.
- Unbelievably Delicious: The brown butter adds a rich, toasty depth that sets these apart from typical cookie bars.
What really makes this recipe stand out is the brown butter technique. It’s a game changer—giving the cookie bars a caramelized, almost nutty flavor that’s balanced perfectly with melty chocolate chips. Plus, the texture hits that ideal chewy spot, neither too cakey nor crumbly. Honestly, it’s comfort food that fits right into lunchboxes without fuss or mess.
It’s the kind of recipe you pull out when you want something familiar but with a little twist—something that feels homemade and thoughtful, even on rushed mornings. I promise, once you try these, you’ll keep coming back to them for all your lunchbox needs or even that mid-afternoon sweet fix.
What Ingredients You Will Need
This recipe uses simple, wholesome ingredients to deliver bold flavor and satisfying chewiness without any fuss. Most are pantry staples, and there’s room for easy swaps if needed.
- Unsalted butter (1 cup / 227g): browned for that rich, nutty flavor—use high-quality butter like Kerrygold for best results.
- Light brown sugar (1 cup / 200g): adds moisture and chewiness, feel free to use dark brown sugar for a deeper molasses note.
- Granulated sugar (1/2 cup / 100g): balances sweetness and helps with texture.
- Large eggs (2, room temperature): binds everything together and adds moisture.
- Pure vanilla extract (2 tsp): enhances the caramel notes from the brown butter.
- All-purpose flour (2 1/4 cups / 280g): provides structure; for gluten-free option, substitute with a 1:1 gluten-free flour blend.
- Baking soda (1 tsp): for gentle lift and softness.
- Salt (1/2 tsp): balances sweetness and deepens flavor.
- Chocolate chips (1 1/2 cups / 270g): semi-sweet or milk chocolate works great; I like Ghirardelli for melt quality.
If you want to switch it up, you can swap chocolate chips for chunks or even a mix of chips and chopped nuts like walnuts. For a dairy-free twist, use coconut oil browned carefully instead of butter, and dairy-free chocolate chips.
Equipment Needed
- Medium saucepan: for browning the butter — a heavy-bottomed pan helps prevent burning.
- Mixing bowls: one large for combining ingredients, preferably glass or stainless steel.
- Measuring cups and spoons: precise measurements make a huge difference in texture.
- 9×13 inch (23×33 cm) baking pan: for cookie bars — I line mine with parchment for easy removal and cleanup.
- Wooden spoon or silicone spatula: for mixing the dough gently without overworking it.
- Cooling rack: to let the bars cool evenly and keep their chewy texture.
If you don’t have a 9×13 pan, a similarly sized square or rectangle pan will work, just adjust the baking time slightly. I’ve also used an 8×8 inch pan when doubling the recipe; it just changes the thickness and baking time a bit.
Preparation Method
- Brown the butter: Place 1 cup (227g) unsalted butter in a medium saucepan over medium heat. Stir occasionally as it melts and starts to foam. After about 5-7 minutes, you’ll see golden brown specks and smell a nutty aroma. Remove from heat immediately to avoid burning. Pour into a heatproof bowl and let cool slightly for 5 minutes.
- Mix sugars and butter: Add 1 cup (200g) light brown sugar and 1/2 cup (100g) granulated sugar to the browned butter. Stir until combined and slightly cooled—warm but not hot to avoid cooking the eggs in the next step.
- Add eggs and vanilla: Beat in 2 large eggs (room temperature) one at a time, followed by 2 teaspoons pure vanilla extract. The batter will look shiny and smooth.
- Combine dry ingredients: In a separate bowl, whisk together 2 1/4 cups (280g) all-purpose flour, 1 teaspoon baking soda, and 1/2 teaspoon salt.
- Incorporate dry into wet: Gradually fold the dry ingredients into the wet mixture using a spatula. Mix just until combined—overmixing will toughen the bars.
- Fold in chocolate chips: Stir in 1 1/2 cups (270g) chocolate chips evenly.
- Prepare the pan: Line a 9×13 inch pan with parchment paper, allowing some overhang for easy removal. Spread the batter evenly in the pan, smoothing the top gently.
- Bake: Preheat oven to 350°F (175°C). Bake the bars for 25-28 minutes, or until the edges are golden and the center looks set but still soft. A toothpick inserted should come out with a few moist crumbs.
- Cool and slice: Let the bars cool completely in the pan on a cooling rack, about 1 hour. Use the parchment overhang to lift the whole slab out, then cut into 16 bars.
If you notice the bars baking too fast on the edges, tent loosely with foil halfway through. The cooling time is crucial for that chewy texture—don’t rush it or you’ll miss out on the perfect bite.
Cooking Tips & Techniques
Brown butter is the secret sauce here, but it can be tricky. Keep your eye on it during the melting process—when it foams and turns golden with nutty aroma, act fast. If it burns, the bars get bitter.
Use room temperature eggs to prevent the batter from curdling. If your batter looks a little loose after adding eggs, don’t worry; it firms up during baking.
Don’t overmix the flour into the batter. Overworking develops gluten and makes the bars tough rather than chewy. Just fold gently until you see no dry streaks.
Line your pan with parchment paper. I learned this the hard way after scraping cookie bars off a sticky pan. Parchment means easy cleanup and perfect edges.
Timing matters. Start checking for doneness around 25 minutes. The center should be set but soft. Overbaking dries out the bars, which defeats the whole chewy purpose.
Trust me, letting the bars cool completely before slicing is a must. Cutting too soon leads to crumbly bars that don’t hold together well in lunchboxes.
Variations & Adaptations
- Nutty Upgrade: Add 1/2 cup chopped toasted pecans or walnuts for crunch and extra flavor.
- Seasonal Flavor: Swap chocolate chips with dried cranberries and white chocolate chips for a festive twist.
- Gluten-Free Option: Use a 1:1 gluten-free baking flour blend instead of all-purpose flour; the texture will be just as chewy.
- Vegan Adaptation: Replace butter with browned coconut oil and eggs with flax eggs (2 tbsp ground flaxseed + 6 tbsp water) for an egg-free version.
- Spiced Variation: Add 1 tsp cinnamon and a pinch of nutmeg to the dry ingredients for a warm spice touch.
Personally, I once added a swirl of peanut butter on top before baking—talk about a crowd-pleaser! It’s a fun way to mix up the flavor while keeping that chewy texture intact.
Serving & Storage Suggestions
These cookie bars are best served at room temperature, making them ideal for lunchboxes or snack time. They hold their shape well and don’t crumble excessively, which means less mess (and happier kids).
Pair them with a cold glass of milk or a warm cup of tea for a cozy afternoon treat. If you’re packing them for school or work, wrap each bar in parchment or beeswax wrap to keep them fresh and portable.
Store leftover bars in an airtight container at room temperature for up to 3 days. For longer storage, refrigerate up to a week or freeze for up to 3 months. When reheating frozen bars, pop them in the microwave for 15-20 seconds to bring back that soft, chewy goodness.
Flavors deepen a bit after sitting overnight, so sometimes I make them a day ahead for a richer taste. It’s a small tip I picked up that makes these bars even more satisfying.
Nutritional Information & Benefits
Each chewy brown butter chocolate chip cookie bar contains approximately:
| Calories | 210 kcal |
|---|---|
| Fat | 11g |
| Carbohydrates | 27g |
| Protein | 2g |
| Sugar | 17g |
While these bars are definitely a treat, they include some wholesome ingredients like real butter and eggs, providing a bit of protein and healthy fats. Brown butter also delivers a richer flavor, so you can enjoy smaller portions without feeling deprived.
For those mindful of dietary restrictions, this recipe can easily be adapted to gluten-free or vegan options without losing its signature chewiness and taste. Just be aware of allergens like dairy, eggs, and gluten when serving to friends or family.
Honestly, I think of these bars as a little balance between comfort and practicality—tasty enough to satisfy a sweet tooth, with enough real ingredients to feel like a thoughtful snack for growing kids or busy adults.
Conclusion
Chewy brown butter chocolate chip cookie bars are the kind of recipe that quietly wins over lunchboxes everywhere. They’re simple, forgiving, and packed with flavor that feels made-from-scratch, not store-bought. Whether you’re juggling a busy morning or just want a sweet treat that travels well, these bars bring you that perfect chewy bite every time.
Feel free to tweak them to fit your family’s tastes or dietary needs—this recipe is flexible enough to handle a few changes without losing its charm. I keep coming back to it because it reminds me of that casual, friendly kitchen exchange that sparked it all, and because it’s just so darn satisfying.
If you give these a try, I’d love to hear how you make them your own—drop a comment or share your favorite variation. Here’s to many more lunchbox smiles and cozy cookie moments ahead!
FAQs
Can I make these cookie bars ahead of time?
Yes! They taste great made a day in advance and stored in an airtight container. Just slice them after they’ve cooled completely.
How do I keep the cookie bars chewy?
Don’t overbake and let them cool fully before slicing. The brown butter also helps keep them moist and chewy.
Can I freeze these cookie bars?
Absolutely. Freeze in an airtight container for up to 3 months. Thaw at room temperature and warm slightly before serving.
What’s the best way to brown butter without burning it?
Use a medium heat and stir often. When the butter foams and turns golden with nutty aroma, remove it from heat right away.
Can I use other types of chocolate in this recipe?
Yes! Dark chocolate chunks, white chocolate chips, or even peanut butter chips work well and add unique flavors.
Pin This Recipe!
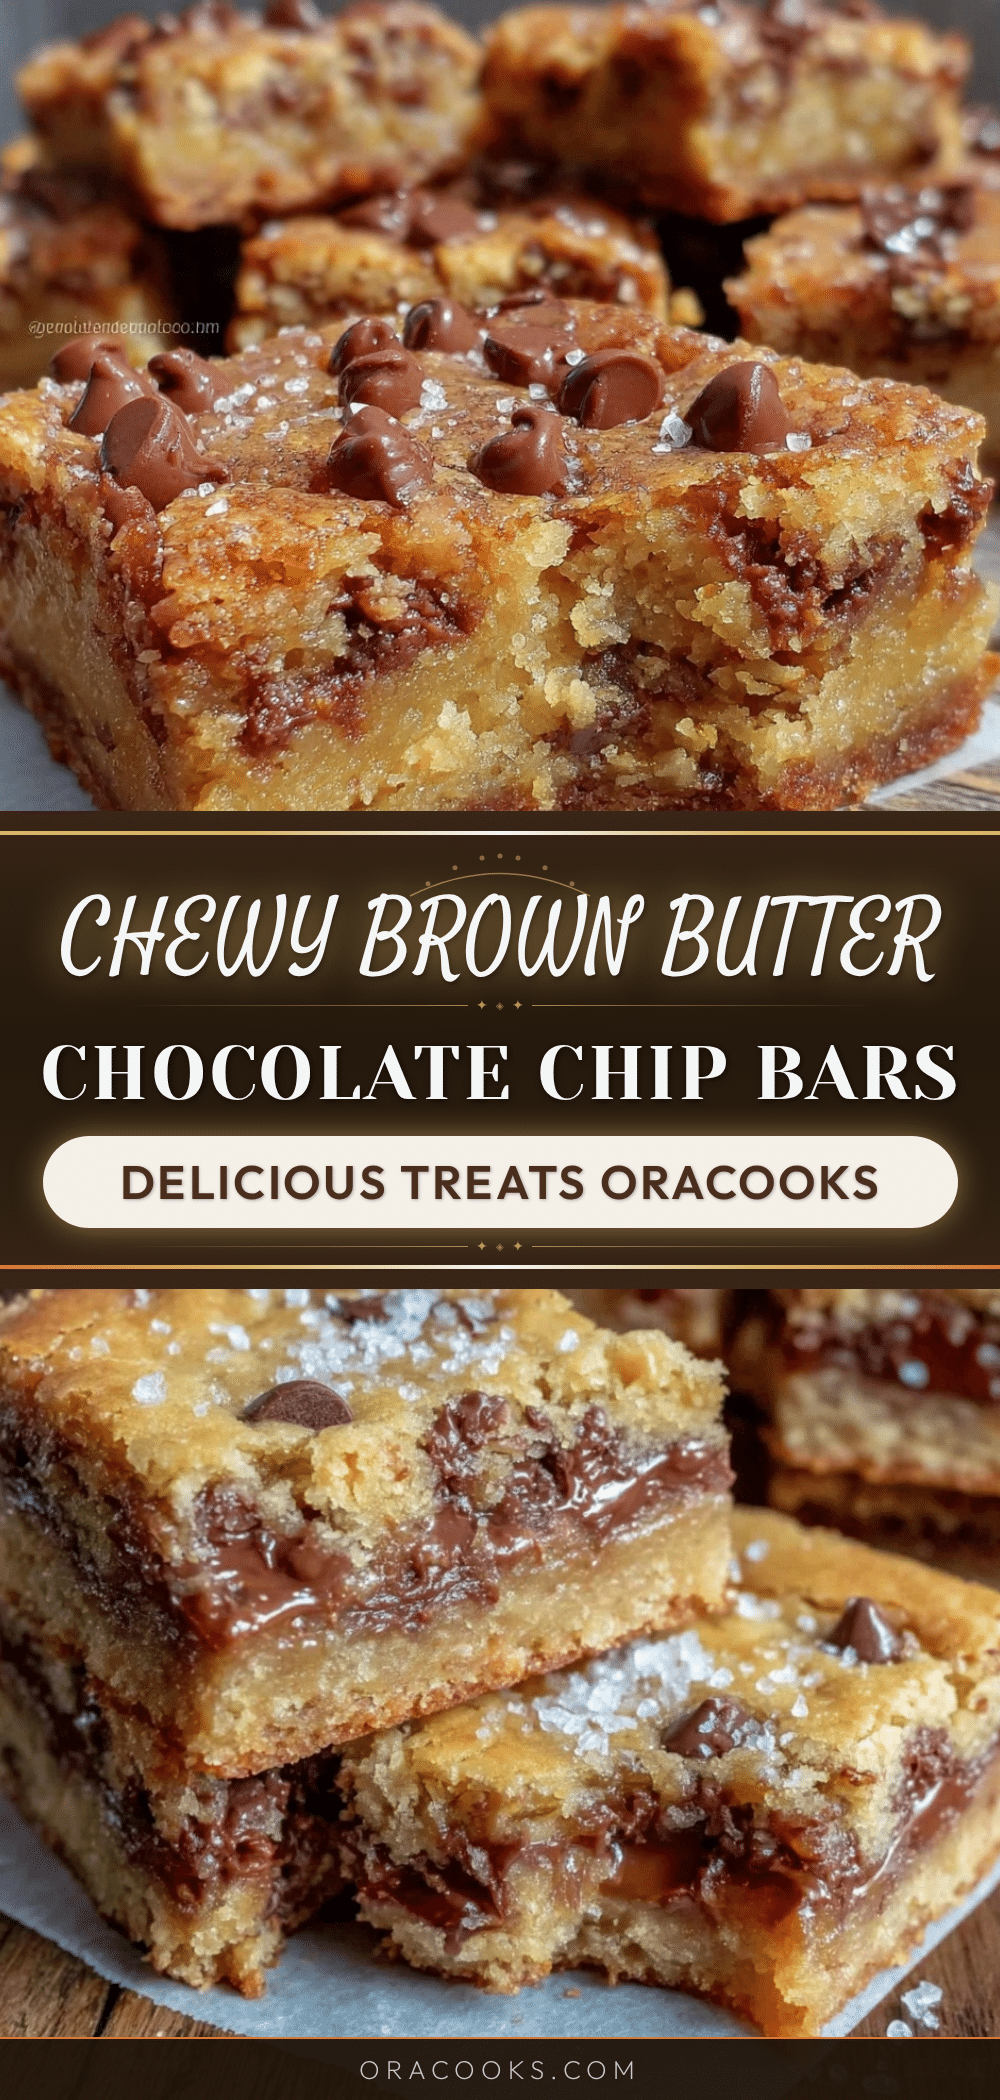
Chewy Brown Butter Chocolate Chip Cookie Bars
These chewy brown butter chocolate chip cookie bars are a quick and easy lunchbox treat with a rich, nutty flavor and perfect chewy texture.
- Prep Time: 15 minutes
- Cook Time: 28 minutes
- Total Time: 1 hour 43 minutes
- Yield: 16 bars 1x
- Category: Dessert
- Cuisine: American
Ingredients
- 1 cup (227g) unsalted butter, browned
- 1 cup (200g) light brown sugar
- 1/2 cup (100g) granulated sugar
- 2 large eggs, room temperature
- 2 teaspoons pure vanilla extract
- 2 1/4 cups (280g) all-purpose flour
- 1 teaspoon baking soda
- 1/2 teaspoon salt
- 1 1/2 cups (270g) semi-sweet or milk chocolate chips
Instructions
- Brown the butter: Place 1 cup (227g) unsalted butter in a medium saucepan over medium heat. Stir occasionally as it melts and starts to foam. After about 5-7 minutes, you’ll see golden brown specks and smell a nutty aroma. Remove from heat immediately to avoid burning. Pour into a heatproof bowl and let cool slightly for 5 minutes.
- Mix sugars and butter: Add 1 cup (200g) light brown sugar and 1/2 cup (100g) granulated sugar to the browned butter. Stir until combined and slightly cooled—warm but not hot to avoid cooking the eggs in the next step.
- Add eggs and vanilla: Beat in 2 large eggs (room temperature) one at a time, followed by 2 teaspoons pure vanilla extract. The batter will look shiny and smooth.
- Combine dry ingredients: In a separate bowl, whisk together 2 1/4 cups (280g) all-purpose flour, 1 teaspoon baking soda, and 1/2 teaspoon salt.
- Incorporate dry into wet: Gradually fold the dry ingredients into the wet mixture using a spatula. Mix just until combined—overmixing will toughen the bars.
- Fold in chocolate chips: Stir in 1 1/2 cups (270g) chocolate chips evenly.
- Prepare the pan: Line a 9×13 inch (23×33 cm) baking pan with parchment paper, allowing some overhang for easy removal. Spread the batter evenly in the pan, smoothing the top gently.
- Bake: Preheat oven to 350°F (175°C). Bake the bars for 25-28 minutes, or until the edges are golden and the center looks set but still soft. A toothpick inserted should come out with a few moist crumbs.
- Cool and slice: Let the bars cool completely in the pan on a cooling rack, about 1 hour. Use the parchment overhang to lift the whole slab out, then cut into 16 bars.
Notes
Keep a close eye on the butter while browning to avoid burning. Use room temperature eggs to prevent curdling. Do not overmix the batter to maintain chewiness. Let bars cool completely before slicing for best texture. Tent with foil if edges brown too quickly.
Nutrition
- Serving Size: 1 bar
- Calories: 210
- Sugar: 17
- Fat: 11
- Carbohydrates: 27
- Protein: 2
Keywords: brown butter, chocolate chip, cookie bars, chewy, lunchbox treats, easy baking, kid-friendly