Love this? Save it for later!
Share the inspiration with your friends
I was standing in line at a hardware store—of all places—when the guy behind me, a retired electrician named Larry, started talking about cake. Not about wiring, not about the weather, but about the most ridiculous, over-the-top chocolate peanut butter cake he claimed his wife made for Super Bowl parties. “She pokes holes in it,” he said, like it was a secret handshake. “Then she drowns it in sweetened condensed milk and peanut butter.” I almost forgot to pay for my paintbrushes. Larry was the last person I expected cooking advice from, but there I was, clutching a receipt and mentally rewriting my weekend baking plans. Honestly, you never know where a good recipe will find you.
This Ultimate Reese’s Peanut Butter Poke Cake is exactly what it sounds like—a ridiculously moist chocolate cake, literally injected with peanut butter goodness, then topped with a creamy peanut butter frosting and more Reese’s than is probably reasonable. The first time I made it, I forgot to grease the pan properly (rookie move, I know), and half the cake stuck to the bottom. But the part that survived? Let me tell you, it was the best mistake I never meant to make. The poked holes soaked up all that sweet, peanutty magic, and the texture was something between a brownie and a cloud.
Maybe you’ve been there—you want a dessert that feels special without requiring a pastry degree. Something that makes people close their eyes when they take a bite. This is that cake. It’s the kind of recipe you pull out when you need to impress, but secretly it’s so easy you could make it on a Tuesday. I’ve been making it for years now, tweaking the frosting ratio and testing different mix-ins, and I can say with total confidence: this is the version you want. The one that gets requested for birthdays, potlucks, and “just because” nights. Larry would approve.
Why You’ll Love This Recipe
Let’s be real for a second. There are a million chocolate cakes out there, and a million peanut butter desserts too. But this Ultimate Reese’s Peanut Butter Poke Cake? It’s different. I’ve tested this recipe more times than I can count—sometimes with different pans, once with a gluten-free flour blend, and even one memorable attempt where I accidentally used salted butter in the frosting (which, honestly, wasn’t bad). Through all that trial and error, I can tell you exactly why this version works.
- Quick & Easy: You don’t need a stand mixer or fancy techniques. A boxed cake mix does the heavy lifting, and the poke method means you get maximum flavor with minimum effort. It comes together in about 45 minutes, plus chilling time.
- Simple Ingredients: No trips to a specialty store. You probably already have eggs, oil, butter, and powdered sugar in your kitchen. The secret weapons—sweetened condensed milk and creamy peanut butter—are total pantry staples.
- Perfect for Celebrations: Birthdays, game days, potlucks, or just a Tuesday that needs a little extra joy. This cake feeds a crowd and always gets the “who made this?!” reaction.
- Crowd-Pleaser: Kids devour it. Adults sneak seconds. Even people who claim they’re “not dessert people” find themselves reaching for another slice. It’s the peanut butter—it gets everyone.
- Unbelievably Delicious: The texture is what gets me every time. The cake stays incredibly moist thanks to the condensed milk soak, the peanut butter frosting is silky and rich, and the chopped Reese’s on top add that perfect little crunch. It’s next-level comfort food.
What makes this recipe stand out from every other poke cake out there is the ratio. I’ve seen versions where the filling is too thin and just sinks to the bottom, or where the frosting is so sweet it masks the peanut butter flavor. This one balances everything. The filling clings to every bite of cake, the frosting has just the right amount of salt to cut the sweetness, and the toppings are generous without being overwhelming. It’s not just another version—it’s the version I keep coming back to, and I think you will too.
This cake is the kind that makes you close your eyes after the first bite. It’s comfort food reimagined—indulgent, yes, but with that soul-soothing satisfaction that only chocolate and peanut butter can deliver. Perfect for impressing guests without stress, or turning a simple evening into something memorable.
What Ingredients You Will Need
This recipe uses simple, mostly pantry-friendly ingredients to deliver that big Reese’s flavor without any complicated steps. Here’s what you need and why each one matters.
For the Cake
- 1 box (15.25 oz) chocolate cake mix – I prefer Duncan Hines or Betty Crocker for consistent results. Devil’s food or dark chocolate both work great.
- Eggs, oil, and water – Follow the box instructions. Usually 3 eggs, 1/3 cup oil, and 1 cup water. Use room temperature eggs for better texture.
- 1/2 cup creamy peanut butter – Swirl this into the batter for extra peanut butter pockets. Skippy or Jif work well. Natural peanut butter can separate, so stick with the classic stuff here.
For the Poke Filling
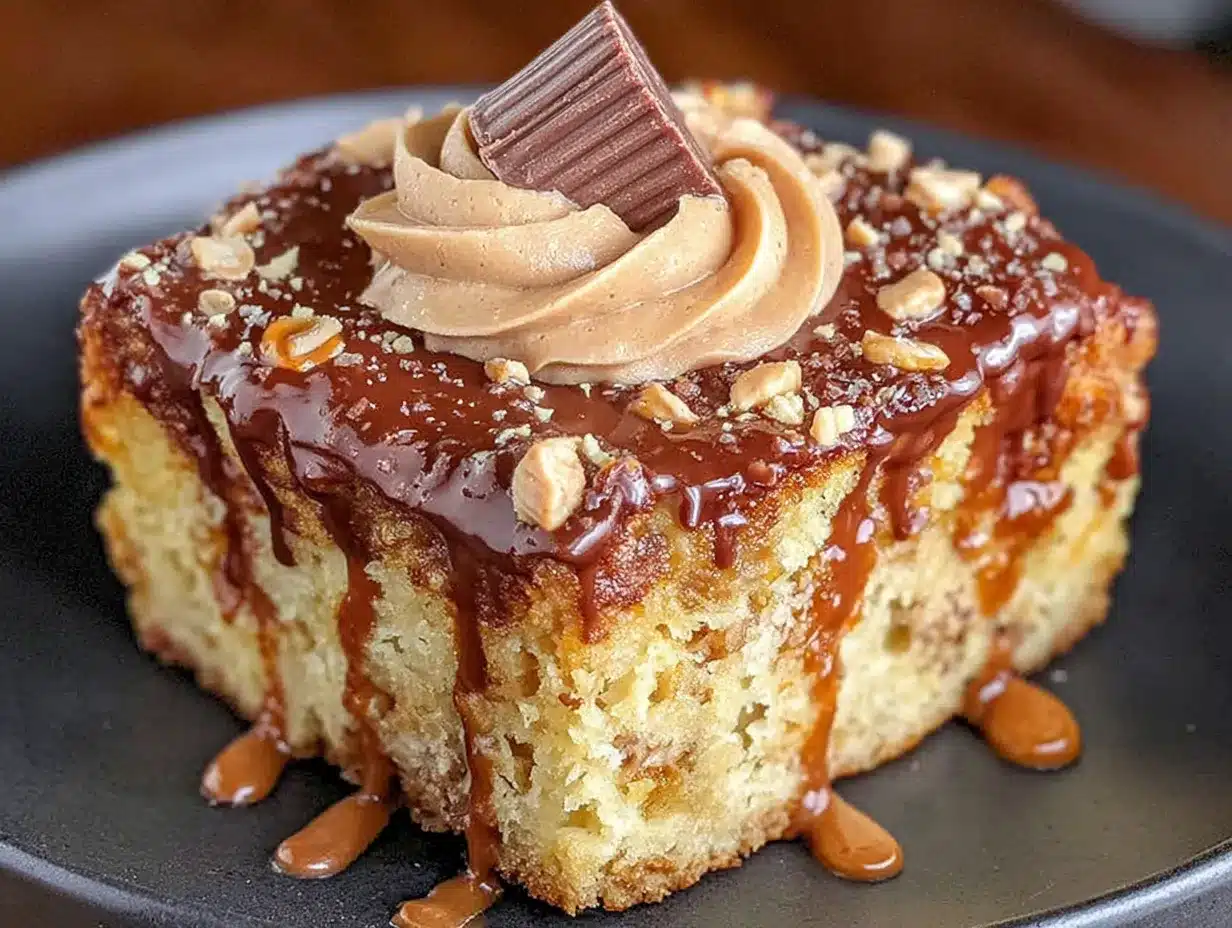
- 1 can (14 oz) sweetened condensed milk – This is the magic ingredient. It soaks into the holes and keeps the cake incredibly moist. (Use dairy-free condensed milk if needed.)
- 1/2 cup creamy peanut butter – Warm it slightly so it mixes smoothly with the condensed milk. This creates that rich, pourable peanut butter sauce.
For the Peanut Butter Frosting
- 1/2 cup unsalted butter, softened – Let it sit out for 30 minutes. Softened butter creams better and gives a fluffier frosting.
- 1 cup creamy peanut butter – Again, skip the natural stuff. You want that stable, smooth texture.
- 2 cups powdered sugar – Sift it if you want an extra-smooth finish, but honestly, I rarely do and it turns out fine.
- 1/4 cup milk – Whole milk adds richness, but 2% or even oat milk works. Add more if the frosting seems too thick.
- 1 teaspoon vanilla extract – Pure vanilla adds warmth. Imitation works in a pinch.
For the Topping
- 1 cup Reese’s peanut butter cups, chopped – About 6-8 mini cups or 3 regular-sized cups. Chop them roughly—some chunks, some crumbs.
- 1/4 cup chocolate syrup – For drizzling. Optional but highly recommended for that classic Reese’s look.
- Optional: 1/4 cup chopped salted peanuts – Adds crunch and balances the sweetness.
Ingredient tip: If you can find the seasonal Reese’s shapes (like the eggs or pumpkins), they’re great for topping because they’re thicker and give a nicer chunk. I stock up after holidays just for this cake.
Equipment Needed
You don’t need a professional bakery setup for this cake. Here’s what you’ll actually use:
- 9×13-inch baking pan – Metal or glass both work. Glass may need an extra 2-3 minutes of baking time. I use a metal pan for more even browning.
- Mixing bowls – One large bowl for the cake batter, one medium bowl for the filling, and another for the frosting. Saves you from washing dishes mid-recipe.
- Wooden spoon or spatula – For mixing the batter and stirring the filling. A rubber spatula is great for scraping every last bit of frosting.
- Hand mixer or stand mixer – The frosting comes together much faster with an electric mixer. A whisk and some elbow grease works too, but your arm will thank you for the mixer.
- The handle of a wooden spoon or a chopstick – This is your poking tool. The round end makes clean holes. I use the thick end of a chopstick—it’s the perfect size.
- Measuring cups and spoons – For accuracy, especially with the peanut butter. Peanut butter is sticky, so spray your measuring cup with nonstick spray first for easy cleanup.
- Wire cooling rack – Helps the cake cool evenly before you add the filling and frosting. Don’t skip this step.
Budget tip: If you don’t have a hand mixer, a whisk works fine for the frosting—just soften the butter really well and go slow. You’ll get a good arm workout!
Preparation Method
Let’s get to the fun part. Follow these steps, and you’ll have a cake that looks like it came from a bakery—but tastes even better because you made it yourself.
- Preheat and prep. Preheat your oven to 350°F (175°C). Grease your 9×13-inch pan with butter or nonstick spray. I like to dust it lightly with cocoa powder instead of flour—keeps the chocolate flavor pure and prevents white spots on the cake.
- Make the cake batter. In a large bowl, combine the chocolate cake mix, eggs, oil, and water according to the box directions. Mix until smooth—about 2 minutes. Don’t overmix, or the cake can get tough. Gently fold in the 1/2 cup of creamy peanut butter. You don’t need to fully incorporate it; a few swirls are perfect. The little peanut butter pockets will melt into the cake as it bakes.
- Bake the cake. Pour the batter into your prepared pan and spread it evenly. Bake for 28-33 minutes, or until a toothpick inserted in the center comes out with a few moist crumbs. My oven runs hot, so I check at 28 minutes. The cake should spring back lightly when touched.
- Poke the holes. Let the cake cool in the pan for about 10 minutes—just enough so it’s not steaming hot, but still warm. Then, using the handle of a wooden spoon or a chopstick, poke holes all over the cake. Space them about 1 inch apart. Don’t be shy; poke all the way to the bottom of the pan. The more holes, the more filling gets absorbed.
- Make the filling. While the cake is cooling slightly, whisk together the sweetened condensed milk and 1/2 cup peanut butter in a small bowl. Warm the peanut butter in the microwave for 15 seconds first—it mixes much easier. Stir until completely smooth. It should be pourable but thick.
- Pour the filling. Slowly pour the peanut butter-condensed milk mixture over the warm cake, making sure it seeps into all the holes. Use a spatula to spread it evenly. Don’t worry if some pools on top—that’s extra goodness. Let the cake cool completely at room temperature, about 1 hour. This gives the filling time to soak in.
- Make the frosting. In a medium bowl, beat the softened butter and 1 cup peanut butter together until smooth and creamy—about 2 minutes. Gradually add the powdered sugar, one cup at a time, beating on low speed. Add the milk and vanilla, then increase speed to medium and beat for 2-3 minutes until light and fluffy. If it’s too thick, add another tablespoon of milk. If it’s too thin, add a little more powdered sugar.
- Frost the cake. Spread the peanut butter frosting evenly over the completely cooled cake. Use an offset spatula or the back of a spoon to create those nice swoops and swirls. Don’t stress about perfection—the toppings will cover any imperfections.
- Add the toppings. Sprinkle the chopped Reese’s peanut butter cups generously over the frosting. Drizzle with chocolate syrup. If you’re using chopped peanuts, scatter those on too. The combination of textures is incredible—creamy frosting, crunchy peanuts, and melty chocolate.
- Chill and serve. Refrigerate the cake for at least 1 hour before slicing. This step is crucial—it lets the filling set and makes slicing much cleaner. I’ve made the mistake of cutting too early, and it turns into a delicious but messy situation. Trust me, the wait is worth it.
Sensory cue: When you pour the filling over the warm cake, you’ll hear a faint sizzle as it sinks in. The cake will look glossy and wet. After chilling, the frosting should be firm to the touch but still soft when you bite into it. The first slice should reveal those dark chocolate crumb layers with peanut butter streaks running through.
Cooking Tips & Techniques
After making this Ultimate Reese’s Peanut Butter Poke Cake more times than I care to admit (including one memorable disaster where I forgot the eggs entirely), I’ve picked up a few tricks that make a real difference.
Don’t overbake the cake. This is the number one mistake. A slightly underbaked cake is actually better here because the poke filling adds moisture. If you overbake it, the cake will be dry even after you pour the filling. Pull it out when a toothpick comes out with a few moist crumbs, not clean. I once baked an extra 5 minutes because I got distracted, and the cake was noticeably less tender.
Poke while warm, but not hot. If the cake is too hot, the filling will just pool on top instead of soaking in. If it’s too cool, the cake won’t absorb as much. The sweet spot is about 10 minutes out of the oven. The cake should feel warm to the touch but not burning. I set a timer on my phone for exactly 10 minutes—no guessing.
Warm your peanut butter. This is a game-changer. Cold peanut butter is stiff and clumpy. A quick 15-second zap in the microwave makes it silky and easy to mix into both the filling and the frosting. I learned this after struggling to get a smooth filling for way too long.
Use room temperature ingredients for the frosting. Cold butter doesn’t cream properly, and cold milk can make the frosting seize up. Set your butter out 30 minutes before you start. If you forget, cut it into small cubes and let it sit for 10 minutes—it softens faster that way.
Chill before slicing. I cannot stress this enough. The cake needs at least 1 hour in the fridge to set. The filling needs time to firm up, and the frosting needs to chill so it doesn’t smear everywhere. I’ve had guests arrive early and I’ve had to serve a slightly warm, messy cake. It still tasted amazing, but it wasn’t as pretty. Patience pays off here.
Use a sharp knife for clean slices. Run your knife under hot water, wipe it dry, then slice. Repeat between each cut. This gives you those beautiful, clean slices that look like they came from a bakery. A dull knife will drag the frosting and ruin the layers.
Variations & Adaptations
One of the best things about this cake is how easy it is to customize. Here are some variations I’ve tried and loved.
Gluten-Free Version: Use a gluten-free chocolate cake mix. I’ve tested this with King Arthur’s gluten-free mix, and it works beautifully. The rest of the ingredients are naturally gluten-free, so you’re good to go. Just make sure your Reese’s cups are certified gluten-free (they usually are, but always check the label).
Peanut Butter Lover’s Extreme: For those who want even more peanut butter, add 1/2 cup of peanut butter chips to the cake batter before baking. You can also mix chopped peanut butter cups into the frosting before spreading. I did this for a friend’s birthday, and she said it was the best cake she’d ever had. It’s intense, but in the best way.
Chocolate Overload: Swap the chocolate syrup drizzle for a homemade chocolate ganache—just heat 1/2 cup heavy cream and pour it over 1 cup chocolate chips, then stir until smooth. Drizzle that over the frosting instead. It adds a rich, fudgy layer that pairs perfectly with the peanut butter.
Lower Sugar Option: Use a sugar-free chocolate cake mix and sugar-free sweetened condensed milk. The peanut butter and frosting will still have some sugar, but this cuts it down significantly. I’ve made this version for a friend managing her sugar intake, and she couldn’t tell the difference.
Seasonal Twist: In the fall, swap the chocolate syrup drizzle for a caramel one, and top with chopped Reese’s Pieces instead of cups. The caramel and peanut butter combination is surprisingly good. In the summer, add a layer of sliced bananas between the cake and frosting for a peanut butter banana vibe—trust me on this one.
Different Cake Base: Try a yellow cake mix or a vanilla cake mix instead of chocolate. It’s a different flavor profile—less rich, more like a peanut butter cookie bar. My kids actually prefer this version. It’s lighter but still has that same poke cake magic.
Serving & Storage Suggestions
This cake is versatile enough for any occasion. Here’s how to serve it and keep it fresh.
Serving Temperature: Serve the cake cold or at room temperature. Straight from the fridge, the frosting is firm and the cake is dense and fudgy—almost like a candy bar. At room temperature, it’s softer and more decadent. I personally prefer it cold, especially on a warm day. Let it sit out for 10-15 minutes before serving if you want it slightly softer.
Presentation Ideas: For a party, cut the cake into small squares and serve on a platter with extra chopped Reese’s sprinkled on top. You can also serve it in a bowl with a scoop of vanilla ice cream and a drizzle of chocolate syrup—it turns into a deconstructed sundae situation. For a more elegant look, use a biscuit cutter to stamp out rounds and stack them with frosting between layers. It’s a showstopper.
Complementary Dishes: This cake pairs beautifully with a cold glass of milk, a hot cup of coffee, or a scoop of vanilla bean ice cream. For a dessert board, serve it alongside fresh strawberries, brownie bites, and chocolate-covered pretzels. The salty-sweet combo is irresistible.
Storage Instructions: Store the cake in an airtight container in the refrigerator for up to 5 days. The flavors actually meld and improve after a day or two. I’ve kept it for a week, and it was still delicious—though the topping gets a little softer over time. If you’re storing it for more than a day, I recommend adding the chopped Reese’s right before serving to keep them crunchy.
Freezing Instructions: This cake freezes beautifully. Wrap the unfrosted cake tightly in plastic wrap, then in foil, and freeze for up to 3 months. When you’re ready to serve, thaw it in the fridge overnight, then make the filling and frosting fresh. You can also freeze the fully assembled cake, but the topping may get a bit soft. I prefer freezing the base and finishing it fresh for the best texture.
Reheating Tips: If you want a warm slice, microwave an individual piece for 15-20 seconds. The frosting gets melty and the cake becomes extra gooey. It’s a completely different experience—almost like a molten lava cake. Don’t microwave the whole cake, or the frosting will slide off.
Nutritional Information & Benefits
Let’s be honest—this is an indulgent dessert, and that’s part of its charm. But here’s a rough breakdown so you know what you’re working with. Per serving (based on 16 servings):
- Calories: Approximately 480-520
- Fat: 28g
- Carbohydrates: 58g
- Protein: 10g
- Sugar: 42g
Health Benefits of Key Ingredients: Peanut butter is actually a decent source of protein and healthy fats. It contains vitamin E, magnesium, and potassium. The chocolate in the cake mix and syrup provides antioxidants (yes, really—dark chocolate is good for you in moderation). And hey, there’s protein from the eggs too. It’s not health food, but it’s not empty calories either.
Dietary Considerations: This recipe contains gluten, dairy, eggs, and peanuts. For a gluten-free version, use a gluten-free cake mix. For a dairy-free version, use dairy-free sweetened condensed milk and a plant-based butter substitute. The peanut butter is obviously non-negotiable for the Reese’s theme, but you could try a seed butter like sunflower seed butter for a nut-free version—though the flavor will change significantly.
Potential Allergens: Peanuts, dairy, gluten, eggs, and soy (in some cake mixes and chocolate products). Always check labels if you’re serving someone with allergies.
My Personal Take: I believe in balance. This cake is a celebration dessert—not an everyday treat. When I make it, I savor every bite and don’t feel guilty about it. Food is meant to bring joy, and this cake does exactly that. Plus, the protein from the peanut butter keeps you fuller longer, so you’re less likely to go back for a third slice. Probably.
Conclusion
This Ultimate Reese’s Peanut Butter Poke Cake is everything I want in a dessert—rich, indulgent, surprisingly easy, and absolutely unforgettable. It came from a random conversation in a hardware store, but it’s become a staple in my kitchen. Every time I make it, I think of Larry and his Super Bowl cake, and I smile.
I love that this recipe is forgiving. You can customize it, swap ingredients, and it still turns out amazing. The first time I made it, I forgot to poke enough holes, and the filling barely soaked in. The second time, I overdid it and the cake was almost soup. But the third time? Perfect. And every time since has been better. That’s the beauty of a good recipe—it grows with you.
Now it’s your turn. Make this cake for your next gathering, or just for a quiet night in. Customize it however you like—add more peanut butter, swap the chocolate syrup for caramel, pile on extra Reese’s. Make it yours. And when you take that first bite, the one that makes you close your eyes and forget everything else, you’ll understand why I keep coming back to this recipe.
I’d love to hear how it turns out. Drop a comment below and let me know—did you make any changes? Was it a hit with your crowd? Did you, like me, forget to grease the pan and end up with a half-cake situation? Share your story. And if you loved it, pass it along to someone who needs a little sweetness in their life. Happy baking!
Frequently Asked Questions
Can I use a homemade chocolate cake instead of a box mix?
Absolutely. If you have a favorite from-scratch chocolate cake recipe, use that instead. Just make sure it’s a sturdy cake that can handle the poking and soaking. A lighter, airier cake might fall apart. I’ve used a sour cream chocolate cake recipe before, and it was incredible—the extra moisture from the sour cream paired perfectly with the filling.
How far in advance can I make this cake?
You can make the full cake up to 2 days ahead. Store it covered in the refrigerator. The flavors actually get better after a day because the filling has more time to soak in. If you’re making it for a party, I recommend making it the day before. Just add the chopped Reese’s and chocolate syrup drizzle right before serving to keep them fresh and crunchy.
Can I use crunchy peanut butter instead of creamy?
You can, but I don’t recommend it for the filling or frosting. The peanut pieces can make the filling grainy and the frosting less smooth. If you want crunch, add chopped peanuts or extra Reese’s pieces on top instead. That way, you get the texture without sacrificing the creamy, silky layers.
My cake came out dry. What went wrong?
Most likely, you overbaked it. Check your oven temperature with an oven thermometer—many ovens run hot. Also, make sure you poked enough holes and poured the filling while the cake was still warm. If the cake is too cool, it won’t absorb the filling as well. Next time, try poking the holes a little deeper and closer together. If it’s already baked and dry, you can brush a little extra sweetened condensed milk over the top before adding the frosting.
Can I make this into cupcakes instead of a sheet cake?
Yes, but it’s a bit trickier. Bake the cupcake batter as usual, then poke holes in each cupcake with a skewer. Spoon the filling over each cupcake, letting it soak in. Frost and top as usual. The ratio is different—you’ll need less filling per cupcake—but it works. Just be warned: they’re messier to eat, but that’s part of the fun.
Pin This Recipe!
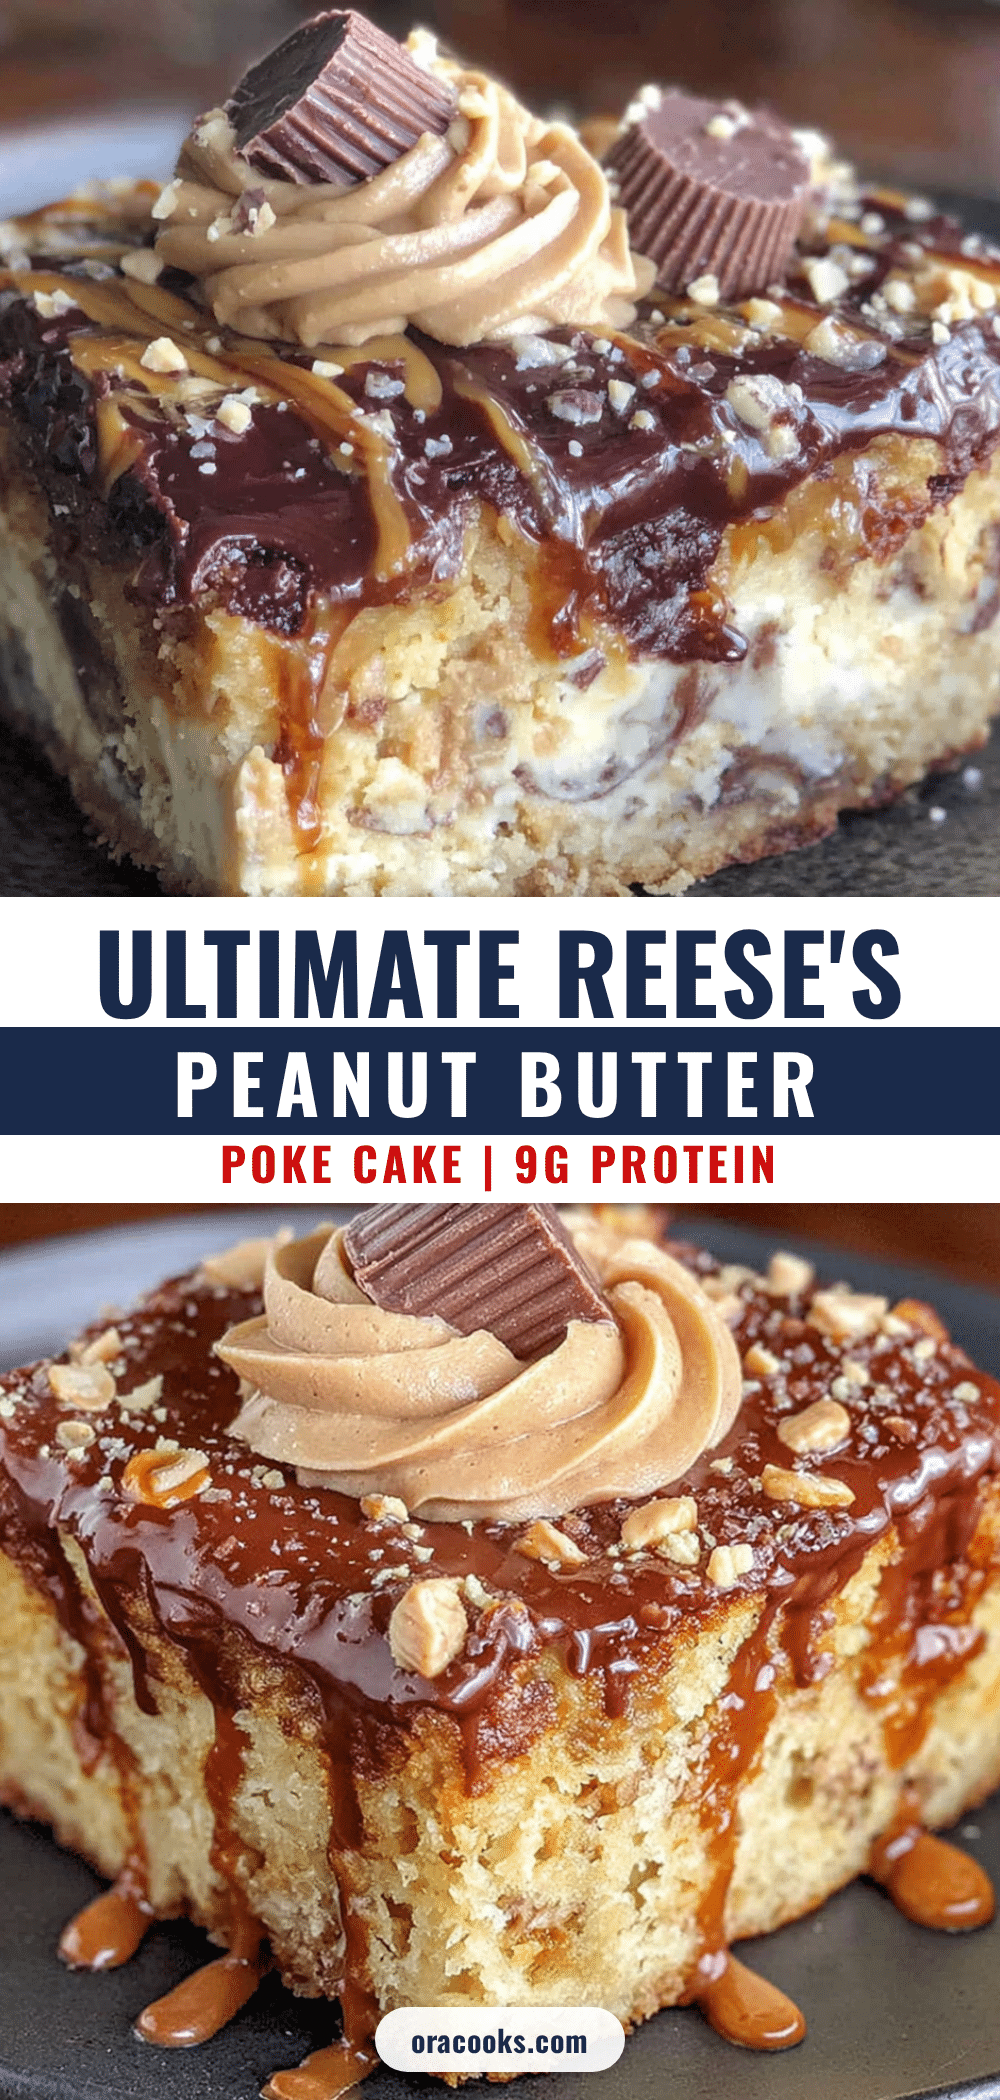
Best Ultimate Reeses Peanut Butter Poke Cake

A ridiculously moist chocolate cake injected with peanut butter goodness, topped with creamy peanut butter frosting and plenty of Reese’s. This easy poke cake is perfect for celebrations and always gets rave reviews.
- Prep Time: 15 minutes
- Cook Time: 30 minutes
- Total Time: 45 minutes (plus 1 hour cooling and 1 hour chilling)
- Yield: 16 servings 1x
- Category: Dessert
- Cuisine: American
Ingredients
- 1 box (15.25 oz) chocolate cake mix (Duncan Hines or Betty Crocker recommended)
- 3 large eggs (room temperature)
- 1/3 cup vegetable oil
- 1 cup water
- 1/2 cup creamy peanut butter (for batter)
- 1 can (14 oz) sweetened condensed milk
- 1/2 cup creamy peanut butter (for filling)
- 1/2 cup unsalted butter, softened
- 1 cup creamy peanut butter (for frosting)
- 2 cups powdered sugar
- 1/4 cup milk (whole milk preferred)
- 1 teaspoon vanilla extract
- 1 cup Reese’s peanut butter cups, chopped (about 6–8 mini cups or 3 regular)
- 1/4 cup chocolate syrup (for drizzling)
- 1/4 cup chopped salted peanuts (optional)
Instructions
- Preheat oven to 350°F (175°C). Grease a 9×13-inch baking pan with butter or nonstick spray; dust with cocoa powder for best results.
- In a large bowl, combine chocolate cake mix, eggs, oil, and water according to box directions. Mix until smooth (about 2 minutes). Gently fold in 1/2 cup creamy peanut butter, leaving a few swirls.
- Pour batter into prepared pan and spread evenly. Bake for 28-33 minutes, until a toothpick inserted in center comes out with a few moist crumbs.
- Let cake cool in pan for 10 minutes. Using the handle of a wooden spoon or a chopstick, poke holes all over the cake, spacing them about 1 inch apart and poking all the way to the bottom.
- In a small bowl, whisk together sweetened condensed milk and 1/2 cup peanut butter (warm peanut butter for 15 seconds first for easier mixing) until smooth.
- Slowly pour the peanut butter-condensed milk mixture over the warm cake, ensuring it seeps into all holes. Let cake cool completely at room temperature (about 1 hour).
- In a medium bowl, beat softened butter and 1 cup peanut butter until smooth and creamy (about 2 minutes). Gradually add powdered sugar, one cup at a time, beating on low. Add milk and vanilla, then beat on medium for 2-3 minutes until light and fluffy.
- Spread peanut butter frosting evenly over completely cooled cake.
- Sprinkle chopped Reese’s peanut butter cups over frosting. Drizzle with chocolate syrup and add chopped peanuts if desired.
- Refrigerate cake for at least 1 hour before slicing. Use a sharp knife run under hot water for clean slices.
Notes
Don’t overbake the cake; a slightly underbaked cake is better as the filling adds moisture. Poke holes while cake is warm (about 10 minutes out of oven) but not hot. Warm peanut butter for 15 seconds in microwave for easier mixing. Use room temperature ingredients for frosting. Chill cake at least 1 hour before slicing for clean cuts. Store in refrigerator for up to 5 days; freeze unfrosted cake for up to 3 months.
Nutrition
- Serving Size: 1 slice (1/16 of cak
- Calories: 500
- Sugar: 42
- Sodium: 380
- Fat: 28
- Saturated Fat: 10
- Carbohydrates: 58
- Fiber: 2
- Protein: 10
Keywords: Reese's, peanut butter, poke cake, chocolate cake, easy dessert, birthday cake, potluck dessert


