Love this? Save it for later!
Share the inspiration with your friends
Introduction
The other afternoon, I was slicing cucumbers for a simple salad when that unmistakable sharp tang of garlic and dill suddenly hit me — and suddenly I was nine years old standing at the edge of Mrs. Langston’s garden during a neighborhood summer picnic. She had this old, chipped green jar filled with crunchy pickle spears, the kind that smelled so fresh and garlicky it made you want to eat the whole jar before lunch. I remember the way the sunlight caught the tiny bubbles inside the jar, and how she’d insist I take “just one,” though I probably took three.
Honestly, I forgot to buy pickles for that salad, but that memory nudged me to try making my own Quick Garlic Dill Refrigerator Pickle Spears at home — and let me tell you, it’s become one of those recipes I keep coming back to. It’s not just about the pickles themselves, but trying to catch that crisp, garlicky bite and the cozy kitchen vibe Mrs. Langston’s pickles gave me, even if I can’t quite replicate the exact moment. Maybe you’ve been there, chasing a flavor that’s tied to a time and place, and you know how satisfying it is when you get close enough to feel like you’re almost back again.
Let me tell you, this recipe stays in my regular rotation because it’s quick, no-fuss, and the kind of pickle that perks up any sandwich or snack without waiting weeks to develop flavor. Plus, it’s perfect for those moments when you want something homemade but don’t want to get lost in complicated canning. So, grab your cucumbers and garlic — I’ll show you how to make these crunchy delights in just 24 hours.
Why You’ll Love This Recipe
As someone who’s tested this recipe over and over (sometimes with a few garlic cloves too many!), I can honestly say it’s a handy go-to for when you want fresh pickles fast. Here’s why this Quick Garlic Dill Refrigerator Pickle Spears recipe wins every time:
- Quick & Easy: Ready to eat in just 24 hours, so no long waits or complicated canning needed.
- Simple Ingredients: Uses pantry staples and fresh cucumbers; no fancy shopping trips required.
- Perfect for Snacking & Meals: These pickles add a bright, tangy crunch to burgers, sandwiches, or charcuterie boards.
- Crowd-Pleaser: Kids and adults alike love the crisp texture and garlicky zing.
- Unbelievably Delicious: The balance of dill and garlic creates a bold, refreshing flavor that feels homemade and satisfying.
This isn’t just any pickle recipe — it’s one I developed by tweaking brine ratios and garlic amounts until everything felt just right. The spears stay crunchy, and the flavor is punchy without overpowering. Honestly, it’s the kind of quick pickle that makes you close your eyes and savor every bite, like you’re tasting summer in a jar. Whether you want to surprise guests with a fresh twist or just add a punchy side to your weekday meals, this recipe has your back.
What Ingredients You Will Need
This recipe uses simple, wholesome ingredients to deliver that bold garlic and dill flavor with a satisfying crunch. Everything here is easy to find and mostly pantry staples, so you can whip up these quick refrigerator pickles anytime.
- Fresh cucumbers (about 4 medium Kirby or pickling cucumbers, washed and cut into spears) – these firm cucumbers hold up best for crisp pickles.
- Garlic cloves (4-6, peeled and smashed) – the star flavor, adding that punchy garlic zing.
- Fresh dill sprigs (4-5 sprigs) – for that classic dill pickle aroma and taste. If fresh isn’t available, dried dill weed (about 2 teaspoons) works in a pinch.
- White vinegar (1 cup / 240 ml) – the acid base that gives pickles their tang. I recommend a quality brand like Heinz for consistent flavor.
- Water (1 cup / 240 ml) – balances the vinegar for a mellow yet bright brine.
- Granulated sugar (1 tablespoon) – just a touch to balance acidity.
- Salt (1 tablespoon pickling or kosher salt) – essential for preserving and flavor.
- Whole black peppercorns (1 teaspoon) – adds subtle spice complexity.
- Optional red pepper flakes (½ teaspoon) – if you like a bit of heat.
If you want to swap out white vinegar, apple cider vinegar works nicely and adds a fruity note. For a gluten-free option, make sure your salt and spices are certified gluten-free. And if fresh dill is out of season, frozen dill can be used but add it after the pickles have chilled for best flavor.
Equipment Needed
Making these refrigerator pickle spears doesn’t call for anything fancy, but having the right tools makes the process smoother.
- Sharp knife and cutting board: For slicing cucumbers into spears. A serrated knife works well if your cucumbers have tough skins.
- Large mixing bowl: To toss cucumbers with salt and drain excess moisture (optional step to keep crunch).
- Quart-sized glass jar with lid: A classic Mason jar or any airtight container suitable for pickling. Glass keeps flavors clean and is easy to sterilize.
- Saucepan: To heat the brine mixture.
- Measuring cups and spoons: For precise ingredient amounts, important for balanced flavor.
If you don’t have a Mason jar, a clean, BPA-free plastic container with a tight lid can work, but I’ve found glass better for long-term flavor and ease of cleaning. Also, if you want extra-crispy pickles, I recommend a vegetable peeler to shave off thin strips of cucumber skin for a prettier presentation.
Preparation Method
- Prepare the cucumbers: Wash and trim the ends from about 4 medium Kirby cucumbers. Cut each cucumber lengthwise into 4 spears, about 3-4 inches long. (Time: 5 minutes)
- Optional step for extra crunch: Place cucumber spears in a large bowl and sprinkle with 1 tablespoon of kosher salt. Toss gently and let sit for 30 minutes to draw out excess water. Rinse well and pat dry with paper towels. This helps keep the pickles crisp. (Time: 35 minutes including waiting)
- Make the brine: In a small saucepan, combine 1 cup (240 ml) white vinegar, 1 cup (240 ml) water, 1 tablespoon granulated sugar, 1 tablespoon pickling salt, 1 teaspoon whole black peppercorns, and optional ½ teaspoon red pepper flakes. Bring to a simmer over medium heat, stirring to dissolve sugar and salt. Remove from heat and let cool slightly. (Time: 10 minutes)
- Pack the jar: Add 4-6 smashed garlic cloves and 4-5 fresh dill sprigs to the bottom of a clean quart-sized glass jar. Pack cucumber spears tightly but without crushing. (Time: 5 minutes)
- Pour the brine: Carefully pour the warm brine over the cucumbers, fully submerging them. Leave about ½ inch (1.3 cm) headspace at the top of the jar. Seal the jar with a lid. (Time: 5 minutes)
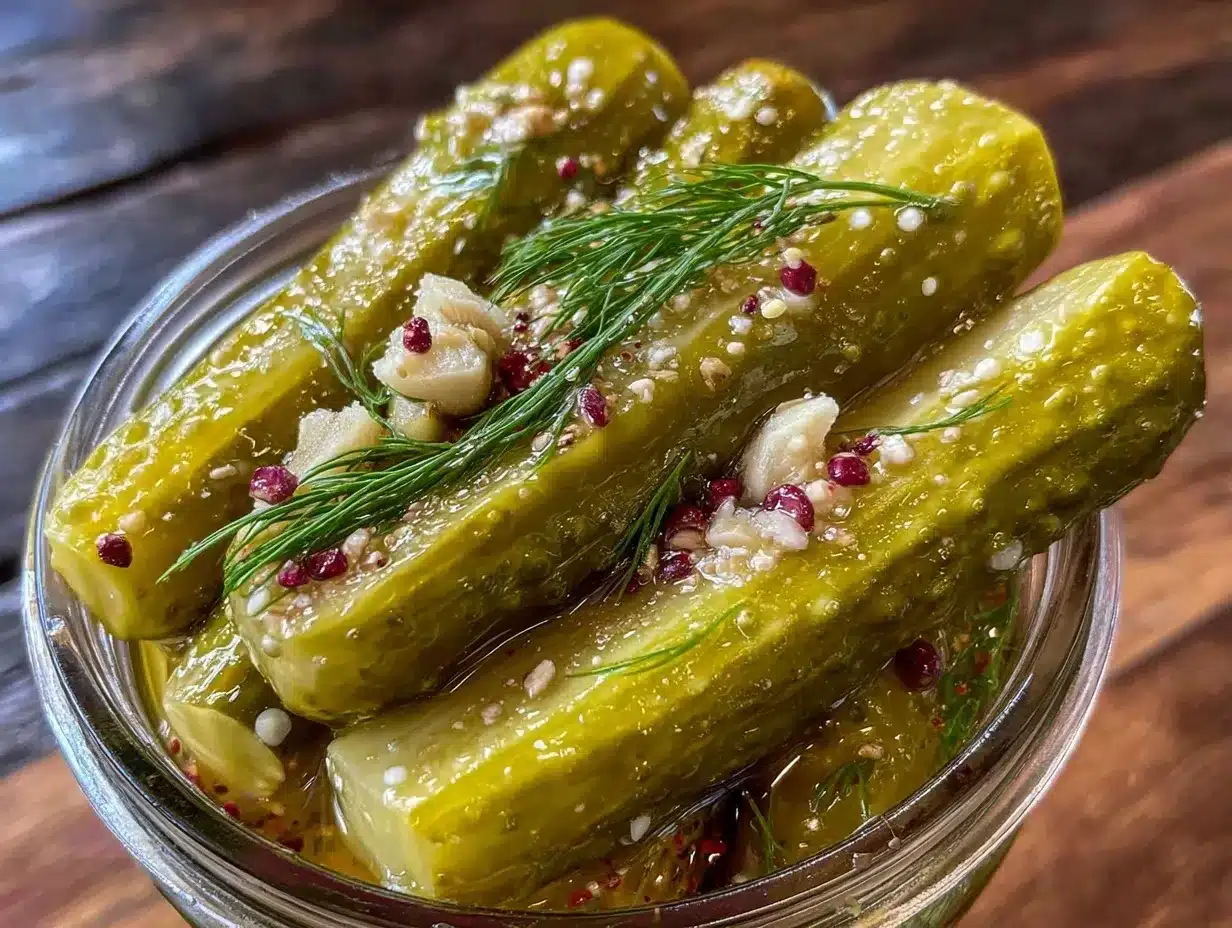
- Chill and wait: Let the jar cool to room temperature, then refrigerate. The pickles will be ready to eat after 24 hours, but flavor improves if left 2-3 days. (Time: 24+ hours chilling)
- Enjoy: Once chilled, your garlic dill pickle spears should be crisp, tangy, and bursting with flavor. Keep refrigerated and consume within 2 weeks for best quality.
Pro tip: If your cucumbers seem a little soft after pickling, it could be because they weren’t salted beforehand or the brine wasn’t hot enough. Next time, try the salting step or slightly increase the vinegar ratio for extra firmness.
Cooking Tips & Techniques
Let me share a few things I learned the hard way when perfecting these Quick Garlic Dill Refrigerator Pickle Spears.
- Salting cucumbers first: It’s tempting to skip, but salting really helps keep your pickles crunchy by drawing out excess moisture. Patting them dry afterward is key to avoid a watery brine.
- Use fresh dill: Fresh dill adds a bright, herbal aroma that dried dill can’t quite match. If you only have dried, use about half the amount and add it after pickling to avoid bitterness.
- Don’t overfill the jar: Leave some headspace so the brine can circulate around the cucumbers and they pickle evenly.
- Warm brine: Pouring warm brine helps dissolve the salt and sugar fully and infuses the flavors faster. Just don’t make it too hot or it might cook the cucumbers a bit.
- Timing matters: While these pickles are technically ready in 24 hours, giving them a couple more days lets the flavors deepen. If you’re impatient like me, 24 hours definitely works!
One time I forgot the garlic in the jar until the very end and the pickles tasted bland. Lesson learned: garlic is essential for that signature zing! Also, keep your knife sharp for clean cuts that help the brine soak in evenly.
Variations & Adaptations
This recipe is a fantastic base to tweak based on your taste or dietary needs. Here are some of my favorite variations:
- Spicy Kick: Add sliced jalapeños or increase the red pepper flakes for a fiery version that’s perfect on tacos or burgers.
- Low-Sodium: Reduce the salt by half and use a salt substitute if you’re watching sodium. Flavor will be milder but still tasty.
- Herb Variations: Swap dill for fresh tarragon or add fresh thyme for a different herbal twist.
- Vinegar Options: Use apple cider vinegar or white wine vinegar for a fruitier brine profile.
- Sweet & Tangy: Increase sugar to 2 tablespoons for a sweeter pickle, reminiscent of bread-and-butter style spears.
Personally, I tried mixing in a few sliced radishes once for color and crunch — it was a fun surprise and added a peppery note. Also, if you want to turn these into fermented spicy pickles, just skip the vinegar and let them ferment at room temperature for a few days instead.
Serving & Storage Suggestions
These Quick Garlic Dill Refrigerator Pickle Spears are best served cold straight from the fridge. They add a perfect crunchy contrast to sandwiches, burgers, and grilled cheese — honestly, I always keep a jar handy when making quick meals like classic grilled cheese sandwiches.
For a nice appetizer, serve them alongside a cheese board or with creamy dips like ranch or hummus. They also pair well with hearty dishes like roast chicken or potato salad.
To store, keep pickles refrigerated in their brine in a sealed jar. They’ll stay fresh and crisp for up to 2 weeks. When reheating meals that include these pickles, add the spears fresh after warming to maintain their crunch and brightness.
Fun fact: the flavors mellow and meld a bit over time, so if you find them too sharp at first, wait a day or two to enjoy the perfectly balanced taste.
Nutritional Information & Benefits
Each serving of these Quick Garlic Dill Refrigerator Pickle Spears is low in calories (about 10-15 calories per spear) and fat-free. They offer a good source of vitamin K from the cucumbers and dill, which supports bone health.
The garlic provides antioxidants and compounds known for immune support, while the vinegar may help with digestion and blood sugar control.
This recipe is naturally gluten-free, vegan, and low-carb, making it accessible for many diets. Just watch the salt if you’re limiting sodium.
From a wellness perspective, homemade pickles like these give you control over ingredients — no preservatives or artificial flavors, just fresh, simple components.
Conclusion
Making these Quick Garlic Dill Refrigerator Pickle Spears has become a little ritual for me — a way to capture a crisp, garlicky bite that’s both nostalgic and fresh. It’s a recipe anyone can pull off quickly, with minimal fuss and maximum flavor payoff. I love that it’s customizable and perfect for so many meals or snacks.
Give it a try, tweak it your way, and soon you’ll have your own jar of pickled goodness ready to brighten up your kitchen moments. If you make these, let me know how you like them or any fun variations you’ve tried — I always enjoy hearing from fellow pickle enthusiasts!
Happy pickling!
FAQs
How long do refrigerator pickles last?
They typically last up to 2 weeks when stored in the fridge in a sealed jar with brine.
Can I use regular cucumbers instead of pickling cucumbers?
You can, but pickling cucumbers are firmer and hold up better during pickling, resulting in crunchier spears.
Do I need to boil the cucumbers before pickling?
Nope! This quick refrigerator pickle recipe uses raw cucumbers, so the texture stays crisp and fresh.
Can I use dried dill instead of fresh?
Yes, but use about half the amount and add it after pickling to avoid a bitter taste.
What if my pickles are too soft?
Try salting the cucumbers before pickling to draw out moisture or ensure your brine is warm enough when poured over the spears.
Pin This Recipe!
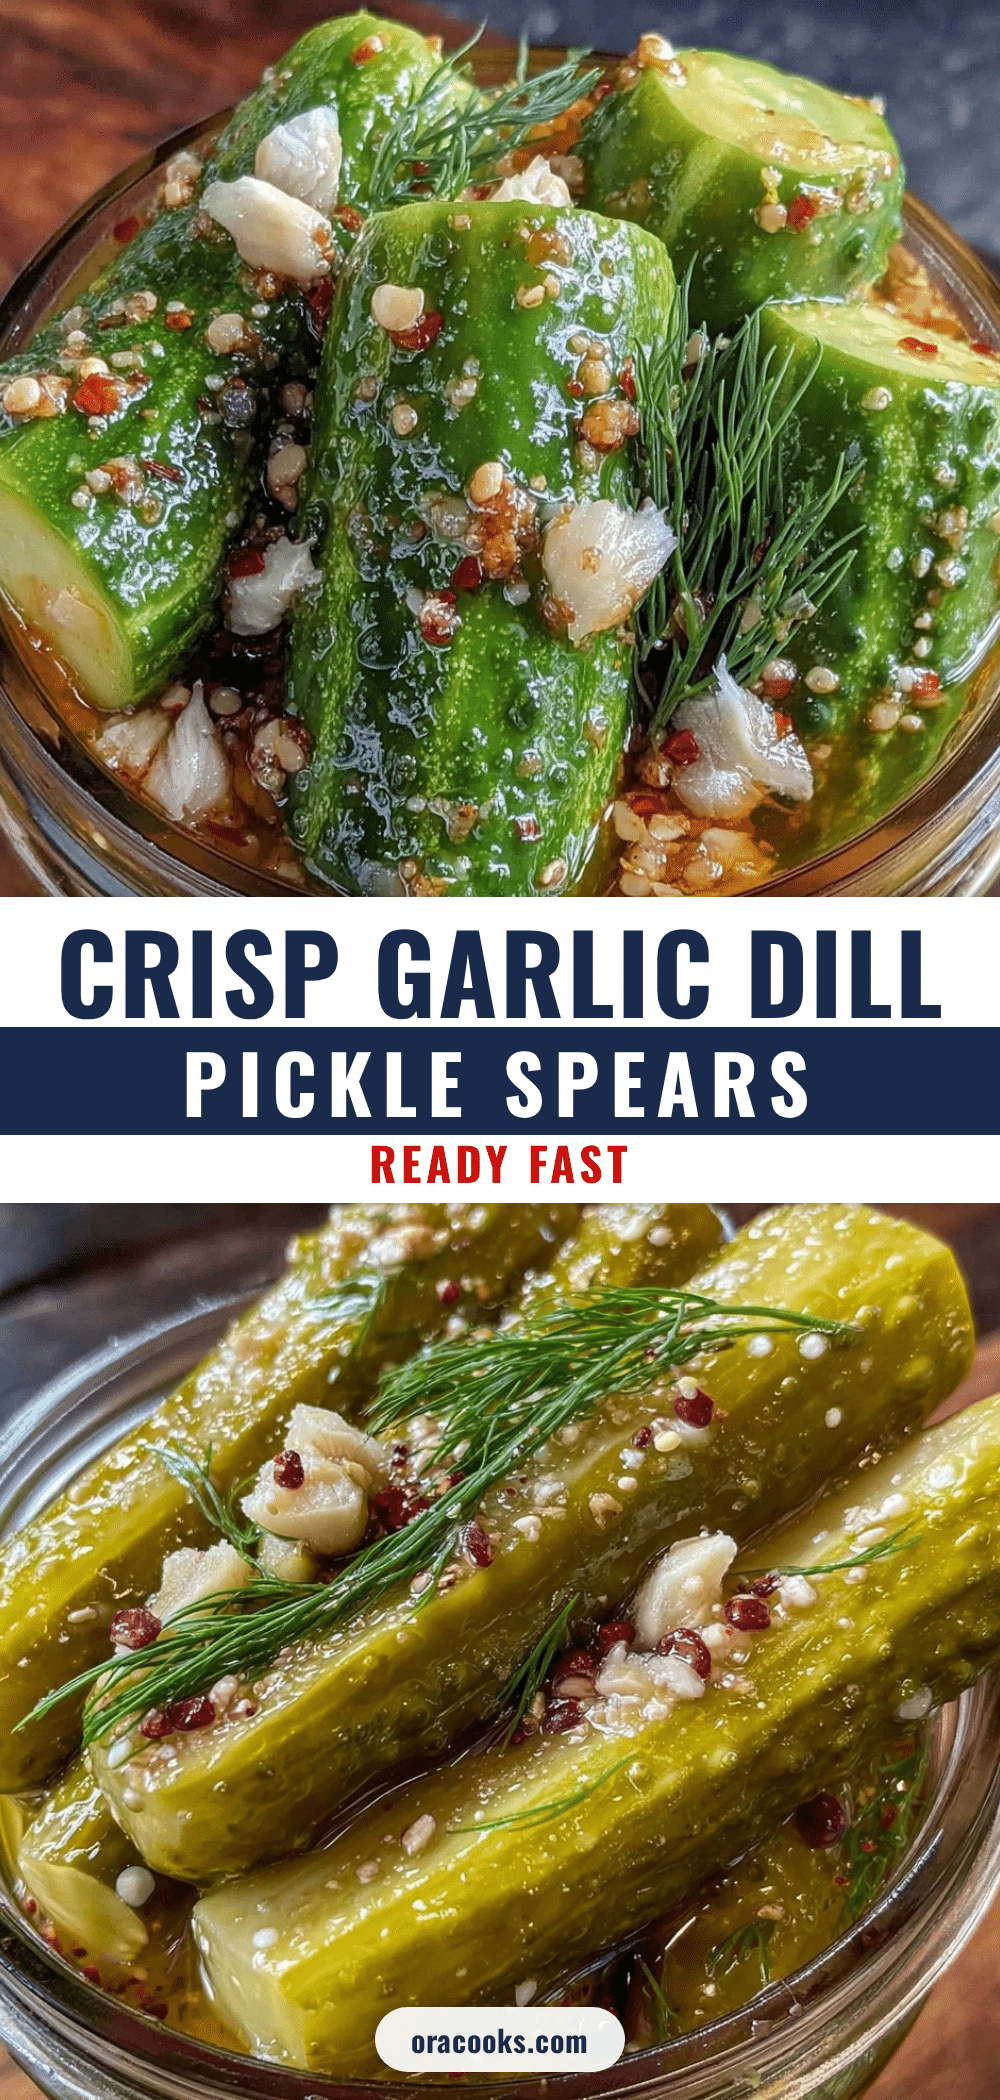
Quick Garlic Dill Refrigerator Pickle Spears Recipe Easy Homemade Pickles in 24 Hours
A quick and easy recipe for crunchy, garlicky dill pickle spears ready to eat in just 24 hours without complicated canning.
- Prep Time: 40 minutes
- Cook Time: 10 minutes
- Total Time: 24 hours 50 minutes
- Yield: About 1 quart jar (4 servings) 1x
- Category: Condiment
- Cuisine: American
Ingredients
- 4 medium Kirby or pickling cucumbers, washed and cut into spears
- 4–6 garlic cloves, peeled and smashed
- 4–5 fresh dill sprigs (or 2 teaspoons dried dill weed)
- 1 cup (240 ml) white vinegar
- 1 cup (240 ml) water
- 1 tablespoon granulated sugar
- 1 tablespoon pickling or kosher salt
- 1 teaspoon whole black peppercorns
- ½ teaspoon optional red pepper flakes
Instructions
- Wash and trim the ends from about 4 medium Kirby cucumbers. Cut each cucumber lengthwise into 4 spears, about 3-4 inches long. (5 minutes)
- Optional: Place cucumber spears in a large bowl and sprinkle with 1 tablespoon kosher salt. Toss gently and let sit for 30 minutes to draw out excess water. Rinse well and pat dry with paper towels. (35 minutes including waiting)
- In a small saucepan, combine 1 cup white vinegar, 1 cup water, 1 tablespoon granulated sugar, 1 tablespoon pickling salt, 1 teaspoon whole black peppercorns, and optional ½ teaspoon red pepper flakes. Bring to a simmer over medium heat, stirring to dissolve sugar and salt. Remove from heat and let cool slightly. (10 minutes)
- Add 4-6 smashed garlic cloves and 4-5 fresh dill sprigs to the bottom of a clean quart-sized glass jar. Pack cucumber spears tightly but without crushing. (5 minutes)
- Carefully pour the warm brine over the cucumbers, fully submerging them. Leave about ½ inch headspace at the top of the jar. Seal the jar with a lid. (5 minutes)
- Let the jar cool to room temperature, then refrigerate. The pickles will be ready to eat after 24 hours, but flavor improves if left 2-3 days. (24+ hours chilling)
- Once chilled, enjoy your crisp, tangy garlic dill pickle spears. Keep refrigerated and consume within 2 weeks for best quality.
Notes
Salting cucumbers before pickling helps keep them crunchy by drawing out excess moisture. Use fresh dill for best flavor. Pour warm brine to dissolve salt and sugar fully but avoid overheating to prevent cooking cucumbers. Leave headspace in jar for even pickling. Flavor improves after 2-3 days but ready in 24 hours. Consume within 2 weeks refrigerated.
Nutrition
- Serving Size: Approximately 1/4 of
- Calories: 1015
- Sugar: 1
- Sodium: 30040
- Carbohydrates: 12
- Fiber: 0.3
Keywords: quick pickles, garlic dill pickles, refrigerator pickles, easy homemade pickles, pickle spears, no canning pickles, crunchy pickles