Love this? Save it for later!
Share the inspiration with your friends
My neighbor Jen wasn’t trying to impress anyone. I’d stopped by to drop off a package that got delivered to my house by mistake, and the sight of her kitchen counter stopped me cold. There she was, casually slapping together what looked like the most perfect little spirals of turkey and cheese on a flour tortilla, barely looking at what her hands were doing. Her kid was tugging at her shirt, the dog was circling her feet, and she was carrying on a conversation with me like she wasn’t creating lunchbox magic right in front of my eyes.
“Oh, these?” she said when I asked, waving her knife dismissively. “They’re just pinwheels. Takes five minutes.” Five minutes. She said it like it was nothing, like she hadn’t just solved every lunch-packing struggle I’d ever had. I mean, let me tell you, I’d been overcomplicating packed lunches for years—bento boxes, themed lunches, those little food picks shaped like animals. And here was Jen, in under the time it takes me to find a matching lid for a container, making something that looked like it belonged on a café menu.
I stood there watching her finish up, honestly a little embarrassed at how impressed I was. She rolled that tortilla up tight, sliced it into perfect little rounds, and popped them into a container like she’d done it a thousand times. Which, I’d later learn, she had. Every single school day for two years. The casualness of it all was the whole point—this was a recipe made like it was nothing, and that’s exactly what made it everything.
Maybe you’ve been there, standing in someone else’s kitchen, realizing you’ve been making things way harder than they need to be. That’s how these Quick 5-Minute Turkey Pinwheel Lunchbox Wraps came into my life, and honestly, they haven’t left my weekly rotation since.
Why You’ll Love This Recipe
These turkey pinwheel wraps aren’t just another lunch idea—they’re the lunch idea you’ll actually make. I’ve tested this recipe at least a dozen times across different tortilla brands, fillings, and rolling techniques, and I can tell you with confidence: this version works every single time.
- Quick & Easy: From fridge to lunchbox in five minutes flat. No cooking, no complicated steps, no excuses. Perfect for those mornings when you’re running on coffee fumes and pure determination.
- Simple Ingredients: You need exactly four main ingredients, and I bet you’ve got at least three of them right now. No fancy grocery store trips required.
- Perfect for Busy Mornings: Whether you’re packing lunchboxes for school, prepping work lunches, or throwing together a quick snack for a road trip, these pinwheels have your back.
- Crowd-Pleaser: Kids love them, adults love them, and picky eaters somehow forget they’re being picky when faced with a cute little spiral of goodness.
- Unbelievably Delicious: The cream cheese spread keeps everything moist and flavorful, and the tight rolling creates this perfect texture that just works.
What makes these different from every other wrap recipe out there? It’s the technique. Most people overstuff their wraps, which leads to sad, falling-apart pinwheels that look more like a disaster than lunch. I learned the hard way that less truly is more here. Plus, the cream cheese-to-turkey ratio is something I’ve dialed in through trial and error—you want enough to bind everything together without making it soggy by lunchtime.
This recipe is the kind that makes you feel like you’ve got your life together, even on days when you definitely don’t. It’s comfort food reimagined for real life—faster, simpler, but with the same satisfying feeling of a meal made with care.
What Ingredients You Will Need
This recipe uses simple, everyday ingredients to deliver maximum flavor with minimum effort. The beauty is in the simplicity—each ingredient plays a specific role, and together they create something greater than the sum of their parts.
- Large flour tortillas (10-inch, burrito size works best for rolling): I prefer Mission brand for their flexibility, but any large soft tortilla will work. Look for ones that are pliable, not dry or cracked at the edges.
- 8 oz cream cheese, softened to room temperature: This is non-negotiable for easy spreading. Cold cream cheese will tear your tortilla every single time. I like Philadelphia brand for consistent texture.
- 6-8 slices deli turkey breast: Get good quality turkey here—it makes a difference. I usually grab Boar’s Head oven-roasted turkey from the deli counter. Ask for it sliced medium-thin, not paper thin and not too thick.
- 4 slices provolone or Swiss cheese: Provolone gives a mild, creamy flavor that doesn’t overpower. Swiss adds a nice nuttiness. Both melt beautifully into the cream cheese layer.
- Optional: Fresh spinach leaves or shredded lettuce: Adds crunch and color. If you’re packing these for later, use heartier greens like spinach that won’t get soggy.
- Optional: 2 tablespoons ranch dressing or honey mustard: Spread this on before the cream cheese for extra flavor. My kids prefer ranch, I’m team honey mustard all the way.
- Salt and black pepper to taste: A tiny pinch elevates everything without being noticeable.
For substitutions: Use dairy-free cream cheese if needed—Kite Hill makes a good one that spreads nicely. Swap the turkey for ham, roast beef, or even grilled chicken strips. No tortillas? Large lettuce leaves work for a low-carb option, though they won’t hold up as well for lunchbox packing.
Pro tip from my many trials: Always check the expiration date on your tortillas. I once used tortillas that were a day past their prime and they cracked into about seventeen pieces during rolling. Not my finest kitchen moment.
Equipment Needed
You don’t need much for these pinwheels, which is honestly my favorite part. Here’s what you’ll want to have on hand:
- Butter knife or offset spatula: For spreading the cream cheese evenly. An offset spatula is my secret weapon here—it gives you that perfect, even layer every time.
- Sharp chef’s knife: A dull knife will squish your pinwheels flat and make a mess. I learned this lesson after ruining an entire batch with my sad, dull knife. A sharp blade gives you clean cuts.
- Cutting board: Preferably one with a non-slip bottom. I use a bamboo board that’s seen better days but still gets the job done.
- Plastic wrap or parchment paper: For wrapping the rolled tortillas tightly before slicing. This step makes a bigger difference than you’d think.
- Lunchbox containers: Small, airtight containers that fit the pinwheels snugly so they don’t unroll during transport.
- Optional: Electric knife: If you’re making a big batch for a party or meal prep, an electric knife gives you the cleanest cuts with zero effort. I picked one up at a garage sale for three dollars and it’s been a game-changer.
Budget-friendly tip: You don’t need fancy equipment here. A regular butter knife and any sharp kitchen knife will work perfectly. The only thing worth spending a little extra on is a good cutting board that won’t slide around on your counter.
Preparation Method
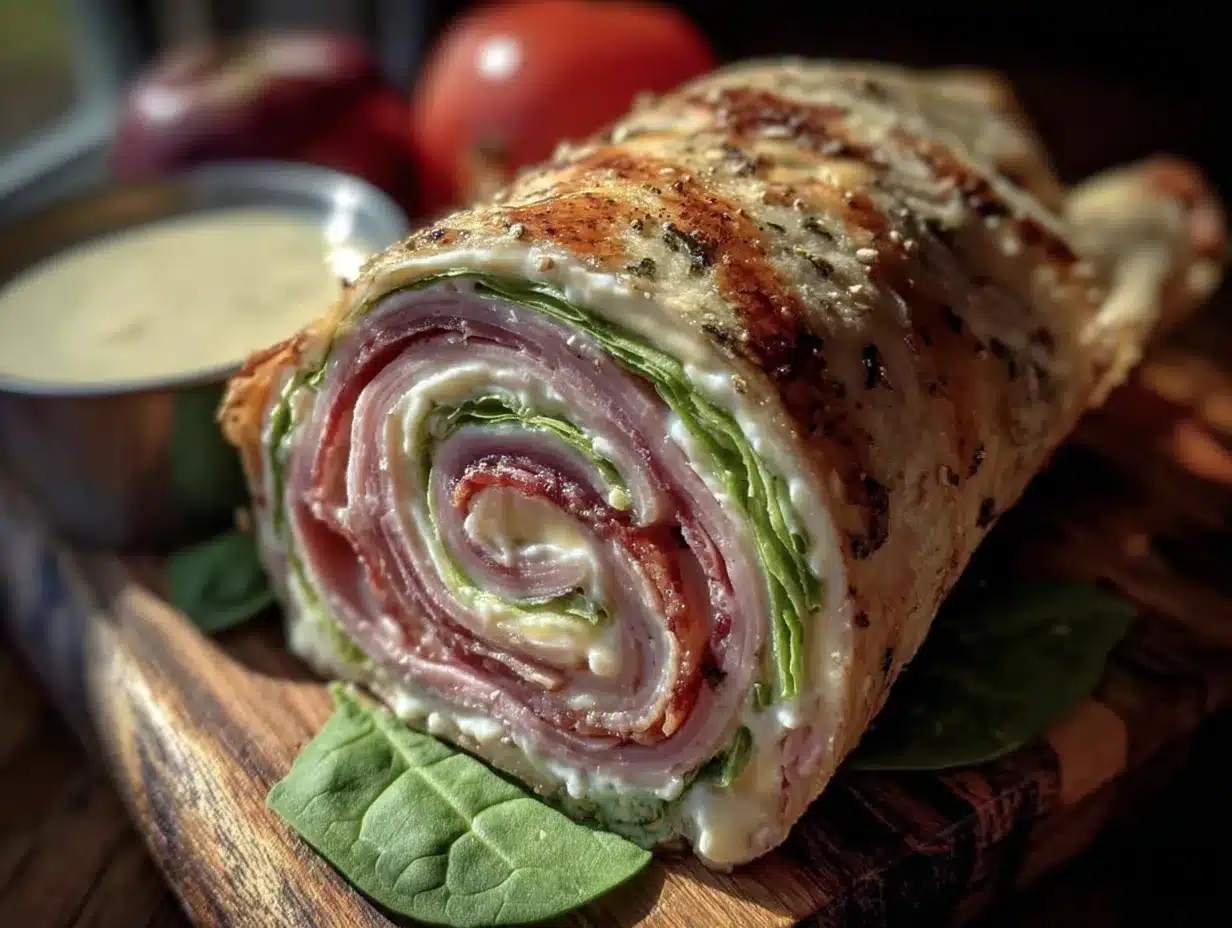
Let me walk you through this step by step. I’ve made these pinwheels more times than I can count, and these are the exact steps that work every single time.
- Soften your cream cheese. Take it out of the fridge about 20 minutes before you start. In a pinch, microwave it for 10-15 seconds, but watch it carefully—you want it soft, not melted. I’ve definitely created cream cheese soup before and it’s not pretty.
- Lay your tortilla flat on the cutting board. Warm it slightly in the microwave for 5-10 seconds if it’s stiff. This makes it more pliable and less likely to crack. You want it flexible but not hot.
- Spread the cream cheese in an even layer across the entire surface of the tortilla, leaving a 1-inch border around the edges. Use the back of a spoon or your offset spatula. Don’t go too thick—a thin, even layer is what you’re after. Think buttering toast, not frosting a cake.
- Layer your turkey slices evenly over the cream cheese. Overlap them slightly so there are no bare spots, but don’t stack them too thick. Two to three layers of turkey is plenty. I usually use about 6-8 slices total, depending on the size of the tortilla.
- Add your cheese slices on top of the turkey. If you’re using provolone, tear the slices in half and arrange them to cover the surface. Same for Swiss. If you’re adding spinach or lettuce, lay a thin layer on top of the cheese now.
- Season lightly with salt and pepper. Don’t go overboard—the turkey and cheese have plenty of flavor already.
- Roll it up tight. Starting from the edge closest to you, fold the tortilla over the filling firmly. Tuck it under slightly as you roll, keeping even pressure. Roll all the way to the other end, like you’re rolling a sleeping bag. The tighter you roll, the neater your pinwheels will look.
- Wrap the rolled tortilla tightly in plastic wrap or parchment paper. Twist the ends like a candy wrapper to secure it. This step is crucial—it helps the pinwheels hold their shape when you slice them.
- Refrigerate for at least 15-20 minutes (or up to overnight). This firms up the cream cheese and makes slicing much cleaner. I know, I know—this adds time. But trust me, it’s worth it. If you’re in a huge rush, 10 minutes in the freezer works too.
- Slice into pinwheels. Unwrap your chilled roll and place it on the cutting board. Using a sharp knife, slice into 1-inch rounds. Use a gentle sawing motion rather than pressing straight down—this prevents squishing. You should get about 8-10 pinwheels per tortilla.
- Arrange in your lunchbox container snugly so they don’t unroll during transport. If you’re packing them for later, place a small ice pack in the lunchbox to keep the cream cheese chilled.
Your pinwheels should look like neat little spirals with visible layers of cream cheese, turkey, and cheese. If they’re falling apart, you either didn’t roll tight enough or your knife wasn’t sharp enough. Don’t worry—they’ll still taste amazing even if they’re not picture-perfect.
Cooking Tips & Techniques
Here’s where I share the hard-won wisdom from my own pinwheel disasters. Because yes, there have been disasters.
The biggest mistake I made early on was overstuffing. I thought more filling meant more flavor, but it just meant my pinwheels exploded into sad little piles of ingredients. You want a thin, even layer of everything. Think of it like a sushi roll—it’s about the balance, not the quantity.
Temperature matters more than you’d think. Room temperature cream cheese spreads like a dream. Cold cream cheese tears tortillas. Warm tortillas roll without cracking. I keep my cream cheese on the counter for 20 minutes before starting, and I give my tortillas a quick 5-second spin in the microwave. These two small steps make the difference between pinwheels that look professional and ones that look like a toddler made them.
Multitasking is your friend here. While your cream cheese is softening, you can prep your other ingredients. Slice your cheese, lay out your turkey, get your plastic wrap ready. The actual assembly takes about two minutes once everything’s prepped.
For consistent results, use the same brand of tortillas each time. Different brands have different levels of flexibility and thickness. I’ve found that Mission brand burrito-size tortillas give me the most reliable results, but your mileage may vary. Once you find a brand that works, stick with it.
One thing I learned the hard way: don’t skip the refrigeration step. I know it adds time, but those 15 minutes in the fridge are what give you those clean, Instagram-worthy slices. I once tried to slice a room-temperature roll and ended up with something that looked more like turkey hash than pinwheels.
Variations & Adaptations
These pinwheels are endlessly adaptable, which is honestly why I never get tired of making them. Here are some of my favorite variations:
Mediterranean Version: Swap the turkey for roasted red peppers and salami. Use hummus instead of cream cheese, add some crumbled feta, and throw in a few kalamata olives. Roll it up and you’ve got a lunch that tastes like a Greek vacation.
Low-Carb Option: Use large lettuce leaves instead of tortillas. Butter lettuce or romaine works best—they’re sturdy enough to hold the filling without tearing. You’ll get fewer pinwheels per wrap, but they’re perfect for keto or low-carb diets.
Veggie-Packed Version: Add thin slices of cucumber, bell pepper, and shredded carrots along with the spinach. The extra crunch is amazing, and it’s a great way to sneak more vegetables into picky eaters’ lunches. My kids don’t even notice the veggies when they’re rolled up tight.
Spicy Southwest Twist: Spread a layer of chipotle cream cheese (just mix regular cream cheese with some adobo sauce from a can of chipotles), use pepper jack cheese instead of provolone, and add some thinly sliced jalapeños if you’re brave. This one’s my personal favorite for adult lunches.
Breakfast Pinwheels: Use cream cheese mixed with a little maple syrup, layer on thin slices of ham or bacon, and add a scrambled egg patty. These are perfect for breakfast meal prep and taste amazing reheated.
I’ve tried all of these variations, and honestly, they’re all winners. The Mediterranean version is my go-to for adult gatherings, while the veggie-packed version saves me during school lunch season when I’m desperate for ways to get vegetables into my kids.
Serving & Storage Suggestions
These pinwheels are best served cold or at room temperature, straight from the lunchbox. I like to arrange them in a single layer in a container with a tight-fitting lid, with the cut sides facing up so you can see those beautiful spirals.
What to serve with them: A handful of cherry tomatoes, some baby carrots, apple slices, or a small cup of ranch dressing for dipping. They’re also great alongside a cup of soup or a simple side salad. For kids, I’ll add a few pretzel sticks and a fruit pouch for a complete lunch.
Storage instructions: Keep pinwheels in an airtight container in the refrigerator for up to 3 days. They actually taste best on day two, once the flavors have had time to meld together. The cream cheese helps keep everything moist, so they don’t dry out like regular sandwiches do.
Freezer option: You can freeze the whole rolled tortillas (before slicing) for up to a month. Wrap them tightly in plastic wrap and then foil. When you’re ready to use them, thaw overnight in the fridge and slice as usual. I do this all the time for Sunday meal prep—I’ll make four or five rolls at once and freeze what I don’t need immediately.
Reheating tips: These are meant to be served cold, so no reheating needed. If you’ve frozen a roll and thawed it, just slice and serve straight from the fridge. The texture stays perfect.
One thing I’ve noticed: the flavors actually get better after a day in the fridge. The cream cheese absorbs some of the turkey flavor, and everything melds together into this cohesive, delicious bite. So don’t worry if you’re making these ahead of time—they’ll be even better.
Nutritional Information & Benefits
Here’s the approximate nutritional breakdown for one serving (about 4-5 pinwheels, using standard ingredients):
- Calories: 280-320
- Protein: 18-22g
- Carbohydrates: 22-26g
- Fat: 14-18g
- Fiber: 1-2g
- Sodium: 600-800mg
Health benefits: Turkey is an excellent source of lean protein, which keeps you full and satisfied throughout the afternoon. Cream cheese provides calcium and a small amount of vitamin A. If you add spinach, you’re getting iron, vitamin K, and antioxidants without even tasting it.
Dietary considerations: These pinwheels can be made gluten-free by using gluten-free tortillas (check the label, as some contain wheat). For a lower-sodium option, look for reduced-sodium deli turkey. Dairy-free cream cheese works well for those avoiding dairy.
Potential allergens: This recipe contains dairy (cream cheese, cheese) and gluten (tortillas). Check your specific ingredient brands for allergen information.
I personally love that these pinwheels give me a way to pack a balanced lunch without spending an hour in the kitchen. The protein keeps me going through the afternoon slump, and the portion size is just right—satisfying without being heavy.
Conclusion
These Quick 5-Minute Turkey Pinwheel Lunchbox Wraps have honestly changed my lunch game in ways I never expected. What started as a casual observation in my neighbor’s kitchen has become my most-repeated recipe, the one I turn to when I need something reliable, fast, and genuinely delicious.
I love that this recipe gives you room to play. Use whatever fillings you have on hand, adjust the seasonings to your taste, make it your own. The basic technique is so forgiving that even on your worst morning, you can pull these together without breaking a sweat. And honestly? That’s exactly what a weeknight recipe should do.
I’d love to hear how these turn out for you. Did you try a fun variation? Did your kids actually eat the veggie-packed version? Drop a comment below and let me know—I read every single one, and your ideas often end up in my own kitchen rotation. If you found this helpful, share it with a friend who’s also tired of the lunch-packing struggle.
Here’s to five-minute lunches that feel like so much more. Happy rolling!
Frequently Asked Questions
Can I make these pinwheels the night before?
Absolutely! In fact, they taste better the next day. Assemble and roll the tortillas, wrap them tightly in plastic wrap, and refrigerate overnight. Slice them in the morning before packing. The flavors meld together beautifully overnight.
How do I keep the pinwheels from unrolling in the lunchbox?
Pack them snugly in a container that’s just big enough to hold them in a single layer. The tight fit prevents them from shifting around and unrolling. You can also secure each pinwheel with a toothpick if you’re really worried, though I’ve never needed to.
Can I use flavored cream cheese?
Yes! Garden vegetable cream cheese adds a nice savory kick, and chive and onion cream cheese works beautifully with turkey. Just make sure whatever flavor you choose complements the other ingredients. I’d avoid sweet flavors like strawberry or honey for savory pinwheels.
How long do these stay fresh in the fridge?
Stored in an airtight container, they’ll stay fresh for up to 3 days. After that, the tortillas can start to get a bit soggy from the cream cheese. I usually make a batch on Sunday and they’re perfect through Wednesday.
Can I use corn tortillas instead of flour?
I wouldn’t recommend it. Corn tortillas are smaller and more prone to cracking when rolled. They also don’t hold their shape as well. If you need a gluten-free option, look for large gluten-free flour tortillas instead—they’ll give you much better results.
Pin This Recipe!

5-Minute Turkey Pinwheel Wraps: Easy Lunchbox Meal

Quick and easy turkey pinwheel wraps made with cream cheese, turkey, and cheese rolled in a flour tortilla. Perfect for lunchboxes, busy mornings, and crowd-pleasing snacks.
- Prep Time: 5 minutes
- Cook Time: 0 minutes
- Total Time: 5 minutes (plus 15-20 minutes chilling)
- Yield: 4 servings 1x
- Category: Lunch
- Cuisine: American
Ingredients
- 4 large flour tortillas (10-inch, burrito size)
- 8 oz cream cheese, softened to room temperature
- 6–8 slices deli turkey breast
- 4 slices provolone or Swiss cheese
- Optional: Fresh spinach leaves or shredded lettuce
- Optional: 2 tablespoons ranch dressing or honey mustard
- Salt and black pepper to taste
Instructions
- Soften cream cheese by leaving it out for 20 minutes or microwaving for 10-15 seconds.
- Lay tortilla flat on cutting board. Warm in microwave for 5-10 seconds if stiff.
- Spread cream cheese evenly across entire tortilla, leaving a 1-inch border.
- Layer turkey slices evenly over cream cheese, overlapping slightly.
- Add cheese slices on top of turkey. Add optional spinach or lettuce.
- Season lightly with salt and pepper.
- Roll tortilla tightly from the edge closest to you, tucking firmly.
- Wrap rolled tortilla tightly in plastic wrap or parchment paper, twisting ends.
- Refrigerate for at least 15-20 minutes (or up to overnight).
- Slice into 1-inch rounds using a sharp knife with a gentle sawing motion.
- Arrange pinwheels snugly in lunchbox container. Add ice pack if packing for later.
Notes
For best results, use room temperature cream cheese and slightly warm tortillas. Refrigeration step is crucial for clean slices. Overstuffing leads to falling-apart pinwheels. Flavors meld and improve after a day in the fridge. Can be frozen as whole rolls for up to a month.
Nutrition
- Serving Size: 4-5 pinwheels
- Calories: 280320
- Sodium: 600800
- Fat: 1418
- Carbohydrates: 2226
- Fiber: 12
- Protein: 1822
Keywords: turkey pinwheels, lunchbox wraps, easy lunch, 5-minute recipe, kid-friendly lunch, meal prep, no-cook lunch