Love this? Save it for later!
Share the inspiration with your friends
My roommate asked why I couldn’t just dump the whole can of green chiles in there. I stared at the recipe card, then back at her. “Because it says half a can,” I said slowly, like I was explaining that fire was hot. She shrugged and went back to scrolling on her phone. But the thought was already planted, you know? I started to explain why that wouldn’t work—then stopped. Honestly, I had no good reason. The recipe was from a box, for crying out loud. It wasn’t like I was protecting some sacred family heirloom.
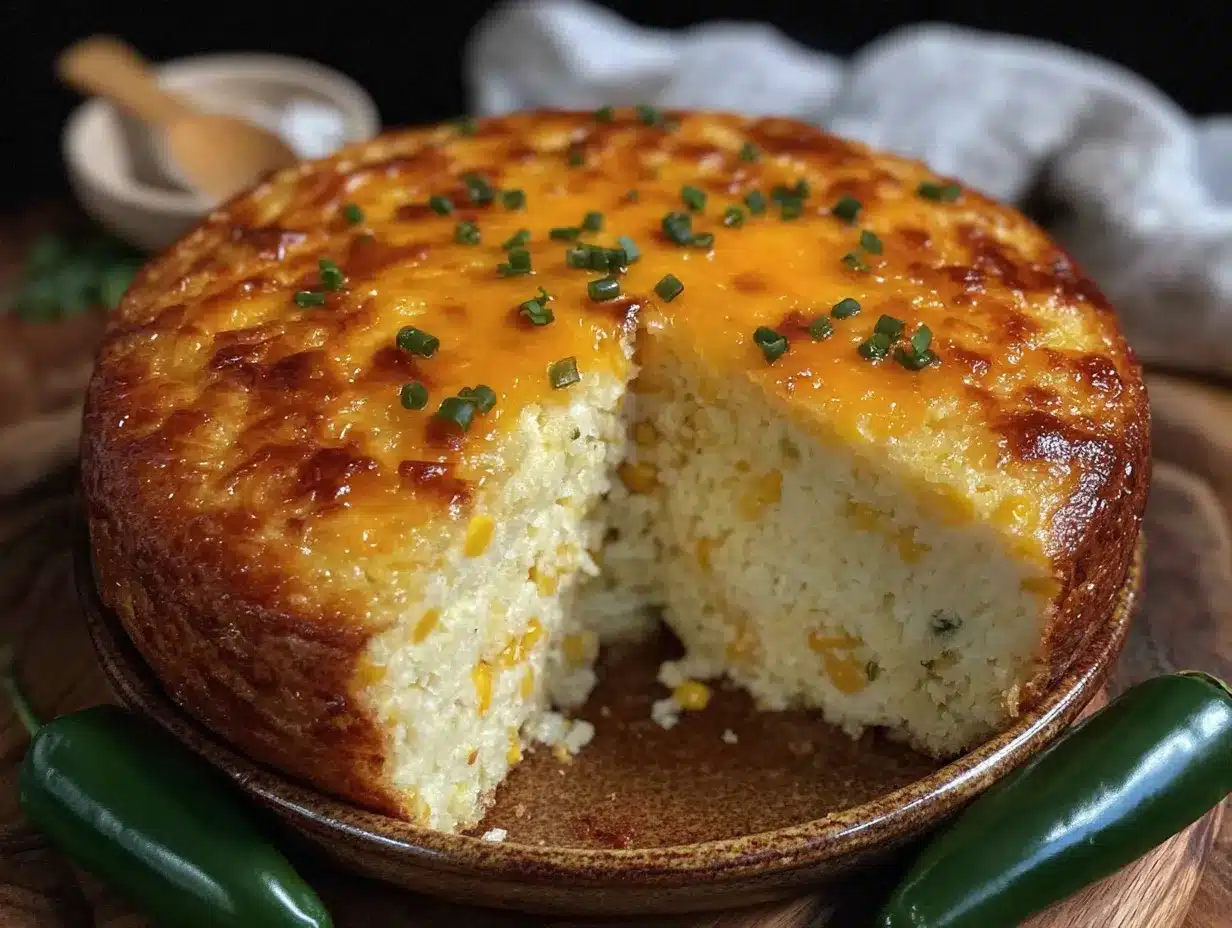
So I dumped the whole can in. And let me tell you, that decision changed my relationship with this dish forever. The casserole came out of the oven looking exactly the same—golden brown on top, bubbly around the edges. But the first bite? That’s when the magic happened. There was this subtle heat that crept up on you, not spicy enough to make you reach for water, but enough to wake up all the other flavors. The cheddar melted into the cornbread base in a way that made every single forkful exciting.
I stood there in the kitchen on a random Tuesday night, eating straight from the dish with a spatula, wondering why I’d been following rules that didn’t even make sense. Maybe you’ve been there—following a recipe so strictly that you forget to trust your own taste buds. This is that dish that taught me to loosen up. It’s become my go-to for potlucks, Thanksgiving sides, and those nights when you just need something warm and buttery and good. Three years later, I still make it the “wrong” way, and I’ve never looked back.
Why You’ll Love This Recipe
This Cozy Jiffy Corn Casserole with Cheddar and Green Chiles isn’t your grandma’s corn casserole—well, actually, it kind of is, but better. I’ve tested this recipe at least a dozen times across different ovens, different altitudes, and even different brands of sour cream. It’s the kind of dish that forgives your mistakes and still shows up looking gorgeous.
- Quick & Easy : From fridge to table in under 45 minutes. Mix everything in one bowl, pour, bake, and done. No stand mixer required, no complicated techniques.
- Simple Ingredients : You probably have most of this in your pantry right now. Jiffy mix, canned corn, sour cream, butter, and cheese. The green chiles are the only “special” ingredient, and they’re in every grocery store.
- Perfect for Holidays & Weeknights : This dish straddles that line between “fancy enough for Thanksgiving” and “easy enough for a Wednesday dinner.” It’s a side dish that steals the show.
- Crowd-Pleaser : I’ve brought this to four different potlucks and watched it disappear every single time. Kids love it. Adults love it. People who claim they don’t like cornbread? They love it too.
- Unbelievably Delicious : The texture is what gets me every time—creamy in the middle, slightly crispy around the edges, with pockets of melted cheddar and those little bursts of green chile heat.
What makes this version different from all the others is the balance. Most corn casseroles are either too dry or too soggy. This one hits that perfect sweet spot because of the ratio of wet to dry ingredients—something I tweaked after my first attempt came out like a cornbread brick. Plus, the combination of creamed corn and whole kernel corn gives you both creamy texture and those little pops of sweetness. It’s comfort food that actually delivers on its promise.
What Ingredients You Will Need
This recipe uses simple, honest ingredients that work together to create something greater than the sum of their parts. Most of these are pantry staples, which makes this dish perfect for those moments when you need to bring something to a gathering and don’t want to make a special trip to the store.
For the Casserole Base
- 2 boxes (8.5 oz each) Jiffy Corn Muffin Mix – This is the backbone of the recipe. I’ve tried other brands, but Jiffy has that specific sweetness and texture that makes this dish work. Don’t substitute with from-scratch cornbread mix unless you’re adjusting the sugar and fat content.
- 1 can (15.25 oz) whole kernel corn, drained – Gives you those lovely bursts of sweetness throughout the casserole. Make sure to drain it well so you don’t add too much liquid.
- 1 can (14.75 oz) cream-style corn – This is the secret to the creamy texture. Don’t drain it—the creamy liquid is exactly what you need.
- 1 cup (8 oz) sour cream – Adds richness and tang. Full-fat works best here, but I’ve used Greek yogurt in a pinch and it turned out fine (just slightly less decadent).
- ½ cup (1 stick) unsalted butter, melted – Butter makes everything better. Let it cool slightly before mixing so you don’t cook the eggs.
- 2 large eggs, lightly beaten – Helps bind everything together and adds structure. Room temperature eggs mix more evenly.
For the Cheesy Chile Layer
- 1 can (4 oz) diced green chiles, undrained – This is where the whole-can revelation comes in. Don’t drain them—the liquid adds flavor and moisture. If you’re nervous about heat, look for “mild” green chiles. If you want more kick, get the “hot” version.
- 2 cups (8 oz) sharp cheddar cheese, shredded – Sharp cheddar stands up to the sweetness of the cornbread. I recommend shredding your own from a block—pre-shredded cheese has anti-caking agents that affect melting. Cabot and Tillamook are my go-to brands.
- Optional: ¼ cup pickled jalapeños, chopped – For those who want extra heat and tang. I add these when I’m making it just for myself.
Ingredient Notes & Swaps
If you’re gluten-sensitive, you can use a gluten-free corn muffin mix, but the texture will be slightly different—more crumbly, less tender. For a dairy-free version, use vegan butter, dairy-free sour cream, and omit the cheese (or use a vegan cheddar alternative). I haven’t tested this with all substitutions, so your mileage may vary. If you’re watching your salt intake, use unsalted butter and low-sodium canned corn.
Equipment Needed
You don’t need a fancy kitchen to make this recipe, which is one of the reasons I love it. Here’s what you’ll need:
- 9×13-inch baking dish – Glass or ceramic works best. Metal pans can cause the edges to brown too quickly. If you only have an 8×8 dish, the casserole will be thicker and need about 10 extra minutes of baking time.
- Large mixing bowl – Big enough to hold everything without splashing. I use my grandmother’s old ceramic bowl, but any large bowl works.
- Whisk – For beating the eggs and mixing the wet ingredients. A fork works in a pinch, but a whisk gives you a smoother batter.
- Rubber spatula – For scraping every last bit of batter into the dish. Don’t waste that goodness.
- Cheese grater – If you’re shredding your own cheese (which you should). A box grater or food processor with a shredding disc both work great.
- Measuring cups and spoons – For accuracy, especially with the sour cream and butter.
I bought a cheap glass baking dish from Target for twelve dollars, and it’s been my go-to for this recipe for years. You really don’t need expensive equipment—just something that distributes heat evenly. If you’re using a dark non-stick pan, reduce the oven temperature by 25 degrees to prevent over-browning.
Preparation Method
Preheat your oven to 350°F (175°C). While it’s heating up, grease your 9×13 baking dish with butter or non-stick spray. I use butter because it adds flavor to the edges, but spray works fine if you’re in a hurry.
Step 1: Mix the wet ingredients. In your large bowl, whisk together the sour cream, melted butter (make sure it’s cooled slightly), and beaten eggs until smooth. The mixture should look pale yellow and slightly thick. If your butter was too hot and you see little scrambled egg bits, don’t panic—just whisk harder and they’ll mostly disappear.
Step 2: Add the corn. Stir in the drained whole kernel corn and the undrained cream-style corn. Mix until everything is combined. This is where you’ll start to smell that sweet corn aroma—it’s a good sign.
Step 3: Add the Jiffy mix. Sprinkle both boxes of corn muffin mix over the wet ingredients. Stir gently until just combined—overmixing will make the casserole tough. You want to see a few small lumps; that’s totally fine. The batter should be thick but pourable, like a loose muffin batter.
Step 4: Add the green chiles and half the cheese. Stir in the entire can of undrained green chiles and 1 cup of the shredded cheddar. Fold gently until the chiles are distributed throughout. Don’t worry if some cheese sinks to the bottom—it’ll create a lovely cheesy layer as it bakes.
Step 5: Pour and top. Pour the batter into your prepared baking dish and spread it evenly with a spatula. Sprinkle the remaining 1 cup of shredded cheddar over the top. If you’re using pickled jalapeños, scatter them over the cheese now.
Step 6: Bake. Place the dish in the preheated oven and bake for 35-40 minutes. The casserole is done when the edges are golden brown and pulling away from the sides of the dish slightly. The center should be set—not jiggly—and a toothpick inserted in the middle should come out clean or with just a few moist crumbs. If the top is browning too quickly but the center isn’t done, tent loosely with foil for the last 10 minutes.
Step 7: Rest and serve. Let the casserole rest for 5-10 minutes before serving. This is crucial—it allows the structure to set so you get clean slices instead of a soupy mess. I know it’s hard to wait, but trust me on this. The aroma filling your kitchen will be absolutely intoxicating.
One time I forgot to add the eggs. I realized it halfway through baking, pulled the dish out, stirred in the beaten eggs, and put it back in. It turned out fine—a little denser than usual, but nobody complained. So if you mess up, don’t throw it out. Just adapt and keep going.
Cooking Tips & Techniques
After making this Cozy Jiffy Corn Casserole with Cheddar and Green Chiles more times than I can count, I’ve learned a few things the hard way. Here’s what I wish someone had told me:
Don’t overmix the batter. I made this mistake my first three times. The more you stir, the more gluten develops, and the denser your casserole gets. Stir until the flour streaks disappear, then stop. A few lumps are your friends.
Let your eggs come to room temperature. Cold eggs seize up the melted butter and create a lumpy batter. If you forgot to take them out ahead of time, place them in a bowl of warm water for 5 minutes. It makes a real difference in how evenly everything mixes.
Watch your oven like a hawk for the last 5 minutes. Every oven runs differently. My friend’s oven bakes this in 32 minutes exactly. Mine takes 38. The difference between perfect and overdone is about 2 minutes. Start checking at 30 minutes and go from there.
Use the convection setting if you have it. Convection helps the top get that beautiful golden crust while keeping the inside moist. Just reduce the temperature by 25 degrees and start checking at 25 minutes.
Don’t skip the resting time. I know it’s tempting to dig in right away, but the casserole needs time to set. If you serve it too soon, it’ll fall apart on the plate. Five minutes is the minimum—ten is better.
Make it ahead of time. You can assemble the entire casserole the night before, cover it, and refrigerate. Just add 10 minutes to the baking time since you’re starting from cold. This is a lifesaver for Thanksgiving morning.
Variations & Adaptations
One of the best things about this recipe is how adaptable it is. I’ve tried several variations over the years, and here are my favorites:
Spicy Southwest Version : Add ½ teaspoon of cumin, ½ teaspoon of chili powder, and a can of drained black beans to the batter. Top with pepper jack cheese instead of cheddar and add fresh cilantro after baking. This version is incredible with grilled chicken or fish.
Bacon and Chive Version : Cook 6 strips of bacon until crispy, crumble them, and stir half into the batter. Sprinkle the remaining bacon and 2 tablespoons of fresh chopped chives over the top before baking. The smoky saltiness pairs beautifully with the sweet corn.
Lighter Version : Use Greek yogurt instead of sour cream, reduce the butter to ¼ cup, and use low-fat cheese. The texture will be slightly less rich, but it still satisfies that comfort food craving. I’ve made this version for weeknight dinners when I’m trying to be a little more mindful.
Gluten-Free Adaptation : Use two boxes of gluten-free corn muffin mix (I like the Pamela’s brand). Add an extra egg because gluten-free batters tend to be drier. The texture will be a bit more crumbly, but the flavor is still fantastic.
Vegetable-Packed Version : Fold in 1 cup of frozen (thawed) corn kernels and ½ cup of finely diced red bell pepper. This adds color, nutrients, and a slight crunch. My kids actually eat this version without complaint, which feels like a parenting win.
Dessert Version : Omit the cheese and green chiles. Add ½ cup of sugar, 1 teaspoon of vanilla extract, and ½ cup of chocolate chips. Bake as directed and serve warm with ice cream. It’s basically cornbread pudding, and it’s dangerously good.
Serving & Storage Suggestions
This Cozy Jiffy Corn Casserole with Cheddar and Green Chiles is best served warm, straight from the oven, when the cheese is still melty and the edges are crispy. But it’s also fantastic at room temperature, which makes it perfect for potlucks and buffets.
Serving Ideas : Scoop it onto plates alongside chili, pulled pork, roasted chicken, or grilled sausages. It also works beautifully as a Thanksgiving side dish—I’ve brought it to three Thanksgivings and it always gets rave reviews alongside turkey and gravy. For brunch, serve it with scrambled eggs and bacon for a hearty morning meal.
Storage : Cover the baking dish tightly with foil or transfer leftovers to an airtight container. It will keep in the refrigerator for up to 4 days. The flavors actually meld together and get even better on day two.
Freezing : This casserole freezes beautifully. Bake it completely, let it cool, wrap tightly in plastic wrap and then foil, and freeze for up to 3 months. To reheat, thaw overnight in the refrigerator, then warm in a 350°F oven for 15-20 minutes, covered with foil. You can also freeze individual portions for quick lunches.
Reheating : The oven is your best bet for maintaining texture. Microwave reheating works in a pinch but can make the edges soggy. If you’re using the microwave, heat in 30-second bursts and stop while it’s still slightly warm in the center—it’ll finish heating through as it rests.
Make-Ahead Tip : I often make two casseroles at once—one for dinner and one to freeze. It’s the same amount of effort but gives you a future meal for zero extra work.
Nutritional Information & Benefits
While this is definitely a comfort food dish, it does have some redeeming qualities. Here’s the approximate nutritional breakdown per serving (based on 12 servings):
- Calories: 320
- Total Fat: 18g
- Saturated Fat: 10g
- Cholesterol: 65mg
- Sodium: 620mg
- Total Carbohydrates: 34g
- Dietary Fiber: 2g
- Sugars: 8g
- Protein: 9g
Corn provides fiber, B vitamins, and antioxidants like lutein and zeaxanthin, which are good for eye health. The eggs add high-quality protein and choline, which supports brain function. Cheddar cheese gives you calcium and protein, while the green chiles contribute vitamin C and capsaicin, which may boost metabolism. If you’re watching your sodium, you can use no-salt-added canned corn and reduce the cheese slightly.
This casserole is vegetarian-friendly and can be made gluten-free with the right substitutions. It contains dairy and eggs, so it’s not suitable for vegans or those with dairy or egg allergies. If you’re serving a crowd with dietary restrictions, I recommend making a separate batch with appropriate substitutions rather than trying to modify this one.
Conclusion
This Cozy Jiffy Corn Casserole with Cheddar and Green Chiles has become a staple in my kitchen for good reason. It’s the dish I bring when I need to impress without stress. It’s the side dish that turns a simple weeknight meal into something special. And honestly? It’s the recipe that taught me to stop being so precious about following rules and start trusting my instincts.
That night with my roommate, when I dumped the whole can of green chiles in against my better judgment, I learned something important about cooking—and about myself. The best recipes aren’t the ones you follow perfectly. They’re the ones you make your own. So go ahead and add extra cheese. Throw in some jalapeños if that’s your thing. Use Greek yogurt if that’s what you have. This casserole can handle it.
I’d love to hear how yours turns out! Drop a comment below and tell me what variations you tried, or tag me in your photos on social media. Did you add bacon? Did you make it for Thanksgiving? Did your picky eater actually ask for seconds? Share it all—I read every single comment. And if you loved this recipe, don’t forget to pin it for later and share it with a friend who needs a little comfort food in their life.
Frequently Asked Questions
Can I make this corn casserole ahead of time?
Absolutely! You can assemble the entire casserole up to 24 hours in advance, cover it, and refrigerate. When you’re ready to bake, add about 10 minutes to the baking time since you’re starting from cold. You can also bake it completely, then reheat in a 350°F oven for 15 minutes before serving.
Can I use fresh or frozen corn instead of canned?
Yes, you can substitute fresh or frozen corn for the whole kernel corn. Use about 1½ cups of fresh corn kernels (cut from about 3 ears) or thawed frozen corn. However, don’t substitute the cream-style corn—it’s essential for the creamy texture and there’s no good replacement for it.
Why did my casserole turn out dry?
Dry casserole usually means it was overbaked or the ratio of wet to dry ingredients was off. Make sure you’re not draining the cream-style corn and that your sour cream is full-fat. Also, check your oven temperature with an oven thermometer—many ovens run hot. Start checking for doneness at 30 minutes.
Can I double this recipe?
Definitely! Double all ingredients and bake in a 9×13 dish for a thicker casserole, or use a larger 11×15 dish. If using the 9×13 dish, you’ll need to increase the baking time by about 15-20 minutes. Check doneness with a toothpick in the center.
How do I make this spicier?
There are several ways to amp up the heat. Use hot green chiles instead of mild, add a can of diced jalapeños, stir in ½ teaspoon of cayenne pepper, or use pepper jack cheese instead of cheddar. You can also serve it with hot sauce on the side for people to add their own heat.
Pin This Recipe!

Cozy Jiffy Corn Casserole with Cheddar and Green Chiles

A creamy, cheesy corn casserole made with Jiffy mix, cheddar, and green chiles. Perfect for potlucks, holidays, or weeknight dinners.
- Prep Time: 15 minutes
- Cook Time: 35-40 minutes
- Total Time: 50-55 minutes
- Yield: 12 servings 1x
- Category: Side Dish
- Cuisine: American
Ingredients
- 2 boxes (8.5 oz each) Jiffy Corn Muffin Mix
- 1 can (15.25 oz) whole kernel corn, drained
- 1 can (14.75 oz) cream-style corn
- 1 cup (8 oz) sour cream
- ½ cup (1 stick) unsalted butter, melted
- 2 large eggs, lightly beaten
- 1 can (4 oz) diced green chiles, undrained
- 2 cups (8 oz) sharp cheddar cheese, shredded
- Optional: ¼ cup pickled jalapeños, chopped
Instructions
- Preheat oven to 350°F (175°C). Grease a 9×13-inch baking dish with butter or non-stick spray.
- In a large bowl, whisk together sour cream, melted butter (cooled slightly), and beaten eggs until smooth.
- Stir in drained whole kernel corn and undrained cream-style corn until combined.
- Sprinkle both boxes of Jiffy Corn Muffin Mix over the wet ingredients. Stir gently until just combined (a few lumps are fine).
- Stir in the entire can of undrained green chiles and 1 cup of shredded cheddar. Fold gently.
- Pour batter into prepared dish and spread evenly. Sprinkle remaining 1 cup of cheddar on top. Add pickled jalapeños if using.
- Bake for 35-40 minutes, until edges are golden brown and center is set. A toothpick inserted in the center should come out clean or with a few moist crumbs.
- Let rest for 5-10 minutes before serving.
Notes
Don’t overmix the batter. Let eggs come to room temperature. Watch oven closely during last 5 minutes. Resting time is crucial for clean slices. Can be assembled night before and refrigerated (add 10 minutes to baking time).
Nutrition
- Serving Size: 1 serving (1/12 of c
- Calories: 320
- Sugar: 8
- Sodium: 620
- Fat: 18
- Saturated Fat: 10
- Carbohydrates: 34
- Fiber: 2
- Protein: 9
Keywords: corn casserole, Jiffy corn casserole, green chiles, cheddar, comfort food, potluck, Thanksgiving side