Love this? Save it for later!
Share the inspiration with your friends
“Why can’t we just toss the cucumbers in the fridge with some dill and call it a day?” my friend asked one humid Saturday afternoon as I was gearing up to teach her how to make traditional dill pickles. I started to explain why that wouldn’t work — then stopped. It was one of those moments where stubborn cooking logic met a surprisingly simple idea. So, we took a chance and went with her suggestion, skipping the whole canning process.
Honestly, I was skeptical at first. I mean, pickles without the boiling jars and hours of waiting? But as the days went by, those cucumbers transformed into the crisp, tangy refrigerator dill pickles that still get me every time. There was no stress, no mess, and definitely no canning jars cluttering the kitchen. Maybe you’ve been there, wanting fresh homemade pickles but feeling overwhelmed by the traditional process. This easy refrigerator dill pickles recipe turned out to be exactly what I didn’t know I needed. It’s simple, fast, and the kind of recipe you’ll keep coming back to because, well, it works—and it tastes amazing.
I remember that cracked glass jar we used (because of course, I forgot to bring the proper one) and how the whole kitchen smelled like dill and garlic in the best way. That summer afternoon, I learned that sometimes the beginner’s instinct is right, and the best recipes come from a bit of flexibility and a lot of honest flavor. This recipe became a staple, especially when I crave crisp, tangy pickles without the fuss. Let me tell you, once you try these easy refrigerator dill pickles, you might just forget all about canning.
Why You’ll Love This Recipe
I’ve tested plenty of pickle recipes over the years, and trust me when I say this one stands out for all the right reasons. It’s one of those rare recipes that’s both forgiving and reliable, perfect for anyone who loves homemade pickles but shies away from the canning process.
- Quick & Easy: Ready to eat in just 48 hours, and you can have perfectly crisp pickles in under a week—ideal for busy weeknights or last-minute snack cravings.
- Simple Ingredients: You probably already have everything in your pantry or fridge: fresh cucumbers, garlic, dill, vinegar, and a few spices.
- Perfect for Every Occasion: Whether you’re adding a crunchy bite to burgers, sandwiches, or just craving a salty snack, these pickles fit the bill.
- Crowd-Pleaser: Kids, adults, and even pickle skeptics tend to love the crisp texture and bright, balanced flavor.
- Unbelievably Delicious: The no-canning method preserves the fresh cucumber crunch while delivering that classic dill flavor punch.
What really makes this recipe different is the easy, no-fuss approach that doesn’t sacrifice taste. Instead of the traditional long wait and boiling water bath, the pickles develop their flavor right in your refrigerator. The combination of fresh garlic, dill, and a pinch of mustard seed creates a seasoning profile that’s simple but just right. Honestly, it’s become my go-to method whenever I want pickles without the hassle, and it’s perfect for impressing guests with minimal effort.
What Ingredients You Will Need
This recipe uses straightforward, wholesome ingredients that work together to create that signature crisp and tangy dill pickle flavor. Most are pantry staples, and if you happen to be missing one, substitutions are usually simple.
- Fresh Cucumbers: About 2 pounds (900 grams) of pickling cucumbers or Kirby cucumbers, sliced into spears or rounds. These hold their crunch best.
- Fresh Dill: 4 to 5 sprigs of fresh dill (or 2 tablespoons dried dill if fresh isn’t available). It’s the star flavor, so fresh is ideal.
- Garlic Cloves: 3 to 4 large cloves, peeled and smashed (adds a punch of sharpness and aroma).
- White Vinegar: 1 cup (240 ml) of distilled white vinegar for that classic tang and pickling acid.
- Water: 1 cup (240 ml) of cold water to balance the vinegar’s acidity.
- Pickling Salt: 2 tablespoons (use kosher or sea salt, avoid iodized salt to keep the flavor clean).
- Mustard Seeds: 1 teaspoon for a subtle spicy undertone.
- Black Peppercorns: 1 teaspoon whole peppercorns for gentle heat.
- Red Pepper Flakes: Optional, ¼ teaspoon for a slight kick if you like things spicy.
For best results, I like to use Morton’s kosher salt—it dissolves evenly and doesn’t cloud the brine. If you want to experiment, swapping in apple cider vinegar adds a fruity note, but the classic white vinegar is unbeatable for crispness. In warmer months, try adding a handful of fresh sliced jalapeños for a fiery twist. The great thing about this recipe is how flexible it is while still delivering a dependable crunch and flavor.
Equipment Needed
Making easy refrigerator dill pickles doesn’t require fancy equipment, which is part of the charm. Here’s what you’ll need:
- Glass Jar or Container: A clean quart-sized (1 liter) glass jar with a tight-fitting lid works best. Mason jars are ideal but any glass container that seals well will do.
- Measuring Cups and Spoons: For precise vinegar, water, and spices measurements.
- Knife and Cutting Board: To slice the cucumbers and smash garlic.
- Small Bowl: To mix the brine before pouring it over the cucumbers.
If you don’t have a mason jar, a food-grade plastic container with a lid can substitute, but glass is preferred to avoid any off flavors. I once used a cracked jar (don’t ask how) and ended up with the brine leaking in the fridge—lesson learned! For smashing garlic, a simple flat side of a chef’s knife works fine. No need for a garlic press here.
Preparation Method
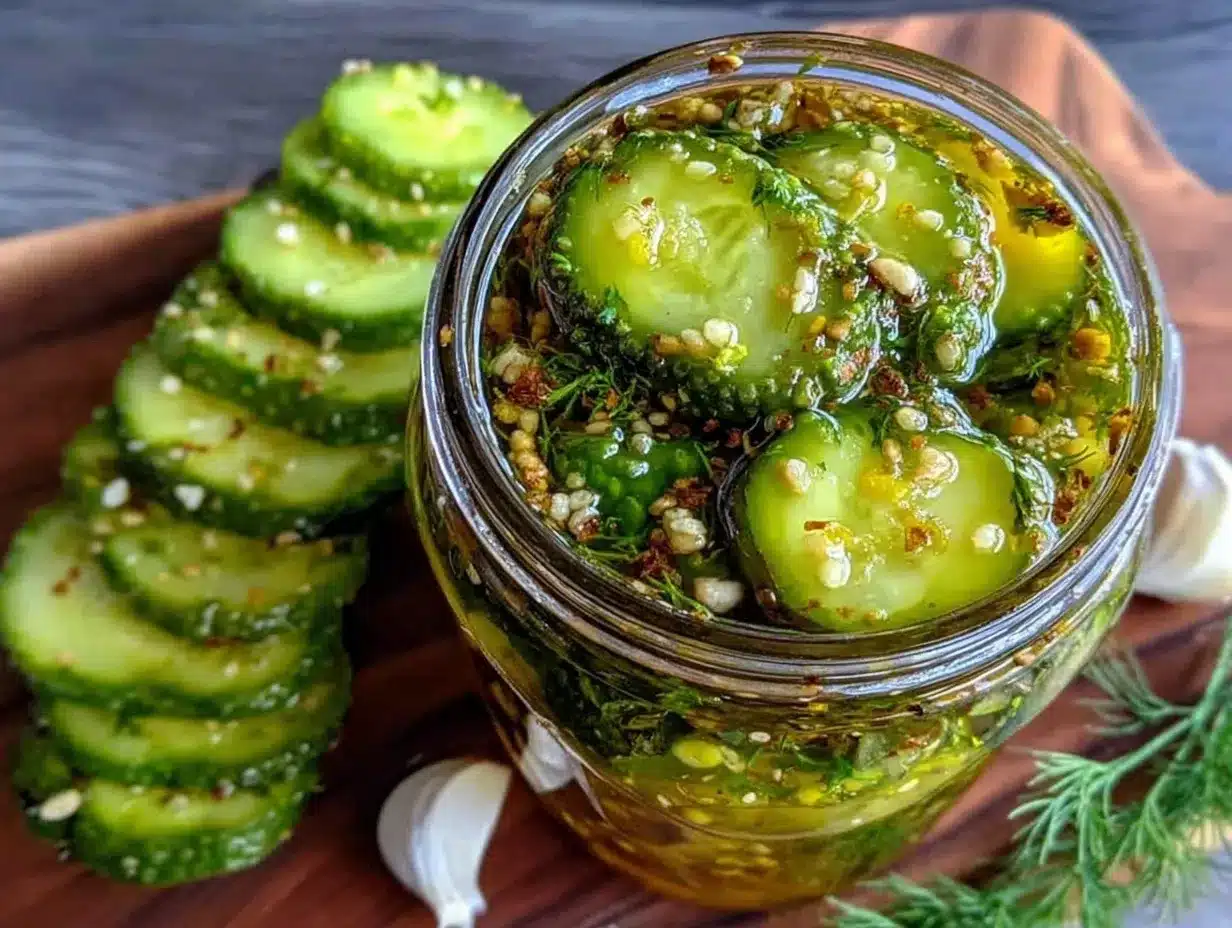
- Prepare the Cucumbers: Wash and dry about 2 pounds (900 grams) of pickling cucumbers thoroughly. Slice them into spears about 3 inches (7.5 cm) long or rounds about ¼ inch (6 mm) thick, depending on your preference. This step takes about 10 minutes.
- Make the Brine: In a small bowl, combine 1 cup (240 ml) white vinegar, 1 cup (240 ml) cold water, and 2 tablespoons pickling salt. Stir until the salt dissolves completely—this should take around 2 minutes. The brine is the magic that makes the pickles crisp and tangy.
- Prepare Flavorings: Peel and smash 3 to 4 garlic cloves using the flat side of a knife. Gather 4 to 5 sprigs of fresh dill. In your clean quart-sized jar, add the garlic, dill, 1 teaspoon mustard seeds, 1 teaspoon whole black peppercorns, and ¼ teaspoon red pepper flakes if using. This aromatic mix is what gives your pickles personality.
- Pack the Jar: Tightly pack the sliced cucumbers into the jar, pressing down gently to fit them snugly without bruising. Pour the brine over the cucumbers, making sure they’re completely submerged. Leaving cucumbers exposed to air can cause them to turn soft, so this step is key. Seal the jar tightly.
- Refrigerate and Wait: Place the jar in the refrigerator. The pickles will start tasting good in 48 hours but reach their best crunch and flavor after about 5 to 7 days. Resist the urge to open the jar too often; keeping the jar sealed lets the flavors meld properly.
If you notice the cucumbers floating, just press them down with a clean fork or add a small piece of parchment paper under the lid to keep them submerged. This simple trick helped me save a batch once when I forgot to pack the jar tightly. When ready, your pickles should smell garlicky and fresh, with the dill’s green aroma filling your kitchen.
Cooking Tips & Techniques
Making refrigerator dill pickles is straightforward, but a few tricks can make all the difference between soggy and perfectly crisp pickles.
- Choose the Right Cucumbers: Kirby or pickling cucumbers are your best bet because of their firm texture and smaller seeds. Regular slicing cucumbers can become mushy.
- Salt Matters: Use pickling or kosher salt, not table salt. I once accidentally used iodized salt and the pickles were cloudy and off-flavored—definitely avoid that.
- Keep Cucumbers Submerged: Air exposure softens pickles quickly. Press them down or use a weight to keep them underwater in the brine.
- Don’t Rush the Process: While you can eat them after 48 hours, letting pickles sit for a full week in the fridge develops better flavor and crunch.
- Use Fresh Herbs: Fresh dill gives an unbeatable aroma and taste. Dried dill works but the flavor won’t be quite the same.
One time, I tried tossing the cucumbers with hot vinegar brine straight away, but that ended in limp pickles. Cold brine and slow pickling in the fridge keep the cucumbers crisp. Also, be patient—good pickles take their time.
Variations & Adaptations
This easy refrigerator dill pickles recipe is a great base for customization. Here are some ideas you might want to try:
- Spicy Pickles: Add extra red pepper flakes or sliced jalapeños to the jar for heat lovers.
- Garlic Lovers: Double up on garlic cloves or add a teaspoon of garlic powder to intensify the flavor.
- Sweet & Tangy: Stir in 1 tablespoon of sugar or honey into the brine for a quick sweet pickle twist.
- Low-Sodium Version: Reduce the salt slightly and increase vinegar to keep flavor bright without too much sodium.
- Vegan & Allergy-Friendly: This recipe is naturally vegan and gluten-free. For those avoiding nightshades, skip the peppercorns and red pepper flakes.
I once tried adding fresh tarragon along with dill, which gave the pickles an unexpected herbal note. It was a fun change that impressed my dinner guests. Feel free to experiment and make the pickles your own!
Serving & Storage Suggestions
These easy refrigerator dill pickles shine best when served cold and crunchy. They’re fantastic straight from the fridge as a snack or as a tangy side for sandwiches, burgers, or even potato salad.
- Serving Temperature: Best chilled for maximum crunch and flavor punch.
- Presentation: Serve in a rustic jar with fresh dill sprigs for a charming touch.
- Storage: Keep pickles refrigerated in the sealed jar for up to 4 weeks. They tend to get tangier over time.
- Reheating: Not applicable—pickles are always enjoyed cold.
- Flavor Development: The flavors deepen over the first week, so if you can wait, you’ll be rewarded with better taste.
These pickles pair perfectly with a cool, creamy creamy potato salad or the classic crispy garlic chicken. Trust me, they add that perfect zing that makes meals feel complete.
Nutritional Information & Benefits
These refrigerator dill pickles are low in calories (about 10-15 calories per spear) and fat-free, making them a guilt-free snack. The vinegar and garlic have antimicrobial and digestive benefits, while cucumbers provide hydration and small amounts of vitamins K and C.
The recipe is naturally gluten-free, vegan, and low-carb. Be mindful of the sodium content from the pickling salt if you’re watching your salt intake. Overall, they’re a refreshing, crunchy way to add flavor without extra calories.
From a wellness perspective, I appreciate having a crunchy snack that satisfies salty cravings without processed ingredients. Plus, the probiotics from traditional fermentation aren’t in this quick pickle, but the fresh garlic and vinegar still support gut health in their own way.
Conclusion
This easy refrigerator dill pickles recipe is a game changer for anyone who loves homemade pickles but dreads the canning process. It’s straightforward, fast, and delivers that classic crispness and tang in just a few days. You can tweak the heat, garlic, or sweetness to suit your taste, making it a versatile pickling recipe for every season.
I keep coming back to this recipe because it’s honest and reliable—no complicated steps, no fancy equipment, just good food. If you try it, I’d love to hear how you customize your pickles or any tips you discover along the way. Sharing our kitchen wins (and fails) is what makes cooking fun, don’t you think?
So go ahead, grab some cucumbers, and start your own jar of easy refrigerator dill pickles. Your taste buds—and your fridge—will thank you!
FAQs
How long do refrigerator dill pickles last?
They typically last about 4 weeks in the fridge when stored in a sealed jar. The flavor intensifies over time but watch for any signs of spoilage.
Can I use regular cucumbers instead of pickling cucumbers?
Regular cucumbers can work but may become softer and less crisp. Pickling cucumbers are best for that crunch.
Do I need to boil the brine for refrigerator pickles?
No, the brine is mixed cold, and the pickles develop flavor in the fridge without the need for boiling or canning.
Can I make these pickles spicy?
Absolutely! Add red pepper flakes or fresh jalapeño slices to the jar for a spicy kick.
What if my pickles aren’t crunchy enough?
Make sure cucumbers are fresh and fully submerged in the brine. Also, avoid using iodized salt, which can affect texture. Letting them sit longer in the fridge often improves crunch.
Pin This Recipe!
Easy Refrigerator Dill Pickles Recipe
A simple, no-canning method to make crisp, tangy dill pickles in your refrigerator using fresh cucumbers, dill, garlic, and a flavorful brine.
- Prep Time: 15 minutes
- Cook Time: 0 minutes
- Total Time: 48 hours to 7 days (refrigeration time)
- Yield: About 1 quart (4 servings) 1x
- Category: Condiment
- Cuisine: American
Ingredients
- 2 pounds pickling cucumbers or Kirby cucumbers, sliced into spears or rounds
- 4 to 5 sprigs fresh dill (or 2 tablespoons dried dill)
- 3 to 4 large garlic cloves, peeled and smashed
- 1 cup (240 ml) distilled white vinegar
- 1 cup (240 ml) cold water
- 2 tablespoons pickling salt (kosher or sea salt, avoid iodized salt)
- 1 teaspoon mustard seeds
- 1 teaspoon whole black peppercorns
- ¼ teaspoon red pepper flakes (optional)
Instructions
- Wash and dry about 2 pounds of pickling cucumbers. Slice into spears about 3 inches long or rounds about ¼ inch thick.
- In a small bowl, combine 1 cup white vinegar, 1 cup cold water, and 2 tablespoons pickling salt. Stir until salt dissolves completely.
- Peel and smash 3 to 4 garlic cloves. In a clean quart-sized glass jar, add garlic, dill sprigs, 1 teaspoon mustard seeds, 1 teaspoon black peppercorns, and optional red pepper flakes.
- Tightly pack the sliced cucumbers into the jar without bruising. Pour the brine over the cucumbers, ensuring they are fully submerged. Seal the jar tightly.
- Place the jar in the refrigerator. Pickles will be ready to eat in 48 hours but develop best flavor and crunch after 5 to 7 days.
Notes
Use pickling or kosher salt to avoid cloudy brine and off flavors. Keep cucumbers fully submerged in brine to maintain crispness. Let pickles sit for a full week for best flavor. Fresh dill is preferred over dried for aroma and taste. Optional additions include jalapeños for spice or sugar/honey for sweetness.
Nutrition
- Serving Size: Approximately 1/4 cu
- Calories: 1015
- Sugar: 1
- Sodium: 500
- Carbohydrates: 2
- Fiber: 0.5
- Protein: 0.3
Keywords: refrigerator pickles, dill pickles, no canning pickles, easy pickles, quick pickles, homemade pickles, crisp pickles


