Love this? Save it for later!
Share the inspiration with your friends
The Super Bowl party was in six hours and I’d completely forgotten I was supposed to bring the main appetizer. Everyone else would be showing up with those elaborate seven-layer dips and slow-cooker meatballs they’d been planning for weeks. I had a bag of tortilla chips, some shredded cheese, and a vague memory of seeing ground beef in the freezer. Honestly, I stood in my kitchen staring at the pantry like it had personally betrayed me.
Then I spotted the cutting board my sister gave me last Christmas—one of those big wooden ones you never actually use because it’s too nice. And it hit me. Why not just throw everything on a board? I mean, nachos are already a pile of stuff on a platter, right? So I grabbed that board, browned the beef in a panic, opened every can of beans and jar of salsa I could find, and just started arranging. No plan. Just vibes and a desperate need to not show up empty-handed.
Here’s the thing—I was so flustered I forgot the jalapeños. And the sour cream was store-brand. But when I walked in with that board, people actually stopped talking. Someone literally said “whoa” out loud. By halftime, the board was scraped clean and three different people asked for the recipe. I had to admit there wasn’t really a recipe—I just made it up under pressure. But that night, I knew I’d stumbled onto something special. This loaded football nacho charcuterie board became my go-to for every game day since, and maybe you’ve been there too—needing something that looks like you planned it for days when you barely had minutes.
Why You’ll Love This Recipe
Let me tell you why this loaded football nacho charcuterie board has saved my reputation more times than I care to admit. First off, it’s ridiculously quick. You can have the whole thing assembled in under 20 minutes, which is faster than ordering delivery around here. The ground beef cooks in one pan while you open cans and chop a couple things. That’s it.
The ingredients are all stuff you probably already have kicking around your kitchen. Chips, cheese, beans, maybe some leftover taco seasoning from taco Tuesday. No fancy grocery store trips required. I’ve made this with whatever random jarred salsa was in the fridge and it still turned out great. The whole point is flexibility—this board works with what you’ve got.
It’s absolutely perfect for game day, obviously, but I’ve also brought it to potlucks, birthday parties, and even a casual backyard wedding reception. People lose their minds over it every single time. There’s something about the combination of textures and flavors—crunchy chips, melty cheese, warm seasoned beef, cold sour cream—that just hits different when it’s all laid out on one big board.
- Quick & Easy: Comes together in under 20 minutes, perfect for last-minute game day cravings.
- Simple Ingredients: No fancy grocery trips needed; you likely already have everything in your kitchen.
- Perfect for Game Day: Great for Super Bowl parties, Monday Night Football, or any casual gathering.
- Crowd-Pleaser: Always gets rave reviews from kids and adults alike—it’s the first thing to disappear.
- Unbelievably Delicious: The combination of warm seasoned beef, gooey cheese, and cold toppings is next-level comfort food.
What makes this recipe different from all those other nacho boards out there is the layering strategy. Instead of just piling everything on top of chips and hoping for the best, I separate the components so everyone can build their own perfect bite. No soggy chips, no uneven distribution of toppings. It’s the difference between okay nachos and unforgettable ones.
What Ingredients You Will Need
This recipe uses simple, straightforward ingredients to deliver bold flavor and satisfying texture without any fuss. Most of these are pantry staples you probably already have on hand.
- For the seasoned beef:
- 1 pound ground beef (80/20 works best for flavor)
- 1 packet taco seasoning (I prefer McCormick or make your own)
- 1/3 cup water
- For the base:
- 1 large bag restaurant-style tortilla chips (about 16 ounces)
- 2 cups shredded Mexican blend cheese (or cheddar if that’s what you have)
- 1 can refried beans (16 ounces, warmed)
- For the toppings:
- 1 cup sour cream
- 1 cup pico de gallo or fresh salsa (drained slightly)
- 1 can black beans (15 ounces, drained and rinsed)
- 1 cup corn kernels (canned or frozen, thawed)
- 1/2 cup pickled jalapeños (adds that essential tang)
- 1/2 cup sliced black olives
- 1 large avocado, diced (toss with lime juice to prevent browning)
- 1/4 cup fresh cilantro, chopped
- 2 green onions, sliced
- 1 lime, cut into wedges
- Optional extras:
- 1/2 cup queso fresco, crumbled
- Hot sauce (Cholula or Valentina are my favorites)
- Extra jalapeños for those who like it spicy
For the best texture, I recommend using a good quality tortilla chip that can hold up to the toppings. I personally like On The Border or Juanita’s brands—they’re sturdy enough to scoop without breaking. If you’re watching your sodium, look for low-sodium taco seasoning and unsalted chips. You can also swap the ground beef for ground turkey or plant-based crumbles if that’s your thing.
Equipment Needed
You don’t need much fancy equipment for this board, which is part of why I love it. Here’s what you’ll need:
- A large wooden cutting board or serving platter (at least 18 inches long)
- A large skillet for browning the beef
- A small saucepan for warming the refried beans
- Small bowls or ramekins for the wet toppings
- A spatula or wooden spoon
- A sharp knife and cutting board for prep
- Measuring cups and spoons
If you don’t have a big wooden board, a baking sheet lined with parchment paper works perfectly. I’ve used a pizza pan in a pinch too. For the small bowls, I just grab whatever ramekins or small cereal bowls I have—they don’t need to match. The key is having something to hold the sour cream, pico de gallo, and any other saucy toppings so they don’t make the chips soggy.
Preparation Method
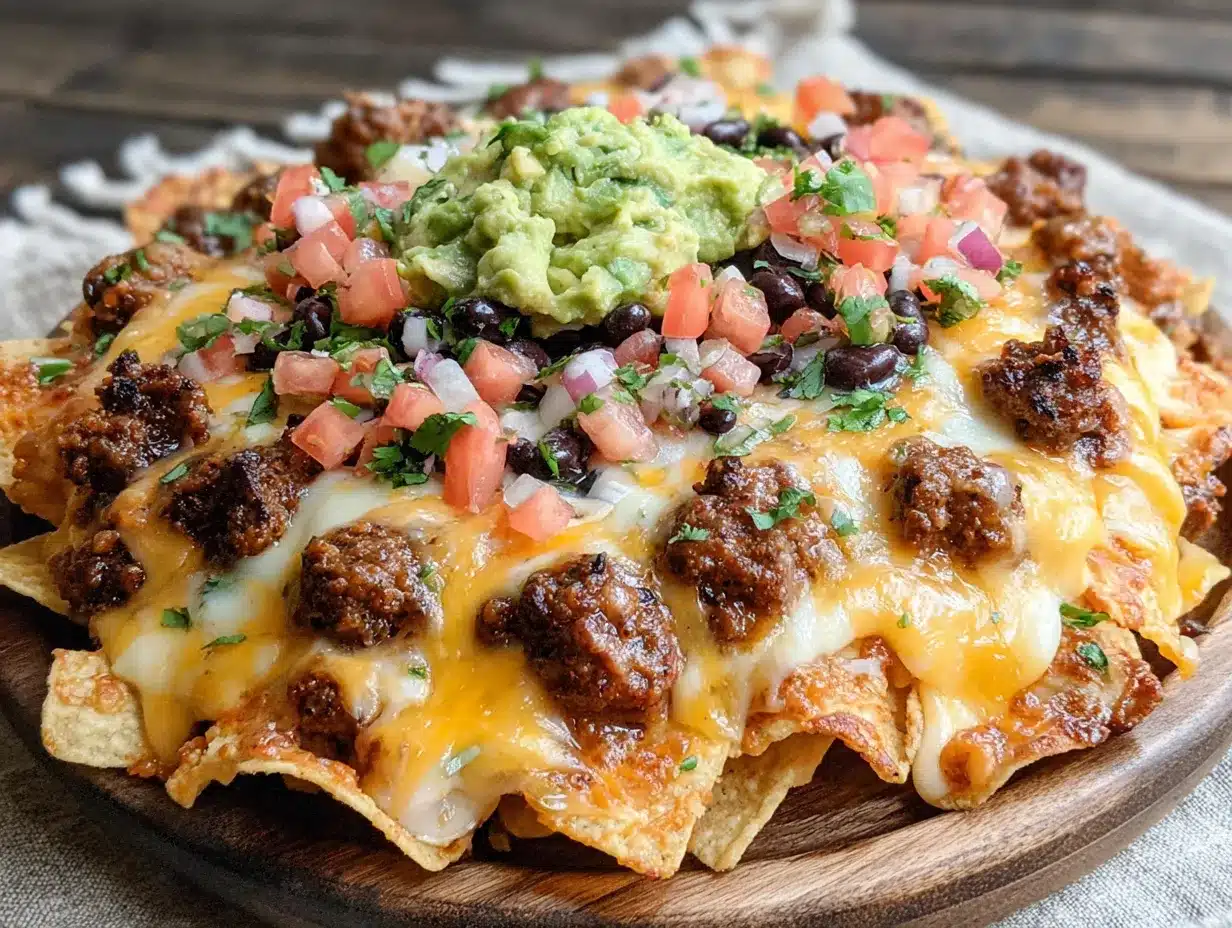
- Cook the beef: Heat your large skillet over medium-high heat. Add the ground beef and break it apart with a spatula. Cook for about 6-8 minutes, stirring occasionally, until it’s browned and no longer pink. Drain off any excess fat—I usually tilt the pan and spoon it out. You want the beef to be crumbly, not greasy.
- Season the beef: Reduce heat to low. Sprinkle the taco seasoning over the cooked beef and add 1/3 cup water. Stir everything together and let it simmer for 2-3 minutes until the sauce thickens and coats the meat. The kitchen should smell amazing at this point. Set the beef aside to cool slightly while you prep everything else.
- Warm the refried beans: In a small saucepan over low heat, warm the refried beans. Stir occasionally to prevent sticking. If they seem too thick, add a tablespoon of water to loosen them up. You want them spreadable but not runny.
- Prep the toppings: While the beef and beans are warming, get your toppings ready. Dice the avocado and toss it with a squeeze of lime juice. Chop the cilantro and slice the green onions. Drain and rinse the black beans. If you’re using fresh corn, you can leave it raw or quickly char it in a dry skillet for extra flavor.
- Assemble the board: Take your large cutting board or platter. Start by arranging the tortilla chips in a single layer across most of the board—leave some space for the bowls. Don’t pile them too high or they’ll be hard to grab. I like to create little valleys and peaks for visual interest.
- Add the warm components: Dollop the warm refried beans in a few spots directly on the chips. Spoon the seasoned beef into a small bowl or directly onto one section of the board. Sprinkle the shredded cheese over the chips while they’re still warm so it starts to melt slightly.
- Arrange the toppings: Place small bowls of sour cream, pico de gallo, and any other wet toppings around the board. Scatter the black beans, corn, jalapeños, olives, diced avocado, cilantro, and green onions in little piles directly on the chips. Tuck lime wedges in between everything.
- Final touches: Give everything a final look and adjust anything that looks bare. You want the board to look abundant and colorful—like there’s something delicious in every direction. Serve immediately while the beef and beans are still warm.
One thing I learned the hard way—don’t put the sour cream or pico de gallo directly on the chips unless you’re serving immediately. They’ll make everything soggy within minutes. Keep them in bowls so people can add them as they go. Also, if you’re making this ahead of time, keep the warm components separate and assemble right before serving.
Cooking Tips & Techniques
I’ve made this board probably twenty times now, and I’ve definitely learned a few things along the way. The biggest mistake people make is overcooking the beef. You want it browned but not dried out. That’s why I drain the fat before adding the seasoning—otherwise the meat gets greasy and tough. Let the seasoning simmer with the water for the full 2-3 minutes so it really absorbs into the meat.
Another tip I wish I’d known earlier—warm your chips slightly before assembling. Just spread them on a baking sheet and pop them in a 300°F oven for 3-4 minutes. They get this extra crunch that holds up better against the toppings. I forgot to do this once and ended up with sad, breakable chips that couldn’t hold anything.
Timing is everything with this board. Cook the beef first, then warm the beans while you’re prepping the cold toppings. That way everything is ready at the same time. I’ve also learned to prep all my toppings before I start cooking—chop the veggies, drain the cans, get everything in little bowls. It makes assembly so much smoother and less stressful.
For consistency, I always taste the beef before I put it on the board. Sometimes taco seasoning packets vary in saltiness, so I add a pinch of cumin or chili powder if it needs more depth. And here’s a weird one—I always put a few extra chips in a bowl on the side. People inevitably grab all the ones on the board and then want more to scoop up the leftover toppings.
Variations & Adaptations
This board is incredibly flexible, which is why I keep coming back to it. Here are some variations I’ve tried and loved:
- Vegetarian version: Skip the ground beef and use seasoned black beans or lentils instead. I’ve also used crumbled tofu with taco seasoning—it’s surprisingly good. Load up on extra veggies like roasted bell peppers and zucchini.
- Spicy version: Add diced habanero to the pico de gallo, use spicy chorizo instead of ground beef, and drizzle everything with chipotle crema. I made this for a friend who loves heat and she practically licked the board clean.
- Breakfast nacho board: Swap the ground beef for scrambled eggs and breakfast sausage. Use cheddar cheese and top with salsa verde instead of red salsa. This is my go-to for Sunday morning football watch parties.
- Low-carb option: Use pork rinds or cheese crisps instead of tortilla chips. Load up on the meat and veggies. It’s not quite the same experience, but it scratches the itch if you’re watching carbs.
- Seafood twist: Top with grilled shrimp or blackened fish instead of beef. Add mango salsa and a cilantro-lime crema. This version feels lighter and more summery—great for outdoor games.
My personal favorite variation is the breakfast version. I stumbled on it by accident when I had leftover taco meat and eggs in the fridge. Now I make it intentionally for lazy Saturday mornings during football season. It’s ridiculous and indulgent and absolutely perfect.
Serving & Storage Suggestions
Serve this board immediately while the beef and beans are still warm and the cheese is slightly melted. I like to put it in the center of the table so everyone can gather around and grab what they want. It’s meant to be shared, so don’t be precious about it—let people dig in.
For drinks, cold beer is the obvious choice—something light like a Mexican lager works perfectly. Margaritas or micheladas are also amazing. If you’re not drinking, a spicy ginger beer or limeade is a great non-alcoholic option. I’ve also served this with a simple pitcher of agua fresca and it was a hit.
Leftovers are tricky because the chips get soft, but here’s what I do. Separate the chips from the toppings and store them in different containers. The beef, beans, and cold toppings will keep in the fridge for 2-3 days. To reheat, warm the beef and beans in a skillet or microwave, then assemble fresh chips and add the cold toppings. It’s almost as good the second time around.
If you’re making this for a party, you can prep everything a day ahead. Cook the beef, warm the beans, chop all the veggies, and store everything separately in the fridge. Then just assemble on the board right before guests arrive. The flavors actually get better overnight as the seasonings meld together.
One thing I’ve noticed—the flavors develop really nicely after a few hours in the fridge. The beef gets even more flavorful, and the beans thicken up perfectly. So if you have leftovers, don’t toss them. Make a nacho bowl the next day with fresh chips and you’ll be happy you saved it.
Nutritional Information & Benefits
Here’s a rough estimate per serving (based on 8 servings):
- Calories: approximately 450-500
- Protein: 22g
- Fat: 28g
- Carbohydrates: 35g
- Fiber: 8g
- Sodium: 800mg (varies based on seasoning and chips)
The black beans and corn add good fiber and plant-based protein, which helps balance out the indulgence factor. Avocados provide healthy monounsaturated fats and potassium. The tomatoes in the pico de gallo offer vitamin C and lycopene. It’s not health food by any stretch, but it’s not as bad as you’d think.
For dietary considerations, this recipe is naturally gluten-free if you use certified gluten-free chips and taco seasoning. It can be made dairy-free by using vegan cheese and sour cream alternatives. The main allergens to watch for are dairy (cheese, sour cream) and corn (chips). If you’re serving a crowd with various restrictions, set up a separate section with compliant toppings.
Personally, I don’t stress about the numbers with this board. It’s a game day treat, not an everyday meal. I focus on using quality ingredients and loading up on the veggies and beans to add some nutritional value. Balance, you know?
Conclusion
This loaded football nacho charcuterie board has honestly become my secret weapon for any gathering. It looks impressive, comes together in minutes, and satisfies that craving for something crunchy, cheesy, and completely indulgent. I love how customizable it is—you can make it as simple or as elaborate as you want, and it always turns out great.
I hope you give this a try for your next game day party. Don’t be afraid to experiment with different toppings or proteins—that’s half the fun. And if you come up with a variation I haven’t tried, I’d love to hear about it. Drop a comment below and let me know how your board turned out. Did you add something unexpected? Did your guests love it as much as mine did?
Thanks for reading, and happy game day snacking! Remember, the best recipes are the ones that bring people together around the table—or in this case, around a giant board of nachos. Enjoy every bite.
Frequently Asked Questions
Can I make this nacho board ahead of time?
Yes, but with some planning. You can cook the beef, warm the beans, and prep all the toppings up to a day in advance. Store everything separately in the fridge. Assemble the board right before serving to keep the chips crunchy and the toppings fresh.
What’s the best way to keep the chips from getting soggy?
Keep wet toppings like sour cream, pico de gallo, and salsa in separate small bowls instead of putting them directly on the chips. Also, warm your chips slightly before assembling—it helps them stay crunchy longer. Serve immediately for best results.
Can I use ground turkey instead of beef?
Absolutely. Ground turkey works great—just make sure to add a little oil to the pan since it’s leaner than beef. Cook it the same way and season with taco seasoning. It’ll be slightly lighter but just as flavorful.
How many people does this board serve?
This recipe serves about 6-8 people as a main appetizer or 10-12 as part of a larger spread. If it’s the only snack at the party, you might want to double the recipe. Trust me, people will go back for seconds.
What can I use instead of refried beans?
You can use whole black beans or pinto beans seasoned with cumin and chili powder. Or try a layer of guacamole or queso dip as the base. I’ve even used leftover chili in a pinch—it works surprisingly well.
Pin This Recipe!
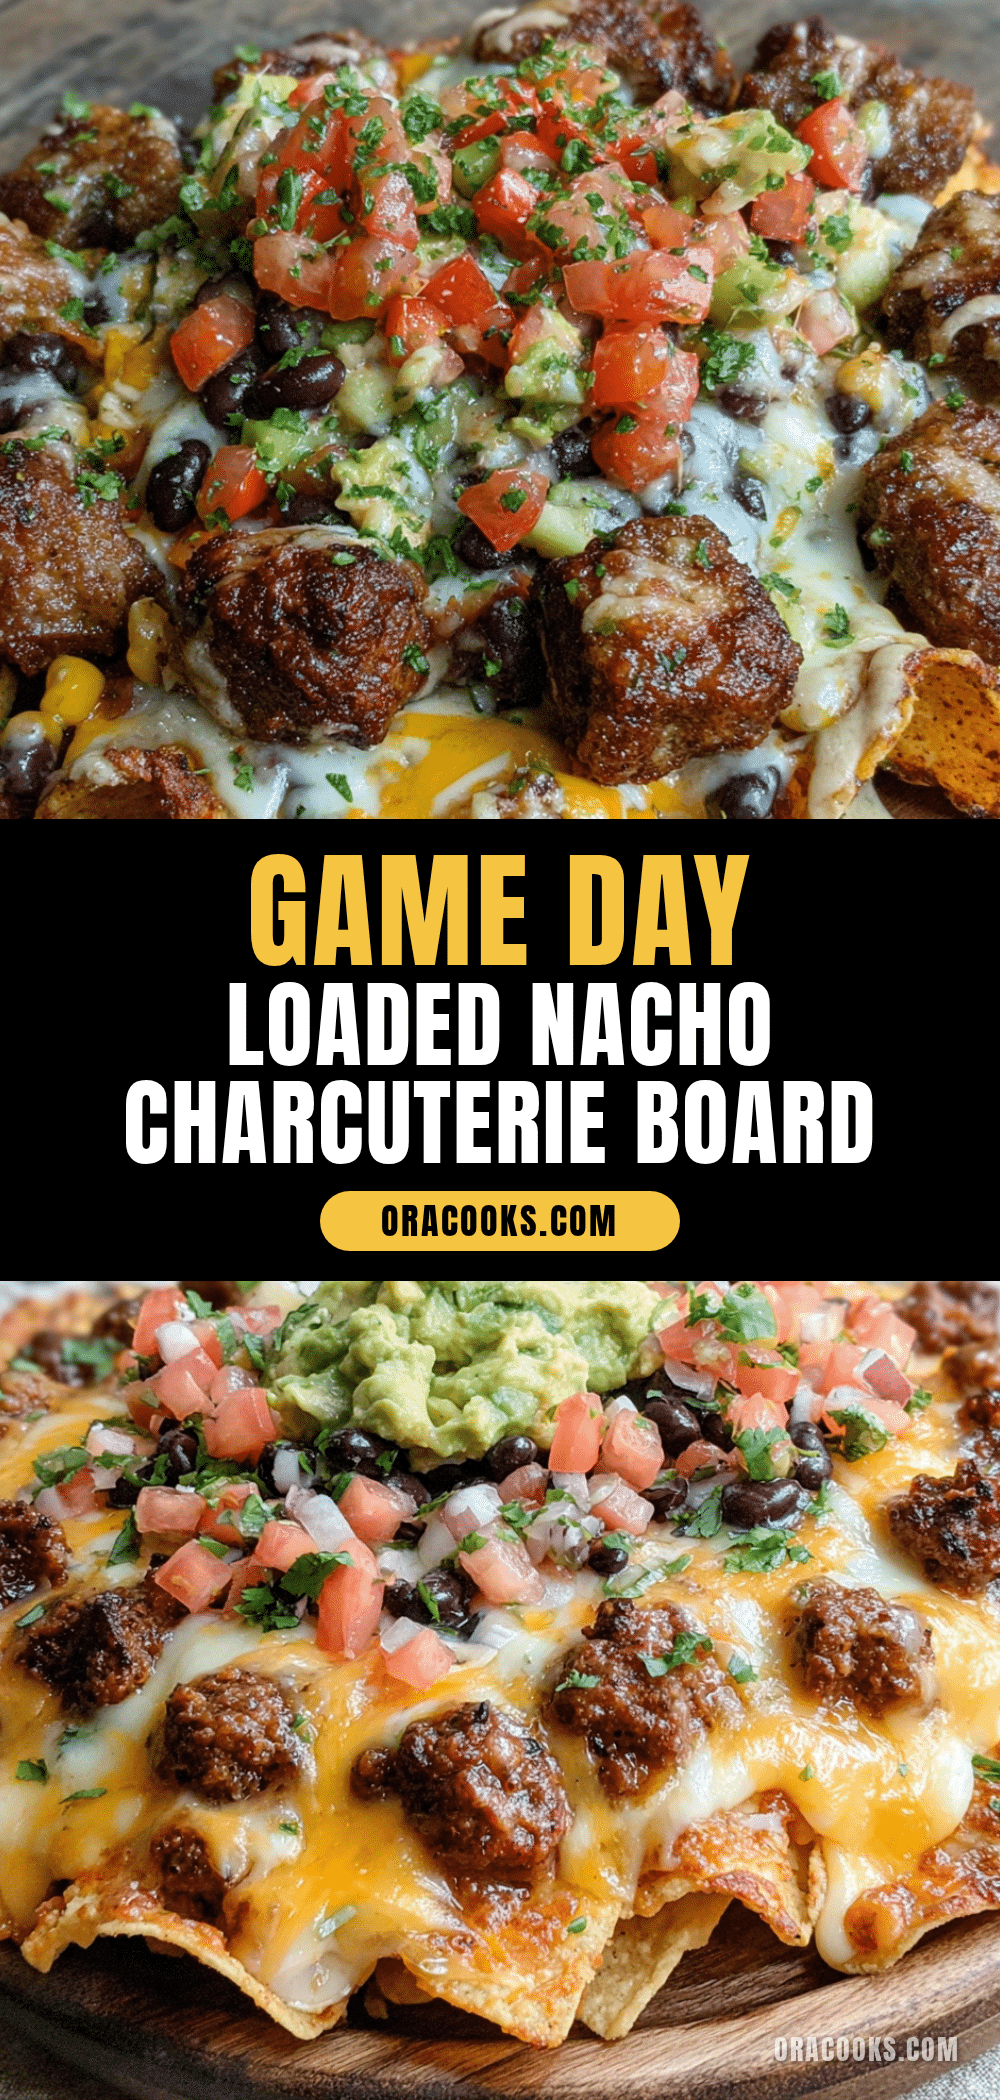
Best Loaded Football Nacho Charcuterie Board (Easy Game Day)
A quick and easy loaded nacho charcuterie board perfect for game day, featuring seasoned ground beef, warm refried beans, and a variety of fresh toppings arranged on a large board for a crowd-pleasing appetizer.
- Prep Time: 15 minutes
- Cook Time: 15 minutes
- Total Time: 30 minutes
- Yield: 8 servings 1x
- Category: Appetizer
- Cuisine: Mexican-American
Ingredients
- 1 pound ground beef (80/20 works best for flavor)
- 1 packet taco seasoning (I prefer McCormick or make your own)
- 1/3 cup water
- 1 large bag restaurant-style tortilla chips (about 16 ounces)
- 2 cups shredded Mexican blend cheese (or cheddar if that’s what you have)
- 1 can refried beans (16 ounces, warmed)
- 1 cup sour cream
- 1 cup pico de gallo or fresh salsa (drained slightly)
- 1 can black beans (15 ounces, drained and rinsed)
- 1 cup corn kernels (canned or frozen, thawed)
- 1/2 cup pickled jalapeños (adds that essential tang)
- 1/2 cup sliced black olives
- 1 large avocado, diced (toss with lime juice to prevent browning)
- 1/4 cup fresh cilantro, chopped
- 2 green onions, sliced
- 1 lime, cut into wedges
- 1/2 cup queso fresco, crumbled (optional)
- Hot sauce (Cholula or Valentina are my favorites) (optional)
- Extra jalapeños for those who like it spicy (optional)
Instructions
- Cook the beef: Heat your large skillet over medium-high heat. Add the ground beef and break it apart with a spatula. Cook for about 6-8 minutes, stirring occasionally, until it’s browned and no longer pink. Drain off any excess fat.
- Season the beef: Reduce heat to low. Sprinkle the taco seasoning over the cooked beef and add 1/3 cup water. Stir everything together and let it simmer for 2-3 minutes until the sauce thickens and coats the meat. Set aside to cool slightly.
- Warm the refried beans: In a small saucepan over low heat, warm the refried beans. Stir occasionally to prevent sticking. If they seem too thick, add a tablespoon of water to loosen them up.
- Prep the toppings: Dice the avocado and toss it with a squeeze of lime juice. Chop the cilantro and slice the green onions. Drain and rinse the black beans. If using fresh corn, you can leave it raw or quickly char it in a dry skillet.
- Assemble the board: Take your large cutting board or platter. Arrange the tortilla chips in a single layer across most of the board, leaving some space for bowls.
- Add the warm components: Dollop the warm refried beans in a few spots directly on the chips. Spoon the seasoned beef into a small bowl or directly onto one section of the board. Sprinkle the shredded cheese over the chips while they’re still warm.
- Arrange the toppings: Place small bowls of sour cream, pico de gallo, and any other wet toppings around the board. Scatter the black beans, corn, jalapeños, olives, diced avocado, cilantro, and green onions in little piles directly on the chips. Tuck lime wedges in between everything.
- Final touches: Give everything a final look and adjust anything that looks bare. Serve immediately while the beef and beans are still warm.
Notes
Keep wet toppings like sour cream and pico de gallo in separate bowls to prevent soggy chips. Warm chips slightly before assembling for extra crunch. Prep all toppings before cooking for smoother assembly. Leftovers can be stored separately for 2-3 days.
Nutrition
- Serving Size: 1 serving (based on
- Calories: 475
- Sugar: 5
- Sodium: 800
- Fat: 28
- Saturated Fat: 10
- Carbohydrates: 35
- Fiber: 8
- Protein: 22
Keywords: nachos, charcuterie board, game day, football, appetizer, party food, loaded nachos, easy recipe


