Love this? Save it for later!
Share the inspiration with your friends
It was 11:47 PM on a random Wednesday in February, and I was supposed to be meal-prepping for the week. Instead, I was standing in front of my open fridge, staring at a bag of chicken wings I’d bought on a whim, with a very specific craving for something sticky, sweet, and garlicky. The problem? I didn’t have the bottle of store-bought sauce I usually reach for, but I had a jar of honey, a head of garlic that was starting to sprout, and a bottle of soy sauce that was almost empty. And then it hit me—why not just make the sauce from scratch? I mean, how hard could it be? Twenty minutes later, I had a pan of wings coated in a glossy, finger-licking sauce that was so much better than anything I’d ever bought. My kitchen smelled like a Chinese takeout place, and I was eating wings over the sink at midnight, completely vindicated in my weird late-night decision. Honestly, maybe you’ve been there—that moment when a random pantry experiment turns into something you can’t stop thinking about. These sticky honey garlic baked chicken wings are the result of that very specific, very sleepy Tuesday night, and I’ve been making them ever since.
Why You’ll Love This Recipe
Let me tell you, these wings are not just another game day snack. They are the kind of recipe that makes you look like a hero without actually working that hard. I’ve tested this method at least a dozen times—baking, broiling, even trying to air-fry them—and this version is the one that delivers every single time.
- Quick & Easy: These come together in under an hour, with just 10 minutes of hands-on prep. Perfect for those last-minute game day gatherings or when you just need a snack that feels special.
- Simple Ingredients: You likely have everything in your pantry right now. Honey, soy sauce, garlic, and a few spices—no fancy grocery trips required.
- Perfect for Game Day: Whether it’s the Super Bowl, a college rivalry game, or just a Tuesday night game, these wings are the ultimate crowd-pleaser. They’re messy in the best way possible.
- Crowd-Pleaser: I’ve served these at parties where people who “don’t like wings” ended up going back for thirds. Kids and adults alike go crazy for that sticky glaze.
- Unbelievably Delicious: The combination of crispy baked skin and that glossy, sweet-savory honey garlic glaze is next-level comfort food. It’s the kind of wing that makes you close your eyes after the first bite.
What makes these different from every other honey garlic wing recipe out there? It’s the technique. Instead of just tossing the wings in sauce and baking them (which makes them soggy), we bake them first until they’re crispy, then coat them in a reduced, concentrated glaze. The result is a wing that stays crunchy even after it’s sauced. This isn’t just another version—it’s my best version, perfected through trial and error (and a few sad, soggy wings along the way).
What Ingredients You Will Need
This recipe uses simple, wholesome ingredients to deliver bold flavor and satisfying texture without the fuss. Most of these are pantry staples, so you can whip these up anytime the craving strikes.
- Chicken Wings: 2 lbs (about 900g) of chicken wings, separated into drumettes and flats. I personally prefer buying whole wings and cutting them myself—it’s cheaper and you can save the tips for stock. Look for wings that are fresh, not frozen, for the best texture.
- Baking Powder: 1 tablespoon. This is the secret to crispy baked wings. It’s not the same as baking soda—don’t mix them up! Baking powder helps dry out the skin, creating that crackly, golden crust.
- Salt: 1 teaspoon. Use kosher salt for better flavor distribution.
- Black Pepper: ½ teaspoon, freshly ground.
- Garlic Powder: ½ teaspoon. Adds a subtle savory note to the wings themselves.
- Honey: ⅓ cup (about 110g). Use a good quality honey for the best flavor. I like using a local wildflower honey—it has a more complex taste than the mass-produced stuff.
- Soy Sauce: ¼ cup (60ml). Use low-sodium soy sauce so you can control the saltiness. Tamari works great for a gluten-free option.
- Garlic: 4 cloves, minced. Fresh garlic is non-negotiable here. The jarred stuff just doesn’t have the same punch. I recommend using a microplane to grate it—it melts right into the sauce.
- Rice Vinegar: 2 tablespoons. Adds a touch of acidity to balance the sweetness. Apple cider vinegar works in a pinch.
- Sesame Oil: 1 teaspoon. Just a little for that nutty, toasty flavor. Don’t skip it—it makes a difference.
- Cornstarch: 1 tablespoon, mixed with 2 tablespoons of water (for the slurry). This thickens the glaze to that perfect sticky consistency.
- Sesame Seeds: 1 tablespoon, for garnish.
- Green Onions: 2-3, thinly sliced, for garnish.
One thing I learned the hard way—don’t use a dark soy sauce or a thick, syrupy honey for this. The dark soy will make the wings look almost black, and thick honey can burn in the pan. Stick with regular soy and runny honey for the best results.
Equipment Needed
You don’t need a lot of fancy equipment for these wings, which is part of what makes them so great. Here’s what you’ll need:
- Baking Sheet: A rimmed baking sheet is essential. The rim catches any drips and prevents a mess in your oven. I use a half-sheet pan (18×13 inches) for the best air circulation.
- Wire Rack: This is a game-changer. Placing a wire rack on top of your baking sheet allows air to circulate all around the wings, making them crispy on all sides. If you don’t have one, you can flip the wings halfway through, but the rack is worth the investment.
- Mixing Bowls: You’ll need a large bowl for tossing the wings with the dry ingredients, and a small bowl for mixing the sauce.
- Small Saucepan: For making the glaze. A non-stick pan works best to prevent the honey from sticking and burning.
- Tongs: For flipping and coating the wings. Silicone-tipped tongs are great so you don’t scratch your pans.
- Pastry Brush: Optional, but helpful for brushing the glaze onto the wings evenly.
If you don’t have a wire rack, don’t stress. I’ve made these without one plenty of times—just flip the wings halfway through baking and they’ll still come out pretty crispy. Also, if you’re using a non-stick baking sheet, you might not need the rack at all. It’s all about what you have on hand.
Preparation Method
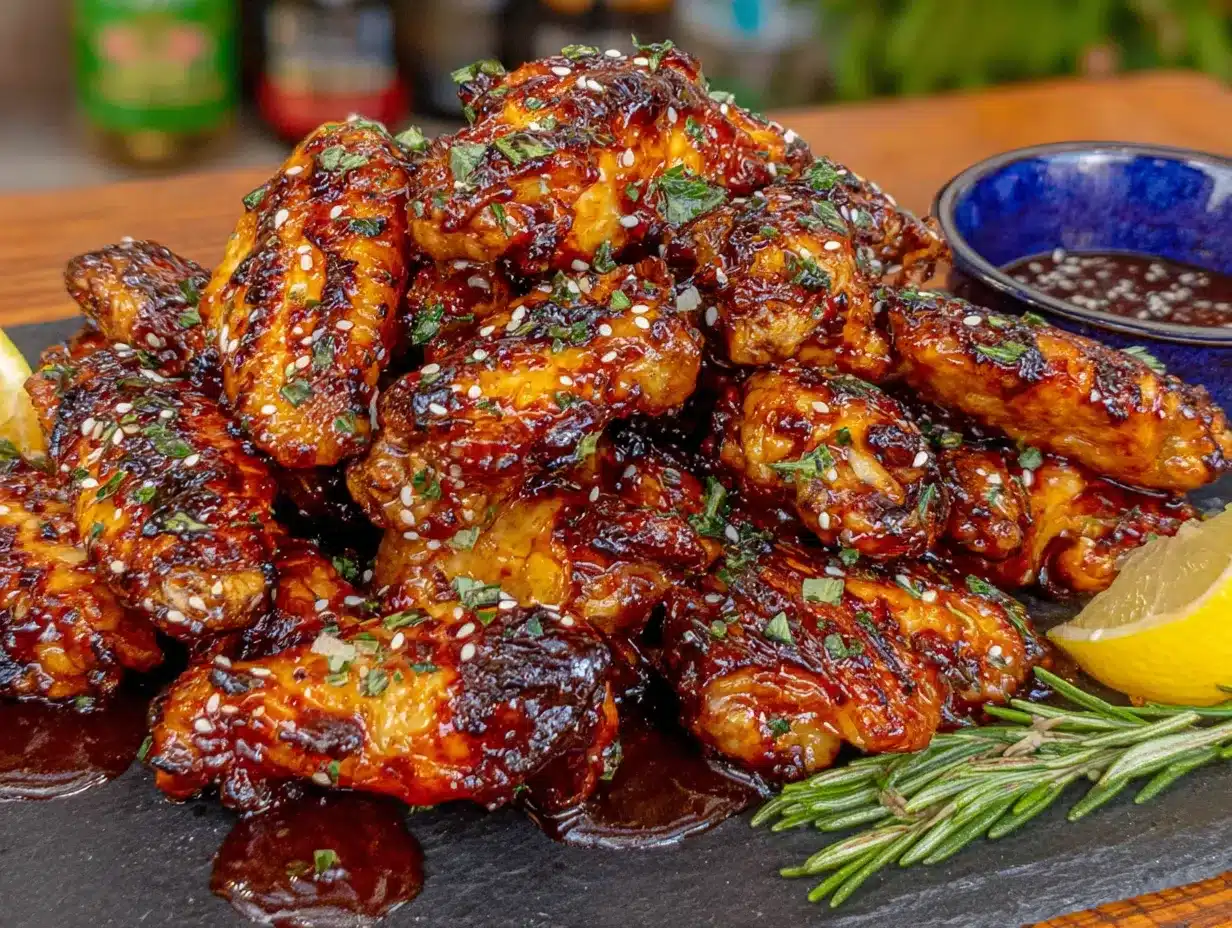
Alright, let’s get cooking. This method is straightforward, but there are a few key steps that make all the difference. Follow these closely, and you’ll have the best wings of your life.
- Prep the Wings: Start by patting the chicken wings completely dry with paper towels. This is crucial—moisture is the enemy of crispy skin. If you have time, let them sit uncovered in the fridge for an hour to dry out even more. In a large bowl, toss the wings with the baking powder, salt, black pepper, and garlic powder. Make sure every wing is evenly coated. The mixture will look a bit powdery, but that’s exactly what you want.
- Set Up for Baking: Preheat your oven to 425°F (220°C). Place a wire rack on top of a rimmed baking sheet and spray it lightly with non-stick cooking spray. Arrange the wings in a single layer on the rack, making sure they’re not touching. If they’re crowded, they’ll steam instead of crisp. Leave a little space between each wing.
- Bake the Wings: Bake for 45-50 minutes, flipping the wings halfway through. At the 25-minute mark, use your tongs to flip each wing over. They should be golden brown and the skin should look dry and crackly. If you want them extra crispy, you can turn on the broiler for the last 2-3 minutes—but watch them closely! They can go from perfect to burnt in seconds.
- Make the Glaze: While the wings are baking, start the glaze. In a small saucepan over medium heat, combine the honey, soy sauce, minced garlic, rice vinegar, and sesame oil. Stir everything together and bring it to a gentle simmer. Let it cook for about 3-4 minutes, stirring occasionally, until the garlic is fragrant and the mixture has slightly thickened.
- Thicken the Glaze: In a small bowl, whisk together the cornstarch and water to make a slurry. Pour the slurry into the simmering sauce while stirring constantly. The sauce will thicken almost immediately—it should coat the back of a spoon. Let it cook for another 30 seconds, then remove it from the heat. Taste it and adjust—if you want it sweeter, add a bit more honey. If you want it saltier, add a splash more soy sauce.
- Coat the Wings: Once the wings are done baking, transfer them to a large bowl. Pour about half of the glaze over the wings and toss gently until every wing is coated. Don’t pour all the glaze at once—you might not need it all, and you don’t want them swimming in sauce. Save the remaining glaze for serving or dipping.
- Finish and Serve: Transfer the glazed wings to a serving platter. Sprinkle generously with sesame seeds and sliced green onions. Serve immediately while they’re still hot and sticky. The glaze will start to set as they cool, so eat them right away for the best texture.
One thing I always do—after tossing the wings in the glaze, I put them back on the baking sheet and pop them under the broiler for 1-2 minutes. This caramelizes the glaze and makes it even stickier. Just be careful not to burn them. Trust me, I’ve learned that lesson the hard way.
Cooking Tips & Techniques
Over the years, I’ve made a lot of mistakes with wings. Soggy skin, burnt sauce, bland flavor—you name it, I’ve done it. Here are the tips I’ve picked up along the way to make sure yours turn out perfect every time.
Don’t Skip the Drying Step: This is the most important tip I can give you. Pat those wings dry. If you’re really serious about crispy skin, let them sit uncovered in the fridge for a few hours or even overnight. The air in the fridge helps dry out the skin even more, which means a better crust.
The Baking Powder Trick: Make sure you’re using baking powder, not baking soda. They look similar but they’re not the same. Baking powder raises the pH of the skin, which helps it brown faster and become crispier. If you use baking soda, your wings will taste metallic and weird. Don’t ask me how I know.
Watch the Glaze: Honey-based sauces can burn easily. When you’re making the glaze, keep the heat at medium or medium-low. High heat will cause the honey to scorch, and then you’ll have a bitter, burnt mess. Also, when you’re tossing the wings in the glaze, do it while the wings are still hot. The heat helps the glaze adhere and soak in a bit.
Multitasking Strategy: Start the wings in the oven first. While they’re baking, you have plenty of time to make the glaze and prep your garnishes. The whole process takes about an hour, but your active time is only about 10 minutes. This is the perfect recipe for game day because you can set it and forget it while you watch the pre-game show.
Consistency is Key: If you want perfectly consistent wings, try to cut them all to a similar size. I usually buy a 2-pound bag and they’re pretty uniform, but if you’re cutting whole wings, make sure the drumettes and flats are roughly the same size. This ensures they cook evenly.
Variations & Adaptations
One of the best things about this recipe is how adaptable it is. Here are a few ways I’ve changed it up when I’m in the mood for something different.
Spicy Honey Garlic: If you like heat, add 1-2 teaspoons of sriracha or gochujang to the glaze. I did this once when I had a cold and wanted something with a kick, and it was amazing. The spice cuts through the sweetness perfectly. You can also sprinkle red pepper flakes on top before serving.
Air Fryer Version: This works great in an air fryer. Cook the wings at 400°F (200°C) for 20-25 minutes, shaking the basket halfway through. Then toss them in the glaze and air fry for another 2-3 minutes. They come out even crispier than the oven version. Just don’t overcrowd the basket—work in batches if needed.
Gluten-Free Adaptation: Use tamari or coconut aminos instead of soy sauce, and make sure your baking powder is gluten-free (some brands contain wheat starch). Everything else is naturally gluten-free. I made this for a friend with celiac disease and she couldn’t tell the difference.
Teriyaki Twist: Add 1 tablespoon of mirin and 1 teaspoon of grated ginger to the glaze for a teriyaki-inspired version. It’s a little more complex and pairs beautifully with the honey. This is my go-to when I want something that feels a bit more “restaurant quality.”
Lemon Garlic Variation: Replace the rice vinegar with fresh lemon juice and add the zest of one lemon to the glaze. The brightness of the lemon balances the richness of the honey and garlic perfectly. It’s a lighter, fresher take that’s great for summer game days.
Serving & Storage Suggestions
These wings are best served hot, right after they’ve been glazed. The sticky, glossy coating is at its peak when it’s fresh from the oven. I like to pile them on a large platter with extra sesame seeds and green onions on top. Serve them with celery sticks and carrot sticks on the side for a little crunch and freshness.
For dipping, I love a simple ranch dressing or blue cheese dip. The cool, creamy dip contrasts perfectly with the sweet and sticky wings. You can also serve them with extra glaze on the side for people who want more sauce (and trust me, they will).
If you have leftovers (which is rare in my house), store them in an airtight container in the refrigerator for up to 3 days. The wings will soften as they sit, but they’re still delicious. To reheat, I recommend using the oven or air fryer. Place them on a baking sheet at 350°F (175°C) for 5-7 minutes, or until heated through. The microwave will make them soggy, so avoid it if you can.
You can also freeze these wings. Place them in a single layer on a baking sheet and freeze until solid, then transfer to a freezer bag. They’ll keep for up to 2 months. To reheat, bake from frozen at 375°F (190°C) for 15-20 minutes, then toss with a little extra glaze.
One thing I’ve noticed—the flavors actually deepen and meld together overnight. So if you’re making these for a party, you can bake the wings a day ahead, store them in the fridge, and then reheat and glaze them right before serving. It’s a great time-saver.
Nutritional Information & Benefits
Let’s be real—these wings are a treat, not a health food. But they’re made with real, whole ingredients, which is always a win. Here’s a rough estimate per serving (about 4-5 wings):
- Calories: 380-420
- Protein: 28g
- Fat: 22g
- Carbohydrates: 18g
- Sugar: 15g
- Sodium: 680mg
The chicken wings themselves are a good source of protein and contain essential nutrients like iron, zinc, and B vitamins. The honey provides antioxidants and natural energy, while the garlic has anti-inflammatory properties. Of course, the glaze adds sugar and sodium, so these are best enjoyed in moderation—but hey, it’s game day, right?
If you’re watching your sugar intake, you can reduce the honey to ¼ cup and add a splash more vinegar for tang. Or try using a sugar-free honey substitute, though the texture will be slightly different. These wings are naturally gluten-free if you use tamari, and they’re also dairy-free and nut-free, making them a great option for people with common allergies.
Conclusion
These sticky honey garlic baked chicken wings are everything you want in a game day snack—they’re crispy, sticky, sweet, savory, and absolutely irresistible. They come together with simple pantry ingredients and a technique that’s foolproof once you know the tricks. Whether you’re hosting a Super Bowl party, watching the big game with friends, or just craving something delicious on a random Tuesday night, these wings deliver every single time.
I love this recipe because it’s proof that you don’t need fancy ingredients or complicated methods to make something truly special. It’s the kind of food that brings people together, makes them smile, and leaves them licking their fingers. Honestly, that’s the best compliment a cook can get.
So go ahead—make these wings for your next game day gathering. Customize them with your favorite variations, pile them high on a platter, and watch them disappear. And when your friends ask for the recipe (because they will), send them my way. I’d love to hear how yours turn out—drop a comment below and let me know if you added any twists of your own. Happy cooking, and enjoy the game!
Frequently Asked Questions
Can I use frozen chicken wings for this recipe?
Yes, but you’ll need to thaw them completely first. Pat them very dry before seasoning—frozen wings release a lot of moisture as they thaw. I recommend thawing them in the refrigerator overnight for the best results.
Why are my wings not crispy?
The most common reasons are (1) not drying the wings thoroughly before seasoning, (2) overcrowding the baking sheet, and (3) not using enough baking powder. Make sure your wings are very dry, leave space between them on the rack, and don’t skip the baking powder step.
Can I make the glaze ahead of time?
Absolutely. You can make the glaze up to a week in advance and store it in an airtight container in the refrigerator. Just reheat it gently on the stove or in the microwave before tossing with the wings. You might need to add a splash of water to thin it out if it’s too thick.
How do I make these wings less sweet?
Reduce the honey to ¼ cup and increase the soy sauce to ⅓ cup. You can also add a tablespoon of sriracha or a splash of apple cider vinegar to balance the sweetness. The key is to taste as you go and adjust to your preference.
Can I grill these wings instead of baking?
Yes, grilling works great. Grill the wings over medium heat for about 20-25 minutes, turning occasionally, until they’re cooked through and charred in spots. Then toss them in the glaze and grill for another 2-3 minutes to caramelize. The smoky flavor from the grill adds a whole new dimension.
Pin This Recipe!
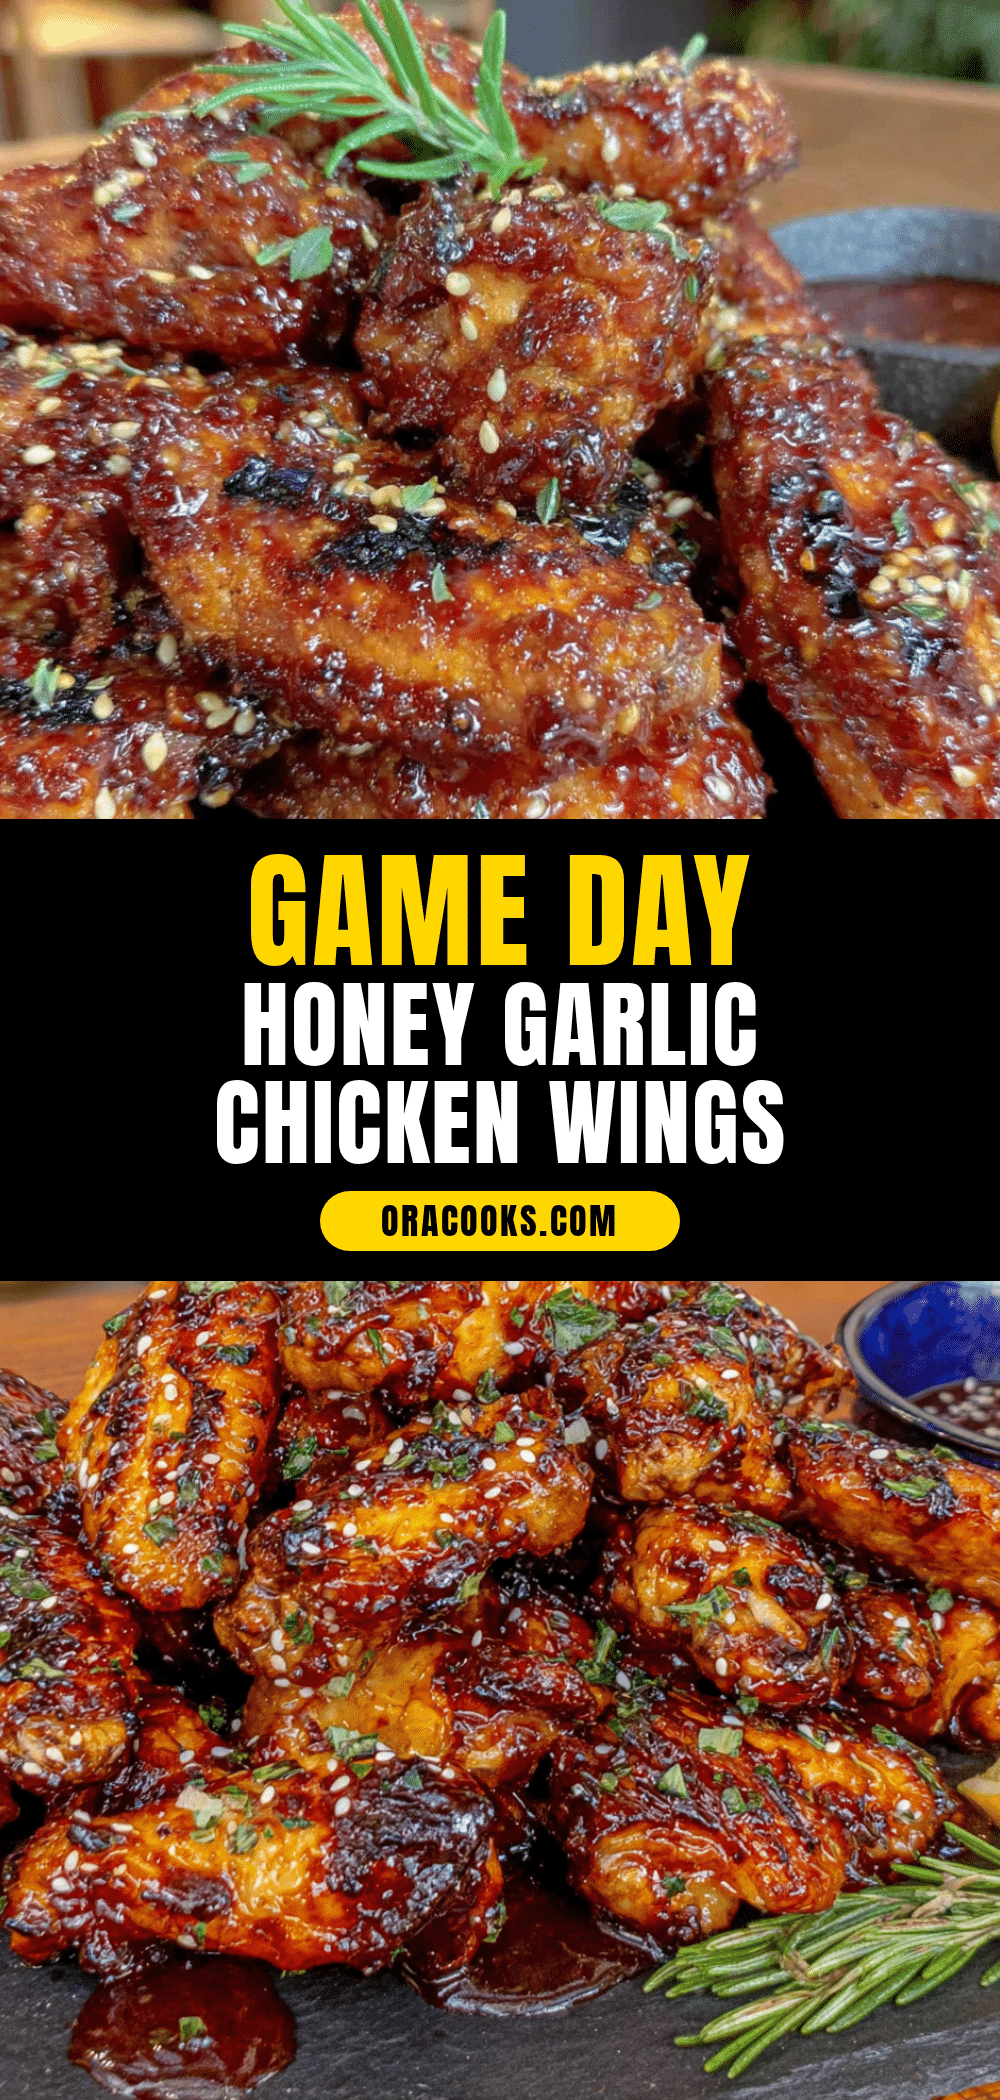
Sticky Honey Garlic Baked Chicken Wings: The Best Game Day Recipe
These sticky honey garlic baked chicken wings are crispy, sweet, savory, and absolutely irresistible. They come together with simple pantry ingredients and a foolproof technique for the perfect game day snack.
- Prep Time: 10 minutes
- Cook Time: 50 minutes
- Total Time: 1 hour
- Yield: 4 servings 1x
- Category: Appetizer
- Cuisine: American
Ingredients
- 2 lbs (about 900g) chicken wings, separated into drumettes and flats
- 1 tablespoon baking powder
- 1 teaspoon kosher salt
- ½ teaspoon freshly ground black pepper
- ½ teaspoon garlic powder
- ⅓ cup (about 110g) honey
- ¼ cup (60ml) low-sodium soy sauce
- 4 cloves garlic, minced
- 2 tablespoons rice vinegar
- 1 teaspoon sesame oil
- 1 tablespoon cornstarch
- 2 tablespoons water (for slurry)
- 1 tablespoon sesame seeds (for garnish)
- 2–3 green onions, thinly sliced (for garnish)
Instructions
- Prep the Wings: Pat the chicken wings completely dry with paper towels. In a large bowl, toss the wings with baking powder, salt, black pepper, and garlic powder until evenly coated.
- Set Up for Baking: Preheat oven to 425°F (220°C). Place a wire rack on a rimmed baking sheet and spray lightly with non-stick cooking spray. Arrange wings in a single layer on the rack, not touching.
- Bake the Wings: Bake for 45-50 minutes, flipping halfway through at the 25-minute mark, until golden brown and crispy. For extra crispiness, broil for the last 2-3 minutes, watching closely.
- Make the Glaze: While wings bake, combine honey, soy sauce, minced garlic, rice vinegar, and sesame oil in a small saucepan over medium heat. Bring to a gentle simmer and cook for 3-4 minutes, stirring occasionally.
- Thicken the Glaze: In a small bowl, whisk cornstarch and water to make a slurry. Pour into the simmering sauce while stirring constantly. Cook for 30 seconds until thickened, then remove from heat. Taste and adjust sweetness or saltiness as desired.
- Coat the Wings: Transfer baked wings to a large bowl. Pour about half the glaze over the wings and toss gently to coat. Reserve remaining glaze for serving or dipping.
- Finish and Serve: Transfer glazed wings to a serving platter. Sprinkle with sesame seeds and sliced green onions. Serve immediately while hot and sticky.
Notes
Pat wings very dry for crispy skin. Use baking powder, not baking soda. Watch the glaze closely to prevent burning. For extra caramelization, broil wings for 1-2 minutes after glazing. Leftovers can be stored in an airtight container in the refrigerator for up to 3 days; reheat in oven or air fryer.
Nutrition
- Serving Size: 4-5 wings
- Calories: 400
- Sugar: 15
- Sodium: 680
- Fat: 22
- Saturated Fat: 6
- Carbohydrates: 18
- Protein: 28
Keywords: sticky honey garlic chicken wings, baked chicken wings, game day recipe, crispy wings, honey garlic glaze, easy appetizer


