Love this? Save it for later!
Share the inspiration with your friends
The woman at the craft store checkout watched me load my basket with candy eyes, white frosting tubes, and way too much cream cheese. She didn’t say anything at first, just raised an eyebrow while scanning my haul. Then she leaned forward and whispered, “Mummy cheesecake bites, right? My granddaughter made those last year. Best thing at the whole party.” I just grinned and nodded, because honestly, she was spot on. That chance encounter happened last October, and it reminded me why I love this recipe so much—it brings people together in the most unexpected ways.
I’m not supposed to play favorites with recipes, but these Easy No-Bake Mummy Cheesecake Bites for Halloween have a special place in my heart. The first time I made them, I accidentally bought low-fat cream cheese (rookie move, I know), and the filling came out a little runny. I had to pop them in the freezer for an extra hour, and let me tell you, that happy accident taught me something valuable about patience in the kitchen. Now I always make sure to grab the full-fat block cream cheese, and the texture turns out perfectly every single time.
These little mummies are the kind of treat that makes people stop and smile. You know that feeling when you bring something to a party and everyone crowds around asking for the recipe? That’s exactly what happens with these. They’re adorable, they’re ridiculously easy to make, and they taste like a cloud of creamy vanilla goodness wrapped in a crispy cookie shell. Maybe you’ve been there—staring at complicated Halloween dessert tutorials thinking there’s no way you have time for that. Trust me, this is the recipe that changes everything. It stayed with me because it proves you don’t need fancy skills or hours in the kitchen to create something truly memorable.
Why You’ll Love This Recipe
Let me tell you why these Easy No-Bake Mummy Cheesecake Bites for Halloween have become my go-to for every spooky season gathering. After testing this recipe about six times (my neighbors were very happy taste testers), I can confidently say it delivers on every level.
- Quick & Easy: Comes together in under 20 minutes of active prep time. The hardest part is waiting for them to chill, and honestly, that’s the perfect excuse to watch a Halloween movie while you wait.
- Simple Ingredients: No fancy grocery trips needed. You probably already have cream cheese, vanilla, and powdered sugar in your kitchen right now. The only specialty item is candy eyes, and those are available at any grocery store during October.
- Perfect for Halloween Parties: Great for classroom treats, office potlucks, or cozy movie nights. They travel well and don’t require reheating, which makes them a lifesaver for busy hosts.
- Crowd-Pleaser: Always gets rave reviews from kids and adults alike. I’ve seen grown adults actually squeal when they see these little guys on the dessert table.
- Unbelievably Delicious: The texture combo is next-level comfort food. Creamy, tangy cheesecake filling meets crunchy cookie crust, all wrapped in fluffy white frosting. It’s like a cheesecake and a whoopie pie had a Halloween baby.
What makes this recipe different from the rest is the technique of freezing the cheesecake balls before decorating. Most recipes skip this step and end up with messy, smeared frosting. By letting them firm up first, you get clean, professional-looking mummies every time. Plus, the ratio of filling to cookie is perfectly balanced—not too sweet, not too tangy, just right.
This recipe isn’t just good—it is the kind that makes you close your eyes after the first bite. It’s comfort food reimagined for Halloween: playful, festive, but with the same soul-soothing satisfaction as a classic cheesecake. Perfect for impressing guests without stress, or turning a simple weeknight into something memorable.
What Ingredients You Will Need
This recipe uses simple, wholesome ingredients to deliver that creamy cheesecake flavor and fun mummy look without the fuss. Most of these are pantry staples, and you can find everything at your regular grocery store.
For the Cheesecake Filling:
- 16 ounces full-fat block cream cheese, softened to room temperature (I recommend Philadelphia—it gives the creamiest texture)
- 1/2 cup powdered sugar, sifted (this prevents lumps in your filling)
- 1 teaspoon vanilla extract (pure vanilla makes a difference, but imitation works fine too)
- Pinch of salt (just a tiny bit to balance the sweetness)
For the Cookie Base:
- About 30-36 vanilla wafer cookies (Nilla Wafers work perfectly, but any brand is fine)
- You can also use shortbread cookies or graham cracker squares if you prefer a different texture
For the Mummy Wraps:
- 1 can (16 ounces) white frosting (store-bought is totally fine here—I like Pillsbury Creamy Supreme)
- Alternatively, you can make your own buttercream: 1/2 cup softened butter, 2 cups powdered sugar, 1 teaspoon vanilla, and 2 tablespoons milk
For the Decorations:
- 1-2 packages candy eyes (you can find these in the baking aisle at Target, Walmart, or any craft store)
- Optional: black decorating gel for drawing little mouths
- Optional: orange sprinkles or edible glitter for a festive touch
Ingredient Selection Tips: Look for cream cheese that comes in block form, not the spreadable tub. The block version has less water content, which means your filling will be thicker and easier to shape. If you only have reduced-fat cream cheese, that works too—just add an extra tablespoon of powdered sugar to help with texture.
Substitution Guidance: For a dairy-free version, use dairy-free cream cheese like Kite Hill or Violife, and pair it with vegan buttercream frosting. For a gluten-free option, use gluten-free vanilla wafers or shortbread cookies—most candy eyes are gluten-free, but always check the label. If you can’t find candy eyes, you can pipe little eyes using melted chocolate or black frosting.
Equipment Needed
You don’t need a fancy kitchen to pull these off. Here’s what you’ll actually use:
- Large mixing bowl and hand mixer (or a stand mixer if you have one)
- Spatula for scraping down the sides
- Small cookie scoop or tablespoon for portioning the filling
- Baking sheet lined with parchment paper or wax paper
- Piping bag or a zip-top bag with the corner snipped off
- Small offset spatula or butter knife for smoothing
- Measuring cups and spoons
If you don’t have a hand mixer, you can absolutely mix the filling by hand with a wooden spoon—just make sure your cream cheese is super soft first. I’ve done it both ways, and honestly, the arm workout is worth it. For the piping bag, a sturdy zip-top bag works just as well as a fancy piping bag, and it’s easier to clean up. I learned that tip after spending way too long washing piping bags last Halloween.
As for budget-friendly options, skip the expensive piping tips. A simple snipped corner creates the perfect mummy wrap texture. And if you don’t have a cookie scoop, two spoons work perfectly for portioning the filling into uniform balls.
Preparation Method
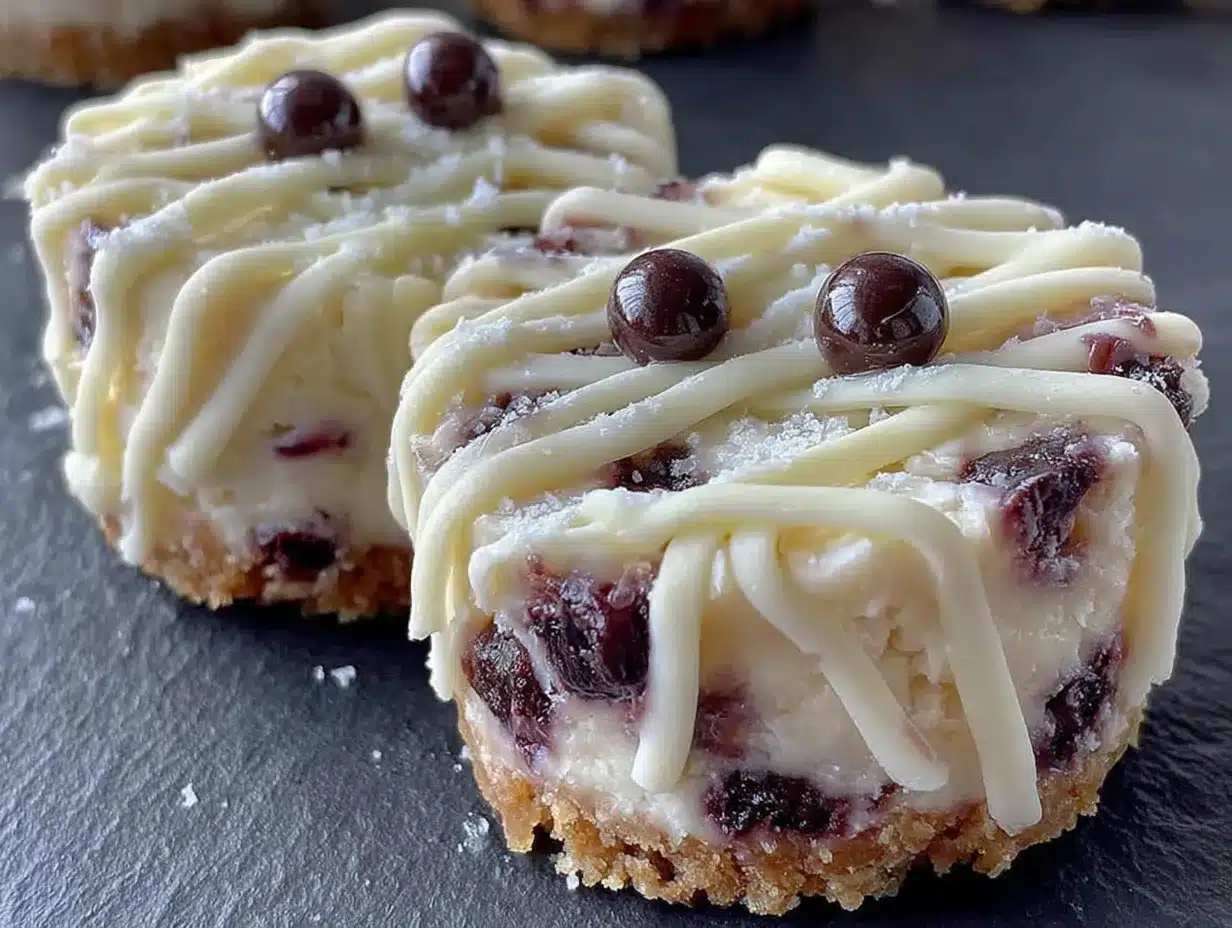
Let me walk you through this step by step. I’ve made these Easy No-Bake Mummy Cheesecake Bites for Halloween more times than I can count, so I’ve figured out all the little tricks along the way.
Step 1: Soften the Cream Cheese (5 minutes)
Take your cream cheese out of the refrigerator about 30 minutes before you start. If you forgot (I do this all the time), unwrap the blocks and microwave them in 10-second bursts until they’re soft but not melted. You want them to give easily when you press your finger in.
Step 2: Make the Cheesecake Filling (5 minutes)
In a large mixing bowl, beat the softened cream cheese with an electric mixer on medium speed until it’s smooth and fluffy—about 2 minutes. Add the sifted powdered sugar, vanilla extract, and pinch of salt. Beat again until everything is combined and creamy. Scrape down the sides of the bowl with your spatula to make sure there are no lumps. The mixture should be thick and hold its shape when you stop mixing.
Step 3: Portion the Filling (10 minutes)
Using your cookie scoop or a tablespoon, scoop out rounded portions of the cheesecake mixture. Each portion should be about 1 heaping tablespoon—roughly the size of a walnut. Roll each portion into a smooth ball between your palms. You should get about 24-30 balls, depending on how generous you are with your scoops. Place each ball on the parchment-lined baking sheet.
Step 4: Assemble the Bites (5 minutes)
Take a vanilla wafer cookie and place it flat side up. Gently press one cheesecake ball onto the center of the cookie. Don’t smash it—just press lightly so it sticks. The cheesecake ball should sit on top like a little dome. Repeat with all the cookies and cheesecake balls.
Step 5: Freeze the Bites (30-60 minutes)
This is the step that makes everything work. Place the baking sheet with your assembled bites in the freezer for at least 30 minutes, or up to 1 hour. You want them to be firm to the touch—almost like a frozen cheesecake pop. If you skip this step, the frosting will smear and your mummies will look messy. Trust me, I learned this the hard way.
Step 6: Prepare the Frosting (5 minutes)
While the bites are freezing, transfer your white frosting to a piping bag or a zip-top bag. If using a zip-top bag, snip off a tiny corner—about 1/8 inch wide. You want a small opening so you can control the frosting lines. If the frosting seems too thick, microwave it for 5-10 seconds to loosen it up.
Step 7: Decorate the Mummies (15 minutes)
Take the frozen cheesecake bites out of the freezer. Working with one bite at a time, pipe the frosting back and forth across the cheesecake ball in uneven lines to create the mummy wrap effect. Leave a small gap for the eyes. Don’t worry about making it perfect—mummies are supposed to look a little messy. Immediately press two candy eyes into the frosting gap before the frosting sets. Repeat with all the bites.
Step 8: Set and Serve (15 minutes)
Place the decorated bites back in the refrigerator for at least 15 minutes to let the frosting set. They’re best served cold, right out of the fridge. The contrast between the creamy filling, crunchy cookie, and fluffy frosting is absolutely perfect.
Cooking Tips & Techniques
After making these Easy No-Bake Mummy Cheesecake Bites for Halloween about a dozen times, I’ve collected some hard-earned wisdom. Let me share the good stuff.
The Freezing Trick is Non-Negotiable
I cannot stress this enough—freezing the bites before decorating is the secret to success. The first batch I made, I skipped this step because I was in a hurry. The frosting melted into a sad, white puddle around each bite. It looked like my mummies had melted in the sun. Now I always freeze them for at least 30 minutes, and the frosting stays exactly where I pipe it.
Don’t Overmix the Filling
When you’re beating the cream cheese and sugar, stop as soon as it’s smooth. Overmixing incorporates too much air, which can make the filling soft and harder to shape. You want dense, creamy cheesecake texture, not whipped cream texture.
Room Temperature Ingredients Matter
Cold cream cheese straight from the fridge will give you lumpy filling. I learned this when I tried to rush through the process and ended up with little white specks throughout the mixture. Let your cream cheese sit out for 30 minutes, or microwave it gently. Your future self will thank you.
Piping Bag Hack
If your frosting lines are too thick, your mummies will look more like snowmen. Keep the piping tip small—about 1/8 inch—and move quickly across the bite. You can always add more lines, but you can’t take them away. And if you mess up, just scrape off the frosting and start again. The frozen filling makes it easy to fix mistakes.
Timing Strategy
Here’s how I tackle these for a party: I make the filling and assemble the bites the night before. They freeze overnight, and the next morning I decorate them. That way, I’m not rushing around on party day. The frozen bites can stay in the freezer for up to a week before decorating, which is incredibly convenient.
Variations & Adaptations
One of the best things about this recipe is how customizable it is. Here are some variations I’ve tried and loved.
Chocolate Mummy Bites
Swap the vanilla wafers for chocolate wafer cookies and add 2 tablespoons of cocoa powder to the cheesecake filling. The chocolate version is always a hit with the kids, and it looks especially spooky with the white frosting wraps. I made these for a Halloween movie night and they disappeared within minutes.
Pumpkin Spice Mummies
Add 1/4 cup of pumpkin puree and 1 teaspoon of pumpkin pie spice to the cheesecake filling. Reduce the powdered sugar to 1/3 cup since the pumpkin adds sweetness. These taste like fall in a bite, and the orange tint under the white frosting looks surprisingly festive. My neighbor tried this version and now she makes them every year for her Thanksgiving dessert table.
Vegan Mummy Bites
Use dairy-free cream cheese and vegan buttercream frosting. For the cookie base, look for vegan vanilla wafers—most major brands have a vegan option. The texture is slightly softer than the original, but the flavor is just as good. I tested this version for a friend with dietary restrictions, and she said it was the best Halloween treat she’d had in years.
Mini Mummy Bites
Use mini vanilla wafers and make the cheesecake balls about half the size. These are perfect for kids’ parties or for portion control (if that’s your thing). The mini versions also freeze faster—only 20 minutes instead of 30.
Peanut Butter Mummies
Replace 1/4 cup of the cream cheese with creamy peanut butter. The peanut butter adds a savory note that balances the sweetness beautifully. Just make sure to use natural peanut butter that isn’t too runny, or your filling might be too soft to shape.
Serving & Storage Suggestions
These Easy No-Bake Mummy Cheesecake Bites for Halloween are best served cold, straight from the refrigerator. The texture is perfect when the filling is firm but not frozen—like a classic cheesecake. I like to arrange them on a platter with some orange and black sprinkles scattered around for a festive look.
What to Serve With Them
These pair beautifully with a warm cup of apple cider or a spiced chai latte. For a full Halloween dessert spread, serve them alongside pumpkin cupcakes, caramel apples, or a bowl of candy corn. They also work great as a standalone treat on a dessert table—their cute appearance draws people in immediately.
Storage Instructions
Store the decorated mummy bites in an airtight container in the refrigerator for up to 5 days. Place them in a single layer with parchment paper between layers if you need to stack them. The cookies will soften slightly over time, but they’ll still taste amazing.
Freezer Storage
You can freeze the undecorated bites for up to 3 months. Just place them on a baking sheet in the freezer until solid, then transfer to a freezer-safe bag. When you’re ready to decorate, let them thaw in the refrigerator for about 15 minutes before piping the frosting. I always keep a batch in my freezer during October for last-minute Halloween emergencies.
Reheating Notes
These don’t need reheating—they’re meant to be eaten cold. If you prefer a softer texture, let them sit at room temperature for 5-10 minutes before serving. The flavors actually develop and deepen after a day in the fridge, so they taste even better on day two.
Nutritional Information & Benefits
Here’s the approximate nutritional breakdown for one mummy bite (based on 24 servings):
Calories: 180 | Total Fat: 10g | Saturated Fat: 6g | Cholesterol: 25mg | Sodium: 120mg | Total Carbohydrates: 21g | Dietary Fiber: 0g | Sugars: 16g | Protein: 2g
While these are definitely a treat, there are some redeeming qualities. The cream cheese provides a good source of calcium and protein, and the portion size is naturally controlled since each bite is small. Using full-fat cream cheese actually helps you feel satisfied with just one or two bites, unlike lower-fat versions that might leave you wanting more.
For those watching their sugar intake, you can reduce the powdered sugar to 1/3 cup without sacrificing too much sweetness. The vanilla wafers add sweetness on their own, so the filling doesn’t need to be overly sugary. If you’re gluten-sensitive, simply swap in gluten-free cookies. And if you’re dairy-free, the vegan variation works beautifully.
I personally love that this recipe allows for indulgence without the guilt of a huge slice of cheesecake. One or two bites feels like a proper treat, and the festive presentation makes it feel special without going overboard.
Conclusion
These Easy No-Bake Mummy Cheesecake Bites for Halloween have become a staple in my kitchen for good reason. They’re adorable, they’re delicious, and they come together with minimal effort—exactly what you need when October gets busy with parties, school events, and last-minute gatherings. The combination of creamy cheesecake filling, crunchy cookie base, and fluffy frosting wraps is simply irresistible.
I encourage you to make these your own. Maybe you’ll add a drop of orange food coloring to the frosting for a festive twist, or swap in chocolate wafers for a darker mummy look. The beauty of this recipe is that it’s forgiving and flexible, so don’t be afraid to experiment. That’s how the best recipes are born—through happy accidents and personal touches.
Honestly, the reason I keep making these year after year is the joy they bring. There’s something magical about watching people’s faces light up when they see these little mummies on the dessert table. It’s pure Halloween happiness in bite-sized form. So go ahead, give them a try. I promise you’ll be the star of every party you bring them to. And when someone asks for the recipe (they will), just smile and tell them the story of how you found it.
Frequently Asked Questions
Can I use low-fat cream cheese for these mummy bites?
Yes, you can use low-fat cream cheese, but the filling will be slightly softer and may not hold its shape as well. If you go this route, I recommend adding an extra tablespoon of powdered sugar to help thicken the mixture. You might also need to freeze the bites for a full hour instead of 30 minutes.
How far in advance can I make these for a party?
You can make the undecorated bites up to a week ahead and keep them frozen. Decorate them the morning of your party for the freshest look. Once decorated, they’ll keep in the refrigerator for up to 5 days, but the frosting may start to soften after day 3.
Can I use homemade frosting instead of canned?
Absolutely! Homemade buttercream works beautifully. Just make sure it’s thick enough to pipe—if it’s too thin, it will slide off the frozen bites. A simple buttercream with equal parts butter and powdered sugar, plus a splash of vanilla, is perfect.
What if I can’t find candy eyes?
No problem! You can pipe little eyes using melted chocolate or black decorating gel. Just make small dots where the eyes should go. You can also use mini chocolate chips turned upside down, though they won’t have the same cute look as candy eyes.
Can kids help make these?
Yes, this is a fantastic recipe for kids! They can help roll the cheesecake balls, press the cookies onto the filling, and pipe the frosting (with supervision). The decorating part is especially fun for little hands. Just be prepared for some very creative mummy designs—that’s half the fun.
Pin This Recipe!
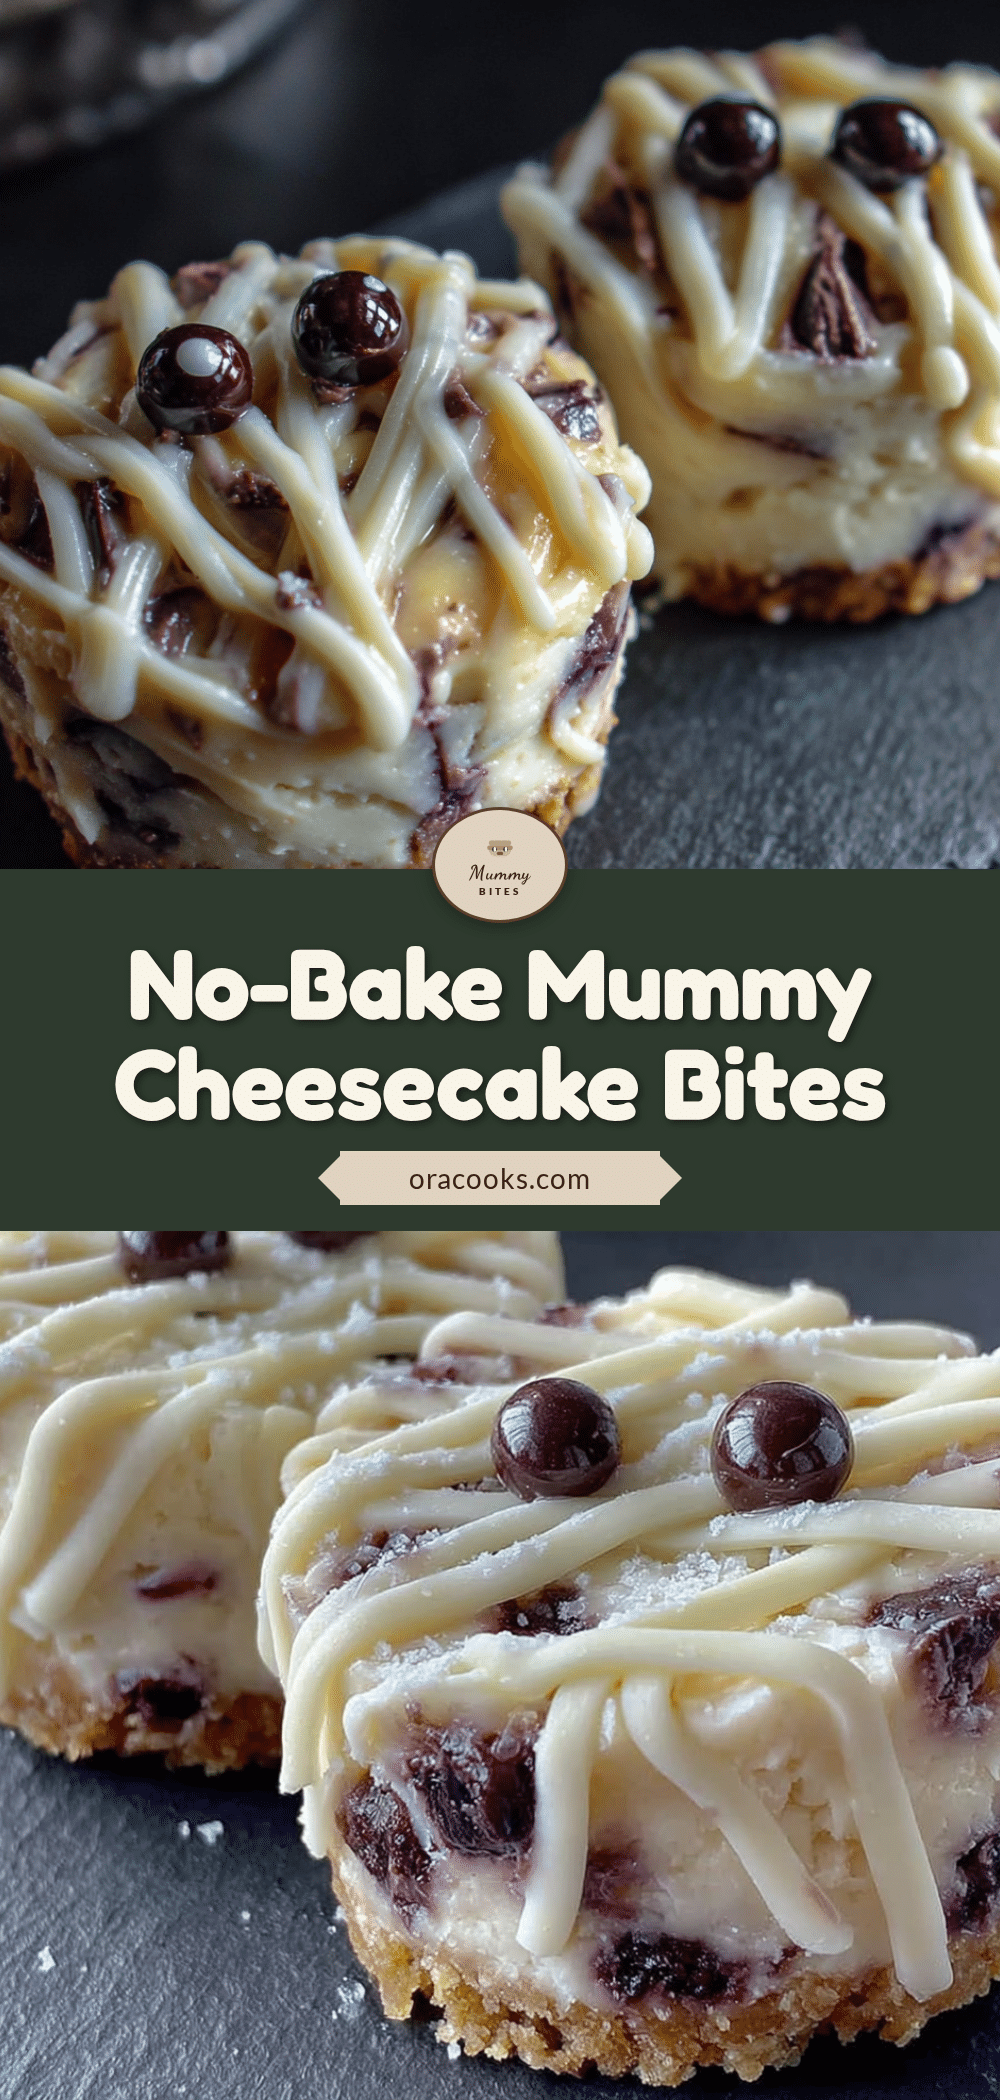
Easy No-Bake Mummy Cheesecake Bites: Perfect Halloween Treat
These adorable no-bake mummy cheesecake bites are a fun and easy Halloween treat. Creamy cheesecake filling on a vanilla wafer cookie, wrapped in fluffy white frosting and topped with candy eyes.
- Prep Time: 20 minutes
- Cook Time: 0 minutes
- Total Time: 1 hour 20 minutes (includes freezing and setting time)
- Yield: 24-30 servings 1x
- Category: Dessert
- Cuisine: American
Ingredients
- 16 ounces full-fat block cream cheese, softened
- 1/2 cup powdered sugar, sifted
- 1 teaspoon vanilla extract
- Pinch of salt
- 30–36 vanilla wafer cookies (e.g., Nilla Wafers)
- 1 can (16 ounces) white frosting (or homemade buttercream)
- 1–2 packages candy eyes
- Optional: black decorating gel
- Optional: orange sprinkles or edible glitter
Instructions
- Soften the cream cheese: Remove from refrigerator 30 minutes before starting, or microwave in 10-second bursts until soft.
- Make the cheesecake filling: In a large bowl, beat softened cream cheese with an electric mixer on medium speed until smooth and fluffy (about 2 minutes). Add sifted powdered sugar, vanilla extract, and salt. Beat until combined and creamy. Scrape down sides.
- Portion the filling: Using a cookie scoop or tablespoon, scoop rounded portions (about 1 heaping tablespoon each) and roll into smooth balls. Place on a parchment-lined baking sheet. You should get 24-30 balls.
- Assemble the bites: Place a vanilla wafer cookie flat side up. Gently press a cheesecake ball onto the center of the cookie. Repeat with all cookies and cheesecake balls.
- Freeze the bites: Place the baking sheet in the freezer for at least 30 minutes, up to 1 hour, until firm.
- Prepare the frosting: Transfer white frosting to a piping bag or zip-top bag. Snip off a tiny corner (about 1/8 inch wide). If too thick, microwave for 5-10 seconds.
- Decorate the mummies: Working with one frozen bite at a time, pipe frosting back and forth across the cheesecake ball in uneven lines to create mummy wraps, leaving a small gap for eyes. Immediately press two candy eyes into the gap. Repeat with all bites.
- Set and serve: Place decorated bites in the refrigerator for at least 15 minutes to let the frosting set. Serve cold.
Notes
Freezing the bites before decorating is essential for clean frosting lines. Use full-fat block cream cheese for best texture. For dairy-free, use dairy-free cream cheese and vegan buttercream. For gluten-free, use gluten-free vanilla wafers. Store in an airtight container in the refrigerator for up to 5 days. Undecorated bites can be frozen for up to 3 months.
Nutrition
- Serving Size: 1 mummy bite
- Calories: 180
- Sugar: 16
- Sodium: 120
- Fat: 10
- Saturated Fat: 6
- Carbohydrates: 21
- Protein: 2
Keywords: Halloween, mummy, cheesecake, no-bake, easy, party treat, kids


