Love this? Save it for later!
Share the inspiration with your friends
It was 10:47 PM on a random Wednesday in October, and I had a ridiculous need for something that tasted like fall but wasn’t a full-blown pie. I didn’t have the patience for a traditional cheesecake—the water bath, the long cooling time, the anxiety about cracks. But I had a box of gingersnaps I’d bought on a whim, a block of cream cheese, and this wild idea that maybe, just maybe, I could make something that felt special without the three-hour commitment. Honestly, I was tired. My kitchen was a mess from dinner, and I had no business starting a baking project. But that craving? It wasn’t going anywhere.
I grabbed the gingersnaps and started crushing them in a bag with a rolling pin—not gracefully, let me tell you. Crumbs ended up on the counter, on the floor, probably in my hair. The pumpkin puree was from a can I’d stashed in the back of the pantry, and I figured if it was good enough for a pie, it was good enough for this late-night experiment. I wasn’t following a recipe. I was flying blind, trusting my hands and my memory of other cheesecakes I’d made. The filling came together in one bowl—no mixer needed, just a whisk and some elbow grease. I poured it over the crust, slid it into the oven, and crossed my fingers.
When those creamy pumpkin cheesecake bars came out of the oven, the kitchen smelled like a cozy sweater feels. The edges were set, the center had a slight jiggle, and the gingersnap crust was fragrant and buttery. I let them cool on the counter while I cleaned up, sneaking a piece of the crumbly edge that had stuck to the pan. That first bite was the kind of quiet victory you don’t get from a perfectly executed recipe—it was the scrappy, improvised win that tastes better because you didn’t overthink it. I’ve made these bars a dozen times since that night, and they always take me back to that messy, happy Wednesday. Maybe you’ve been there—standing in your kitchen at an unreasonable hour, determined to make something good out of what you’ve got. This recipe is for that version of you.
Why You’ll Love This Recipe
These creamy pumpkin cheesecake bars aren’t just another fall dessert. They’re the kind of treat that makes you wonder why you ever bothered with a full cheesecake. I’ve tested this recipe more times than I can count, tweaking the filling ratio, playing with the crust texture, and even stress-testing it at a family gathering where my aunt (the self-proclaimed pumpkin pie queen) asked for the recipe. That’s when I knew I had something special.
- Quick & Easy: No water bath, no springform pan, no fuss. These bars come together in about 20 minutes of active prep and bake in under an hour. Perfect for a weeknight baking session or a last-minute Thanksgiving contribution.
- Simple Ingredients: You probably have most of these in your pantry right now. Canned pumpkin, cream cheese, eggs, sugar, and a box of gingersnaps. No fancy extracts or hard-to-find spices.
- Perfect for Fall Gatherings: Whether it’s a Friendsgiving potluck, a Halloween party, or just a cozy Sunday afternoon, these bars travel well, slice cleanly, and disappear fast.
- Crowd-Pleaser: I’ve served them to kids who “don’t like pumpkin” and adults who claim they’re “not dessert people.” The creamy texture and spicy crust win everyone over.
- Unbelievably Delicious: The combination of silky pumpkin cheesecake and crunchy, molasses-rich gingersnap crust is next-level comfort food. It’s like pumpkin pie and cheesecake had a baby, and that baby is easier to make than both parents.
What makes this recipe different from the rest? It’s the crust-to-filling ratio. Most pumpkin cheesecake bars bury the crust under a thick layer of filling. I’ve balanced it so every bite has that perfect crunch of gingersnap against the creamy, spiced cheesecake. Plus, I use a technique of pre-baking the crust for just five minutes, which keeps it from getting soggy. Trust me, that little step makes all the difference.
This isn’t just good—it’s the kind of dessert that makes you close your eyes after the first bite. It’s comfort food reimagined: faster, easier, but with the same soul-soothing satisfaction. Perfect for impressing guests without the stress, or turning a simple Tuesday into something memorable.
What Ingredients You Will Need
This recipe uses simple, wholesome ingredients to deliver bold fall flavor and a satisfying texture. Most of these are pantry staples, especially if you do any fall baking. Here’s what you’ll need, broken down by component.
For the Gingersnap Crust
- 2 cups (about 200g) gingersnap cookie crumbs (I recommend Nabisco or a store brand with strong molasses flavor; you can crush them in a food processor or by hand in a sealed bag)
- 5 tablespoons (70g) unsalted butter, melted (salted butter works too—just skip the added salt below)
- 2 tablespoons (25g) granulated sugar (optional, but adds a little extra sweetness and helps the crust bind)
- Pinch of salt (omit if using salted butter)
For the Creamy Pumpkin Filling
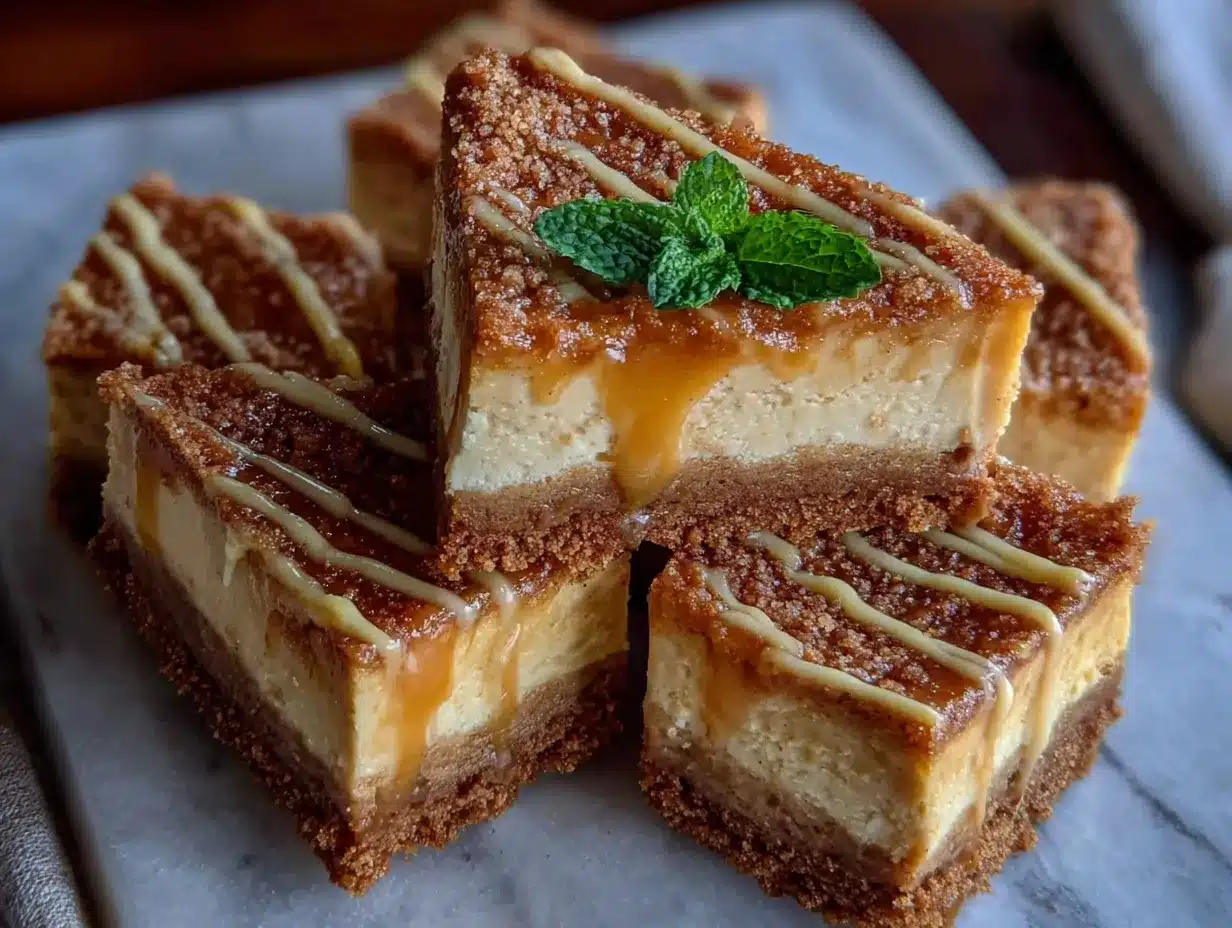
- 16 ounces (450g) cream cheese, softened to room temperature (full-fat is best for the creamiest texture; low-fat will work but may be less rich)
- 1 cup (200g) granulated sugar
- 2 large eggs, room temperature (cold eggs can make the filling lumpy)
- 1 cup (245g) pumpkin puree (not pumpkin pie filling—make sure it’s 100% pure pumpkin. Libby’s is my go-to)
- 1 teaspoon vanilla extract
- 1 teaspoon pumpkin pie spice (or make your own: ½ tsp cinnamon, ¼ tsp ginger, ¼ tsp nutmeg, pinch of cloves)
- ½ teaspoon ground cinnamon (for extra warmth)
- ¼ teaspoon salt (balances the sweetness and enhances the spices)
Ingredient Selection Tips: For the creamiest filling, make sure your cream cheese is truly at room temperature—about 30 minutes on the counter. If you’re in a rush, cut it into cubes and let it sit for 15 minutes. For the gingersnaps, look for cookies that are crisp, not soft. The sturdier the cookie, the better the crust will hold together. If you can’t find gingersnaps, graham crackers with a teaspoon of molasses and an extra pinch of ginger work in a pinch.
Substitution Guidance: For a gluten-free version, use gluten-free gingersnaps or a blend of almond flour and crushed gluten-free cookies. For a dairy-free option, use vegan cream cheese and a plant-based butter substitute (though the texture will be slightly less firm). If you don’t have pumpkin pie spice, just use 1 teaspoon of cinnamon and ¼ teaspoon each of ginger and nutmeg.
Equipment Needed
- 9×9-inch baking pan (an 8×8 works too, but the bars will be slightly thicker and need a few extra minutes of baking time)
- Parchment paper (for easy lifting and clean slicing)
- Mixing bowls (one large, one medium)
- Hand mixer or stand mixer (a whisk and some elbow grease work, but a mixer gives the smoothest filling)
- Rolling pin or food processor (for crushing the gingersnaps)
- Measuring cups and spoons
- Spatula (for scraping the bowl clean—don’t waste a drop)
- Sharp knife (for clean slices; run it under hot water and wipe between cuts)
I’ve made this recipe with a cheap hand mixer I bought at a discount store, and it worked perfectly. Don’t feel like you need fancy equipment. If you don’t have a food processor for the crust, a zip-top bag and a rolling pin (or even a heavy skillet) work great. Just make sure the crumbs are uniform so the crust bakes evenly. One tip: line your pan with parchment paper so it hangs over two sides. That “sling” makes lifting the whole block of bars out a breeze.
Preparation Method
Preheat your oven to 350°F (175°C). Line your 9×9-inch pan with parchment paper, leaving an overhang on two opposite sides. This is your ticket to stress-free removal later.
- Make the crust: In a medium bowl, combine the gingersnap crumbs, melted butter, sugar (if using), and salt. Stir with a fork until the mixture looks like wet sand and holds together when you squeeze it. If it’s too dry, add another tablespoon of melted butter. Too wet? A few more crumbs will fix it.
- Press the crust: Dump the crumb mixture into your prepared pan. Use the bottom of a measuring cup or a flat-bottomed glass to press it down firmly and evenly. Don’t skimp on this step—a tightly packed crust won’t crumble when you cut the bars. Pop it in the oven for 10 minutes, then set it aside to cool slightly while you make the filling.
- Beat the cream cheese: In a large bowl, beat the softened cream cheese with an electric mixer on medium speed until smooth and fluffy—about 2 minutes. Scrape down the sides of the bowl with a spatula. This is where patience pays off; any lumps here will show up in the final texture.
- Add the sugar: Gradually add the sugar and beat until combined, about 1 minute. The mixture should look glossy and smooth.
- Incorporate the eggs: Add the eggs one at a time, beating on low speed after each just until combined. Over-beating at this stage can incorporate too much air, leading to cracks. You want a dense, creamy filling, not a souffle.
- Add the pumpkin and spices: Add the pumpkin puree, vanilla, pumpkin pie spice, cinnamon, and salt. Beat on low until everything is uniform. The color should be a beautiful, deep orange—like a perfect autumn leaf. Give the bowl a final scrape and fold the mixture a few times with your spatula to make sure the bottom is fully incorporated.
- Assemble: Pour the filling over the pre-baked crust. Use your spatula to spread it evenly to the edges. Give the pan a gentle tap on the counter to release any air bubbles.
- Bake: Place the pan in the preheated oven and bake for 40-45 minutes. The edges should look set and slightly puffed, but the center should still have a slight jiggle when you gently shake the pan. That jiggle is your friend—it means the bars will be silky, not dry. If the center looks completely firm, you’ve overbaked them.
- Cool completely: Transfer the pan to a wire rack and let it cool to room temperature. This takes about 1-2 hours. Don’t rush this step. If you try to refrigerate them while they’re still warm, condensation will form and make the top sticky.
- Chill: Once cool, cover the pan with plastic wrap and refrigerate for at least 4 hours, but overnight is better. This is the hardest part, I know. But the bars need this time to set up properly. The flavor deepens, the texture firms up, and slicing becomes effortless.
- Slice and serve: Use the parchment sling to lift the entire block out of the pan. Place it on a cutting board. Use a sharp knife to cut into 16 squares (4 rows by 4 rows). For the cleanest cuts, wipe the knife clean between each slice.
Cooking Tips & Techniques
I’ve made a lot of mistakes in the kitchen, and this recipe taught me a few hard lessons. Let me save you the trouble.
Don’t overmix the filling. I learned this the hard way after making a batch that looked beautiful but had a weird, almost spongy texture. Overmixing incorporates too much air, which expands in the oven and then collapses, leaving cracks and a less creamy texture. Mix just until everything is combined—a few streaks of cream cheese are better than a fully aerated batter.
Room temperature ingredients matter. I know it’s annoying to wait, but cold cream cheese creates lumps that are nearly impossible to beat out. Cold eggs can cause the fat in the cream cheese to seize up. Trust me, I’ve tried to speed through this step and ended up with a filling that looked like cottage cheese. Not the vibe. Take the cream cheese and eggs out of the fridge 30 minutes before you start.
The jiggle test is everything. Ovens vary wildly. My old oven would have these bars done in 38 minutes; my current one takes 45. Don’t rely solely on the timer. At the 35-minute mark, start checking. Gently shake the pan. If the center wobbles like Jell-O, it’s not done. If the whole thing is still and the edges are pulling away from the pan, you’ve gone too far. That perfect jiggle in a 2-inch area in the very center is your sweet spot.
Let them chill overnight. I get it. The smell is intoxicating. You want to dig in. But cutting these bars too early is like opening a present before Christmas morning—disappointing. The bars need that long chill to set the filling and let the crust fully absorb the moisture from the cheesecake. Overnight in the fridge yields the creamiest, cleanest slices.
Variations & Adaptations
One of the best things about this recipe is how flexible it is. Here are a few variations I’ve tried and loved.
Pecan Praline Topping: After the bars have chilled, top them with a layer of candied pecans. Melt 2 tablespoons of butter with ¼ cup of brown sugar in a skillet, toss in ½ cup of chopped pecans, and cook for 2 minutes. Spread over the bars and let it set. The crunch against the creamy filling is incredible.
Chocolate Swirl: Melt ½ cup of semi-sweet chocolate chips with 2 tablespoons of heavy cream. Dollop it over the filling before baking and use a knife to swirl it in. The chocolate and pumpkin spice combo is surprisingly good—like a pumpkin mocha in bar form.
Dairy-Free Version: Use vegan cream cheese (I’ve had good luck with Kite Hill or Tofutti) and a plant-based butter in the crust. The texture will be slightly softer, so chill them for a full 24 hours. They won’t be as firm as the original, but the flavor is still spot-on.
Gluten-Free Adaptation: Swap the gingersnaps for a gluten-free gingersnap cookie (Annie’s makes a good one) or use a mix of almond flour and crushed gluten-free graham crackers with extra ginger and molasses. Everything else in the recipe is naturally gluten-free.
Mini Version: Line a muffin tin with paper liners and press the crust into the bottom of each cup. Fill with the cheesecake mixture and bake for 18-22 minutes. These mini bars are perfect for parties or portion control (or so I tell myself).
Serving & Storage Suggestions
These bars are best served cold, straight from the fridge. The texture is firm and creamy, and the crust stays snappy. If you prefer a softer texture, let them sit at room temperature for 10-15 minutes before serving. I like to top each bar with a dollop of whipped cream and a light dusting of cinnamon—it makes them look fancy with almost zero effort.
For a full fall spread, serve these alongside a warm mug of apple cider, a pumpkin spice latte, or even a strong black coffee to cut through the sweetness. They also pair beautifully with a scoop of vanilla ice cream if you’re feeling extra indulgent.
Storage: Keep the bars in an airtight container in the refrigerator for up to 5 days. Place a piece of parchment paper between layers if you’re stacking them to prevent sticking. The flavor actually improves after a day or two as the spices meld with the cream cheese.
Freezing: These bars freeze like a dream. Wrap individual slices tightly in plastic wrap, then place them in a freezer-safe bag or container. They’ll keep for up to 3 months. To thaw, transfer a slice to the fridge overnight or let it sit at room temperature for about 30 minutes. I always keep a stash in my freezer for unexpected guests or late-night cravings.
Reheating: I don’t recommend reheating these bars—they’re meant to be enjoyed cold. But if you want a warm dessert, microwave a single slice for about 10 seconds. It won’t look as pretty, but it’ll taste like a warm pumpkin cheesecake pudding.
Nutritional Information & Benefits
Here’s an approximate nutritional breakdown for one bar (based on 16 servings):
| Nutrient | Amount Per Serving |
|---|---|
| Calories | 285 |
| Total Fat | 18g |
| Saturated Fat | 10g |
| Cholesterol | 75mg |
| Sodium | 220mg |
| Total Carbohydrates | 28g |
| Dietary Fiber | 1g |
| Sugars | 20g |
| Protein | 5g |
While these bars are definitely a treat, they do offer some nutritional perks. Pumpkin is packed with vitamin A (over 200% of your daily needs per cup), which supports eye health and immune function. It’s also a good source of fiber and potassium. The cream cheese provides calcium and protein, while the ginger in the crust has anti-inflammatory properties. Of course, this is still a dessert—but it’s one that makes you feel a little bit better about indulging.
Dietary Considerations: This recipe contains gluten, dairy, and eggs. For a gluten-free option, see the variations section. For a dairy-free version, use plant-based substitutes as noted. The bars are naturally nut-free (unless you add the pecan topping).
FAQs
Can I use pumpkin pie filling instead of pumpkin puree?
I wouldn’t recommend it. Pumpkin pie filling is already sweetened and spiced, which will throw off the sugar and spice balance in this recipe. Stick with 100% pure pumpkin puree for the best results. If you only have pie filling on hand, reduce the sugar by half and skip the added spices.
Why did my cheesecake bars crack on top?
Cracks usually happen from overmixing or overbaking. Make sure you’re not beating the filling too vigorously after adding the eggs, and pull the bars out of the oven while the center still has a slight jiggle. Rapid temperature changes can also cause cracking, so let the bars cool gradually on the counter before refrigerating.
Can I make these bars in a 9×13 pan?
Absolutely. Double the crust and filling ingredients and bake in a 9×13 pan. The baking time will be similar—start checking at 35 minutes. The bars will be slightly thinner, so they’ll set faster. Just keep an eye on them.
How do I get clean slices?
The key is patience. Make sure the bars are fully chilled—overnight is best. Use a sharp knife and run it under hot water, wiping it dry between each cut. The heat helps the knife glide through the cheesecake without dragging. For the cleanest edges, wipe the blade after every single slice.
Can I skip the parchment paper?
You can, but you’ll regret it. Without parchment, getting the bars out of the pan is a nightmare. You’ll end up digging them out with a spatula, and they’ll look like a messy casserole instead of clean, beautiful bars. Just use the parchment—it’s worth the extra 30 seconds.
Conclusion
These creamy pumpkin cheesecake bars with gingersnap crust are the kind of recipe that becomes a tradition. They’re easy enough for a random Tuesday but special enough for Thanksgiving. The combination of the spicy, crunchy crust and the velvety, pumpkin-spiced filling is pure fall magic. I love that I can make them ahead, freeze them for later, and still get compliments every single time I serve them.
I hope you give these bars a try—and I hope they become a tradition in your kitchen too. Maybe you’ll add your own twist, like a drizzle of caramel or a sprinkle of sea salt. Maybe you’ll make them for a holiday party and watch them disappear. Whatever you do, let me know how it goes. Tag me in your photos, leave a comment below, or tell me about your own late-night baking adventures. I love hearing how these recipes come to life in your homes.
Now go preheat that oven. Fall isn’t going to wait forever.
Pin This Recipe!
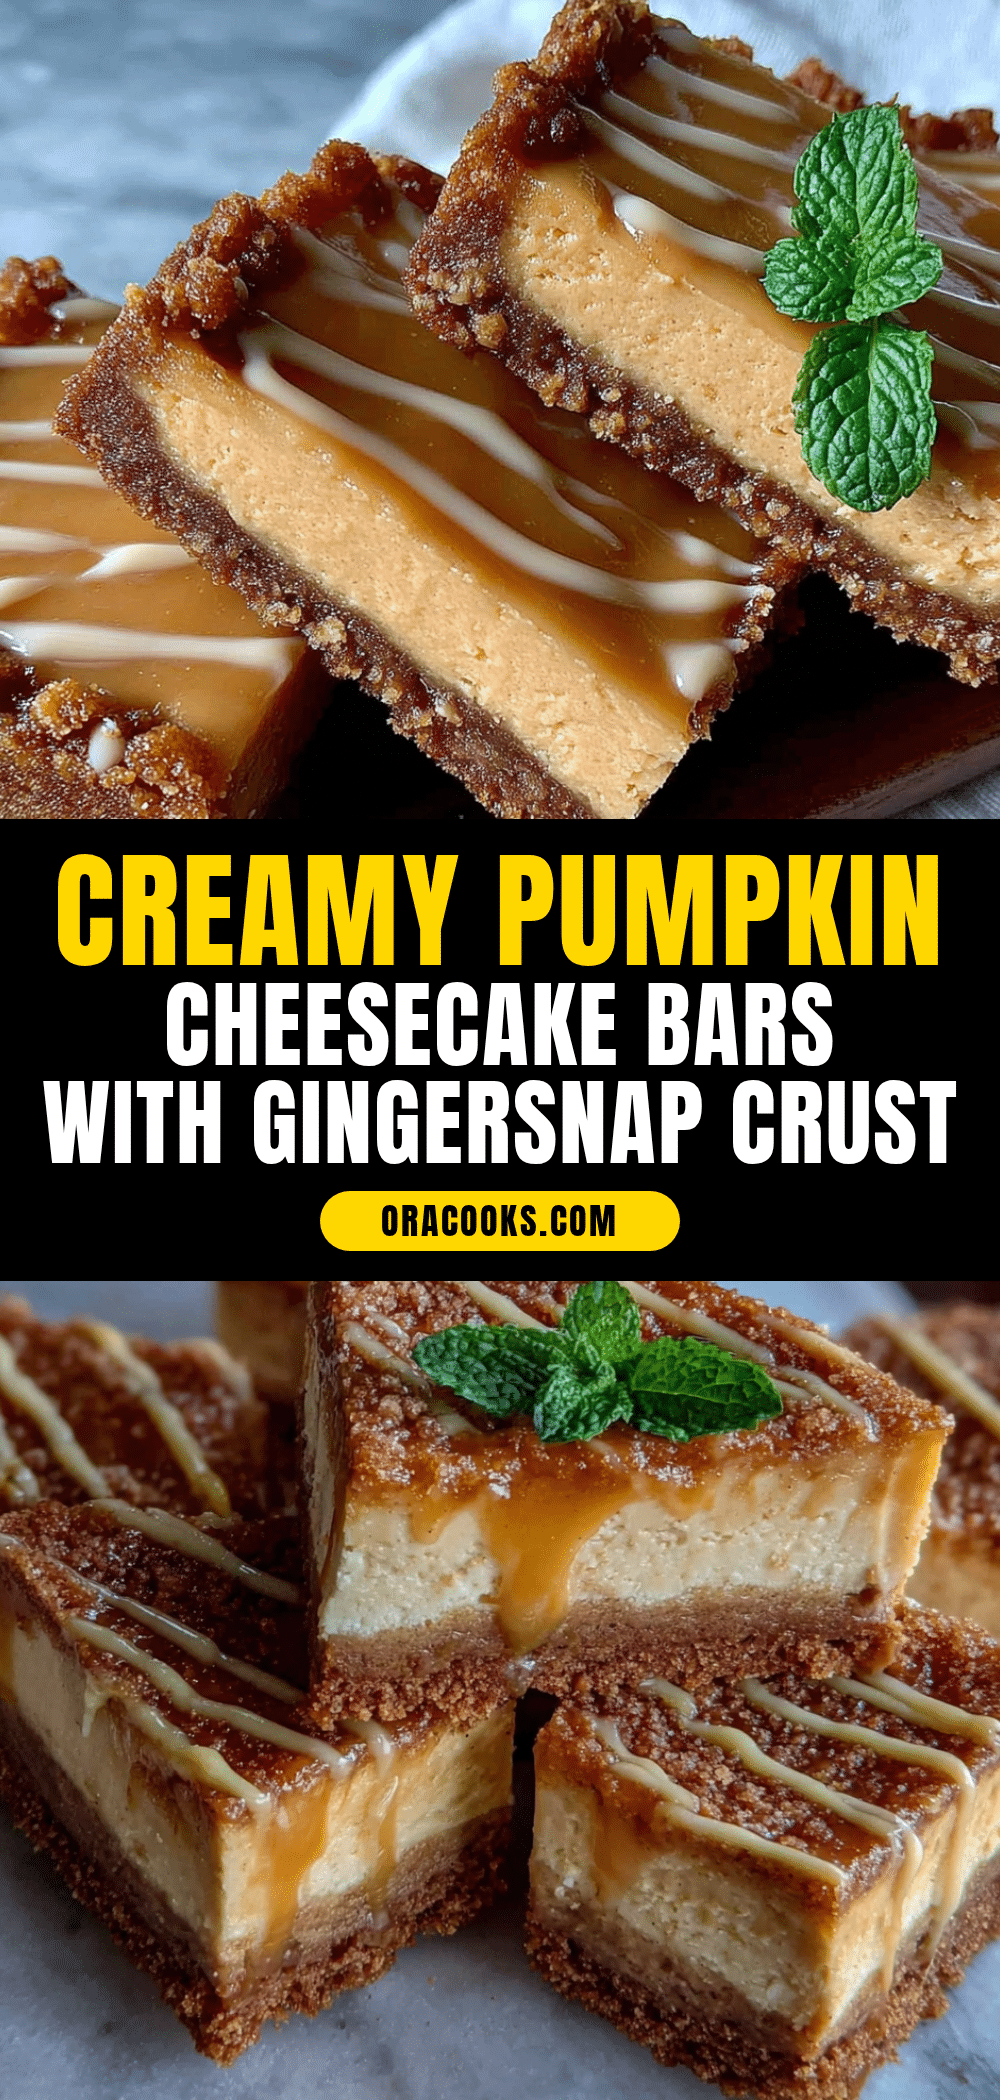
Easy Creamy Pumpkin Cheesecake Bars Recipe
These creamy pumpkin cheesecake bars with a gingersnap crust are the perfect fall dessert. They’re quick, easy, and require no water bath or springform pan.
- Prep Time: 20 minutes
- Cook Time: 45 minutes
- Total Time: 1 hour 5 minutes (plus cooling and chilling time)
- Yield: 16 servings 1x
- Category: Dessert
- Cuisine: American
Ingredients
- 2 cups (about 200g) gingersnap cookie crumbs
- 5 tablespoons (70g) unsalted butter, melted
- 2 tablespoons (25g) granulated sugar (optional)
- Pinch of salt (omit if using salted butter)
- 16 ounces (450g) cream cheese, softened to room temperature
- 1 cup (200g) granulated sugar
- 2 large eggs, room temperature
- 1 cup (245g) pumpkin puree (not pumpkin pie filling)
- 1 teaspoon vanilla extract
- 1 teaspoon pumpkin pie spice
- ½ teaspoon ground cinnamon
- ¼ teaspoon salt
Instructions
- Preheat oven to 350°F (175°C). Line a 9×9-inch pan with parchment paper, leaving overhang on two sides.
- Make the crust: In a medium bowl, combine gingersnap crumbs, melted butter, sugar (if using), and salt. Stir until mixture looks like wet sand and holds together when squeezed.
- Press the crust: Dump crumb mixture into prepared pan. Use bottom of a measuring cup to press firmly and evenly. Bake for 10 minutes, then set aside to cool slightly.
- Beat the cream cheese: In a large bowl, beat softened cream cheese with electric mixer on medium until smooth and fluffy, about 2 minutes. Scrape down sides.
- Add the sugar: Gradually add sugar and beat until combined, about 1 minute.
- Incorporate the eggs: Add eggs one at a time, beating on low after each just until combined.
- Add the pumpkin and spices: Add pumpkin puree, vanilla, pumpkin pie spice, cinnamon, and salt. Beat on low until uniform. Fold mixture a few times with spatula.
- Assemble: Pour filling over pre-baked crust. Spread evenly to edges. Tap pan gently on counter to release air bubbles.
- Bake: Bake for 40-45 minutes. Edges should be set and slightly puffed, center should have slight jiggle when shaken.
- Cool completely: Transfer pan to wire rack and cool to room temperature, about 1-2 hours.
- Chill: Cover pan with plastic wrap and refrigerate for at least 4 hours, preferably overnight.
- Slice and serve: Use parchment sling to lift block out of pan. Cut into 16 squares with a sharp knife, wiping clean between slices.
Notes
For best results, use room temperature cream cheese and eggs. Don’t overmix the filling to avoid cracks. The jiggle test is key: center should jiggle slightly when done. Chill overnight for cleanest slices.
Nutrition
- Serving Size: 1 bar
- Calories: 285
- Sugar: 20
- Sodium: 220
- Fat: 18
- Saturated Fat: 10
- Carbohydrates: 28
- Fiber: 1
- Protein: 5
Keywords: pumpkin cheesecake bars, fall dessert, easy cheesecake, gingersnap crust, pumpkin dessert


