Love this? Save it for later!
Share the inspiration with your friends
The neighborhood fall bake-off was in three hours and I’d completely forgotten. Everyone else would be bringing those elaborate, multi-day creations—you know, the kind with homemade caramel and hand-piped frosting that look like they belong on a magazine cover. I had a half-can of pumpkin puree, some butter that was about to expire, and honestly, a growing sense of panic. My neighbor Karen had been talking about her sourdough starter for weeks. Another friend was bringing a French apple tart she’d been perfecting since September.
I stood in my kitchen, staring at the pantry like it might magically produce a winning recipe. Let me tell you, that pressure does something to you. I grabbed the butter and threw it in a pan, not even thinking straight. The smell that filled my kitchen—that nutty, toasty brown butter aroma—stopped me cold. I mean, it was one of those moments where your brain goes, “Wait, this is actually good.” I tossed in the pumpkin, some spices, and before I knew it, I had a batter that smelled like everything cozy about autumn.
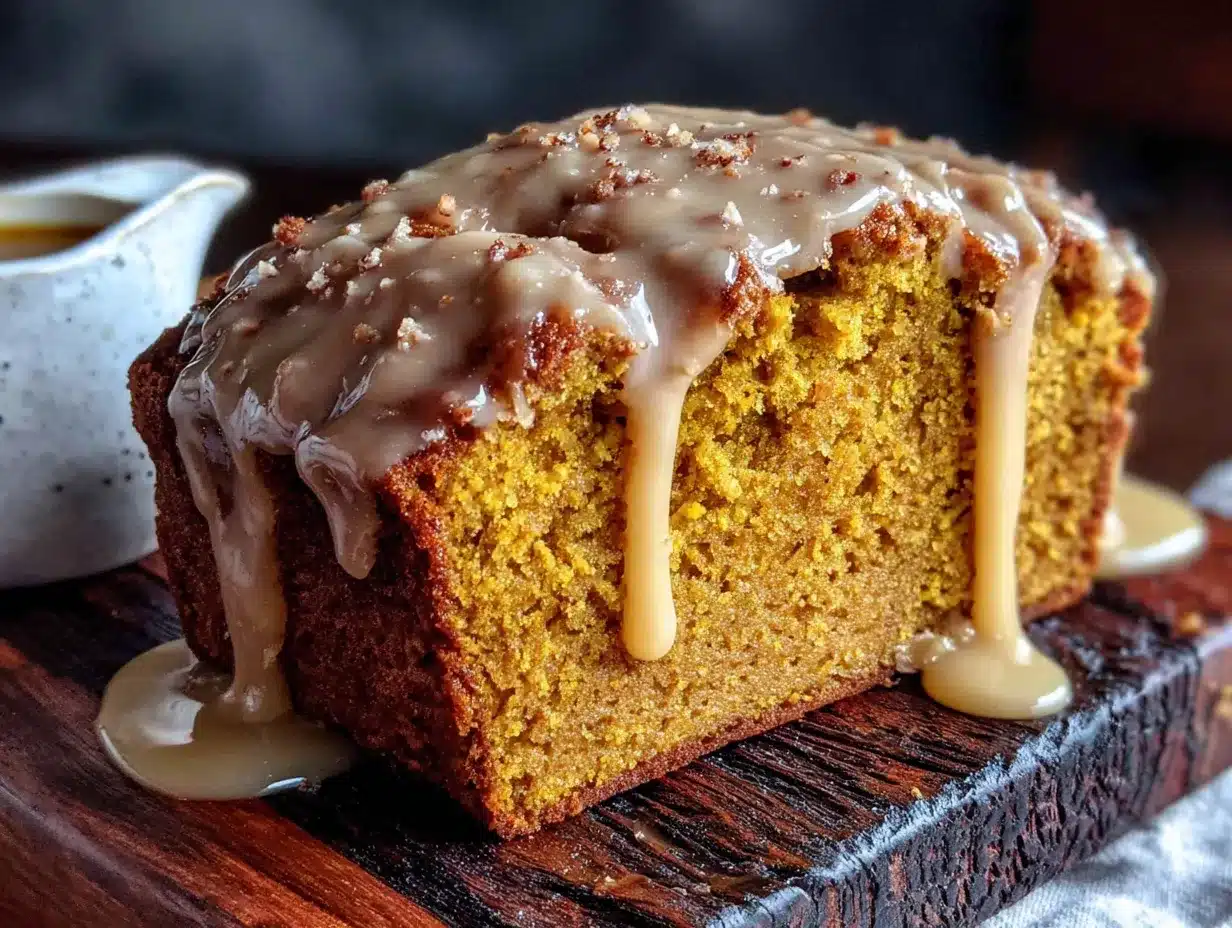
I didn’t have time to make a complicated frosting, so I whisked together some maple syrup and powdered sugar. It was messy. I spilled a little on the counter. But when that bread came out of the oven, golden and fragrant, with the glaze dripping down the sides? Something shifted. I brought it to the bake-off feeling like I was showing up to a black-tie event in sweatpants.
The bread won. Not just a participation ribbon, either. First place. People kept coming up to me asking for the recipe, and I had to admit I’d made it up on the fly. That’s the thing about this wholesome brown butter pumpkin bread with maple glaze—it doesn’t need days of prep or fancy techniques. It just needs to be made. And honestly, maybe you’ve been there, staring at a bare pantry with a deadline looming. This recipe was born from that chaos, and it’s been my go-to ever since.
Why You’ll Love This Recipe
This isn’t just another pumpkin bread recipe floating around the internet. I’ve tested this version at least a dozen times, tweaking the brown butter timing and the glaze consistency until everything clicked. As someone who’s spent years developing recipes for busy home cooks, I can tell you this one hits all the right notes without the stress.
- Quick & Easy : From start to finish, you’re looking at about an hour. The active prep time is maybe 15 minutes, which means you can whip this up on a Tuesday afternoon without breaking a sweat.
- Simple Ingredients : No trips to specialty stores. You probably have most of these items in your kitchen right now—flour, sugar, eggs, pumpkin puree. The brown butter is the one “fancy” touch, and it takes all of five minutes.
- Perfect for Fall Gatherings : Whether it’s a potluck, a Thanksgiving brunch, or just a cozy weekend morning, this bread fits right in. It’s impressive enough for company but casual enough for everyday.
- Crowd-Pleaser : I’ve served this to kids who usually pick at desserts and adults who claim they’re “watching their sugar.” Both groups came back for seconds. It’s that balanced—sweet but not cloying, rich but not heavy.
- Unbelievably Delicious : The brown butter adds this deep, nutty complexity that regular pumpkin bread just doesn’t have. Paired with the maple glaze, it’s like autumn in every bite. I’m not exaggerating when I say people close their eyes after tasting it.
What makes this recipe different from the rest is the technique. Browning the butter might seem like an extra step, but it transforms the entire flavor profile. You get this toasty, caramelized depth that plays perfectly with the pumpkin and warm spices. And the maple glaze? It’s not just sweet—it has that slightly woodsy, complex flavor that real maple syrup brings. This isn’t your standard pumpkin bread. It’s the version you’ll bookmark and make every single fall.
What Ingredients You Will Need
This recipe uses simple, wholesome ingredients that work together to create something truly special. The brown butter is the star, but every component plays its part in building flavor and texture. Here’s what you’ll need:
For the Brown Butter Pumpkin Bread
- 1/2 cup (113g) unsalted butter (I prefer Kerrygold for its rich flavor, but any good-quality butter works)
- 1 cup (200g) granulated sugar
- 1/2 cup (100g) packed light brown sugar (adds moisture and depth)
- 2 large eggs, room temperature
- 1 cup (245g) pumpkin puree (not pumpkin pie filling—look for 100% pure pumpkin)
- 1 teaspoon vanilla extract
- 1 3/4 cups (220g) all-purpose flour
- 1 teaspoon baking soda
- 1/2 teaspoon baking powder
- 1/2 teaspoon salt
- 2 teaspoons pumpkin pie spice (or 1 teaspoon cinnamon, 1/2 teaspoon ginger, 1/4 teaspoon nutmeg, 1/4 teaspoon cloves)
For the Maple Glaze
- 1 cup (120g) powdered sugar, sifted
- 3 tablespoons pure maple syrup (the real stuff, not pancake syrup—it makes a difference)
- 1-2 tablespoons milk or heavy cream (adjust for consistency)
- Pinch of salt
A few notes on ingredient selection: For the pumpkin puree, I recommend Libby’s or a store brand that’s just as smooth. Avoid the organic brands that can be watery—you want a thick, consistent puree. The brown sugar should be fresh and soft, not hard as a rock. If it’s clumpy, you can microwave it for a few seconds with a damp paper towel to soften it up.
For the maple syrup, please use the real deal. I know it’s pricier, but the flavor is unmatched. I’ve tried this with the imitation stuff, and honestly, it tastes like artificial maple candy—not what we’re going for here. If you need a dairy-free option, you can substitute the butter with a high-quality vegan butter and use almond milk in the glaze. The texture will be slightly different, but still delicious.
The pumpkin pie spice is worth buying pre-mixed, but if you’re like me and have a drawer full of individual spices, feel free to blend your own. Just make sure the cinnamon is fresh—old cinnamon loses its punch, and this bread deserves all the warmth it can get.
Equipment Needed
You don’t need a professional kitchen to make this bread, but having the right tools makes the process smoother. Here’s what I use:
- 9×5-inch loaf pan : This is the standard size. If you use an 8×4-inch pan, you’ll need to increase the baking time by 10-15 minutes. A 9-inch round cake pan works too, but adjust the time.
- Light-colored metal loaf pan : I’ve learned this the hard way—dark pans absorb more heat and can burn the edges before the center is done. If you only have dark pans, reduce the oven temperature by 25°F.
- Small saucepan : For browning the butter. A light-colored pan helps you see the color change better.
- Mixing bowls : One large, one medium. Glass or stainless steel works fine.
- Whisk : For combining dry ingredients and smoothing out the batter.
- Rubber spatula : For scraping every last bit of brown butter out of the pan. Trust me, you don’t want to waste that stuff.
- Parchment paper : Line your loaf pan with this for easy removal. I’ve had breads stick to non-stick pans—parchment is your insurance policy.
- Cooling rack : Let the bread cool completely before glazing. If you glaze it while it’s warm, the glaze will melt into a puddle.
- Small bowl and whisk : For the glaze. A fork works in a pinch, but a whisk gives you a smoother result.
If you don’t have a cooling rack, you can use the wire rack from your oven (just make sure it’s clean). And honestly, parchment paper is non-negotiable for me. I’ve spent too many birthdays scrubbing loaf pans to skip this step.
Preparation Method
Let’s walk through this step by step. I’ll include all the little details I’ve learned from making this bread more times than I can count.
- Preheat your oven to 350°F (175°C). Position the rack in the center of the oven. Line your 9×5-inch loaf pan with parchment paper, leaving some overhang on the long sides—this creates handles for lifting the bread out later. Lightly spray the parchment with non-stick spray.
- Brown the butter. Place the 1/2 cup of unsalted butter in a small saucepan over medium heat. Let it melt completely, then continue cooking, swirling the pan occasionally. The butter will start to foam and sizzle—that’s normal. After about 4-5 minutes, you’ll see brown specks forming at the bottom of the pan. The butter will smell nutty and toasty. Once it reaches a golden-amber color, immediately remove it from the heat and pour it into a heat-safe bowl to stop the cooking process. Don’t walk away during this step—brown butter can go from perfect to burnt in seconds. Let it cool for 5-10 minutes.
- Mix the wet ingredients. In a large bowl, whisk together the granulated sugar, brown sugar, and the cooled brown butter. The mixture should look like wet sand. Add the eggs one at a time, whisking well after each addition. Stir in the pumpkin puree and vanilla extract until everything is smooth and combined. The batter will be thick and glossy at this point.
- Combine the dry ingredients. In a separate medium bowl, whisk together the all-purpose flour, baking soda, baking powder, salt, and pumpkin pie spice. Make sure there are no lumps—the baking soda especially likes to clump up. If you’re feeling fancy, you can sift the dry ingredients, but I find a good whisk does the job.
- Fold the dry ingredients into the wet. Add the dry mixture to the wet ingredients in two additions, folding gently with a rubber spatula. Mix just until you see no more streaks of flour. Overmixing will make the bread tough and dense. A few small lumps are totally fine—they’ll bake out. The batter should be thick but scoopable.
- Pour the batter into the prepared pan. Use your spatula to spread it evenly. Give the pan a gentle tap on the counter to release any air bubbles. If you want a bakery-style crack down the middle, you can run a butter knife through the center of the batter lengthwise—this encourages the bread to split evenly as it rises.
- Bake for 50-60 minutes. Start checking at 50 minutes by inserting a toothpick into the center. If it comes out clean or with just a few moist crumbs, it’s done. The top should be golden brown and spring back when lightly pressed. If the top is browning too quickly (around the 40-minute mark), tent the pan loosely with aluminum foil. Every oven is different—my old oven took 55 minutes, but my current one finishes at 52 minutes. Trust your senses over the timer.
- Cool in the pan for 10 minutes. This allows the bread to set and makes it easier to remove. After 10 minutes, use the parchment handles to lift the bread out and transfer it to a cooling rack. Let it cool completely before glazing—about 1-2 hours. I know it’s tempting, but glazing a warm bread will result in a runny mess.
- Make the maple glaze. In a small bowl, whisk together the sifted powdered sugar, maple syrup, and 1 tablespoon of milk. If the glaze is too thick, add more milk a teaspoon at a time. If it’s too thin, add more powdered sugar. You want it thick enough to drizzle but thin enough to flow off a spoon. Add a pinch of salt to balance the sweetness.
- Glaze the bread. Once the bread is completely cool, drizzle the glaze over the top. Let it drip down the sides naturally—that rustic look is part of the charm. Let the glaze set for 15-20 minutes before slicing. If you’re in a hurry, you can pop it in the fridge for 5 minutes.
A quick tip: If you want extra crunch, sprinkle some chopped pecans or pepitas on top of the glaze while it’s still wet. The nuts toast slightly and add a wonderful texture contrast.
Cooking Tips & Techniques
I’ve made this bread enough times to learn what works and what doesn’t. Let me save you some trouble.
Don’t rush the brown butter. The first time I made this, I got impatient and cranked the heat to high. The butter burned before I even saw the brown specks. Brown butter requires medium heat and patience. The sweet spot is when you see those little brown bits forming and smell that nutty aroma. If you see black specks, you’ve gone too far. Start over—it’s only five minutes.
Room temperature eggs matter. I know, I used to skip this step too. But cold eggs can seize the brown butter, creating a lumpy batter. If you forgot to take the eggs out ahead of time, place them in a bowl of warm water for 5 minutes. Problem solved.
Measure your flour correctly. This is the most common mistake in baking. Spoon the flour into your measuring cup and level it off with a knife. Don’t scoop directly from the bag—that packs the flour and gives you too much, resulting in dry bread. If you have a kitchen scale, even better. 220 grams is your target.
Check for doneness with a thermometer. If you’re unsure about the toothpick test, use an instant-read thermometer. The internal temperature should be 200-205°F (93-96°C). This is foolproof. I learned this trick from a pastry chef friend, and I haven’t overbaked a loaf since.
Let it cool completely. I cannot stress this enough. I once glazed a slightly warm bread because I was impatient, and the glaze slid right off into a sticky puddle on the plate. The bread was still delicious, but it looked sad. Patience pays off here.
Toast your spices for extra depth. If you have an extra minute, toast the pumpkin pie spice in a dry pan over low heat for 30 seconds before adding it to the flour. This wakes up the essential oils and makes the spices more aromatic. It’s a small step with big payoff.
Variations & Adaptations
This recipe is wonderfully flexible. Here are some variations I’ve tried and loved:
Gluten-Free Version: Substitute the all-purpose flour with a 1:1 gluten-free baking flour blend. I’ve had good results with Bob’s Red Mill. Add 1 teaspoon of xanthan gum if your blend doesn’t already include it. The texture will be slightly more crumbly, but the flavor is spot on. Let the bread cool completely before slicing to avoid crumbling.
Vegan Adaptation: Replace the butter with vegan butter (I like Miyoko’s) and use flax eggs (1 tablespoon ground flaxseed mixed with 3 tablespoons water per egg). For the glaze, use coconut cream instead of milk. The bread will be a bit denser, but the brown butter flavor from the vegan butter still comes through nicely.
Chocolate Chip Pumpkin Bread: Fold in 1/2 cup of semi-sweet chocolate chips along with the dry ingredients. The chocolate pairs beautifully with the pumpkin and brown butter. Use dark chocolate for a less sweet version. My kids go crazy for this variation.
Nutty Crunch Version: Add 1/2 cup of toasted chopped pecans or walnuts to the batter. For extra crunch, sprinkle more nuts on top of the glaze before it sets. The toasted nuts add a lovely texture and complement the brown butter flavor perfectly.
Spiced Maple Glaze: Add 1/4 teaspoon of cinnamon or a pinch of nutmeg to the glaze for extra warmth. You can also substitute the maple syrup with bourbon maple syrup for an adult twist. Just reduce the milk slightly to compensate for the extra liquid.
Mini Loaves or Muffins: Divide the batter among mini loaf pans or a muffin tin. Bake mini loaves for 25-30 minutes and muffins for 18-22 minutes. This is perfect for gifting or portion control. The glaze can be drizzled over each individually.
Serving & Storage Suggestions
This bread is best served at room temperature, but honestly, it’s delicious at any temperature. Here’s how I like to enjoy it:
Serving Ideas: Slice the bread and serve it with a pat of salted butter on top—the saltiness cuts through the sweetness beautifully. For a decadent breakfast, toast the slices lightly and drizzle with extra maple syrup. It’s also wonderful alongside a cup of coffee or a chai latte. For dessert, serve it warm with a scoop of vanilla ice cream and a drizzle of caramel sauce. Trust me on this one.
Storage: Store the bread in an airtight container at room temperature for up to 3 days. The glaze will stay intact if you let it set completely before storing. If you live in a humid climate, the glaze might get slightly sticky—that’s normal. You can store it in the refrigerator for up to 5 days, but bring it to room temperature before serving for the best texture.
Freezing Instructions: This bread freezes beautifully. Wrap the unglazed bread tightly in plastic wrap, then in aluminum foil. Freeze for up to 3 months. When you’re ready to serve, thaw it overnight in the refrigerator, then bring it to room temperature. Make the glaze fresh and drizzle it over the thawed bread. I often bake two loaves at once—one for now, one for later. It’s my secret weapon for unexpected guests.
Reheating: To revive leftover bread, microwave individual slices for 10-15 seconds. For a crispier exterior, pop slices in a toaster oven at 350°F for 5 minutes. The glaze will melt slightly, but it’s still delicious. I actually prefer day-old bread toasted—the flavors have had time to meld together.
Flavor Development: Here’s a little secret: this bread actually tastes better the next day. The pumpkin and spice flavors deepen as they sit. So if you can resist, make it a day ahead. The glaze might soften slightly, but the flavor payoff is worth it.
Nutritional Information & Benefits
While this bread is definitely a treat, it does have some redeeming qualities. Here’s the estimated nutritional breakdown per slice (based on 10 slices):
- Calories: 320
- Total Fat: 12g
- Saturated Fat: 7g
- Cholesterol: 55mg
- Sodium: 280mg
- Total Carbohydrates: 52g
- Dietary Fiber: 2g
- Sugars: 34g
- Protein: 4g
Pumpkin is packed with vitamin A, fiber, and antioxidants. It’s also low in calories, which means you’re getting some nutritional benefits even in a dessert bread. The brown butter adds healthy fats, and the maple syrup contains antioxidants and minerals like zinc and manganese. Of course, this is still a sweet bread, so enjoy it in moderation.
For a lighter version, you can reduce the sugar to 3/4 cup total and use a sugar substitute like monk fruit sweetener. The texture will be slightly different, but the flavor will still be there. If you’re watching your sodium, use unsalted butter and reduce the added salt to 1/4 teaspoon.
This recipe is vegetarian and can be made dairy-free with the substitutions mentioned earlier. It contains gluten and dairy in its standard form. For nut-free versions, skip the optional nut toppings and check your flour blend for cross-contamination if needed.
Conclusion
This wholesome brown butter pumpkin bread with maple glaze has become my fall signature, and I think it deserves a spot in your kitchen too. It started as a panic-driven experiment and turned into something I genuinely look forward to making every year. The brown butter adds a depth that surprises people, and the maple glaze is just sweet enough without being overwhelming.
I love that this recipe doesn’t require any special skills or equipment. It’s forgiving, adaptable, and always delivers. Whether you’re bringing it to a gathering, enjoying it with your morning coffee, or sneaking a slice at midnight (no judgment here), it’s the kind of bread that feels special without the fuss.
I’d love to hear how yours turns out. Did you try any of the variations? Did you add your own twist? Drop a comment below and let me know—I read every single one. And if you share it on social media, tag me so I can see your beautiful creation. Happy baking, friends. May your kitchen smell like brown butter and warm spices all season long.
Frequently Asked Questions
Can I use canned pumpkin pie filling instead of pumpkin puree?
No, please don’t. Pumpkin pie filling is pre-sweetened and spiced, which will throw off the sugar and spice balance in this recipe. Stick with 100% pure pumpkin puree. If you only have pumpkin pie filling, you’ll need to reduce the sugar and spices significantly, but honestly, it’s better to just buy the right ingredient.
Why did my brown butter burn?
Brown butter burns easily if the heat is too high or if you walk away from the pan. Always use medium heat and watch it closely. The process takes about 4-5 minutes. Once you see brown specks forming and smell a nutty aroma, remove it from the heat immediately. Pour it into a cool bowl to stop the cooking process.
Can I make this bread without the maple glaze?
Absolutely. The bread is delicious on its own—the brown butter and pumpkin flavors are strong enough to stand alone. You can also dust the top with powdered sugar for a simpler presentation. If you skip the glaze, the bread will last a day or two longer at room temperature since there’s no moist topping.
How do I know when the bread is fully baked?
Use the toothpick test: insert a toothpick into the center of the bread. If it comes out clean or with just a few moist crumbs, it’s done. You can also use an instant-read thermometer—the internal temperature should be 200-205°F. The top should be golden brown and spring back when lightly pressed.
Can I double this recipe?
Yes, this recipe doubles beautifully. Just make sure you have a large enough mixing bowl—the batter will be substantial. Bake in two separate loaf pans rather than one giant pan for even baking. You may need to add 5-10 minutes to the baking time if you’re baking both loaves at once, since the oven will be more crowded.
Pin This Recipe!
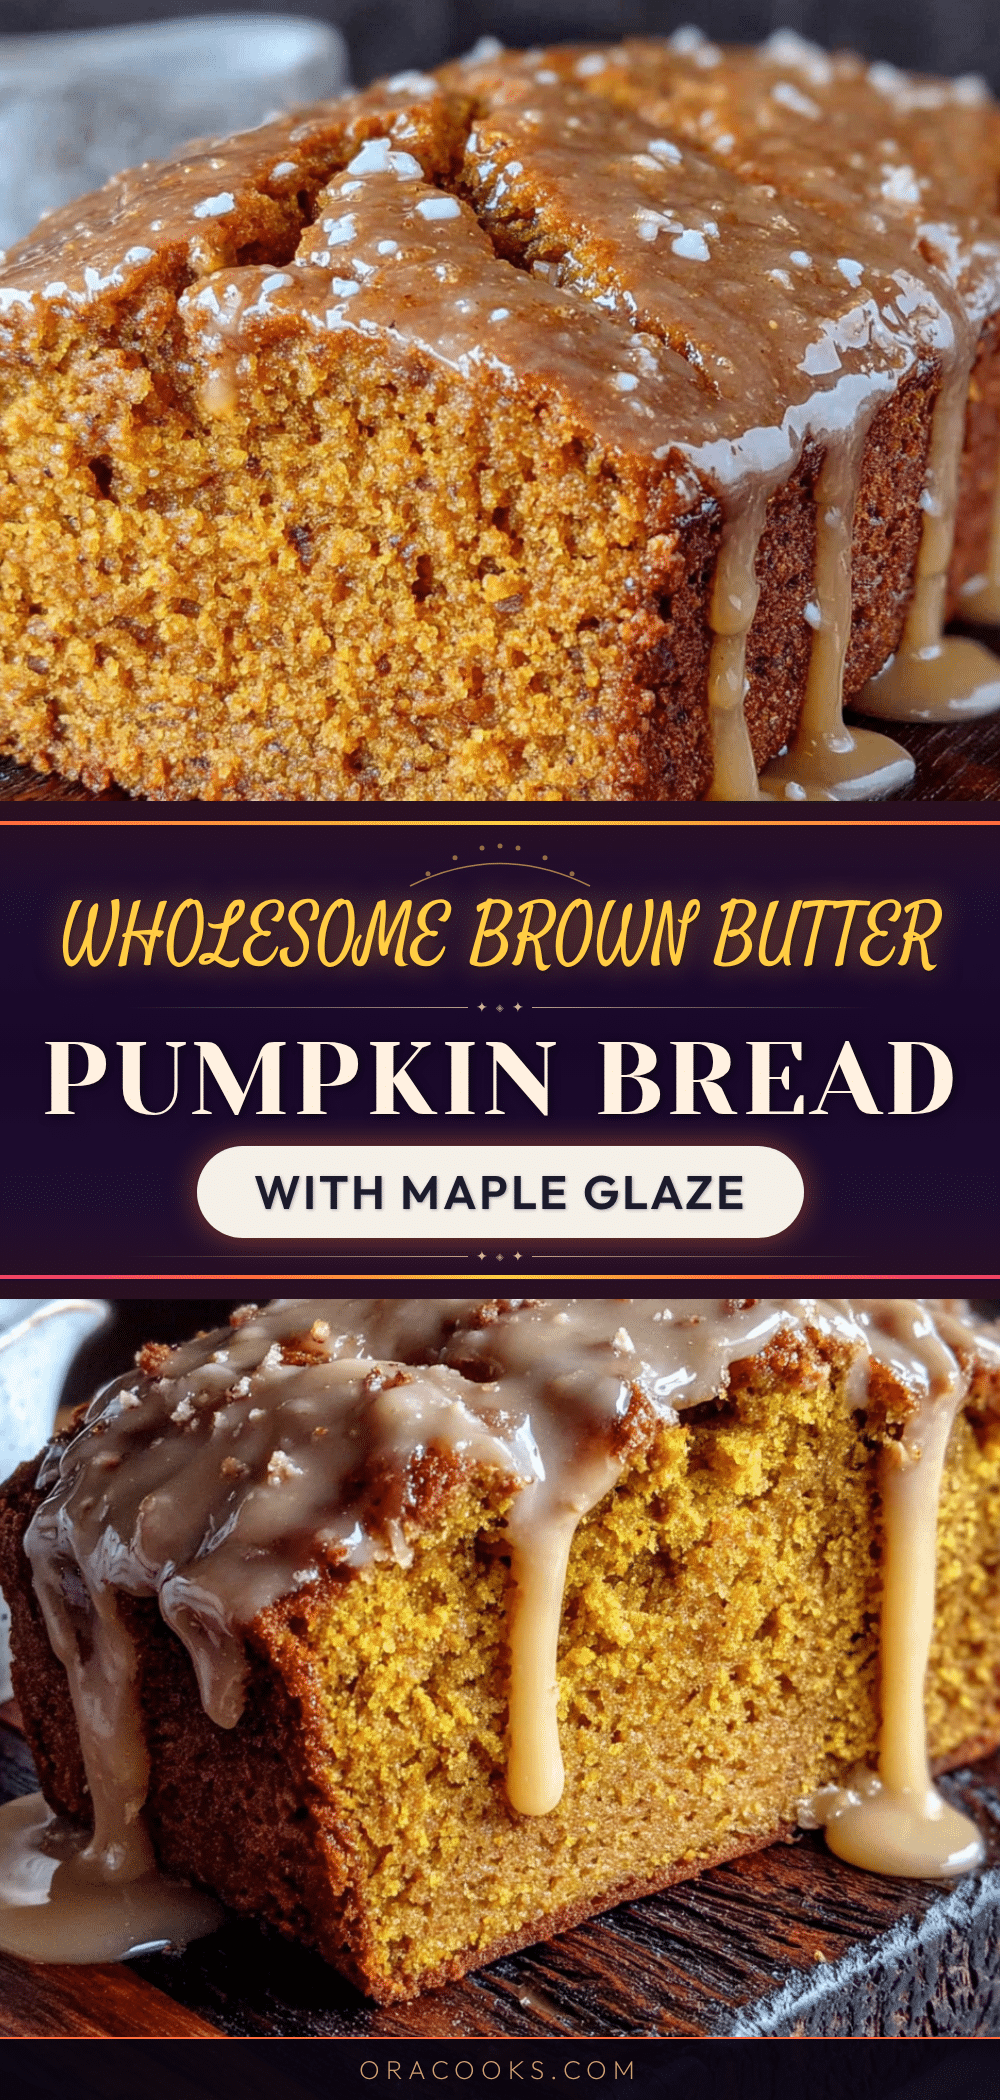
Wholesome Brown Butter Pumpkin Bread with Easy Maple Glaze
This wholesome brown butter pumpkin bread with maple glaze is a quick and easy fall recipe that won a neighborhood bake-off. It features a nutty brown butter base, warm pumpkin spices, and a simple maple glaze for a cozy, crowd-pleasing treat.
- Prep Time: 15 minutes
- Cook Time: 55 minutes
- Total Time: 1 hour 10 minutes
- Yield: 10 servings 1x
- Category: Dessert
- Cuisine: American
Ingredients
- 1/2 cup (113g) unsalted butter
- 1 cup (200g) granulated sugar
- 1/2 cup (100g) packed light brown sugar
- 2 large eggs, room temperature
- 1 cup (245g) pumpkin puree (not pumpkin pie filling)
- 1 teaspoon vanilla extract
- 1 3/4 cups (220g) all-purpose flour
- 1 teaspoon baking soda
- 1/2 teaspoon baking powder
- 1/2 teaspoon salt
- 2 teaspoons pumpkin pie spice (or 1 teaspoon cinnamon, 1/2 teaspoon ginger, 1/4 teaspoon nutmeg, 1/4 teaspoon cloves)
- 1 cup (120g) powdered sugar, sifted
- 3 tablespoons pure maple syrup
- 1–2 tablespoons milk or heavy cream
- Pinch of salt
Instructions
- Preheat your oven to 350°F (175°C). Position the rack in the center of the oven. Line a 9×5-inch loaf pan with parchment paper, leaving overhang on the long sides. Lightly spray the parchment with non-stick spray.
- Brown the butter: Place 1/2 cup unsalted butter in a small saucepan over medium heat. Melt completely, then continue cooking, swirling occasionally, until the butter foams, sizzles, and turns golden-amber with brown specks (about 4-5 minutes). Immediately remove from heat and pour into a heat-safe bowl to stop cooking. Let cool for 5-10 minutes.
- Mix the wet ingredients: In a large bowl, whisk together granulated sugar, brown sugar, and cooled brown butter until it looks like wet sand. Add eggs one at a time, whisking well after each. Stir in pumpkin puree and vanilla extract until smooth and combined.
- Combine the dry ingredients: In a separate medium bowl, whisk together flour, baking soda, baking powder, salt, and pumpkin pie spice until no lumps remain.
- Fold the dry ingredients into the wet: Add dry mixture to wet in two additions, folding gently with a rubber spatula until just combined. Do not overmix; a few small lumps are fine.
- Pour the batter into the prepared pan and spread evenly. Tap the pan gently on the counter to release air bubbles. Optionally, run a butter knife through the center lengthwise to encourage a crack.
- Bake for 50-60 minutes, until a toothpick inserted in the center comes out clean or with a few moist crumbs. If the top browns too quickly, tent loosely with foil. Cool in the pan for 10 minutes, then lift out using parchment handles and transfer to a cooling rack. Cool completely (1-2 hours) before glazing.
- Make the maple glaze: In a small bowl, whisk together sifted powdered sugar, maple syrup, and 1 tablespoon milk. Add more milk a teaspoon at a time if too thick, or more powdered sugar if too thin. Stir in a pinch of salt.
- Once the bread is completely cool, drizzle the glaze over the top, letting it drip down the sides. Let the glaze set for 15-20 minutes before slicing.
Notes
Don’t rush the brown butter; use medium heat and watch closely. Room temperature eggs prevent the butter from seizing. Measure flour correctly by spooning into the cup and leveling off. For foolproof doneness, use an instant-read thermometer (internal temp 200-205°F). Let the bread cool completely before glazing to avoid a runny mess. For extra crunch, sprinkle chopped pecans or pepitas on the wet glaze.
Nutrition
- Serving Size: 1 slice
- Calories: 320
- Sugar: 34
- Sodium: 280
- Fat: 12
- Saturated Fat: 7
- Carbohydrates: 52
- Fiber: 2
- Protein: 4
Keywords: pumpkin bread, brown butter, maple glaze, fall baking, easy pumpkin bread, quick bread, autumn recipe


