Love this? Save it for later!
Share the inspiration with your friends
I was standing in my kitchen last October, staring at a half-empty can of pumpkin puree and feeling that familiar pang of defeat. There used to be a tiny bakery in the old part of town, wedged between a vintage bookstore and a shoe repair shop, that made the most incredible pumpkin scones. They were nothing like those dense, dry triangles you find at chain coffee shops. No, these were delicate, almost ethereal things with a crumb so tender you barely felt them on your tongue. When that bakery closed two years ago—the owner retired, just like that—I honestly felt a little lost. I mean, where do you go when your favorite seasonal treat disappears?
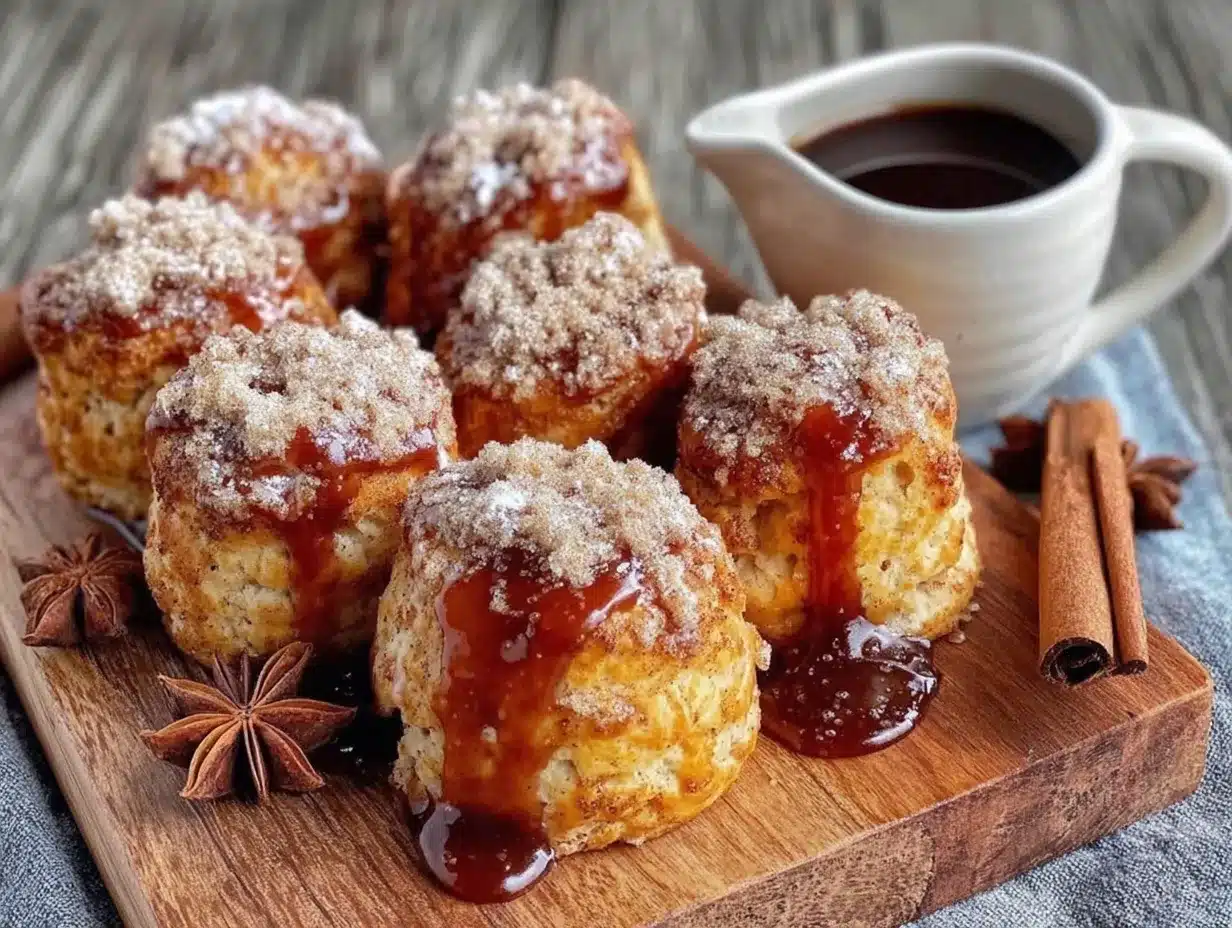
After twelve attempts—twelve, let me tell you—I finally got it. There were batches that came out too flat, some that were too dense, and one memorable disaster that spread across the baking sheet like a pancake. My kitchen looked like a flour bomb had gone off more than once. But that morning, when I pulled the baking sheet from the oven and saw those perfect, golden triangles with their soft, pillowy centers, I almost teared up. The maple glaze dripped down the sides just the way I remembered, catching the morning light from the window.
Maybe you’ve been there, chasing a flavor from your past that feels just out of reach. These light and fluffy pumpkin scones with maple glaze are that memory made real again. They’re the reason I keep a can of pumpkin in my pantry year-round, just in case the craving hits. And honestly? I think my version is even better than the original.
Why You’ll Love This Recipe
Let me tell you why these scones are different from every other pumpkin scone recipe you’ve tried. I’ve tested this more times than I care to admit, and every single tweak was worth it.
- Quick & Easy: From mixing to cooling, these come together in under 35 minutes. Perfect for that spontaneous Saturday morning baking urge or when company shows up unexpected.
- Simple Ingredients: Nothing fancy here. You probably have most of these in your kitchen right now. No trips to specialty stores or hunting down obscure ingredients.
- Perfect for Fall Mornings: These scones were made for crisp autumn days with a hot cup of coffee. They also shine at brunch gatherings, Thanksgiving morning, or as a cozy afternoon treat.
- Crowd-Pleaser: I’ve brought these to potlucks, book club meetings, and family gatherings. They disappear fast. Kids love them, adults love them, and people always ask for the recipe.
- Unbelievably Delicious: The texture is what gets everyone. Light, tender, almost cloud-like on the inside with that slightly crisp exterior. The maple glaze adds just the right amount of sweetness without overwhelming the pumpkin flavor.
What makes these scones truly special is the technique. I spent months figuring out how to keep them light and fluffy instead of dense and heavy like most pumpkin baked goods. The secret is in how you handle the butter and the pumpkin—getting that balance just right so the scones rise beautifully and stay tender. This isn’t just another pumpkin scone recipe; it’s the one I reach for every single time.
There’s something about that first bite that makes you pause. It’s comfort food that feels luxurious but comes together with everyday ingredients. Perfect for impressing guests without stressing yourself out, or for turning a regular Tuesday morning into something worth remembering.
What Ingredients You Will Need
This recipe uses simple, wholesome ingredients to create something truly special. Each one plays a specific role in getting that light, tender texture and rich flavor. Here’s what you’ll need and why each ingredient matters.
For the Scones
- All-purpose flour, 2 cups (250g) – Gives structure while keeping the scones tender. I use King Arthur Flour for consistent results, but any good brand works.
- Granulated sugar, 1/3 cup (65g) – Adds just enough sweetness without overpowering the pumpkin. You can reduce this slightly if you prefer less sweet scones.
- Baking powder, 1 tablespoon – This is crucial for lift. Make sure yours is fresh—test it by dropping a little in hot water; if it fizzes, it’s good.
- Pumpkin pie spice, 1½ teaspoons – You can use store-bought or make your own with cinnamon, nutmeg, ginger, and cloves. I actually prefer making my own blend for a fresher taste.
- Ground cinnamon, ½ teaspoon – Adds warmth and depth. I recommend Saigon cinnamon for a bolder flavor.
- Salt, ½ teaspoon – Balances the sweetness and enhances all the other flavors. Don’t skip this.
- Unsalted butter, 6 tablespoons (85g), cold and cubed – This is the key to flaky, tender scones. Keep it really cold until you’re ready to use it. I sometimes pop my cubed butter in the freezer for 10 minutes before starting.
- Pumpkin puree, ½ cup (120g) – Use pure pumpkin puree, not pumpkin pie filling. Libby’s is my go-to brand for consistent moisture content.
- Heavy cream, ¼ cup (60ml), plus more for brushing – Adds richness and helps create that tender crumb. You can substitute half-and-half if that’s what you have.
- Vanilla extract, 1 teaspoon – Enhances the warm spices and adds a subtle sweetness. Pure vanilla extract is worth the extra cost here.
For the Maple Glaze
- Powdered sugar, 1 cup (120g) – Creates that smooth, glossy finish. Sift it first to avoid lumps in your glaze.
- Pure maple syrup, 2 tablespoons – Use real maple syrup, not pancake syrup. Grade A dark amber gives the best maple flavor.
- Heavy cream or milk, 1-2 tablespoons – Adjusts the consistency. Start with 1 tablespoon and add more until you reach your desired thickness.
- Vanilla extract, ½ teaspoon – Rounds out the maple flavor beautifully.
A quick note on substitutions: If you need a dairy-free version, you can use cold coconut oil instead of butter and full-fat coconut cream instead of heavy cream. The texture will be slightly different but still delicious. For a gluten-free option, use a good 1-to-1 gluten-free flour blend that contains xanthan gum.
Equipment Needed
You don’t need a professional bakery setup for these scones, but having the right tools makes the process smoother. Here’s what I use and what works as a backup.
- Baking sheet – A standard half-sheet pan works perfectly. Line it with parchment paper for easy cleanup. I’ve used the same Nordic Ware sheet for years and it’s never let me down.
- Pastry cutter or two forks – For cutting the butter into the flour. A pastry cutter is faster, but two forks work fine. My grandmother used her hands, but I find that warms the butter too much.
- Large mixing bowl – You need room to work the dough without making a mess. A wide, shallow bowl actually works better than a deep one here.
- Bench scraper – Not essential, but incredibly helpful for shaping the dough and cutting the scones cleanly. A sharp knife works too.
- Whisk – For mixing the dry ingredients and for making the glaze smooth. A fork works in a pinch for the glaze.
- Measuring cups and spoons – For accuracy. I recommend using a kitchen scale for the flour especially, since scooping can give you too much.
- Pastry brush – For brushing cream on top of the scones before baking. You can use a paper towel if you don’t have one.
- Cooling rack – Helps the scones cool evenly and keeps the bottoms from getting soggy. If you don’t have one, transfer them to a plate after a few minutes.
The pastry cutter is honestly my favorite tool here. I picked mine up for about eight dollars at a kitchen supply store, and it’s one of those things you don’t realize you need until you have it. If you’re just starting out, don’t stress about having everything perfect. Your hands and a good knife will get the job done.
Preparation Method
Let me walk you through this step by step. I’ve included all the little details I wish someone had told me when I was figuring this out.
- Preheat your oven to 400°F (200°C). Line a baking sheet with parchment paper. Getting the oven hot before you start mixing is important—you want it ready when the scones are shaped.
- Whisk the dry ingredients together. In a large bowl, combine the flour, sugar, baking powder, pumpkin pie spice, cinnamon, and salt. Whisk until everything is evenly distributed. This takes about 30 seconds. Make sure there are no lumps of baking powder hiding in there.
- Cut in the cold butter. Add the cold, cubed butter to the flour mixture. Using a pastry cutter or two forks, cut the butter into the flour until the mixture resembles coarse meal with some pea-sized butter pieces remaining. This is where the magic happens—those little butter bits create steam pockets as they melt, giving you those flaky layers. Work quickly so the butter stays cold. If your hands start warming it up, pop the bowl in the fridge for five minutes.
- Mix the wet ingredients. In a small bowl or measuring cup, whisk together the pumpkin puree, heavy cream, and vanilla extract until smooth. Make sure there are no streaks of cream in the pumpkin—it should be one uniform mixture.
- Combine wet and dry. Pour the pumpkin mixture into the flour mixture. Use a rubber spatula or fork to stir until just combined. The dough will look shaggy and a little dry—that’s exactly what you want. Overmixing will make your scones tough. Stop as soon as you don’t see any more dry flour patches.
- Bring the dough together. Turn the dough out onto a lightly floured surface. Gently knead it 4-5 times until it comes together. Don’t overwork it. If the dough feels too sticky, sprinkle a little more flour on your hands and the surface. If it feels too dry, add a teaspoon of cream.
- Shape the dough. Pat the dough into a ¾-inch thick circle, about 7 inches across. Don’t use a rolling pin—your hands give you better control and keep the dough from getting overworked. The edges might crack a little; just press them back together gently.
- Cut the scones. Using a bench scraper or sharp knife, cut the circle into 8 equal wedges like a pizza. Cut cleanly straight down—don’t saw back and forth, which can seal the edges and prevent rising. Transfer the wedges to the prepared baking sheet, spacing them about 2 inches apart.
- Brush with cream. Brush the tops of the scones with a little heavy cream. This helps them brown beautifully and gives a slight sheen. Don’t skip this step—it makes a real difference in the final appearance.
- Bake. Bake for 14-16 minutes, until the scones are golden brown on the bottom and lightly golden on top. The tops should feel firm when gently pressed. My oven runs hot, so I check at 13 minutes. Rotate the pan halfway through for even baking.
- Cool. Let the scones cool on the baking sheet for 5 minutes, then transfer them to a cooling rack. They need to cool completely before glazing, or the glaze will just melt right off. Trust me on this one—I learned the hard way.
- Make the glaze. While the scones cool, whisk together the powdered sugar, maple syrup, vanilla, and 1 tablespoon of cream. Add more cream a teaspoon at a time until you reach a thick but pourable consistency. It should slowly drizzle off the whisk.
- Glaze the scones. Once the scones are completely cool, drizzle the glaze over the tops. I like to use a spoon and let it drip naturally down the sides. Let the glaze set for about 10 minutes before serving.
Cooking Tips & Techniques
After all those test batches, I’ve picked up a few tricks that make a real difference. Here’s what I wish I’d known from the start.
Keep everything cold. This is the single most important tip for light, fluffy scones. Cold butter creates steam pockets as it bakes, which gives you that tender, flaky texture. If your kitchen is warm, chill your bowl and flour for 10 minutes before starting. I’ve even frozen my butter and grated it into the flour on hot summer days.
Don’t overwork the dough. This was my biggest mistake early on. Scone dough should be handled as little as possible. The more you knead and press, the more gluten develops, and the tougher your scones get. Mix until just combined, shape gently, and get them in the oven. Your scones will thank you.
Use a light touch with the pumpkin. Pumpkin adds moisture, which is great for tenderness but can also make scones dense if you’re not careful. Make sure your pumpkin puree isn’t watery. If it looks loose, pat it with a paper towel to remove excess moisture before measuring.
Check your baking powder. This is one of those things nobody tells you. Baking powder loses its potency over time, and old baking powder won’t give your scones the lift they need. If yours has been sitting in the cabinet for more than six months, buy a fresh can. It’s worth it.
Let them cool properly. I know it’s tempting to dive right in, but scones need that cooling time to set their structure. Glazing while they’re warm leads to a runny mess. Patience pays off here—the wait is maybe 20 minutes, and the result is so much better.
One more thing—I once forgot to add the sugar. Don’t do that. It was a sad, bland batch of scones that even the maple glaze couldn’t save. Keep a checklist if you need to; I still use one for new recipes.
Variations & Adaptations
One of the best things about this recipe is how adaptable it is. Here are some variations I’ve tried and loved.
Chocolate Chip Pumpkin Scones: Fold in ½ cup of mini chocolate chips before shaping the dough. The chocolate pairs beautifully with the pumpkin and spices. My kids go crazy for this version.
Gluten-Free Version: Substitute the all-purpose flour with a 1-to-1 gluten-free baking blend that contains xanthan gum. I’ve had great results with Bob’s Red Mill. The texture is slightly more delicate, so handle the dough even more gently.
Vegan Pumpkin Scones: Use cold coconut oil instead of butter and full-fat coconut cream instead of heavy cream. For the glaze, use maple syrup with a little coconut cream and powdered sugar. The flavor is slightly different but still delicious.
Spiced Maple Glaze: Add ¼ teaspoon of pumpkin pie spice or a pinch of cinnamon to the glaze for extra warmth. This is my favorite fall variation—it makes the kitchen smell incredible.
Extra Flaky Version: After cutting in the butter, grate an additional 2 tablespoons of frozen butter into the flour mixture. This creates even more steam pockets and a flakier texture. It’s a bit more work but worth it for special occasions.
Savory-Sweet Twist: Reduce the sugar to 2 tablespoons and add ½ cup of sharp cheddar cheese, shredded, along with a pinch of black pepper. Skip the maple glaze and brush with melted butter instead. These are amazing with soup.
I once made a batch with dried cranberries and orange zest mixed into the dough, then used a citrus glaze instead of maple. It was a happy accident—I was out of maple syrup—and honestly, it might be my second favorite version now.
Serving & Storage Suggestions
These scones are best enjoyed the day they’re made, but they store well if you know the right tricks.
Serving: Serve the scones at room temperature with the maple glaze fully set. They’re wonderful with a hot cup of coffee, chai tea, or a pumpkin spice latte. For a real treat, warm them slightly in the microwave for 10-15 seconds before serving—it softens the interior and makes the glaze slightly gooey.
What to serve alongside: These scones pair beautifully with a simple fruit salad, scrambled eggs for a heartier breakfast, or a bowl of butternut squash soup for a cozy lunch. I also love them with a dollop of clotted cream or extra butter.
Storage: Store unglazed scones in an airtight container at room temperature for up to 2 days. If you’ve already glazed them, place them in a single layer in the container with parchment paper between layers to prevent sticking. The glaze may soften slightly, but they’ll still taste wonderful.
Freezing: These scones freeze beautifully. Freeze unglazed scones on a baking sheet until firm, then transfer to a freezer bag for up to 3 months. To serve, thaw at room temperature, then reheat in a 350°F oven for 5-7 minutes. Glaze after reheating for the best result. I always keep a batch in the freezer for unexpected guests or those mornings when I need something special.
Reheating: For best results, reheat scones in a 350°F oven for 5 minutes. The microwave works in a pinch but can make them a bit chewy. If you’re reheating glazed scones, the oven is definitely the way to go—the glaze sets back up nicely.
One thing I’ve noticed is that the flavors actually deepen after a day. The spices meld together and the pumpkin flavor becomes more pronounced. So don’t worry if you have leftovers—they might taste even better on day two.
Nutritional Information & Benefits
Here’s the approximate nutritional breakdown for one scone with glaze. Keep in mind these are estimates and can vary based on specific ingredients used.
- Calories: Approximately 320 per scone
- Fat: 14g
- Carbohydrates: 46g
- Protein: 4g
- Fiber: 2g
- Sugar: 24g
While these are certainly a treat, they do offer some nutritional benefits. Pumpkin is rich in vitamin A, which supports eye health and immune function. It also provides fiber and antioxidants. The warm spices—cinnamon, ginger, nutmeg—have anti-inflammatory properties and can help regulate blood sugar.
For a lighter version, you can reduce the sugar in the scones to ¼ cup and use a thinner glaze with less powdered sugar. The texture will be slightly different but still delicious. I sometimes make a batch with half whole wheat pastry flour for extra fiber, and honestly, nobody notices the difference.
These scones are vegetarian and can easily be made dairy-free or vegan with the substitutions I mentioned earlier. They contain gluten, eggs, and dairy in the standard version, so keep that in mind for any allergies.
I believe in balance—these scones are a celebration food, something to enjoy on a crisp fall morning without guilt. They’re made with real ingredients, and that counts for something.
FAQs
Can I use fresh pumpkin instead of canned?
Yes, you can use fresh pumpkin puree. Just make sure to roast the pumpkin until tender, then puree it until smooth. Fresh pumpkin often has more moisture than canned, so you may need to drain it through a cheesecloth or paper towel to remove excess liquid before using.
Why did my scones turn out dense?
Dense scones usually come from overworking the dough or using warm butter. Handle the dough as little as possible, keep your butter cold, and stop mixing as soon as the ingredients come together. Also check that your baking powder is fresh—old baking powder won’t give enough lift.
Can I make the dough ahead of time?
Absolutely. Shape the scones, place them on a parchment-lined baking sheet, and refrigerate for up to 24 hours. You can even freeze them at this point. Bake straight from the fridge or freezer, adding a couple of extra minutes to the baking time if needed.
How do I get the glaze to look so smooth?
Sift your powdered sugar before whisking to remove any lumps. Whisk the glaze thoroughly until it’s completely smooth, and add the cream slowly until you reach the right consistency. If the glaze is too thick, add more cream a teaspoon at a time. If it’s too thin, add more powdered sugar.
Can I skip the maple glaze?
Of course. The scones are delicious on their own or with a simple dusting of powdered sugar. You can also try a vanilla glaze, a cream cheese drizzle, or even a sprinkle of cinnamon sugar before baking. The base recipe is versatile enough to work with whatever topping you prefer.
Conclusion
These light and fluffy pumpkin scones with maple glaze are more than just a recipe to me. They’re a piece of my food memory made real, a taste of that little bakery that meant so much. And honestly, they’ve become something even better—a recipe I can share, adapt, and make my own.
I hope you give these a try, whether you’re chasing a memory of your own or just looking for a really good scone. Don’t be afraid to make them your own—add chocolate chips, try a different glaze, or experiment with the spices. That’s the beauty of baking; every batch tells a slightly different story.
When you make these, I’d love to hear about it. Drop a comment below and let me know how they turned out, or share your own twist on the recipe. Tag me in your photos if you’re on social media—there’s nothing that makes my day like seeing someone else enjoying these scones.
Now go preheat that oven. Your kitchen is about to smell incredible.
Pin This Recipe!

Light & Fluffy Pumpkin Scones with Easy Maple Glaze

These light and fluffy pumpkin scones with maple glaze are tender, almost cloud-like on the inside with a slightly crisp exterior. The maple glaze adds just the right amount of sweetness without overwhelming the pumpkin flavor.
- Prep Time: 15 minutes
- Cook Time: 16 minutes
- Total Time: 31 minutes
- Yield: 8 servings
- Category: Breakfast
- Cuisine: American
Ingredients
- All-purpose flour, 2 cups (250g)
- Granulated sugar, 1/3 cup (65g)
- Baking powder, 1 tablespoon
- Pumpkin pie spice, 1½ teaspoons
- Ground cinnamon, ½ teaspoon
- Salt, ½ teaspoon
- Unsalted butter, 6 tablespoons (85g), cold and cubed
- Pumpkin puree, ½ cup (120g)
- Heavy cream, ¼ cup (60ml), plus more for brushing
- Vanilla extract, 1 teaspoon
- Powdered sugar, 1 cup (120g)
- Pure maple syrup, 2 tablespoons
- Heavy cream or milk, 1-2 tablespoons
- Vanilla extract, ½ teaspoon
Instructions
- Preheat your oven to 400°F (200°C). Line a baking sheet with parchment paper.
- Whisk the dry ingredients together: In a large bowl, combine the flour, sugar, baking powder, pumpkin pie spice, cinnamon, and salt. Whisk until evenly distributed.
- Cut in the cold butter: Add the cold, cubed butter to the flour mixture. Using a pastry cutter or two forks, cut the butter into the flour until the mixture resembles coarse meal with some pea-sized butter pieces remaining.
- Mix the wet ingredients: In a small bowl or measuring cup, whisk together the pumpkin puree, heavy cream, and vanilla extract until smooth.
- Combine wet and dry: Pour the pumpkin mixture into the flour mixture. Use a rubber spatula or fork to stir until just combined. The dough will look shaggy and a little dry.
- Bring the dough together: Turn the dough out onto a lightly floured surface. Gently knead it 4-5 times until it comes together. Don’t overwork it.
- Shape the dough: Pat the dough into a ¾-inch thick circle, about 7 inches across. Don’t use a rolling pin.
- Cut the scones: Using a bench scraper or sharp knife, cut the circle into 8 equal wedges like a pizza. Cut cleanly straight down. Transfer the wedges to the prepared baking sheet, spacing them about 2 inches apart.
- Brush with cream: Brush the tops of the scones with a little heavy cream.
- Bake: Bake for 14-16 minutes, until the scones are golden brown on the bottom and lightly golden on top. Rotate the pan halfway through for even baking.
- Cool: Let the scones cool on the baking sheet for 5 minutes, then transfer them to a cooling rack. Cool completely before glazing.
- Make the glaze: While the scones cool, whisk together the powdered sugar, maple syrup, vanilla, and 1 tablespoon of cream. Add more cream a teaspoon at a time until you reach a thick but pourable consistency.
- Glaze the scones: Once the scones are completely cool, drizzle the glaze over the tops. Let the glaze set for about 10 minutes before serving.
Notes
Keep everything cold for light, fluffy scones. Don’t overwork the dough. Use a light touch with the pumpkin. Check your baking powder is fresh. Let scones cool completely before glazing.
Nutrition
- Serving Size: 1 scone
- Calories: 320
- Sugar: 24
- Sodium: 280
- Fat: 14
- Saturated Fat: 8
- Carbohydrates: 46
- Fiber: 2
- Protein: 4
Keywords: pumpkin scones, maple glaze, fall baking, breakfast, brunch, easy scone recipe


