Love this? Save it for later!
Share the inspiration with your friends
It was 10:47 PM on a rainy Wednesday in late October, and I had a very specific, slightly ridiculous craving: I wanted something that looked like a ghost but tasted like a toasted marshmallow. I didn’t have any candy melts or fancy cookie cutters, but I had three egg whites left over from dinner, a bag of sugar, and the sudden, stubborn idea that I could make Halloween treats that didn’t involve a trip to the store in that weather. Honestly, the rain was coming down sideways, and my motivation to put on real pants was at an all-time low.
So there I was, standing in my kitchen in pajama pants, whisking egg whites by hand because my stand mixer was buried under a pile of mail. Let me tell you, my arm was not prepared for that workout. I was about to give up and just make scrambled eggs when I remembered that trick about using a glass bowl for meringue—something about the stability? I grabbed a clean wine glass, balanced the bowl on top, and suddenly I had a makeshift setup that actually worked. It was one of those weird, late-night kitchen hacks that you’d never try in the light of day, but at 11 PM, it felt like genius.
The first batch came out looking less like ghosts and more like lumpy clouds that had seen better days. But the second batch? Those little guys had personality. They had tiny, lopsided smiles and the kind of charm that only comes from something made at midnight with a slightly reckless attitude. Maybe you’ve been there—that moment when you’re too tired to follow the rules but too stubborn to give up. That’s exactly how these cozy ghost meringue cookies for Halloween were born, and I’ve been making them every October since.
Why You’ll Love This Recipe
These cozy ghost meringue cookies for Halloween are the kind of treat that feels both special and totally doable. I’ve tested this recipe about seven times now—yes, seven—and each batch taught me something new. The first time, I over-whipped the eggs and they deflated in the oven. The second time, I didn’t let them cool long enough and ended up with sticky ghosts. But by batch number three, I had it down, and I promise you’ll get there too on your first try if you follow these steps.
- Quick & Easy: From start to finish, you’re looking at about 2 hours, but most of that is baking time. Active prep is only 15 minutes.
- Simple Ingredients: You probably have everything already—egg whites, sugar, vanilla, and a little cream of tartar. No special Halloween candy required.
- Perfect for Halloween: These are great for classroom parties, Halloween movie nights, or just a cozy night in when you want something festive without the sugar crash from store-bought candy.
- Crowd-Pleaser: Kids think they’re adorable, and adults appreciate that they’re naturally gluten-free and lower in fat than most Halloween treats.
- Unbelievably Delicious: The texture is light and airy with a slightly chewy center—like a marshmallow that went to finishing school.
What makes this recipe different from all the other meringue cookies out there? It’s the technique. Instead of piping perfect little shapes, we’re going for a slightly rustic, hand-shaped look that makes each ghost unique. Plus, I’ve figured out the exact oven temperature and timing to get that perfect crisp exterior with a soft, marshmallowy interior. It’s comfort food reimagined—simpler, faster, but with the same soul-soothing satisfaction that makes you close your eyes after the first bite.
What Ingredients You Will Need
This recipe uses simple, pantry-friendly ingredients to create something truly magical. The key is using room-temperature egg whites and being patient with the whipping process. Here’s what you’ll need:
For the Meringue Ghosts
- 3 large egg whites, room temperature (this is crucial—cold eggs won’t whip up as high)
- 3/4 cup (150g) granulated sugar (I prefer fine baker’s sugar as it dissolves faster, but regular works fine)
- 1/4 teaspoon cream of tartar (this stabilizes the meringue and helps it hold its shape)
- 1/2 teaspoon vanilla extract (pure, not imitation—trust me on this one)
- Pinch of salt (about 1/8 teaspoon, just to balance the sweetness)
For the Faces
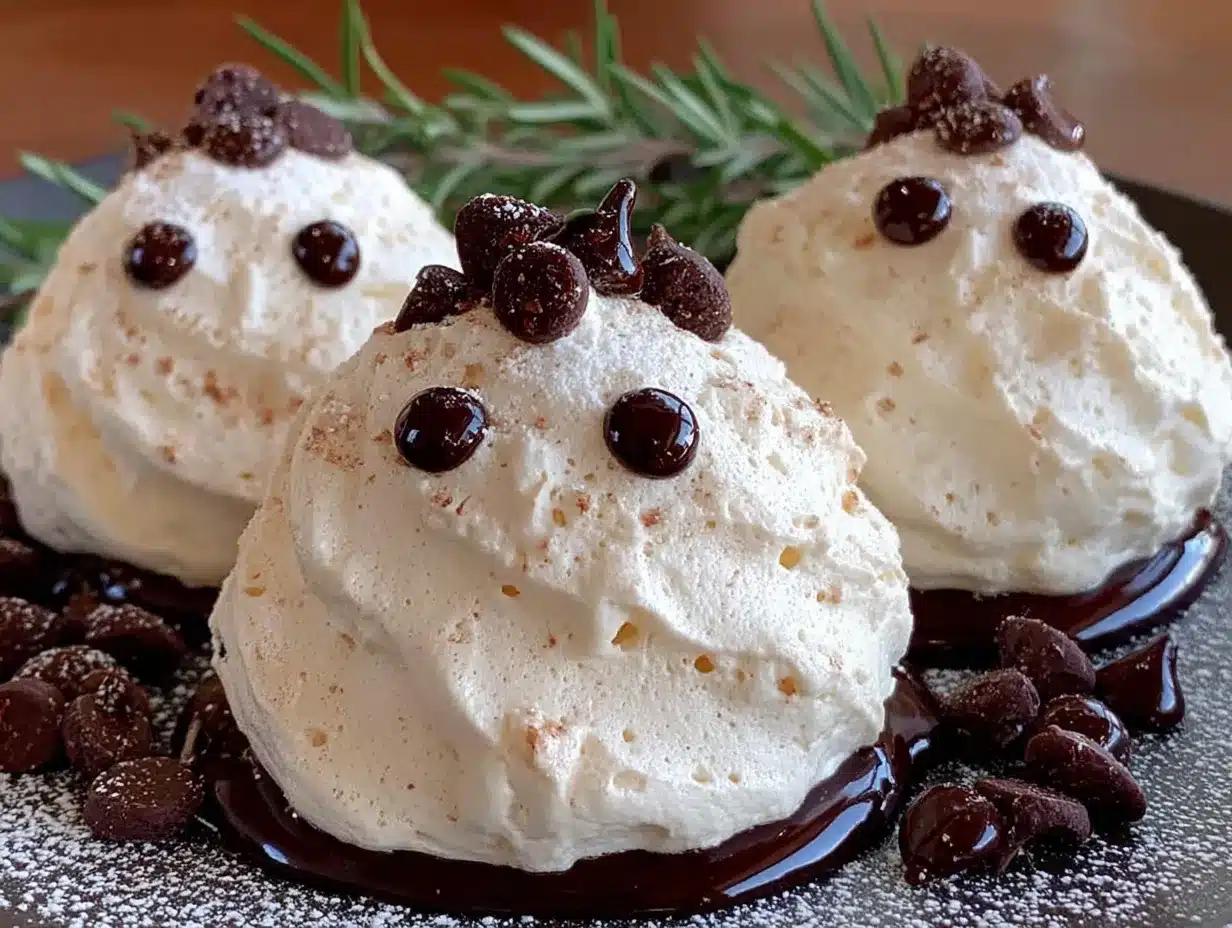
- 1 tablespoon melted dark chocolate (or dairy-free chocolate chips if needed)
- A toothpick or small piping bag for drawing the faces
Let’s talk about the sugar for a second. I’ve tried this with both regular granulated sugar and superfine sugar, and honestly, the superfine sugar makes a noticeable difference in texture. If you don’t have it, just pulse your regular sugar in a food processor for 30 seconds. It dissolves faster, which means a smoother, glossier meringue. I learned this the hard way after one batch came out grainy—not a good look for a ghost.
For the chocolate, I recommend using dark chocolate chips from a brand like Ghirardelli or Enjoy Life (if you need dairy-free). The bitterness of the dark chocolate contrasts beautifully with the sweet meringue. Don’t use milk chocolate—it’s too sweet and doesn’t show up as well against the white meringue.
One more thing: make sure your bowl and whisk are completely clean and free of any grease. Even a tiny bit of oil will prevent your egg whites from whipping properly. I wipe my bowl down with a little lemon juice and a paper towel before starting—old pastry chef trick.
Equipment Needed
You don’t need much for this recipe, which is part of the beauty. Here’s what you’ll want to have on hand:
- Electric mixer (handheld or stand mixer—both work fine; I’ve used both and prefer the stand mixer for stability, but my handheld gets the job done too)
- Large glass or metal mixing bowl (plastic can hold onto grease, so avoid it)
- Baking sheet (lined with parchment paper—don’t skip the parchment or your ghosts will stick)
- Piping bag or zip-top bag (for shaping the ghosts; a zip-top bag with the corner snipped off works perfectly)
- Toothpick (for drawing faces)
- Cooling rack (optional but helpful for even cooling)
If you don’t have a piping bag, honestly, just use a sturdy zip-top bag. I’ve done it a dozen times, and it works just as well. Snip off about 1/2 inch from one corner, and you’re good to go. No need to buy specialty equipment for a simple Halloween treat.
Preparation Method
Let’s make some ghosts! Follow these steps carefully, and you’ll have a batch of adorable, cozy ghost meringue cookies for Halloween in no time.
- Preheat your oven to 200°F (95°C). Yes, that’s low—we’re drying these out, not baking them. Line a large baking sheet with parchment paper and set aside.
- Separate your eggs while they’re cold. It’s easier to separate whites from yolks when the eggs are cold, but let the whites come to room temperature before whipping—about 20 minutes. I usually separate them first, then let them sit while I clean up the kitchen.
- In your clean, grease-free bowl, combine the egg whites and cream of tartar. Start mixing on medium speed until the mixture becomes foamy and starts to look like a bubble bath—about 1-2 minutes. You’ll see small bubbles forming, and the mixture will be slightly opaque.
- Gradually add the sugar, one tablespoon at a time. This is the most important step. If you dump all the sugar in at once, your meringue will deflate. Keep the mixer running on medium-high speed and add the sugar slowly, letting each addition incorporate before adding the next. This takes about 3-4 minutes total.
- Add the vanilla and salt. Once all the sugar is in, add the vanilla extract and the pinch of salt. Continue beating on high speed until stiff, glossy peaks form. You’ll know it’s ready when you lift the whisk and the meringue stands up in a firm peak that doesn’t droop. This usually takes another 3-5 minutes. The mixture should look like marshmallow fluff—thick, white, and shiny.
- Test the meringue. Rub a tiny bit between your fingers. If it feels smooth and you can’t feel any sugar granules, you’re good. If it feels gritty, keep beating for another minute. This is the difference between silky ghosts and sad, grainy ones.
- Transfer the meringue to your piping bag. If using a zip-top bag, place it in a tall glass and fold the edges over the rim to make filling easier. Spoon the meringue in, then twist the top to seal.
- Pipe the ghosts. Hold the bag straight down over the baking sheet and squeeze out a round blob about 2 inches wide. Then, without releasing pressure, pull the bag straight up to create a little peak on top—that’s the ghost’s head. Each ghost should be about 2-3 inches tall. Leave about 1 inch between them as they won’t spread much.
- Bake for 1 hour 15 minutes to 1 hour 30 minutes. The ghosts should be dry to the touch and easily lift off the parchment. They’ll still be slightly soft in the center, which is what we want. Don’t open the oven door during the first hour—the temperature change can cause them to crack.
- Turn off the oven and let the ghosts cool inside. Leave them in the turned-off oven with the door closed for at least 1 hour, or overnight if you have time. This final drying step ensures they stay crisp on the outside and chewy on the inside.
- Draw the faces. Once the ghosts are completely cool, melt your dark chocolate in a small microwave-safe bowl (20-second intervals, stirring between each). Using a toothpick or the tip of a small piping bag, draw tiny eyes and a little smile on each ghost. I like making them slightly uneven—it gives them personality.
- Let the chocolate set. Place the ghosts in the refrigerator for 5-10 minutes to set the chocolate, or just let them sit at room temperature for 15 minutes.
A quick note: if your ghosts start to crack while baking, don’t panic. It happens. Sometimes it’s because the oven temperature fluctuated, or the meringue was a little over-whipped. Cracked ghosts are still delicious—they just look like they’ve seen a ghost themselves!
Cooking Tips & Techniques
After making these cozy ghost meringue cookies for Halloween more times than I care to count, I’ve picked up a few tricks that make all the difference.
Humidity is your enemy. Meringue hates moisture. If you live in a humid climate or it’s a rainy day, your meringue might not whip up as well. I learned this the hard way during a particularly sticky September. Now I check the weather before I start. If it’s humid, I add an extra tablespoon of sugar and beat the meringue a little longer.
Don’t over-whip, but don’t under-whip either. This is the Goldilocks zone of meringue making. Under-whipped meringue will deflate in the oven, and over-whipped meringue will start to look grainy and separate. You want that sweet spot where it’s glossy and holds a stiff peak. If you see the mixture starting to look dry or curdled, you’ve gone too far—start over.
Use a timer for the sugar. I know it sounds silly, but I set a timer for 30 seconds between each tablespoon of sugar. It forces me to be patient, and the meringue is always better for it. Rushing the sugar is the number one mistake I see people make.
Keep the oven door closed. I know it’s tempting to peek, but resist. Opening the door lets in cool air and moisture, which can cause your ghosts to collapse. I once opened the door at the 45-minute mark to check on them, and half of them deflated instantly. Never again.
Let them cool completely. I know you’re excited, but don’t rush this step. The ghosts continue to dry out as they cool in the oven, and that’s what gives them their perfect texture. If you take them out too soon, they’ll be sticky and soft all the way through.
Variations & Adaptations
One of the best things about these cozy ghost meringue cookies for Halloween is how easy they are to customize. Here are some variations I’ve tried and loved:
Chocolate Ghosts
Swap 2 tablespoons of the granulated sugar for 2 tablespoons of unsweetened cocoa powder. Sift it in with the sugar to avoid lumps. The ghosts will be a pale chocolate color, which is actually pretty cute—they look like little cocoa ghosts.
Peppermint Ghosts
Add 1/4 teaspoon of peppermint extract along with the vanilla. Crush up a candy cane and sprinkle the pieces on top of the ghosts before baking. The red and white specks look festive, and the minty flavor is perfect for Halloween.
Vegan Meringue Ghosts
Use aquafaba (the liquid from a can of chickpeas) instead of egg whites. 3 tablespoons of aquafaba equals about 1 egg white. Whip it the same way, but it might take a little longer to reach stiff peaks. The texture is slightly different—a bit more chewy—but still delicious.
Pumpkin Spice Ghosts
Add 1 teaspoon of pumpkin pie spice and 1/4 teaspoon of cinnamon to the sugar before adding it to the egg whites. The warm spices make these feel extra cozy for fall. I made these for a Halloween party last year, and they disappeared in minutes.
Gluten-Free Option
These are naturally gluten-free, so no adjustments needed. Just make sure your vanilla extract and chocolate are certified gluten-free if that’s a concern.
Serving & Storage Suggestions
These cozy ghost meringue cookies for Halloween are best served at room temperature, straight from the baking sheet if you can’t wait. I like arranging them on a white platter with a few fake cobwebs and some candy corn for a spooky display.
They pair beautifully with a warm drink—think hot chocolate, chai tea, or a pumpkin spice latte. The sweetness of the meringue balances the bitterness of coffee or the spice of chai. For a fun Halloween party, set up a meringue decorating station and let guests draw their own faces.
Storage: Store the ghosts in an airtight container at room temperature for up to 1 week. Don’t refrigerate them—the moisture will make them sticky. If you’re stacking them, place a piece of parchment paper between layers to prevent sticking.
Freezing: These freeze beautifully! Place the cooled, undecorated ghosts in a single layer in a freezer-safe container, with parchment between layers. They’ll keep for up to 3 months. When you’re ready to serve, thaw them at room temperature for about 30 minutes, then add the chocolate faces.
The flavors actually develop a bit over time—the vanilla becomes more pronounced, and the texture evens out. I honestly think they’re even better on day two, if you can resist eating them all that long.
Nutritional Information & Benefits
Per serving (2 ghosts): approximately 80 calories, 0g fat, 19g carbohydrates, 2g protein. These are naturally low in fat and free from common allergens like dairy and nuts. They’re also gluten-free, making them a great option for parties with diverse dietary needs.
The main ingredient, egg whites, is a good source of protein and contains no cholesterol. The cream of tartar adds a small amount of potassium. Of course, these are still a treat—sugar is sugar—but they’re a lighter option compared to most Halloween candy.
If you’re watching your sugar intake, you can reduce the sugar to 1/2 cup, but the texture will be slightly less stable. I’ve tried it, and while it works, the ghosts don’t hold their shape as well. For a lower-sugar option, consider making smaller ghosts—they’ll still satisfy that sweet tooth without overdoing it.
FAQs
Why did my meringue deflate? This usually happens because of moisture, grease, or over-whipping. Make sure your bowl and whisk are completely clean and dry. If you live in a humid climate, try adding an extra tablespoon of sugar and beating the meringue on high speed for an extra minute.
Can I use liquid egg whites from a carton? Yes, but they won’t whip up as well as fresh egg whites. If using carton egg whites, let them come to room temperature first and add 1/8 teaspoon of cream of tartar for extra stability. The texture might be slightly less fluffy, but they’ll still work.
How do I know when the meringue is done whipping? Lift the whisk attachment straight up. The meringue should form a stiff peak that stands up on its own without drooping. The mixture should also look glossy and smooth, not grainy. Rub a little between your fingers—if it feels smooth, you’re good.
Can I make these ahead of time? Absolutely! These are perfect for making a day or two ahead. Store them in an airtight container at room temperature, and add the chocolate faces just before serving to keep them looking fresh. They’ll stay good for up to a week.
Why are my meringues sticky? Sticky meringues usually mean they weren’t baked long enough or cooled properly. Make sure you’re baking at a low temperature (200°F) and leaving them in the turned-off oven to dry out completely. If it’s a humid day, they might absorb moisture from the air—store them immediately in an airtight container.
Conclusion
These cozy ghost meringue cookies for Halloween have become a tradition in my kitchen, and I hope they become one in yours too. They’re proof that you don’t need fancy ingredients or complicated techniques to make something truly special. Just three egg whites, some sugar, and a little bit of patience—that’s all it takes to create a treat that feels like a hug in cookie form.
I love how forgiving this recipe is. Even the imperfect ghosts—the ones with lopsided smiles or tiny cracks—have a charm that store-bought candy just can’t match. They remind me that cooking doesn’t have to be perfect to be wonderful. Sometimes the best things come from a rainy night, a random craving, and a willingness to try something new.
So go ahead, give these a try. Make them your own—add chocolate chips, switch up the flavors, or just enjoy them plain. And when you do, I’d love to hear about it. Drop a comment below and tell me how your ghosts turned out. Did you make any fun variations? Did your kids help draw the faces? Share your stories—I read every single one.
Happy Halloween, friends. May your ghosts be cute, your meringue be glossy, and your kitchen be filled with the sweet, cozy smell of vanilla and sugar. You’ve got this.
Pin This Recipe!
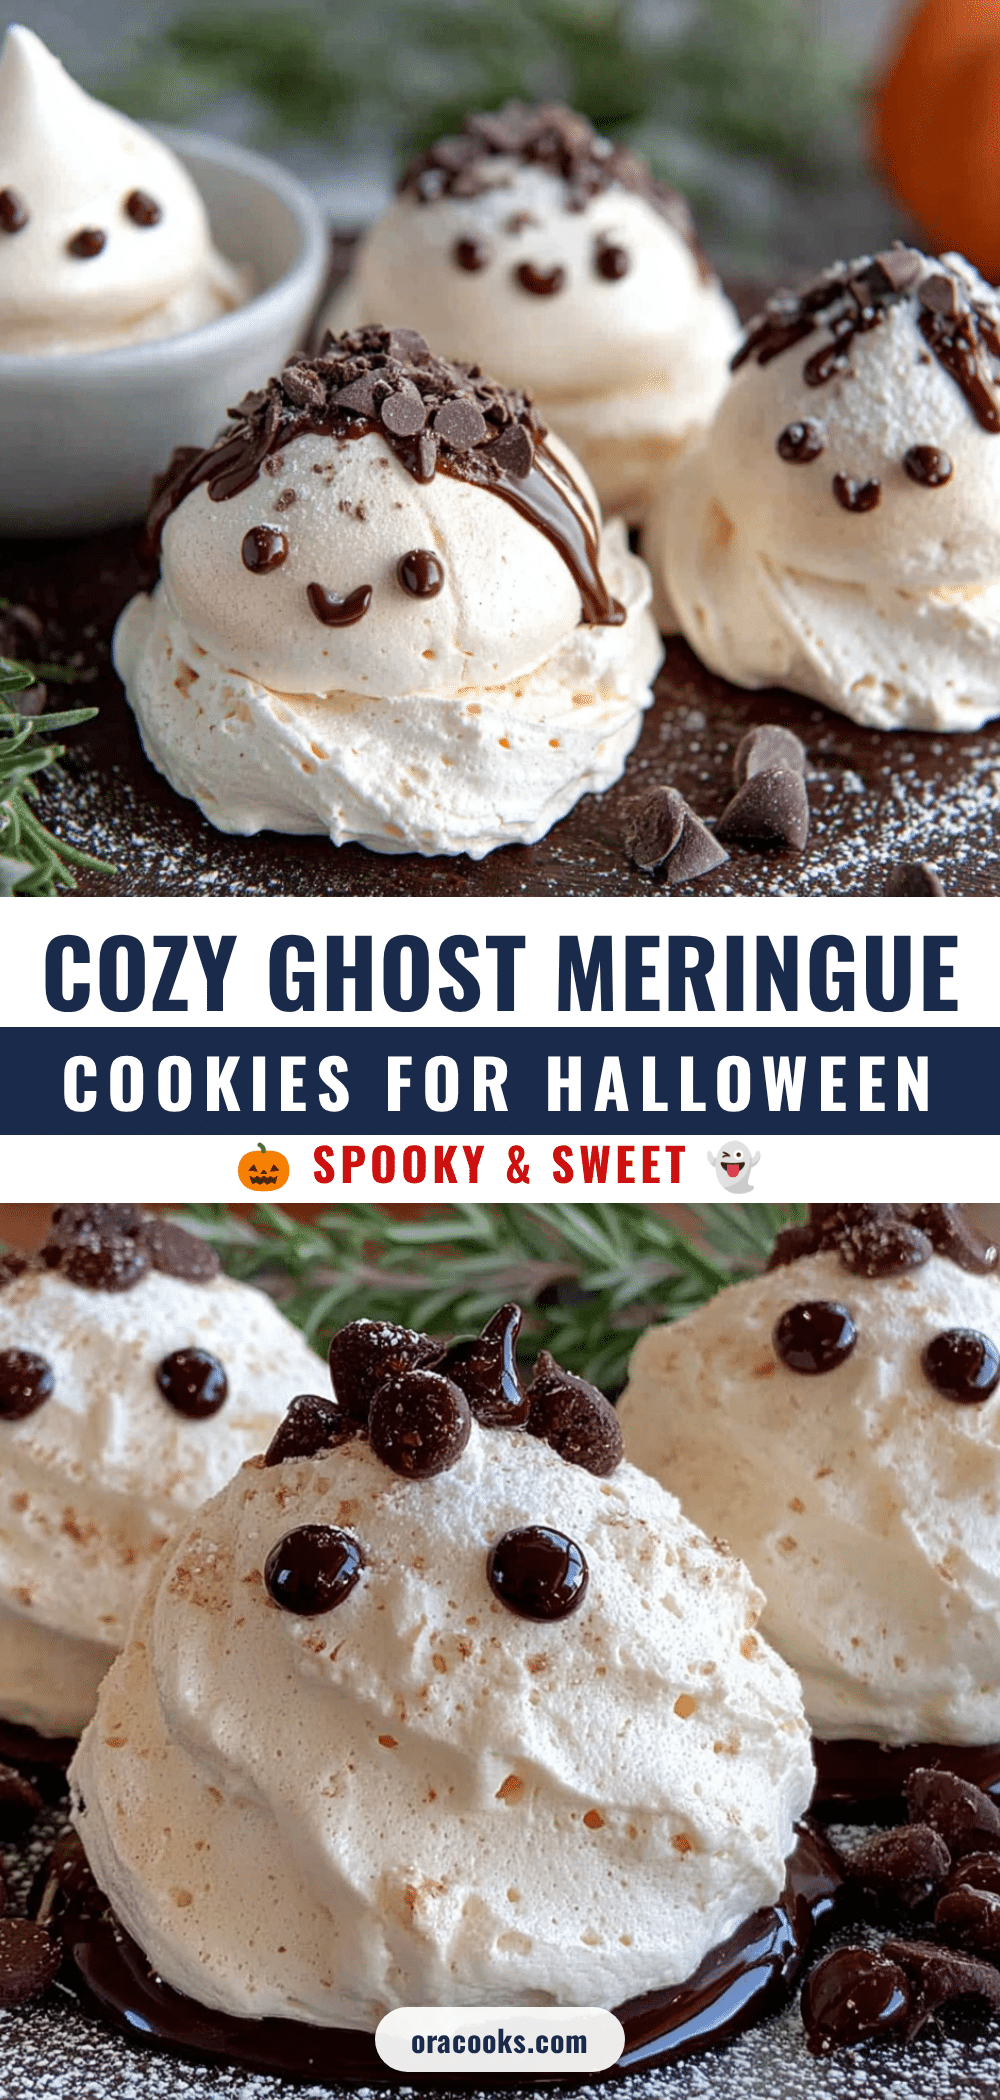
Cozy Ghost Meringue Cookies: Easy Halloween Treat
These adorable ghost-shaped meringue cookies are light, airy, and taste like toasted marshmallows. Made with simple ingredients, they’re perfect for Halloween parties or a cozy night in.
- Prep Time: 15 minutes
- Cook Time: 1 hour 15 minutes
- Total Time: 2 hours 30 minutes
- Yield: 24 ghosts 1x
- Category: Dessert
- Cuisine: American
Ingredients
- 3 large egg whites, room temperature
- 3/4 cup (150g) granulated sugar
- 1/4 teaspoon cream of tartar
- 1/2 teaspoon vanilla extract
- Pinch of salt (about 1/8 teaspoon)
- 1 tablespoon melted dark chocolate (for faces)
Instructions
- Preheat your oven to 200°F (95°C). Line a large baking sheet with parchment paper.
- Separate your eggs while cold, then let the whites come to room temperature (about 20 minutes).
- In a clean, grease-free bowl, combine the egg whites and cream of tartar. Mix on medium speed until foamy, about 1-2 minutes.
- Gradually add the sugar, one tablespoon at a time, while mixing on medium-high speed. This takes about 3-4 minutes.
- Add the vanilla and salt. Continue beating on high speed until stiff, glossy peaks form, about 3-5 minutes. The mixture should look like marshmallow fluff.
- Test the meringue by rubbing a bit between your fingers; it should feel smooth, not gritty.
- Transfer the meringue to a piping bag or a zip-top bag with the corner snipped off.
- Pipe ghosts onto the prepared baking sheet: squeeze out a 2-inch round blob, then pull the bag straight up to create a peak. Leave 1 inch between ghosts.
- Bake for 1 hour 15 minutes to 1 hour 30 minutes, until dry to the touch. Do not open the oven door during the first hour.
- Turn off the oven and let the ghosts cool inside with the door closed for at least 1 hour, or overnight.
- Once completely cool, melt the dark chocolate. Using a toothpick or small piping bag, draw eyes and a smile on each ghost.
- Let the chocolate set in the refrigerator for 5-10 minutes, or at room temperature for 15 minutes.
Notes
Humidity can affect meringue; if it’s humid, add an extra tablespoon of sugar and beat longer. Ensure all equipment is clean and grease-free. For best results, let ghosts cool completely in the turned-off oven.
Nutrition
- Serving Size: 2 ghosts
- Calories: 80
- Sugar: 19
- Sodium: 30
- Carbohydrates: 19
- Protein: 2
Keywords: Halloween cookies, meringue cookies, ghost cookies, easy Halloween treats, gluten-free cookies, low-fat cookies