Love this? Save it for later!
Share the inspiration with your friends
There used to be a tiny bakery tucked between a laundromat and a vintage shop on the corner of 7th and Elm that made the most incredible pumpkin cheesecake bars. When they closed their doors three years ago—just a handwritten sign in the window saying “Thanks for the memories”—I honestly felt a little lost. That bakery was my go-to for fall gatherings, for Thanksgiving desserts, for those random Tuesday nights when I needed something sweet. And their pumpkin cheesecake bars with that spicy, crunchy gingersnap crust? Pure magic.
After maybe seven or eight attempts—some that were too dense, a couple where the crust got soggy, one that I accidentally over-baked into a dry mess—I finally cracked the code. These easy pumpkin cheesecake bars with gingersnap crust are the result of that obsession. They hit every single note that bakery’s version did: the creamy, tangy cheesecake layer, the velvety pumpkin spice filling, and that perfectly crunchy, buttery crust that snaps when you bite into it.
What I love most about this version is that it’s actually easier than the original. I streamlined the process so you’re not standing over a mixer forever, and I swapped in a few shortcuts that save time without sacrificing flavor. If you’ve ever tried to make a full cheesecake and dealt with water baths and cracking and all that drama—you’re going to love these bars. No fuss, no stress, just incredible fall flavor in every single bite. Let me tell you, once you make these, you’ll understand why I spent three years chasing that memory.
Why You’ll Love This Recipe
Let’s be real for a second. Weeknight baking needs to be practical. You’re tired, you’ve got a million things going on, and the last thing you need is a complicated dessert that takes over your whole kitchen. These easy pumpkin cheesecake bars with gingersnap crust are the answer to that exact problem.
- Quick & Easy: From start to finish, these bars come together in about 45 minutes of active time. The oven does most of the work, and you’re free to get dinner on the table or finally sit down for a minute.
- Simple Ingredients: No fancy grocery store trips needed. Canned pumpkin, cream cheese, gingersnaps, butter—these are all things you probably have or can grab without a second thought.
- Perfect for Fall Gatherings: Whether it’s a casual weeknight dessert, a Thanksgiving potluck, or just a Tuesday that needs a little pumpkin spice pick-me-up, these bars fit right in.
- Crowd-Pleaser: I’ve brought these to family dinners, neighbor gatherings, and work events, and they disappear every single time. Kids love the creamy texture, adults love the sophisticated gingersnap kick.
- Unbelievably Delicious: The combination of tangy cream cheese, warm pumpkin spice, and that crunchy, buttery crust is just next-level comfort food. You’ll close your eyes after the first bite, I promise.
What makes this recipe different from all the other pumpkin cheesecake bars out there? It’s the crust, honestly. Most recipes use graham crackers, which are fine, but gingersnaps bring a whole other dimension of flavor. The molasses and ginger in the cookies complement the pumpkin spice in a way that feels intentional and special. Plus, I’ve tested the baking time to perfection—no more checking every two minutes wondering if the center is supposed to jiggle or not. This recipe gives you clear cues so you know exactly when they’re done.
This isn’t just another pumpkin dessert. It’s the kind that makes you slow down and actually enjoy the season. No stress, no complicated techniques—just pure, soul-soothing pumpkin cheesecake goodness that feels like a warm hug on a crisp fall evening.
What Ingredients You Will Need
This recipe uses simple, wholesome ingredients to deliver bold flavor and satisfying texture without the fuss. Most of these are pantry staples, especially if you do any fall baking at all. Here’s what you’ll need, broken down by component.
For the Gingersnap Crust
- 2 cups (about 200g) gingersnap cookies, finely crushed — I recommend using store-bought gingersnaps for convenience. Look for a brand that’s crisp, not soft. You want that snap when you bite into the finished bars. Nabisco’s “Old Fashioned” ginger snaps or the store brand version both work great.
- 1/4 cup (50g) granulated sugar — Just a touch of sweetness to balance the spicy cookies.
- 6 tablespoons (85g) unsalted butter, melted — This binds the crust together and adds richness. Use salted butter if that’s all you have, just reduce the added salt if you’re adding any.
- Pinch of salt — Optional, but it helps balance the sweetness if your gingersnaps are on the sweeter side.
For the Cheesecake Layer
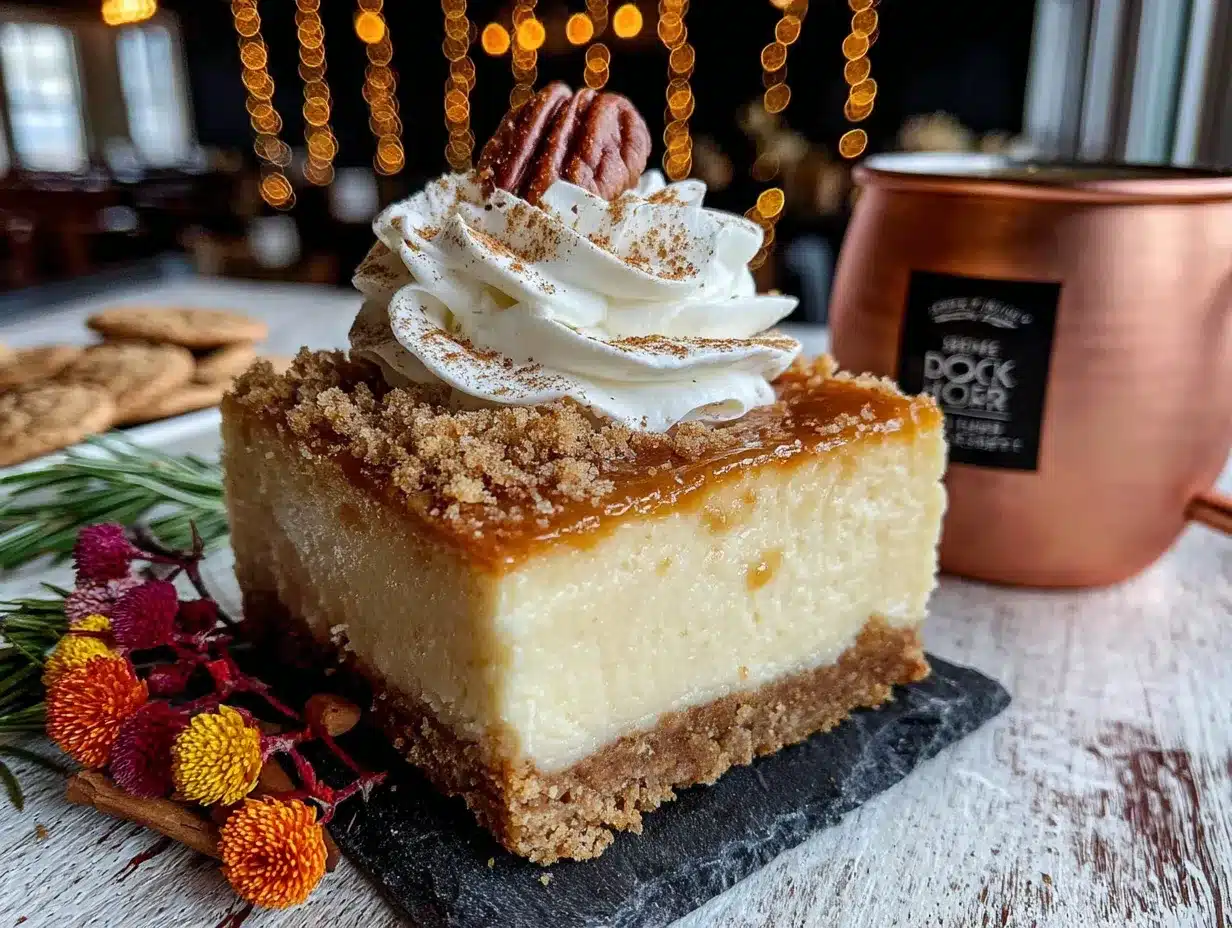
- 16 ounces (450g) cream cheese, softened — Full-fat cream cheese is the way to go here. It gives the bars that rich, creamy texture that makes them so satisfying. Let it sit out for at least 30 minutes before you start mixing.
- 1/2 cup (100g) granulated sugar — Standard sweetness for cheesecake.
- 2 large eggs — Room temperature is ideal. If you forgot to take them out, put them in a bowl of warm water for 5 minutes.
- 1 teaspoon vanilla extract — Pure vanilla extract makes a difference, but imitation works in a pinch.
For the Pumpkin Layer
- 1 cup (240g) canned pumpkin puree — Not pumpkin pie filling. Make sure you grab the 100% pure pumpkin. Libby’s is my go-to brand for consistent results.
- 1/2 cup (100g) packed light brown sugar — Brown sugar adds moisture and a deeper, caramel-like sweetness that pairs beautifully with pumpkin.
- 2 large eggs — Again, room temperature.
- 1 teaspoon vanilla extract — For warmth and depth.
- 1 1/2 teaspoons pumpkin pie spice — You can use store-bought or make your own with 3/4 teaspoon cinnamon, 1/2 teaspoon ginger, 1/4 teaspoon nutmeg, and a pinch of cloves.
- 1/4 teaspoon salt — Enhances all the flavors and balances the sweetness.
Ingredient Selection Tips: For the cream cheese, I’ve found that Philadelphia brand consistently gives the smoothest results, but any full-fat block cream cheese works. Avoid the spreadable kind in a tub—it has added water and stabilizers that can make the cheesecake layer too soft. For the gingersnaps, look for cookies that are crunchy but not rock-hard. If they’re too hard, they’ll be difficult to crush evenly.
Substitution Guidance: If you need a gluten-free option, use gluten-free gingersnap cookies (they exist!) and check that your pumpkin pie spice is certified gluten-free. For a dairy-free version, use dairy-free cream cheese and a plant-based butter substitute, though the texture will be slightly less rich. You can swap the brown sugar for coconut sugar if you’re looking for a less refined option, but keep in mind the flavor will be slightly different.
Equipment Needed
You don’t need a professional bakery setup to make these easy pumpkin cheesecake bars with gingersnap crust. Here’s what you’ll need:
- 9×9-inch baking pan — This is the sweet spot for these bars. An 8×8 pan works too, but the bars will be slightly thicker and may need a few extra minutes of baking time.
- Parchment paper — This is non-negotiable for easy removal. Cut two strips that overlap in the pan, leaving overhang on all sides.
- Food processor or zip-top bag and rolling pin — For crushing the gingersnaps. A food processor gives the most even crumbs, but a bag and rolling pin work just fine if you’re up for a little arm workout.
- Medium mixing bowl — For the crust mixture.
- Large mixing bowls (2) — One for the cheesecake layer, one for the pumpkin layer.
- Electric hand mixer or stand mixer — A hand mixer is perfectly fine and easier to clean. You just need to get the cream cheese smooth.
- Rubber spatula — For scraping down the bowl and spreading the layers.
- Measuring cups and spoons — Standard set.
- Sharp knife — For clean cuts after the bars have chilled.
Budget-Friendly Options: If you don’t have a food processor, place the gingersnaps in a sturdy zip-top bag, seal it, and crush them with a rolling pin or even the bottom of a heavy skillet. It takes a few minutes, but it works perfectly. And if you don’t have a 9×9 pan, a 9×13 pan will work—just reduce the baking time by about 5 minutes and expect thinner bars.
Preparation Method
Let’s get to the fun part. Follow these steps, and you’ll have the most incredible easy pumpkin cheesecake bars with gingersnap crust in no time. I’ve included time estimates and sensory cues so you know exactly what to look for at each stage.
- Preheat and Prep (5 minutes)
Preheat your oven to 350°F (175°C). Line a 9×9-inch baking pan with parchment paper, leaving about 2 inches of overhang on two opposite sides. This will be your “handle” to lift the bars out later. Lightly grease the parchment with cooking spray or a little butter. - Make the Crust (10 minutes)
Place the gingersnap cookies in a food processor and pulse until you have fine crumbs—about 20-30 seconds. You should have about 2 cups of crumbs. Transfer to a medium bowl, add the sugar and salt, and stir to combine. Pour the melted butter over the crumbs and mix with a fork until everything is evenly moistened. The mixture should look like wet sand and hold together when you squeeze a handful. - Press and Bake the Crust (10 minutes)
Pour the crust mixture into the prepared pan and press it down firmly and evenly. I use the bottom of a measuring cup to really pack it in—this prevents the crust from crumbling when you cut the bars later. Bake for 8-10 minutes, until the crust is set and just starting to brown at the edges. Set it aside to cool while you make the fillings. - Make the Cheesecake Layer (10 minutes)
In a large bowl, beat the softened cream cheese with an electric mixer on medium speed until smooth and creamy, about 2 minutes. Scrape down the sides and the bottom of the bowl with a spatula. Add the sugar and beat for another minute until well combined. Add the eggs one at a time, beating on low speed after each addition just until incorporated. Stir in the vanilla. Be careful not to overmix—you don’t want to incorporate too much air, which can cause cracks. - Make the Pumpkin Layer (5 minutes)
In a separate large bowl, combine the pumpkin puree, brown sugar, eggs, vanilla, pumpkin pie spice, and salt. Beat on medium speed until smooth and well combined, about 2 minutes. The mixture should be thick and silky, with a beautiful deep orange color. - Layer the Fillings (10 minutes)
Pour the cheesecake mixture over the cooled crust and spread it into an even layer with a spatula. Then, carefully spoon the pumpkin mixture over the top. Here’s the trick: drop spoonfuls randomly across the surface, then use a knife or skewer to gently swirl the two layers together. Don’t over-swirl—you want distinct ribbons of pumpkin and cheesecake, not a muddy brown mixture. A few figure-eight motions are all you need. - Bake (35-40 minutes)
Place the pan in the preheated oven and bake for 35-40 minutes. The edges should look set and slightly puffed, and the center should have a slight jiggle—like firm Jell-O, not liquid. A toothpick inserted 1 inch from the edge should come out clean, but the center might still look a little wet. That’s okay; it will continue to set as it cools. - Cool and Chill (4 hours minimum, overnight is best)
Remove the pan from the oven and place it on a wire rack to cool completely at room temperature, about 1 hour. Once cool, cover the pan with plastic wrap and refrigerate for at least 4 hours, but overnight is truly best. This is where the magic happens—the flavors meld together and the texture firms up perfectly. - Slice and Serve (5 minutes)
When you’re ready to serve, lift the bars out of the pan using the parchment overhang. Place on a cutting board and use a sharp knife to slice into 9 or 16 squares. For clean cuts, wipe the knife clean between each slice. Serve cold or at room temperature.
Troubleshooting Tip: If your cheesecake layer looks lumpy after mixing, your cream cheese probably wasn’t soft enough. Next time, let it sit out for a full hour. For now, keep mixing—the lumps won’t be noticeable in the finished bars.
Cooking Tips & Techniques
After testing this recipe more times than I care to admit, I’ve gathered a few tricks that make these easy pumpkin cheesecake bars with gingersnap crust turn out perfectly every single time.
Don’t skip the parchment paper. I learned this the hard way. The first time I made these, I just greased the pan and hoped for the best. Let me tell you, getting those first bars out was a wrestling match. Parchment paper with overhang makes removal effortless and keeps your bars looking beautiful.
Room temperature ingredients matter. I know, I know—it’s an extra step. But cold cream cheese creates lumps, and cold eggs can cause the mixture to curdle. Take everything out of the fridge 30-60 minutes before you start. If you’re short on time, cut the cream cheese into cubes and let it sit for 15 minutes—it softens much faster that way.
Press that crust firmly. A loose crust is a crumbly crust. Use the bottom of a glass or a measuring cup to really pack those gingersnap crumbs down. I’ve found that pressing too lightly is the number one reason for crust that falls apart when you cut the bars.
Watch the swirl. Less is more when it comes to swirling the pumpkin and cheesecake layers. Three or four gentle figure-eight motions with a knife are plenty. If you over-swirl, you’ll lose the beautiful contrast and end up with one uniform color. Trust me, I’ve made that mistake more than once.
Patience with chilling. I know you want to eat these right away. I get it. But cutting into warm or even room-temperature bars is a recipe for a mess. The bars need that full 4 hours in the fridge to set properly. Overnight is even better—the flavors deepen and the texture becomes incredibly creamy. Plan ahead and make them the day before you need them.
Use a hot knife for clean cuts. Run your knife under hot water, dry it off, then slice. The heat helps the knife glide through the cheesecake without dragging. Wipe the blade clean between each cut for the prettiest squares.
Variations & Adaptations
One of the best things about these easy pumpkin cheesecake bars with gingersnap crust is how versatile they are. Here are some ways to make them your own.
Gluten-Free Version: Swap the regular gingersnaps for gluten-free gingersnap cookies. Brands like Mi-Del or Annie’s make great options. Everything else in the recipe is naturally gluten-free, so you’re good to go. Just double-check your pumpkin pie spice label to be safe.
Dairy-Free Version: Use dairy-free cream cheese (Kite Hill or Tofutti work well) and a plant-based butter substitute for the crust. The texture will be slightly less rich, but the flavor is still fantastic. I’ve tested this with Kite Hill and was honestly surprised at how creamy it turned out.
Spice It Up: If you like a little heat, add 1/4 teaspoon of cayenne pepper or a pinch of black pepper to the pumpkin layer. The warmth pairs surprisingly well with the ginger in the crust. My neighbor tried this variation and now makes it every year for her Thanksgiving dessert table.
Chocolate Twist: Drizzle melted dark chocolate over the top of the cooled bars for a decadent finish. The bitterness of the chocolate balances the sweetness of the cheesecake beautifully. Or, add 1/4 cup of mini chocolate chips to the pumpkin layer before baking.
Nutty Crust: Replace 1/2 cup of the gingersnap crumbs with finely chopped pecans or walnuts. Toast the nuts first for extra flavor. This gives the crust a wonderful crunch and an earthy note that complements the pumpkin.
Individual Servings: Make these in a muffin tin for perfectly portioned bars. Line 12 muffin cups with paper liners, press the crust into the bottoms, add the fillings, and bake for about 20 minutes. They’re adorable for parties and portion control is built right in.
Serving & Storage Suggestions
These easy pumpkin cheesecake bars with gingersnap crust are delicious in so many ways. Here’s how to serve and store them for the best experience.
Serving Temperature: I prefer these bars cold, straight from the fridge. The texture is firmer and the flavors are more pronounced. But they’re also wonderful at room temperature—just let them sit out for 15-20 minutes before serving. If you’re serving them at a gathering, I’d recommend pulling them out about 30 minutes ahead so they’re not ice-cold.
Presentation Ideas: Arrange the bars on a platter and dust them lightly with powdered sugar or a sprinkle of cinnamon. Add a dollop of whipped cream on each bar for an extra touch of indulgence. For a fall-themed presentation, garnish with a few candied pecans or a drizzle of caramel sauce.
Complementary Dishes: These bars pair beautifully with a hot cup of coffee, a chai latte, or a glass of cold milk. If you’re serving them as part of a dessert spread, they go well with apple crisp, pecan pie, or a simple vanilla ice cream. For a savory contrast, serve them alongside a cheese board with sharp cheddar and dried figs.
Storage Instructions: Store the bars in an airtight container in the refrigerator for up to 5 days. I like to layer them with parchment paper between each layer to prevent sticking. For longer storage, you can freeze them for up to 3 months. Wrap each bar individually in plastic wrap, then place them in a freezer-safe bag or container.
Reheating Tips: These bars are meant to be served cold or at room temperature, so reheating isn’t necessary. But if you want a warm dessert, microwave a single bar for 10-15 seconds. The cheesecake will soften slightly, and the crust will warm up nicely. Just don’t overdo it, or the bars will lose their structure.
Flavor Development: Honestly, these bars taste even better the next day. The flavors have time to meld together, and the texture becomes incredibly creamy. If you can resist eating them right away, you’ll be rewarded with an even more delicious dessert. I always make mine a day ahead when I’m bringing them to a gathering.
Nutritional Information & Benefits
While these easy pumpkin cheesecake bars with gingersnap crust are definitely a treat, they do offer some nutritional perks worth noting.
Estimated Nutritional Values (per bar, based on 9 servings):
- Calories: 345
- Total Fat: 22g
- Saturated Fat: 12g
- Cholesterol: 105mg
- Sodium: 280mg
- Total Carbohydrates: 34g
- Dietary Fiber: 2g
- Sugars: 24g
- Protein: 6g
Health Benefits of Key Ingredients: Pumpkin is packed with vitamin A, which supports eye health and immune function. It’s also a good source of fiber and antioxidants. The cream cheese provides calcium and protein, while the ginger in the crust has anti-inflammatory properties. Plus, the eggs add high-quality protein and essential vitamins.
Dietary Considerations: This recipe contains gluten (from the gingersnaps), dairy (from the cream cheese and butter), and eggs. For a gluten-free version, use gluten-free gingersnaps. For a dairy-free version, substitute dairy-free cream cheese and butter. The recipe is naturally nut-free, but always check labels if you’re serving someone with allergies.
Personal Wellness Perspective: I believe in balance. These bars are a special treat, not an everyday food. But when you do indulge, you’re getting real ingredients—pumpkin, cream cheese, eggs—not artificial flavors or preservatives. That’s something I feel good about. Plus, the portion-controlled bar format makes it easy to enjoy a satisfying dessert without overdoing it.
Conclusion
These easy pumpkin cheesecake bars with gingersnap crust are everything I hoped they would be when I started chasing that memory of the bakery on 7th and Elm. They’re creamy, spicy, sweet, and satisfying—all in one perfect little square. And the best part? They’re genuinely simple to make. No complicated techniques, no fancy equipment, just straightforward steps that deliver restaurant-quality results.
I hope you give these a try and make them your own. Maybe you’ll add a little extra spice, or drizzle them with caramel, or serve them with a scoop of vanilla ice cream. However you choose to enjoy them, I think you’ll find yourself coming back to this recipe again and again. It’s become my go-to fall dessert, and I have a feeling it’ll become yours too.
If you make these bars, I’d love to hear about it! Leave a comment below and let me know how they turned out. Did you try any variations? What did your family think? Share your photos on Pinterest and tag me—I can’t wait to see your beautiful creations. Happy baking, friends!
Frequently Asked Questions
Can I use fresh pumpkin instead of canned?
Yes, you can use fresh pumpkin puree. Just make sure to roast or steam the pumpkin until tender, then blend it until smooth. You’ll need to drain any excess liquid through a cheesecloth or fine-mesh strainer, because fresh pumpkin tends to be more watery than canned. If you skip this step, the bars might turn out too soft.
Can I make these bars ahead of time?
Absolutely! In fact, I recommend it. These bars need at least 4 hours of chilling time, but they actually taste better when made a day ahead. The flavors have time to meld together, and the texture becomes even creamier. You can make them up to 3 days in advance and store them in the refrigerator.
Can I freeze pumpkin cheesecake bars?
Yes, these bars freeze beautifully. Once they’re fully chilled and set, cut them into individual squares. Wrap each bar tightly in plastic wrap, then place them in a freezer-safe bag or container. They’ll keep for up to 3 months. To thaw, transfer a bar to the refrigerator overnight or let it sit at room temperature for about 30 minutes.
Why did my crust turn out soggy?
A soggy crust usually happens for one of two reasons. Either the crust wasn’t baked long enough before adding the filling, or the filling was too wet. Make sure you bake the crust for the full 8-10 minutes until it’s set and lightly browned. Also, make sure you’re using 100% pure pumpkin puree, not pumpkin pie filling, which has added liquids and sugar.
Can I use a different type of cookie for the crust?
Definitely! While gingersnaps are my favorite because of their spicy flavor, you can use graham crackers, shortbread cookies, or even vanilla wafers. If you use a sweeter cookie like graham crackers, you might want to reduce the sugar in the crust slightly. The flavor will be different, but the bars will still be delicious.
Pin This Recipe!
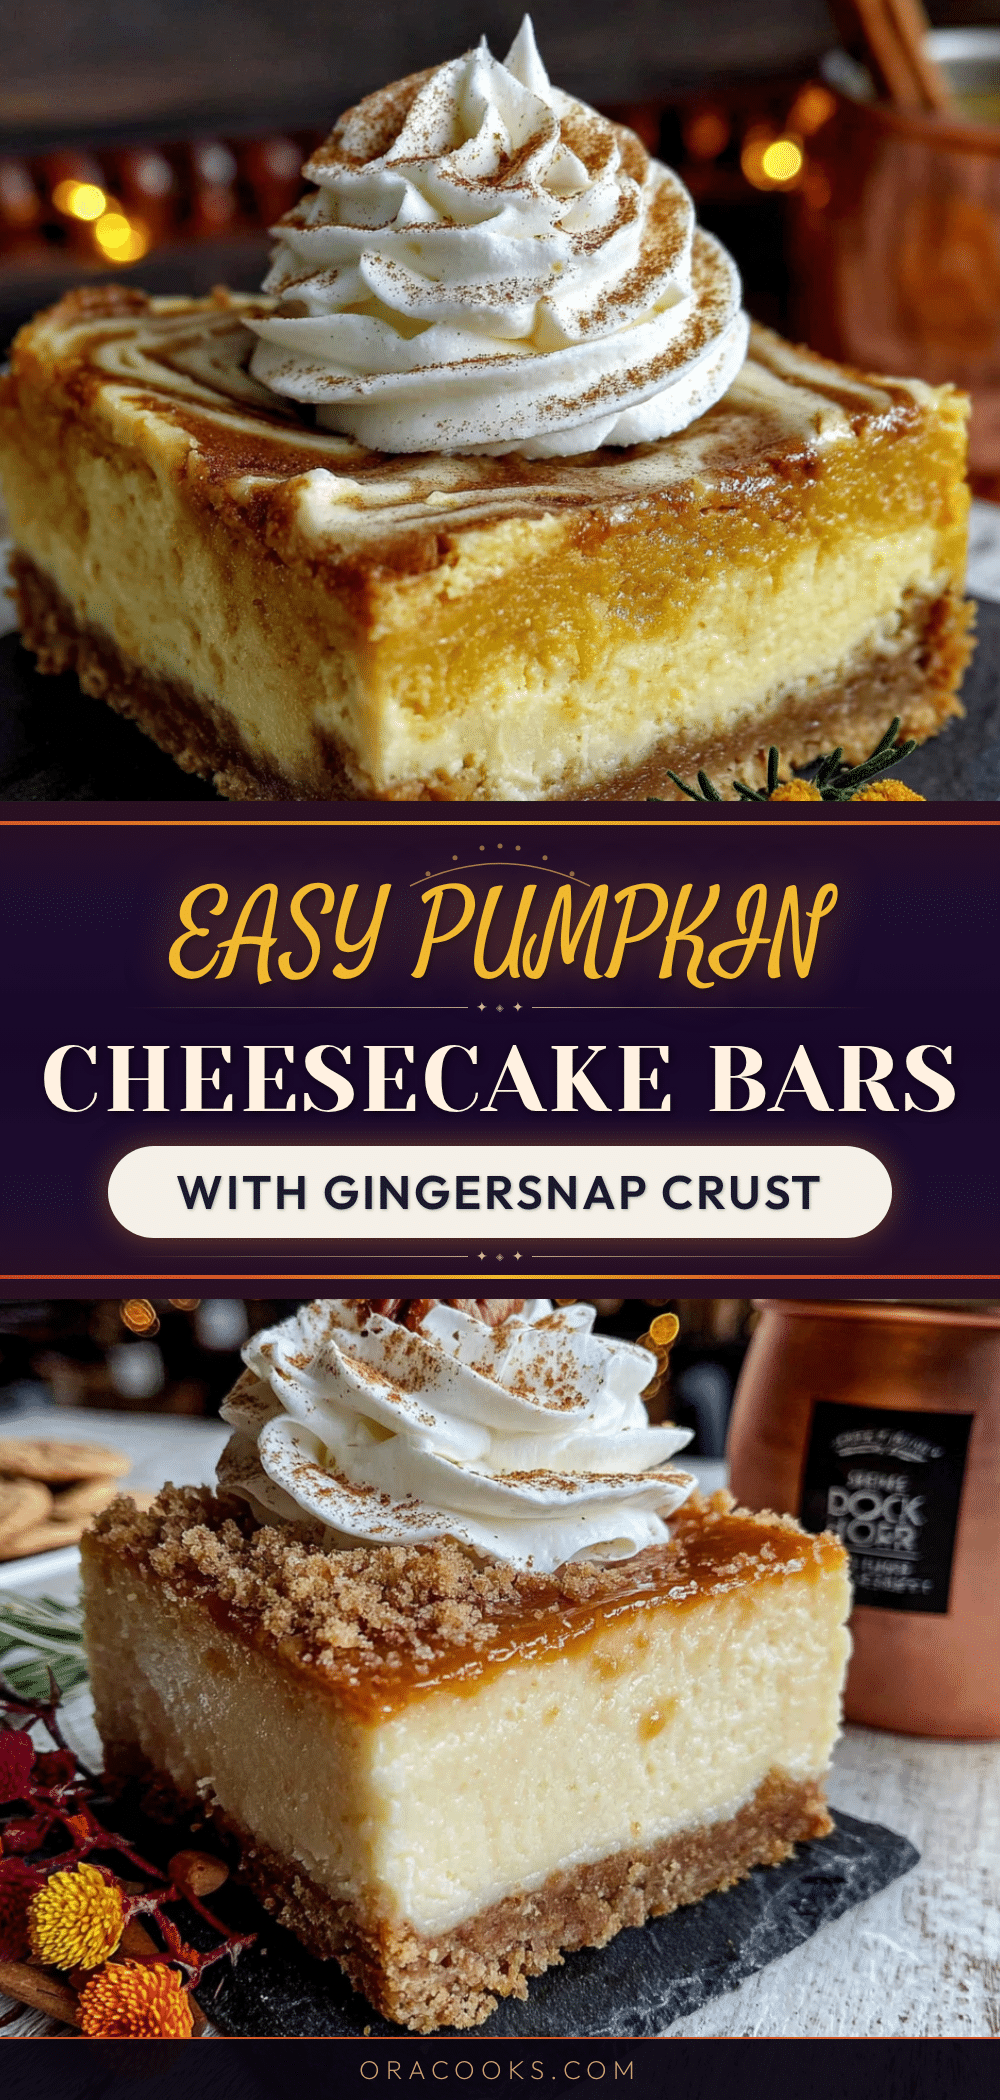
Easy Pumpkin Cheesecake Bars with Gingersnap Crust
These easy pumpkin cheesecake bars feature a creamy cheesecake layer, velvety pumpkin spice filling, and a crunchy, buttery gingersnap crust. They’re simple to make, perfect for fall gatherings, and taste even better the next day.
- Prep Time: 45 minutes
- Cook Time: 35-40 minutes
- Total Time: 4 hours 45 minutes (includes chilling)
- Yield: 9 servings 1x
- Category: Dessert
- Cuisine: American
Ingredients
- 2 cups (about 200g) gingersnap cookies, finely crushed
- 1/4 cup (50g) granulated sugar
- 6 tablespoons (85g) unsalted butter, melted
- Pinch of salt
- 16 ounces (450g) cream cheese, softened
- 1/2 cup (100g) granulated sugar
- 2 large eggs
- 1 teaspoon vanilla extract
- 1 cup (240g) canned pumpkin puree
- 1/2 cup (100g) packed light brown sugar
- 2 large eggs
- 1 teaspoon vanilla extract
- 1 1/2 teaspoons pumpkin pie spice
- 1/4 teaspoon salt
Instructions
- Preheat your oven to 350°F (175°C). Line a 9×9-inch baking pan with parchment paper, leaving about 2 inches of overhang on two opposite sides. Lightly grease the parchment with cooking spray or butter.
- Place the gingersnap cookies in a food processor and pulse until you have fine crumbs—about 20-30 seconds. Transfer to a medium bowl, add the sugar and salt, and stir to combine. Pour the melted butter over the crumbs and mix with a fork until everything is evenly moistened. The mixture should look like wet sand and hold together when squeezed.
- Pour the crust mixture into the prepared pan and press it down firmly and evenly. Bake for 8-10 minutes, until the crust is set and just starting to brown at the edges. Set aside to cool.
- In a large bowl, beat the softened cream cheese with an electric mixer on medium speed until smooth and creamy, about 2 minutes. Scrape down the sides and bottom. Add the sugar and beat for another minute until well combined. Add the eggs one at a time, beating on low speed after each addition just until incorporated. Stir in the vanilla.
- In a separate large bowl, combine the pumpkin puree, brown sugar, eggs, vanilla, pumpkin pie spice, and salt. Beat on medium speed until smooth and well combined, about 2 minutes.
- Pour the cheesecake mixture over the cooled crust and spread into an even layer. Carefully spoon the pumpkin mixture over the top, then use a knife or skewer to gently swirl the two layers together with a few figure-eight motions.
- Bake for 35-40 minutes. The edges should look set and slightly puffed, and the center should have a slight jiggle—like firm Jell-O. A toothpick inserted 1 inch from the edge should come out clean.
- Remove from the oven and place on a wire rack to cool completely at room temperature, about 1 hour. Once cool, cover with plastic wrap and refrigerate for at least 4 hours, preferably overnight.
- When ready to serve, lift the bars out of the pan using the parchment overhang. Place on a cutting board and slice into 9 or 16 squares using a sharp knife. Wipe the knife clean between each slice for clean cuts.
Notes
For best results, use room temperature cream cheese and eggs. Press the crust firmly to prevent crumbling. Do not over-swirl the layers. Chill for at least 4 hours, preferably overnight, for the best texture and flavor. Use a hot knife for clean cuts.
Nutrition
- Serving Size: 1 bar
- Calories: 345
- Sugar: 24
- Sodium: 280
- Fat: 22
- Saturated Fat: 12
- Carbohydrates: 34
- Fiber: 2
- Protein: 6
Keywords: pumpkin cheesecake bars, gingersnap crust, fall dessert, easy cheesecake bars, pumpkin dessert, Thanksgiving dessert


