Love this? Save it for later!
Share the inspiration with your friends
It was 11:47 PM on a rainy Tuesday, and I had that ache. You know the one—the specific, hollow kind that only a warm chocolate chip cookie can fill. I didn’t have the energy for a full batch, and honestly, I didn’t have the patience for chilling dough. I had a half-stick of butter softening on the counter, a single egg, and a desperate hope. The ‘real’ recipe I usually make requires at least two hours of fridge time, and let me tell you, at that hour, two hours might as well be two years. So I did something I’d never tried before. I skipped the chill entirely, melted the butter instead of creaming it, and just went for it. I figured, what’s the worst that could happen? A flat, greasy mess? Maybe. But the alternative was going to bed cookie-less, and that just wasn’t an option. I pulled out my smallest mixing bowl—the one that’s chipped on the rim from a clumsy move last spring—and started measuring. The kitchen was quiet except for the rain against the window and the soft scrape of the spatula against the bowl. There was something almost meditative about it, this tiny, urgent act of baking. And when those four little pucks of dough came out of the oven, golden and cracked on top, I knew I’d stumbled onto something. They weren’t just good for a no-chill recipe. They were the best small-batch cookies I’d ever made. I’ve been making them ever since, and I think you’re going to love them too.
Why You’ll Love This Recipe
Let me tell you why this recipe has become my secret weapon. It’s not just about the cookies—it’s about the whole experience. I’ve tested this probably a dozen times now, tweaking the butter temperature and the flour ratio, and I can honestly say this version is the one that hits every single time.
- No Chilling Required: You read that right. From bowl to oven in under 15 minutes. No waiting, no planning ahead—just cookie dough and immediate gratification.
- Perfectly Sized: This makes exactly four generous cookies. No more staring at a Tupperware full of cookies for three days wondering who’s going to eat them all. It’s just enough for a cozy night in.
- Simple Pantry Ingredients: Butter, sugar, an egg, flour, baking soda, salt, and chocolate chips. That’s it. You probably have everything right now.
- That Bakery-Style Texture: The edges get perfectly crisp and golden, while the centers stay soft, chewy, and almost gooey. The melted butter technique is the secret here—it gives you that rich, toffee-like flavor without any extra work.
- Perfect for a Late-Night Craving: Whether it’s after a long day, a rainy evening, or just a Tuesday that felt like a Monday, these cookies are the answer. They’re quick enough to make on a whim but special enough to feel like a treat.
I’ve made these for myself more times than I can count, and I’ve also whipped up a batch when a friend stopped by unexpectedly. They disappeared in about four minutes flat. There’s something about a warm, fresh cookie that just makes everything feel a little bit better, you know?
What Ingredients You Will Need
This recipe uses simple, humble ingredients to create something genuinely special. The magic is in the method, not a long shopping list. Here’s what you’ll need and why each one matters.
For the Cookie Dough:
- 4 tablespoons unsalted butter (melted and slightly cooled) — This is the key to the no-chill method. Melting the butter gives you a chewier, denser cookie without needing to rest the dough. I use Kerrygold when I have it, but any good unsalted butter works.
- 1/4 cup packed light brown sugar (50g) — Brown sugar adds moisture and that deep, molasses-y flavor that makes cookies taste homemade. Pack it firmly into your measuring cup.
- 2 tablespoons granulated sugar (25g) — White sugar helps with spreading and gives the edges that slight crispiness.
- 1 large egg yolk — Just the yolk! This gives you richness and tenderness without making the dough too wet. Save the white for scrambled eggs tomorrow.
- 1/2 teaspoon vanilla extract — Pure vanilla makes a difference here. Imitation will work, but pure is worth the splurge for that warm, aromatic flavor.
- 1/2 cup all-purpose flour (60g) — Spoon and level it. Don’t scoop directly from the bag or you’ll end up with dry cookies.
- 1/4 teaspoon baking soda — This helps the cookies spread just the right amount and gives them a little lift.
- 1/4 teaspoon salt — Don’t skip this. Salt balances the sweetness and makes the chocolate sing. I use fine sea salt.
- 1/3 cup semi-sweet chocolate chips (about 60g) — I prefer Ghirardelli or Guittard for the best melt and flavor. You can also chop up a good chocolate bar for those irregular, melty pools.
Ingredient Selection Tips: For the best texture, make sure your egg is at room temperature. If you forgot to take it out, place it in a bowl of warm water for 5 minutes. The melted butter should be warm but not hot—you don’t want to cook the egg yolk when you mix them together. And honestly, if you only have salted butter, just skip the added salt in the recipe.
Substitution Guidance: You can use dark brown sugar instead of light for a deeper flavor. For a dairy-free version, use vegan butter or coconut oil (solid, not melted). If you’re out of vanilla, a tiny pinch of cinnamon adds a nice warmth. And for the chocolate, any chips or chunks work—milk, dark, or even white chocolate if that’s your thing.
Equipment Needed
The beauty of a small-batch recipe is that you don’t need much. Here’s what I use every time.
- Small mixing bowl — A cereal bowl or small mixing bowl works perfectly. Less surface area means less cleanup.
- Whisk or fork — For combining the wet ingredients. A fork works in a pinch.
- Rubber spatula or wooden spoon — For folding in the dry ingredients and chocolate chips. I prefer a spatula for getting every last bit of dough.
- Measuring cups and spoons — Accurate measurements matter more in a small batch. A kitchen scale is even better if you have one.
- Baking sheet — A quarter sheet pan or even a small toaster oven tray works.
- Parchment paper or silicone baking mat — This prevents sticking and helps with even browning. I’ve used foil in a pinch, but parchment is better.
- Cooling rack — Optional but nice for getting those crispy edges. A plate works too.
Budget-Friendly Tip: If you don’t have a baking sheet, a cast-iron skillet works surprisingly well for just four cookies. Just make sure it’s clean and preheated slightly.
Preparation Method
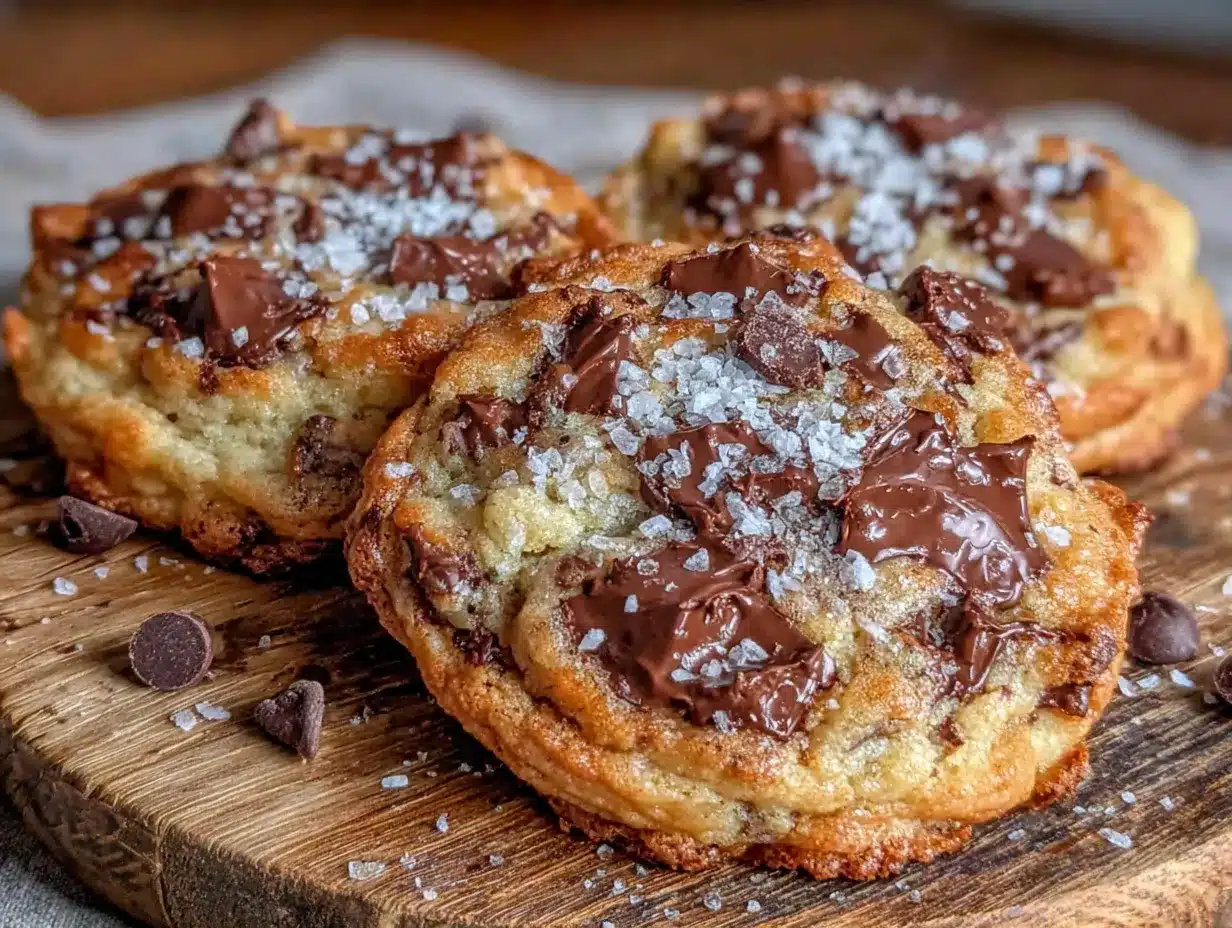
Alright, let’s make some cookies. This whole process takes about 20 minutes from start to finish, including baking time. Preheat your oven to 350°F (175°C) now so it’s ready when you are.
- Melt the butter. In a small microwave-safe bowl, melt the 4 tablespoons of butter in 20-second bursts until just melted. Don’t let it boil. Set it aside to cool for about 2 minutes—it should be warm but not hot to the touch.
- Mix the sugars and butter. In your small mixing bowl, combine the melted butter with both sugars. Whisk vigorously for about 30 seconds until the mixture looks smooth and glossy. You’ll notice it starts to pull away from the sides of the bowl a little. This is good—it means the sugar is dissolving.
- Add the egg yolk and vanilla. Drop in the egg yolk and the vanilla extract. Whisk again until everything is fully combined and the mixture looks like a thick, shiny caramel. It should smell incredible already.
- Combine the dry ingredients. In a separate tiny bowl (or just on a piece of wax paper), whisk together the flour, baking soda, and salt. Make sure the baking soda is evenly distributed—nobody wants a pocket of it in one bite.
- Fold it all together. Add the dry ingredients to the wet mixture. Use your spatula to fold gently, just until you can’t see any more flour streaks. Be careful not to overmix, or the cookies will be tough. A few small lumps are totally fine.
- Add the chocolate chips. Fold in the chocolate chips until they’re evenly distributed throughout the dough. The dough will be soft and slightly sticky—that’s exactly what you want.
- Portion the dough. Using a spoon or your hands, divide the dough into 4 equal pieces. Roll each into a ball and place them on your prepared baking sheet, spaced well apart. Don’t flatten them—they’ll spread on their own.
- Bake immediately. Pop the baking sheet into the preheated oven. Bake for 10-12 minutes, or until the edges are golden brown and the centers look slightly puffy and set. The tops should be cracked and light golden. For softer cookies, pull them at 10 minutes. For crispier edges, go to 12.
- Cool on the sheet. Let the cookies rest on the hot baking sheet for 2-3 minutes. This is crucial—they need this time to set up. After that, transfer them to a cooling rack or plate.
Sensory Cue: Your kitchen will smell like a bakery. The cookies will look slightly underdone in the center when you pull them out, but trust the process. They continue to bake on the hot sheet.
Cooking Tips & Techniques
I’ve learned a few things the hard way so you don’t have to. Here are my best tips for perfect small-batch cookies every time.
The Melted Butter Trick: This is the whole reason we don’t need to chill the dough. Melting the butter hydrates the flour differently than creaming softened butter, which gives you a chewier cookie without the wait. But here’s the catch—if your butter is too hot, it will make the dough greasy. Let it cool for those 2 minutes. I once rushed this step and ended up with cookies that spread into one giant cookie puddle. Tasty, but not pretty.
Don’t Overmix: I know it’s tempting to keep stirring until everything looks perfectly smooth, but stop as soon as the flour disappears. Overmixing develops gluten, which makes cookies tough and cakey instead of tender and chewy. A few streaks of flour are okay.
Size Matters: Four cookies is the perfect number for a small batch. If you try to make them bigger, they’ll spread too much. If you make them smaller, they’ll bake too quickly. I use a cookie scoop that’s about 1.5 tablespoons for consistent sizing.
The Parchment Paper Life: Line your baking sheet with parchment paper or a silicone mat. It prevents sticking, helps with even browning, and makes cleanup a breeze. I once forgot to do this and spent 10 minutes scraping cookie bits off the pan. Never again.
Watch the Oven: Ovens vary wildly. Start checking at 9 minutes if your oven runs hot. The cookies are done when the edges are set and golden, but the center still looks soft and slightly underdone. They’ll firm up as they cool.
Variations & Adaptations
This recipe is a great base for all kinds of fun twists. Here are a few of my favorites.
Double Chocolate: Swap 1 tablespoon of the flour for unsweetened cocoa powder. Use white chocolate chips or dark chocolate chunks for a rich, decadent version. I made these for a friend who declared them “the best cookies I’ve ever had.” High praise.
Sea Salt Finish: Sprinkle a tiny pinch of flaky sea salt (like Maldon) on top of each cookie right when they come out of the oven. The salty crunch against the sweet, soft cookie is absolutely divine. This is my go-to when I want to feel fancy.
Nutty Crunch: Add 2 tablespoons of chopped toasted walnuts or pecans along with the chocolate chips. Toast them in a dry pan for a few minutes first to bring out their flavor. The texture contrast is wonderful.
Gluten-Free Option: Use a 1:1 gluten-free baking flour blend. I’ve tried this with Bob’s Red Mill and King Arthur brands, and both work well. The texture will be slightly more delicate, but still delicious.
Vegan Version: Use vegan butter and replace the egg yolk with 1 tablespoon of aquafaba (the liquid from a can of chickpeas) mixed with 1/2 teaspoon of cornstarch. It sounds weird, but it works. The cookies will be a bit more cakey but still very tasty.
Flavor Boost: Add 1/4 teaspoon of cinnamon or espresso powder to the dry ingredients. It doesn’t make the cookies taste like coffee—it just deepens the chocolate flavor. I do this almost every time now.
Serving & Storage Suggestions
These cookies are best enjoyed warm, straight from the oven. That’s the whole point of a small batch, right? But here’s how to handle them if you have any leftovers (unlikely, but possible).
Serving: Serve these cookies slightly warm with a tall glass of cold milk. The contrast of the warm, melty chocolate and the cold milk is pure comfort. They’re also amazing with a scoop of vanilla ice cream for an impromptu ice cream sandwich. For a cozy fall twist, try them with a mug of hot apple cider.
Storage: Store any leftover cookies in an airtight container at room temperature for up to 2 days. They’ll soften a bit overnight, which some people actually prefer. If you want to keep them crispier, leave the lid slightly cracked.
Reheating: To bring back that fresh-from-the-oven warmth, pop a cookie in the microwave for 10 seconds. Or, for a crisper edge, reheat in a 300°F oven for 3-4 minutes. Honestly, they’re pretty great at room temperature too.
Freezing: You can freeze the baked cookies for up to a month. Wrap them individually in plastic wrap, then place in a freezer bag. Thaw at room temperature for about 15 minutes. For the best results, freeze the raw dough balls instead. Place them on a small tray, freeze until solid, then transfer to a bag. Bake straight from frozen, adding 1-2 minutes to the bake time.
Flavor Development: These cookies are at their absolute best within the first 6 hours. The texture is perfect, the chocolate is melty, and the edges are crisp. After that, they’re still good, but that magical fresh-baked quality fades. That’s why the small batch is so perfect—you make exactly what you’ll eat right now.
Nutritional Information & Benefits
Let’s be real—these are cookies, not health food. But knowing what’s in them can help you enjoy them mindfully. Here’s the estimated nutrition for one cookie (based on 4 cookies per batch).
| Nutrient | Amount Per Cookie |
|---|---|
| Calories | ~220 |
| Total Fat | 12g |
| Saturated Fat | 7g |
| Carbohydrates | 28g |
| Sugar | 18g |
| Protein | 3g |
Ingredient Benefits: The butter provides a small amount of Vitamin A. The egg yolk offers choline, which is good for brain health. Dark chocolate (if you use 70% or higher) contains antioxidants and a little bit of iron. And honestly, the biggest benefit is the joy and comfort a warm cookie brings. Sometimes that matters more than the numbers.
Dietary Considerations: This recipe contains gluten, dairy, and eggs. For gluten-free, dairy-free, or vegan options, check the variations section above. The sugar content is moderate for a dessert, but if you’re watching your intake, you can reduce the granulated sugar by 1 tablespoon without affecting the texture too much.
Conclusion
These cozy small-batch chocolate chip cookies have become my go-to for those moments when only a warm, homemade cookie will do. They’re quick, they’re easy, and they deliver that perfect combination of crispy edges and soft, chewy centers without any chilling or fuss. I love that I can whip up a batch in the time it would take me to decide what to order from a delivery app—and the result is so much more satisfying.
I hope you’ll give them a try the next time a cookie craving strikes at an odd hour. Customize them with your favorite add-ins, sprinkle on some sea salt, or just enjoy them exactly as written. They’re forgiving, adaptable, and genuinely delicious. And honestly, there’s something special about making just enough for yourself (or yourself and one lucky person). It feels intentional, cozy, and a little bit indulgent.
If you make these, I’d love to hear how they turn out. Leave a comment below, tag me in your photos, or tell me what variation you tried. Happy baking, friend. You deserve a warm cookie.
Frequently Asked Questions
Can I double this recipe?
Absolutely. To make 8 cookies, simply double all the ingredients. The baking time and temperature stay the same. Just make sure your bowl is big enough to hold the larger amount of dough.
Why did my cookies spread too much?
This usually happens if the butter was too hot when you mixed it, or if you used too little flour. Make sure your melted butter is warm but not hot, and always spoon and level your flour rather than scooping it.
Can I use margarine instead of butter?
You can, but the texture won’t be the same. Butter gives the cookies a richer flavor and better texture. Margarine has a higher water content, which can make the cookies spread more and become greasy.
How do I know when the cookies are done baking?
The edges should be golden brown and set, while the centers still look slightly soft and puffy. They’ll continue to bake on the hot sheet after you take them out. When in doubt, pull them at the shorter bake time—underdone cookies are still delicious, but overdone ones are dry.
Can I make the dough ahead of time?
Yes, you can refrigerate the dough for up to 24 hours. Just cover the bowl tightly with plastic wrap. If you do chill the dough, let it sit at room temperature for 10 minutes before scooping and baking—it will be too firm to work with straight from the fridge. You may also need to add 1-2 minutes to the bake time.
Pin This Recipe!
Cozy Small-Batch Chocolate Chip Cookies: No Chilling Needed

These quick and easy small-batch chocolate chip cookies require no chilling and deliver perfectly crispy edges with soft, chewy centers. Made with simple pantry ingredients, they’re perfect for late-night cravings or a cozy night in.
- Prep Time: 10 minutes
- Cook Time: 10-12 minutes
- Total Time: 20-22 minutes
- Yield: 4 cookies 1x
- Category: Dessert
- Cuisine: American
Ingredients
- 4 tablespoons unsalted butter, melted and slightly cooled
- 1/4 cup packed light brown sugar (50g)
- 2 tablespoons granulated sugar (25g)
- 1 large egg yolk
- 1/2 teaspoon vanilla extract
- 1/2 cup all-purpose flour (60g), spooned and leveled
- 1/4 teaspoon baking soda
- 1/4 teaspoon salt
- 1/3 cup semi-sweet chocolate chips (about 60g)
Instructions
- Preheat oven to 350°F (175°C). Line a baking sheet with parchment paper or a silicone mat.
- In a small microwave-safe bowl, melt the butter in 20-second bursts until just melted. Set aside to cool for about 2 minutes.
- In a small mixing bowl, combine the melted butter with both sugars. Whisk vigorously for about 30 seconds until smooth and glossy.
- Add the egg yolk and vanilla extract. Whisk until fully combined and the mixture looks like thick, shiny caramel.
- In a separate small bowl, whisk together the flour, baking soda, and salt.
- Add the dry ingredients to the wet mixture. Fold gently with a spatula just until no flour streaks remain. Do not overmix.
- Fold in the chocolate chips until evenly distributed. The dough will be soft and slightly sticky.
- Divide the dough into 4 equal pieces. Roll each into a ball and place on the prepared baking sheet, spaced well apart. Do not flatten.
- Bake immediately for 10-12 minutes, until edges are golden brown and centers look slightly puffy and set. For softer cookies, bake 10 minutes; for crispier edges, bake 12 minutes.
- Let cookies rest on the hot baking sheet for 2-3 minutes, then transfer to a cooling rack or plate.
Notes
For best results, use room temperature egg and slightly cooled melted butter. Do not overmix the dough. Cookies continue to bake on the hot sheet after removal. For a sea salt finish, sprinkle flaky sea salt on top right after baking. For gluten-free, use a 1:1 gluten-free baking flour blend. For vegan, use vegan butter and replace egg yolk with 1 tablespoon aquafaba mixed with 1/2 teaspoon cornstarch.
Nutrition
- Serving Size: 1 cookie
- Calories: 220
- Sugar: 18
- Sodium: 180
- Fat: 12
- Saturated Fat: 7
- Carbohydrates: 28
- Fiber: 1
- Protein: 3
Keywords: small-batch cookies, chocolate chip cookies, no chill cookies, quick cookies, easy cookies, late-night cookies, cozy cookies


