Love this? Save it for later!
Share the inspiration with your friends
I was standing in the baking aisle of the grocery store last December, honestly just trying to find vanilla extract before the holiday crowds turned the place into a war zone, when the smell hit me. It wasn’t from the store at all—it was from the woman next to me, who had just opened a bag of peppermint candies. And suddenly I was eight years old at my neighbor Mrs. Kowalski’s kitchen table, the one with the wobbly leg she always fixed with a matchbook, watching her crush candy canes with a rolling pin while the radio played “Rockin’ Around the Christmas Tree.” She’d let me lick the chocolate off the spatula, and I remember thinking that grown-up happiness must taste exactly like that—minty, sweet, and a little bit stolen. I haven’t thought about that kitchen in years, but here I was, tearing up over baking supplies. That’s when I knew I had to recreate that feeling, not just the flavor. These Cozy Peppermint Bark Christmas Cake Pops are my attempt to bottle up that exact moment—the crunch of the candy, the richness of the chocolate, the soft cake inside that melts like a memory you can’t quite hold onto. Maybe you’ve been there, standing in some random place when a smell pulls you back to a time you thought you’d forgotten. This recipe is for those moments.
Why You’ll Love This Recipe
Let me tell you, I’ve tested this recipe more times than I care to admit. The first batch? Total disaster. The cake was too dry, the pops fell off the sticks, and I had peppermint crumbs all over my kitchen floor. But I kept at it because I knew the potential was there. After seven tries, I finally cracked the code, and now this is the recipe I bring to every holiday party.
- Quick & Easy: These come together in about 45 minutes of active time, plus chilling. Perfect for those December evenings when you need a treat but don’t want to spend all night in the kitchen.
- Simple Ingredients: No weird specialty items here. You probably have most of these in your pantry right now, minus maybe the candy canes.
- Perfect for Christmas: These are the star of any cookie exchange, holiday party, or cozy night by the fire. They scream “Christmas” without being fussy.
- Crowd-Pleaser: I brought these to my office potluck and they disappeared in ten minutes. Kids love them, adults love them, and people who say they don’t like cake pops? They love them too.
- Unbelievably Delicious: The combination of rich chocolate, cool peppermint, and soft cake is pure comfort food magic. It’s like a peppermint bark and a cake pop had a baby, and that baby is perfect.
What makes this recipe different is the texture. Most cake pops are dense and heavy, but I’ve figured out how to keep them light and tender while still holding their shape. The secret is in how you mix the frosting into the cake—not too much, not too little. Plus, that crushed candy cane coating? It stays crunchy for days if you store them right.
This isn’t just another dessert recipe. It’s the kind that makes people close their eyes after the first bite and go “mm-hmm” with their mouths full. It’s comfort food dressed up in holiday sparkle, and honestly, we all need that this time of year.
What Ingredients You Will Need
This recipe uses simple, wholesome ingredients to create something that tastes way more complicated than it actually is. Most of these are pantry staples, especially if you do any holiday baking.
For the Cake Base
- 1 box chocolate cake mix (I prefer Duncan Hines Devil’s Food for the richest flavor)
- 3 large eggs, room temperature
- 1 cup whole milk (adds richness; use 2% if that’s what you have)
- 1/2 cup vegetable oil (or melted coconut oil for a subtle flavor twist)
- 1 teaspoon peppermint extract (not mint—peppermint is sweeter and less “toothpaste-y”)
For the Frosting & Binding
- 1/2 cup unsalted butter, softened (let it sit out for an hour)
- 2 cups powdered sugar, sifted if you’re feeling fancy
- 2 tablespoons heavy cream (or whole milk in a pinch)
- 1/2 teaspoon peppermint extract
- Pinch of salt (trust me on this—it balances the sweetness)
For the Coating & Decoration
- 16 ounces white chocolate melting wafers (I like Ghirardelli or Wilton brands)
- 8 ounces dark chocolate chips (60% cacao is my sweet spot)
- 1 cup crushed candy canes (about 6-8 regular candy canes, crushed not too fine)
- 20-24 lollipop sticks (available at craft stores or online)
- 1 tablespoon coconut oil (for thinning the chocolate, optional but helpful)
Ingredient Tips: For the candy canes, crush them in a zip-top bag with a rolling pin. You want some tiny pieces and some bigger chunks for texture. Don’t use pre-crushed peppermint—it’s often too powdery and won’t give you that satisfying crunch. Also, make sure your eggs and butter are truly at room temperature. Cold ingredients make the frosting lumpy and the cake dense.
Substitution Note: If you need these gluten-free, use a gluten-free chocolate cake mix and double-check your candy canes (most are naturally gluten-free, but check the label). For a dairy-free version, use almond milk in the cake, vegan butter in the frosting, and dairy-free chocolate wafers.
Equipment Needed
You don’t need a fancy kitchen for these, but a few specific tools will make your life way easier.
- Baking sheet (9×13 works best)
- Large mixing bowls (at least two)
- Electric hand mixer or stand mixer (you can do it by hand, but your arm will hate you)
- Lollipop sticks (20-24 of them)
- Styrofoam block or floral foam (for drying the pops upright)
- Microwave-safe bowls (for melting chocolate)
- Parchment paper (for drying the finished pops)
- Zip-top bag (for crushing candy canes)
- Rolling pin or meat mallet (for the crushing)
- Cookie scoop or small ice cream scoop (for uniform cake balls)
- Double boiler (optional, but great if you’re nervous about burning chocolate)
I’ve melted chocolate in a makeshift double boiler using a metal bowl over a saucepan, and honestly, it works fine. Don’t let missing equipment stop you. The Styrofoam block is the one thing I’d say is non-negotiable—trying to dry cake pops on their sides is a recipe for lopsided disasters.
Preparation Method
Let’s walk through this step by step. I’ll tell you exactly what to look for at each stage so you don’t have to guess.
Step 1: Bake the Cake
Preheat your oven to 350°F (175°C). Grease your 9×13 baking sheet with butter or cooking spray. In a large bowl, combine the cake mix, eggs, milk, oil, and 1 teaspoon peppermint extract. Mix on medium speed for about 2 minutes until smooth and well combined. The batter should be thick but pourable—think pancake batter consistency. Pour it into the prepared pan and bake for 28-32 minutes. You’ll know it’s done when a toothpick inserted in the center comes out clean or with just a few moist crumbs. Let the cake cool completely in the pan on a wire rack. This takes about an hour, so plan ahead. I’ve made the mistake of rushing this step, and the warm cake melts the frosting into a soupy mess.
Step 2: Make the Frosting
While the cake cools, make your frosting. In a medium bowl, beat the softened butter with an electric mixer until it’s light and fluffy, about 2 minutes. Gradually add the powdered sugar, one cup at a time, beating on low speed to avoid a sugar cloud. Add the heavy cream, 1/2 teaspoon peppermint extract, and pinch of salt. Beat on medium-high for 3-4 minutes until the frosting is smooth, creamy, and spreadable. If it’s too thick, add another tablespoon of cream. Too thin? Add a little more powdered sugar. Set aside.
Step 3: Crumble the Cake
Once the cake is completely cool, crumble it into a large bowl. Use your hands for this—it’s messy but satisfying. You want fine, even crumbs with no large chunks bigger than a pea. This is crucial for smooth cake pops. I usually put on a podcast and zone out for this part.
Step 4: Mix and Form the Balls
Add about 3/4 cup of the frosting to the crumbled cake. Start mixing with a spatula, then use your hands to really work it in. You want the mixture to hold together when squeezed—like damp sand. If it’s too dry, add more frosting a tablespoon at a time. If it’s too wet (sticky and greasy), add a little more crumbled cake. The texture should be pliable but not sticky. Once it’s right, scoop out portions using your cookie scoop (about 1.5 tablespoons each). Roll each portion into a smooth ball between your palms. Place them on a parchment-lined baking sheet. You should get 20-24 balls. Refrigerate for 30 minutes—this makes them easier to dip.
Step 5: Melt the White Chocolate
While the balls chill, melt your white chocolate wafers in a microwave-safe bowl. Microwave in 30-second intervals, stirring thoroughly between each, until completely smooth. Add 1 tablespoon of coconut oil if the chocolate seems too thick for dipping. Be careful—white chocolate burns easily and seizes up if it gets too hot. If you see it starting to look grainy, you’ve gone too far. Start over with fresh chocolate.
Step 6: Dip and Decorate
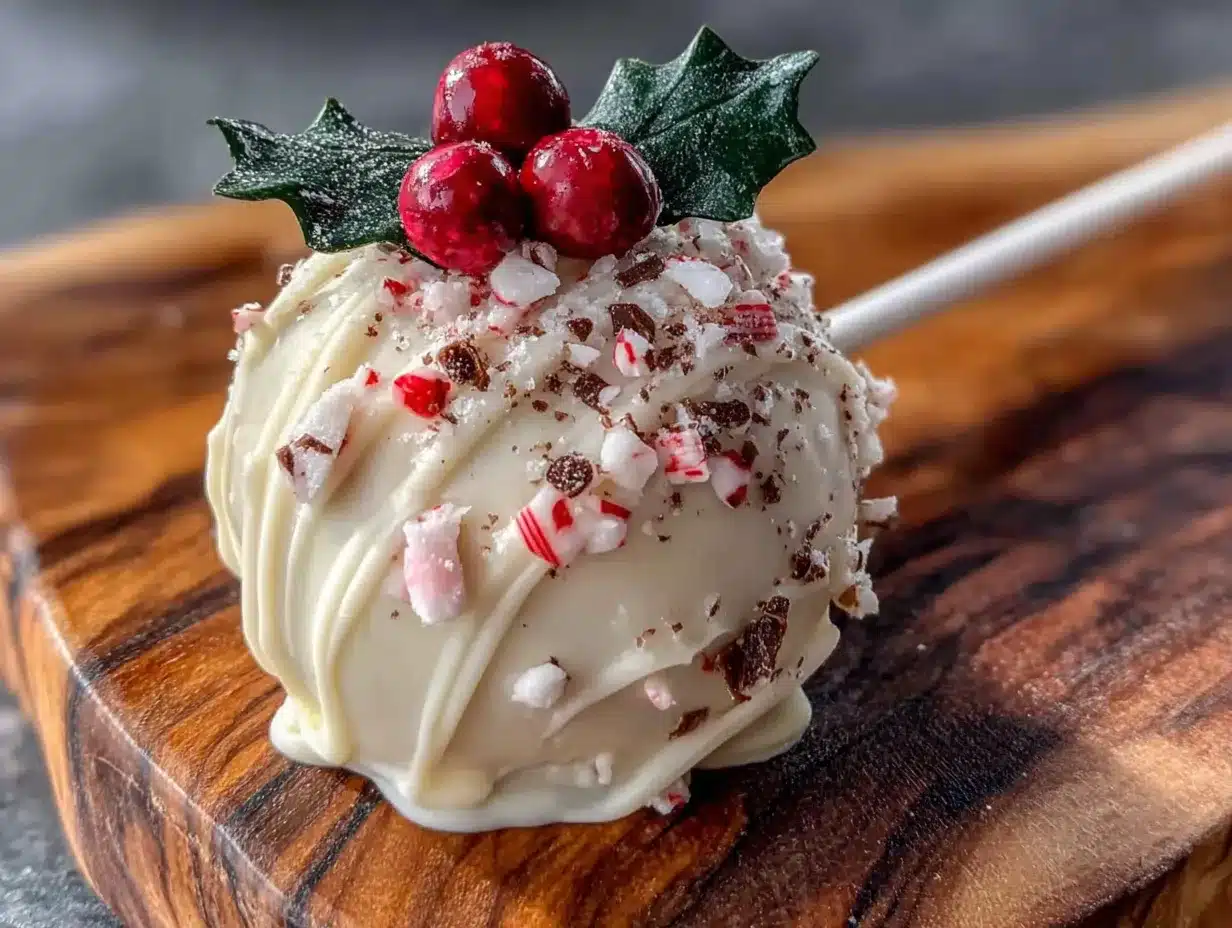
Remove the cake balls from the fridge. Dip the tip of a lollipop stick into the melted white chocolate, then insert it about halfway into a cake ball. This acts like glue. Dip the entire cake pop into the white chocolate, covering it completely. Gently tap the stick on the edge of the bowl to let excess chocolate drip off. Immediately sprinkle the crushed candy canes over the wet chocolate before it sets. Place the finished pop upright in your Styrofoam block. Repeat with all the pops. Let them set completely, about 20 minutes at room temperature or 10 minutes in the fridge.
Step 7: Add the Dark Chocolate Drizzle
Once the white chocolate is set, melt your dark chocolate chips in a separate bowl using the same microwave method. Transfer the melted chocolate to a small zip-top bag, snip off a tiny corner, and drizzle it over the cake pops in a back-and-forth motion. This is where they start looking like fancy bakery treats. Let the dark chocolate set before serving—about 15 minutes.
Cooking Tips & Techniques
I’ve learned a few things the hard way so you don’t have to. Here’s what I wish someone had told me before my first attempt.
Don’t overmix the cake mixture. I know I said mix for 2 minutes, but if you go longer, the cake gets tough. You want it tender, not chewy. Stop when you don’t see any flour streaks.
Crush the candy canes while they’re still in the wrapper. This keeps the mess contained and prevents candy shrapnel from ending up in places you’ll find for weeks. Trust me on this one.
If your chocolate seizes up, don’t panic. It happens to everyone. Add a teaspoon of coconut oil and stir vigorously. Sometimes that saves it. If not, just start fresh—it’s cheaper than ruining the whole batch.
Work in small batches. Don’t take all the cake balls out of the fridge at once. They warm up quickly and become harder to dip. Keep them chilled until you’re ready to work with them.
Use a deep, narrow bowl for dipping. A tall drinking glass or a narrow measuring cup works better than a wide bowl. You want to submerge the pop completely without wasting tons of chocolate.
Let the chocolate cool slightly before dipping. If it’s too hot, it will melt the frosting inside the cake ball and cause cracks. You want it warm but not hot—test it on your wrist like baby formula.
I once tried to dip a whole batch with chocolate that was too hot, and every single pop cracked down the middle. It looked like a cake pop crime scene. Don’t be like me.
Variations & Adaptations
One of the best things about this recipe is how easy it is to make it your own. Here are some variations I’ve tried and loved.
Dark Chocolate Base
Swap the white chocolate coating for dark chocolate and use crushed peppermint on top. It’s less sweet and more sophisticated—perfect for adult gatherings. I did this for a book club meeting and got asked for the recipe three times.
Gluten-Free Version
Use a gluten-free chocolate cake mix (King Arthur Flour makes a great one) and double-check that your candy canes are certified gluten-free. Everything else in the recipe is naturally gluten-free. My friend with celiac disease said these were the best cake pops she’d ever had.
Gingerbread Twist
Use a gingerbread cake mix instead of chocolate, and add 1 teaspoon of molasses to the frosting. The spicy gingerbread with the cool peppermint is unexpectedly amazing. I stumbled onto this combo by accident when I ran out of chocolate mix, and now it’s my secret holiday weapon.
Vegan Version
Use a vegan chocolate cake mix, flax eggs (1 tablespoon ground flax + 3 tablespoons water per egg), plant-based milk, vegan butter, and dairy-free chocolate wafers. The texture is slightly different—a little more delicate—but the flavor is spot on.
Extra Peppermint Kick
Add 1/4 teaspoon of peppermint extract to the melted white chocolate coating. Warning: this is potent. Start with less and taste as you go. You can always add more, but you can’t take it out.
Serving & Storage Suggestions
These cake pops are best served at room temperature. The chocolate coating should be firm but not hard, and the cake inside should be soft and tender. If you serve them straight from the fridge, the texture is too firm and the flavor is muted. Give them about 15 minutes on the counter before serving.
Presentation Idea: Arrange the cake pops in a tall glass jar or a festive mug for a cozy, rustic look. Or stick them in a Styrofoam block wrapped in holiday wrapping paper for a more polished presentation. I’ve also tied a little bow around the sticks with ribbon—it takes two seconds and looks so cute.
What to Serve With Them: These pair beautifully with a hot cup of coffee, a mug of hot chocolate, or a glass of cold milk. For an adult gathering, try them with peppermint schnapps hot chocolate or a dark stout beer. The bitterness of the beer balances the sweetness perfectly.
Storage Instructions: Store cake pops in an airtight container in the refrigerator for up to 5 days. Layer them between sheets of parchment paper to prevent sticking. Before serving, let them sit at room temperature for 15-20 minutes. The candy cane coating will stay crunchy for about 3 days before it starts to soften from the moisture in the fridge.
Freezer Instructions: You can freeze undipped cake balls for up to 3 months. Wrap them tightly in plastic wrap, then place in a freezer bag. When you’re ready to use them, thaw in the refrigerator overnight, then dip as directed. I do this every December—make a big batch of cake balls in November, then dip them fresh for holiday parties. It saves so much time.
Flavor Development: Honestly, these taste even better the next day. The flavors meld together overnight, and the cake becomes more moist. If you can resist eating them all on day one, you’ll be rewarded on day two.
Nutritional Information & Benefits
Let’s be real—these are a treat, not a health food. But here’s the estimated breakdown for one cake pop (based on 24 servings):
| Nutrient | Amount |
|---|---|
| Calories | 245 |
| Total Fat | 12g |
| Saturated Fat | 7g |
| Cholesterol | 35mg |
| Sodium | 210mg |
| Total Carbohydrates | 33g |
| Sugars | 24g |
| Protein | 3g |
Now, let’s talk about the good stuff. Dark chocolate is rich in antioxidants and can help lower blood pressure. Peppermint has been shown to aid digestion and soothe headaches—so technically, these are medicinal! (I’m joking, but it makes me feel better about eating three in one sitting.)
Dietary Considerations: These contain dairy, eggs, and gluten. They are not suitable for vegans in their current form, but see the variations section for vegan options. The candy canes are typically free of common allergens, but always check the label.
I personally believe that desserts like this have emotional benefits too. There’s something about making and sharing these that brings people together. The act of dipping, sprinkling, and arranging—it’s almost meditative. And watching someone’s face light up when they take a bite? That’s the real nutrition.
Conclusion
These Cozy Peppermint Bark Christmas Cake Pops are more than just a recipe. They’re a way to capture that holiday feeling—the warmth, the nostalgia, the joy of creating something beautiful with your own hands. Whether you’re making them for a party, a gift, or just because you need a little Christmas cheer, they deliver every single time.
I hope you’ll take this recipe and make it your own. Add more peppermint if you’re bold. Use dark chocolate if you’re feeling fancy. Double the batch because one is never enough. The best recipes are the ones that evolve with the person making them, and this one has plenty of room for your personal touch.
I’d love to hear how yours turn out! Drop a comment below and let me know if you tried any variations, what occasion you made them for, or if you had any questions along the way. And if you share a photo on Pinterest, tag me—I want to see your beautiful creations. Until next time, happy baking, and may your holidays be as sweet as these little pops.
Frequently Asked Questions
Why did my cake pops crack?
This usually happens when the chocolate coating is too hot or too cold. If the chocolate is too hot, it expands the cake ball and causes cracks. If the cake balls are too cold, the chocolate sets too quickly and contracts, also causing cracks. Let your cake balls sit at room temperature for 5 minutes after coming out of the fridge, and let your melted chocolate cool slightly before dipping. Also, make sure you’re tapping off excess chocolate gently—too much force can cause cracks too.
Can I use store-bought frosting instead of making my own?
You can, but I don’t recommend it. Store-bought frosting has a different texture—it’s often too soft and contains more air, which makes the cake pops harder to shape. If you’re in a pinch, use about 1/2 cup of store-bought frosting and add a little powdered sugar to stiffen it up. But honestly, homemade frosting takes 5 minutes and makes a huge difference in both texture and flavor.
How do I get the cake pops off the sticks without them breaking?
This is a common problem! The trick is to not push the stick in too far—only about halfway through the cake ball. Also, make sure you’re using enough melted chocolate as “glue” at the tip of the stick before inserting it. When you’re ready to eat them, gently twist the stick while pulling—don’t yank straight out. If they’re really stuck, sometimes it’s easier to just eat them off the stick. No judgment here.
Can I make these ahead of time for a party?
Absolutely! You have two options. Option one: Make the cake balls up to 3 months ahead and freeze them undipped. Thaw in the fridge overnight, then dip and decorate the day before your party. Option two: Make the complete cake pops up to 3 days ahead and store them in an airtight container in the fridge. Let them come to room temperature before serving. The candy cane coating will stay crunchy for about 3 days before it starts to soften.
My white chocolate is grainy and lumpy—what went wrong?
White chocolate is notoriously finicky. It seizes up when it gets too hot or when even a drop of water gets into it. If this happens, try adding a teaspoon of coconut oil or vegetable shortening and stirring vigorously. Sometimes that smooths it out. If it’s still grainy, you’ll need to start over with fresh chocolate. To prevent this in the future, always microwave in short bursts (30 seconds or less), stir thoroughly between each burst, and make sure all your tools are completely dry before they touch the chocolate.
Pin This Recipe!

Best Easy Peppermint Bark Christmas Cake Pops Recipe

These Cozy Peppermint Bark Christmas Cake Pops combine rich chocolate, cool peppermint, and soft cake for a nostalgic holiday treat. Perfect for cookie exchanges, parties, or cozy nights by the fire.
- Prep Time: 45 minutes
- Cook Time: 30 minutes
- Total Time: 1 hour 15 minutes (plus chilling time)
- Yield: 20-24 servings 1x
- Category: Dessert
- Cuisine: American
Ingredients
- 1 box chocolate cake mix (preferably Duncan Hines Devil’s Food)
- 3 large eggs, room temperature
- 1 cup whole milk
- 1/2 cup vegetable oil
- 1 teaspoon peppermint extract
- 1/2 cup unsalted butter, softened
- 2 cups powdered sugar, sifted
- 2 tablespoons heavy cream
- 1/2 teaspoon peppermint extract
- Pinch of salt
- 16 ounces white chocolate melting wafers
- 8 ounces dark chocolate chips (60% cacao)
- 1 cup crushed candy canes (about 6–8 regular candy canes)
- 20–24 lollipop sticks
- 1 tablespoon coconut oil (optional, for thinning chocolate)
Instructions
- Preheat oven to 350°F (175°C). Grease a 9×13 baking sheet with butter or cooking spray.
- In a large bowl, combine cake mix, eggs, milk, oil, and 1 teaspoon peppermint extract. Mix on medium speed for about 2 minutes until smooth and well combined.
- Pour batter into prepared pan and bake for 28-32 minutes, until a toothpick inserted in the center comes out clean or with a few moist crumbs. Let cool completely in the pan on a wire rack (about 1 hour).
- While cake cools, make frosting: In a medium bowl, beat softened butter with an electric mixer until light and fluffy, about 2 minutes. Gradually add powdered sugar, one cup at a time, beating on low speed. Add heavy cream, 1/2 teaspoon peppermint extract, and pinch of salt. Beat on medium-high for 3-4 minutes until smooth and creamy.
- Once cake is completely cool, crumble it into a large bowl using your hands until you have fine, even crumbs no larger than a pea.
- Add about 3/4 cup of frosting to the crumbled cake. Mix with a spatula, then use your hands to work it in until the mixture holds together when squeezed (like damp sand). Adjust with more frosting or cake crumbs as needed.
- Using a cookie scoop (about 1.5 tablespoons each), scoop portions and roll into smooth balls. Place on a parchment-lined baking sheet. Refrigerate for 30 minutes.
- While balls chill, melt white chocolate wafers in a microwave-safe bowl in 30-second intervals, stirring thoroughly between each, until completely smooth. Add 1 tablespoon coconut oil if too thick.
- Remove cake balls from fridge. Dip the tip of a lollipop stick into melted white chocolate, then insert it about halfway into a cake ball. Dip the entire cake pop into the white chocolate, covering completely. Gently tap the stick on the edge of the bowl to let excess drip off.
- Immediately sprinkle crushed candy canes over the wet chocolate. Place the finished pop upright in a Styrofoam block. Repeat with all pops. Let set completely, about 20 minutes at room temperature or 10 minutes in the fridge.
- Once white chocolate is set, melt dark chocolate chips in a separate bowl using the same microwave method. Transfer to a small zip-top bag, snip off a tiny corner, and drizzle over the cake pops in a back-and-forth motion. Let dark chocolate set before serving, about 15 minutes.
Notes
For the candy canes, crush them in a zip-top bag with a rolling pin. Don’t use pre-crushed peppermint. Make sure eggs and butter are at room temperature. If chocolate seizes, add a teaspoon of coconut oil and stir vigorously. Work in small batches, keeping cake balls chilled until ready to dip. Use a deep, narrow bowl for dipping. Let chocolate cool slightly before dipping to prevent cracks.
Nutrition
- Serving Size: 1 cake pop
- Calories: 245
- Sugar: 24
- Sodium: 210
- Fat: 12
- Saturated Fat: 7
- Carbohydrates: 33
- Fiber: 1
- Protein: 3
Keywords: peppermint bark, cake pops, Christmas, holiday, chocolate, peppermint, easy, no-bake


