Love this? Save it for later!
Share the inspiration with your friends
I was standing in the baking aisle of a grocery store last February, staring at a dusty box of red velvet cake mix, when a scent hit me—not from the shelf, but from somewhere deep in my memory. It was the faint, almost electric smell of vinegar meeting cocoa powder, the way it used to fill my Aunt Josie’s tiny kitchen on Valentine’s Day mornings. I was seven again, sitting on a wobbly stool at her counter, watching her measure out buttermilk with the concentration of a scientist. She passed away five years ago, and I hadn’t made her red velvet cupcakes since. But standing there, surrounded by heart-shaped sprinkles and pink frosting, I felt this sudden, sharp ache to get it right—to recreate not just the taste, but that specific feeling of being small and safe and deeply loved. Honestly, I almost bought the mix. But something stopped me. I wanted her version, the one where the cocoa is a little bitter and the cream cheese frosting is so thick it leaves a mustache. So I went home, called my mom for the recipe she’d scribbled on a napkin years ago, and got to work. The first batch? A total disaster. The cupcakes sank in the middle, and I may have cried a little. But the second batch—the one I’m sharing with you today—that was it. That was the taste of a February morning in 1995. If you’ve ever tried to chase a memory through a recipe, you know exactly what I’m talking about. This is that recipe.
Why You’ll Love This Recipe
Let me tell you, I’ve tested a lot of red velvet recipes over the years. Some were too dry. Some tasted like straight-up cocoa powder. And some just didn’t have that tangy, buttery thing that makes red velvet, well, red velvet. But this one? This one hits every single note. It’s the kind of cupcake that makes people close their eyes after the first bite—I saw my neighbor Dave do it last week, and he’s not exactly the emotional type.
Here’s why these are going to be your new go-to:
- Quick & Easy: From start to finish, you’re looking at about 45 minutes. That includes cooling time. Perfect for a Tuesday night baking session when you realize Valentine’s Day is tomorrow and you promised to bring treats to the office.
- Simple Ingredients: You probably have most of this stuff in your pantry right now. No weird extracts or hard-to-find flours. Just butter, sugar, eggs, cocoa, buttermilk, and a little red food coloring.
- Perfect for Valentine’s Day: I mean, they’re heart-shaped cupcakes with cream cheese frosting. Need I say more? They’re basically edible love notes. Great for classroom parties, date night, Galentine’s brunch, or just because you’re feeling romantic about yourself.
- Crowd-Pleaser: Kids love the color. Adults love the flavor. Everyone loves the frosting. I’ve brought these to potlucks, birthday parties, and a book club meeting, and they disappear faster than anything else on the table. I’m not exaggerating.
- Unbelievably Delicious: The secret is the balance. A little cocoa, a little tang from the buttermilk and vinegar, and a lot of creamy, dreamy frosting. It’s not too sweet, not too rich—it’s just right.
What makes this version different from the dozens of red velvet recipes out there? It’s the technique. I blend the buttermilk and vinegar separately before adding them to the batter, which gives the cupcakes a lighter, more tender crumb. And I use a trick my aunt taught me: a tiny pinch of salt in the frosting. It sounds weird, but it makes the sweetness pop in a way that’s honestly addictive. This isn’t just another red velvet cupcake. It’s your best version.
What Ingredients You Will Need
This recipe uses simple, everyday ingredients to create something that feels special. Most of these are pantry staples, but a few—like buttermilk and red food coloring—are worth picking up fresh for the best results. Here’s what you’ll need:
For the Cupcakes
- 1 ½ cups (190g) all-purpose flour – Spoon and level it for accuracy. Too much flour makes dense cupcakes.
- 1 cup (200g) granulated sugar – Adds sweetness and helps with browning.
- 1 tablespoon unsweetened cocoa powder – Use a good quality brand like Hershey’s or Ghirardelli. This is for color and a subtle chocolate flavor, not for making them taste like brownies.
- ½ teaspoon baking soda – Helps the cupcakes rise and stay fluffy.
- ¼ teaspoon salt – Balances the sweetness and enhances the cocoa.
- ½ cup (120ml) buttermilk – Room temperature. This adds tang and tenderness. If you don’t have buttermilk, you can make a quick substitute by adding 1 ½ teaspoons of lemon juice or white vinegar to ½ cup of milk and letting it sit for 5 minutes.
- ½ cup (120ml) vegetable oil – Keeps the cupcakes moist. I use canola or avocado oil.
- 1 large egg – Room temperature. This helps everything emulsify properly.
- 1 teaspoon vanilla extract – Pure vanilla, not imitation, if you can swing it.
- 1 tablespoon red food coloring – Liquid or gel. Gel gives a more vibrant color with less liquid. I prefer the brand Americolor for a rich, true red.
- ½ teaspoon white vinegar – This reacts with the baking soda to create lift and also enhances the red color. Don’t skip it!
For the Cream Cheese Frosting
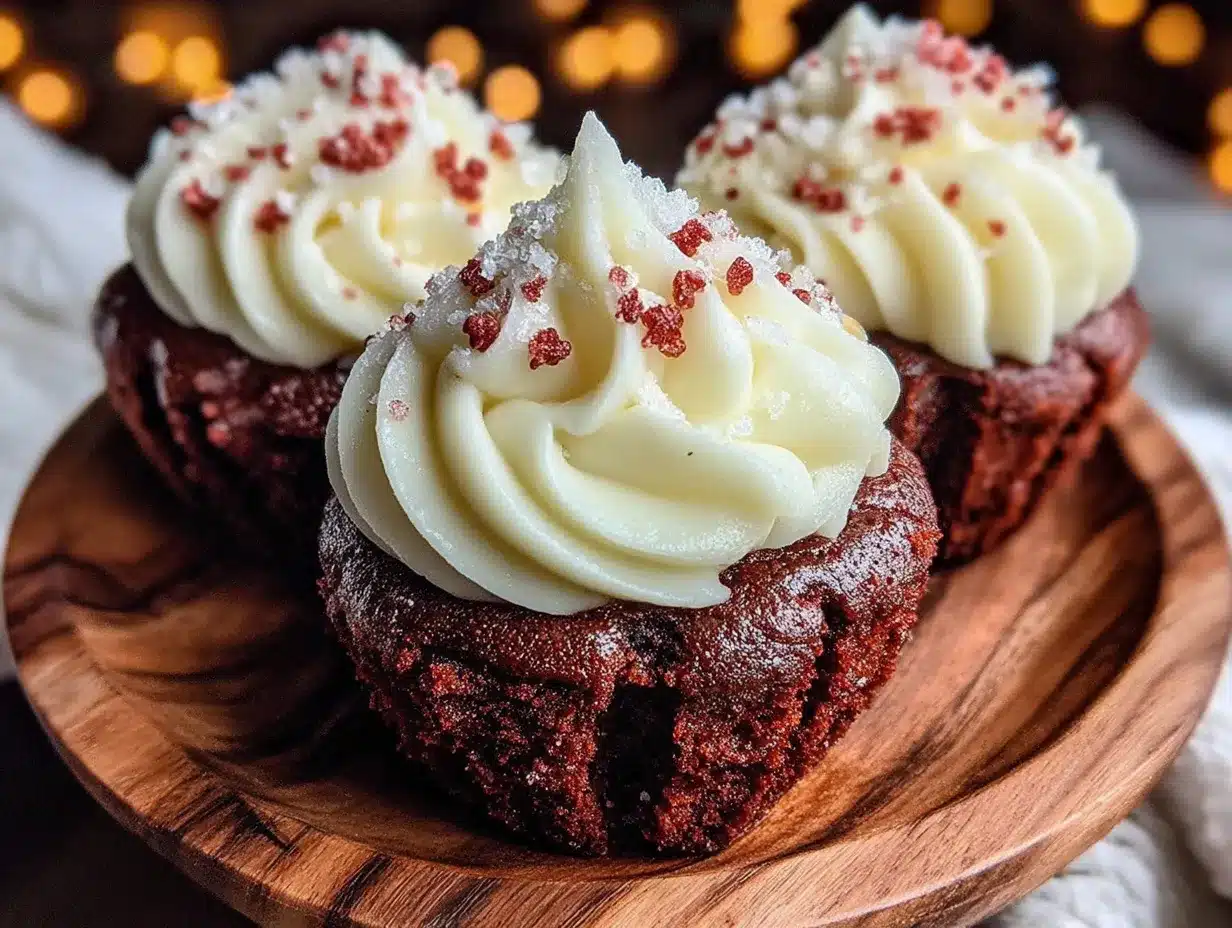
- 8 oz (226g) cream cheese – Full-fat, softened to room temperature. Low-fat cream cheese can make the frosting runny.
- ½ cup (113g) unsalted butter – Softened. I like using Kerrygold for its rich flavor.
- 3 cups (360g) powdered sugar – Sifted, if you want a super smooth frosting. I usually skip sifting and it’s fine, but sifting does prevent lumps.
- 1 teaspoon vanilla extract – Again, pure vanilla is best.
- Pinch of salt – Trust me on this one. It makes the frosting taste more complex.
For Decoration (Optional but Fun)
- Heart-shaped sprinkles – I found a bag at Target that had pink and red hearts. Cute and easy.
- Red sanding sugar – Adds a little sparkle.
- Fresh raspberries or strawberries – For a fancy touch. I sometimes put a raspberry on top of each frosted cupcake.
Equipment Needed
You don’t need a professional bakery setup for these, but a few tools will make your life a lot easier. Here’s what I recommend:
- Muffin tin – A standard 12-cup tin works perfectly. If you’re making heart-shaped cupcakes, you’ll also need a heart-shaped silicone baking mold or a regular muffin tin and a heart-shaped cookie cutter (see the method section for details).
- Cupcake liners – I like using red or pink foil liners for Valentine’s Day. They hold up better than paper and look prettier. But plain white paper liners work fine too.
- Mixing bowls – You’ll need at least two: one for dry ingredients and one for wet. A medium and a large bowl should do it.
- Electric hand mixer or stand mixer – For the frosting, a hand mixer is totally fine. You can mix the cupcake batter by hand with a whisk, but a mixer makes the frosting silky smooth.
- Rubber spatula – For scraping down the sides of the bowl and folding in ingredients. I have a red one that I only use for baking. It makes me feel official.
- Measuring cups and spoons – Dry and liquid measuring cups are both important. Use the dry ones for flour and sugar, and the liquid one for buttermilk and oil.
- Piping bag and star tip – A piping bag makes the frosting look professional, but you can also use a zip-top bag with the corner snipped off. A star tip (like a 1M) gives those pretty swirls. I got a set of reusable piping bags on Amazon for like eight bucks, and they’ve lasted years.
- Cooling rack – Essential for letting cupcakes cool completely before frosting. If you frost them while they’re warm, the frosting will melt into a sad puddle. I learned this the hard way.
Preparation Method
Alright, let’s get into it. I’m going to walk you through every step, including the little tricks I’ve picked up along the way. Set a timer for 45 minutes and let’s go.
Step 1: Preheat and Prep
Preheat your oven to 350°F (175°C). Line your muffin tin with cupcake liners. If you’re using a heart-shaped silicone mold, place it on a baking sheet for stability. If you’re using a regular muffin tin and a heart-shaped cookie cutter, don’t worry—I’ll explain that in a minute.
Step 2: Mix the Dry Ingredients
In a medium bowl, whisk together the flour, sugar, cocoa powder, baking soda, and salt. Make sure there are no lumps of cocoa. I use a fork to break up any clumps. Set this aside.
Step 3: Mix the Wet Ingredients
In a large bowl, whisk together the buttermilk, vegetable oil, egg, vanilla extract, and red food coloring. Whisk until everything is combined and the color is uniform. It should look like a very pink, very vibrant liquid. If it’s more of a light pink, add a few more drops of food coloring. You want a deep red. Now, add the white vinegar and whisk again. You’ll see it start to bubble slightly—that’s the reaction happening. Good.
Step 4: Combine Wet and Dry
Pour the dry ingredients into the wet ingredients. Use a rubber spatula to fold them together gently. Mix just until you no longer see streaks of flour. Do not overmix! Overmixing develops gluten and makes the cupcakes tough. A few small lumps are totally fine. The batter will be thin—like a thick pancake batter. That’s normal.
Step 5: Fill the Liners
Divide the batter evenly among the cupcake liners. I use a cookie scoop (about 3 tablespoons) to make sure each one is the same size. Fill each liner about ⅔ full. If you’re using a heart-shaped mold, pour the batter directly into the heart cavities, filling them about ⅔ full as well.
Pro tip for heart-shaped cupcakes with a regular muffin tin: After the cupcakes are baked and cooled, use a heart-shaped cookie cutter to cut out the center of each cupcake. It’s not as neat as using a mold, but it works in a pinch. I’ve done it, and honestly, the kids didn’t care. They just wanted the frosting.
Step 6: Bake
Bake for 15-18 minutes, or until a toothpick inserted into the center of a cupcake comes out clean or with a few moist crumbs. The tops should spring back when lightly touched. My oven runs hot, so I check at 15 minutes. Let them cool in the pan for 5 minutes, then transfer to a wire rack to cool completely. Do not skip this cooling time. If you try to take them out too early, they’ll fall apart.
Step 7: Make the Frosting
While the cupcakes are cooling, make the frosting. In a large bowl, beat the softened cream cheese and butter together with an electric mixer on medium speed until smooth and creamy—about 2 minutes. Scrape down the sides of the bowl. Add the vanilla and the pinch of salt, and beat again. Gradually add the powdered sugar, one cup at a time, beating on low speed after each addition. Once all the sugar is in, increase the speed to medium-high and beat for 2-3 minutes until the frosting is light and fluffy. Don’t overbeat it, or it can become too soft. If it’s too soft to pipe, pop it in the fridge for 10-15 minutes.
Step 8: Assemble and Decorate
Once the cupcakes are completely cool, it’s time to frost. I use a piping bag fitted with a star tip and pipe a swirl starting from the outside and working inward. If you don’t have a piping bag, you can just spread the frosting with a knife—it’ll still taste amazing. Top with heart-shaped sprinkles, red sanding sugar, or a fresh raspberry. I like to add a little sparkle with edible glitter, because why not? It’s Valentine’s Day.
Cooking Tips & Techniques
I’ve made these cupcakes about a dozen times now, and I’ve learned a few things the hard way. Here are my best tips to save you from my mistakes:
- Room temperature ingredients matter. I cannot stress this enough. Cold eggs and cold buttermilk won’t emulsify properly, and you’ll end up with a lumpy batter. Take everything out of the fridge 30 minutes before you start baking.
- Don’t overmix the batter. This is the number one mistake people make with red velvet. Mix until just combined. A few lumps are your friends. Overmixing makes the cupcakes dense and tough, and nobody wants a tough red velvet cupcake.
- Use gel food coloring for a deeper red. Liquid food coloring works, but you need more of it, and it can thin out the batter. Gel coloring gives you a vibrant red with just a teaspoon or so. I use Americolor Super Red, and it’s perfect.
- Check your baking soda. Red velvet relies on the reaction between buttermilk and baking soda for its rise. If your baking soda is old, your cupcakes won’t rise properly. Test it by dropping a little into vinegar—if it fizzes vigorously, it’s good.
- Let the cupcakes cool completely. I know you’re excited, but frosting warm cupcakes is a disaster. The frosting will melt, slide off, and make a mess. I once frosted a batch after 20 minutes because I was in a hurry, and I ended up with pink soup. Learn from me.
- Chill the frosting if it’s too soft. If your kitchen is warm, the cream cheese frosting can get a little loose. Pop it in the fridge for 15 minutes before piping. It’ll hold its shape much better.
Variations & Adaptations
One of the things I love about this recipe is how flexible it is. Here are some ways to make it your own:
- Gluten-Free Version: Swap the all-purpose flour with a 1:1 gluten-free baking flour blend. I’ve used Bob’s Red Mill and King Arthur’s gluten-free flour, and both worked great. Just don’t overmix, and let the batter rest for 5 minutes before baking.
- Dairy-Free Version: Use a dairy-free cream cheese (like Kite Hill or Tofutti) and substitute the buttermilk with a mixture of ½ cup unsweetened almond milk and 1 ½ teaspoons of lemon juice. Use vegan butter in the frosting. I’ve made these for a friend with a dairy allergy, and she said they were the best cupcakes she’d had in years.
- Egg-Free Version: You can replace the egg with a flax egg (1 tablespoon ground flaxseed mixed with 3 tablespoons water, let sit for 5 minutes). The texture will be slightly denser, but still delicious.
- Chocolate Lover’s Version: Add ½ cup of mini chocolate chips to the batter. I did this once on a whim, and it was a huge hit. The chocolate chips add little pockets of melty goodness.
- Different Frosting Flavors: Instead of cream cheese frosting, try a chocolate buttercream or a strawberry buttercream. For a strawberry version, add ¼ cup of freeze-dried strawberry powder to the frosting. It’s pink and fruity and perfect for Valentine’s Day.
- Mini Cupcakes: Use a mini muffin tin and bake for 8-10 minutes instead of 15-18. You’ll get about 24 mini cupcakes. Great for parties or for portion control (ha!).
Serving & Storage Suggestions
These cupcakes are best served at room temperature. If you’ve refrigerated them, let them sit out for about 20 minutes before serving. The cream cheese frosting firms up in the fridge, and it needs a little time to soften to that perfect creamy texture.
For presentation, I like to arrange them on a pretty cake stand or a white platter. The red and white contrast is so striking. Add a few fresh strawberries or raspberries around the base for a pop of color. If you’re feeling fancy, dust them with a little powdered sugar right before serving. It looks like snow on a red velvet heart.
As for storage, these cupcakes will keep in an airtight container in the refrigerator for up to 5 days. I’ve also frozen them successfully. To freeze, place the unfrosted cupcakes in a single layer in a freezer-safe container. Freeze for up to 3 months. When you’re ready to eat them, thaw them in the refrigerator overnight, then bring to room temperature and frost. You can also freeze the frosting separately in a piping bag. Just thaw it in the fridge and give it a quick re-whip before using.
One thing I’ve noticed: the flavors actually develop and deepen after a day in the fridge. The tanginess of the buttermilk and the sweetness of the frosting meld together in a really lovely way. So don’t be afraid to make these a day ahead. In fact, I recommend it.
Nutritional Information & Benefits
Let’s be real—these are cupcakes, not health food. But that doesn’t mean they can’t have some redeeming qualities. Here’s a rough estimate of the nutritional content per cupcake (based on 12 servings):
- Calories: Approximately 380
- Fat: 22g
- Carbohydrates: 45g
- Protein: 4g
- Sugar: 33g
The cocoa powder in red velvet contains antioxidants called flavonoids, which are good for heart health. And the cream cheese frosting, while indulgent, does provide a little calcium and protein from the dairy. I like to think of these as a “sometimes food” that brings a lot of joy for the calories. If you’re watching your sugar intake, you can reduce the sugar in the frosting by ¼ cup—it’ll still be sweet, just less so. And if you’re gluten-free or dairy-free, the substitutions I mentioned above work beautifully without sacrificing flavor.
Honestly, I believe that food is about more than just numbers. These cupcakes are about connection, celebration, and love. And that has its own nutritional value, if you ask me.
Conclusion
These red velvet heart cupcakes are more than just a dessert. They’re a little piece of my childhood, a way to honor my Aunt Josie, and a chance to create something beautiful and delicious for the people I care about. The first time I made them successfully, I sat on my kitchen floor and ate one while crying happy tears. It sounds dramatic, I know, but that’s what happens when you finally get a recipe right after years of trying.
I hope you make these for your Valentine—whether that’s a partner, a friend, a child, or yourself. Because you deserve a cupcake that looks as good as it tastes. Don’t be afraid to get creative with the decorations or to make substitutions based on what you have in your pantry. The best recipes are the ones that become yours.
If you try these, I’d love to hear about it. Leave a comment below and tell me how they turned out. Did you add sprinkles? Did you use a different frosting? Did you eat three in one sitting? (No judgment here.) And if you share them on social media, tag me—I want to see your beautiful creations. Happy Valentine’s Day, friend. Go make some memories.
Frequently Asked Questions
Can I make these cupcakes without a heart-shaped mold?
Absolutely. You can use a regular muffin tin and cupcake liners. After baking, you can either frost them as round cupcakes or use a heart-shaped cookie cutter to cut the center of each cupcake into a heart shape. It’s a little extra work, but the result is adorable.
Why did my red velvet cupcakes turn out brown instead of red?
This usually happens when you don’t use enough red food coloring, or when you use a natural cocoa powder that’s too dark. I recommend using a Dutch-processed cocoa powder for a lighter color and a gel-based red food coloring for a vibrant hue. Also, make sure you’re not overbaking them, as that can darken the crumb.
Can I use a boxed cake mix for this recipe?
You can, but I don’t recommend it if you want that authentic red velvet flavor and texture. Boxed mixes often have a different chemical balance and can taste artificial. This homemade version is actually just as easy and tastes so much better. Give it a try—I promise you won’t regret it.
How do I get my cream cheese frosting to be stiff enough for piping?
Make sure your cream cheese and butter are at room temperature but not too warm. If the frosting is too soft, pop it in the fridge for 15-20 minutes before piping. You can also add an extra ¼ cup of powdered sugar to stiffen it up. Just be careful not to make it too sweet.
Can I freeze these cupcakes with the frosting on?
I don’t recommend it. The cream cheese frosting can become grainy and separate when thawed. It’s best to freeze the unfrosted cupcakes and the frosting separately. When you’re ready to serve, thaw both in the refrigerator, bring to room temperature, and then frost.
Pin This Recipe!
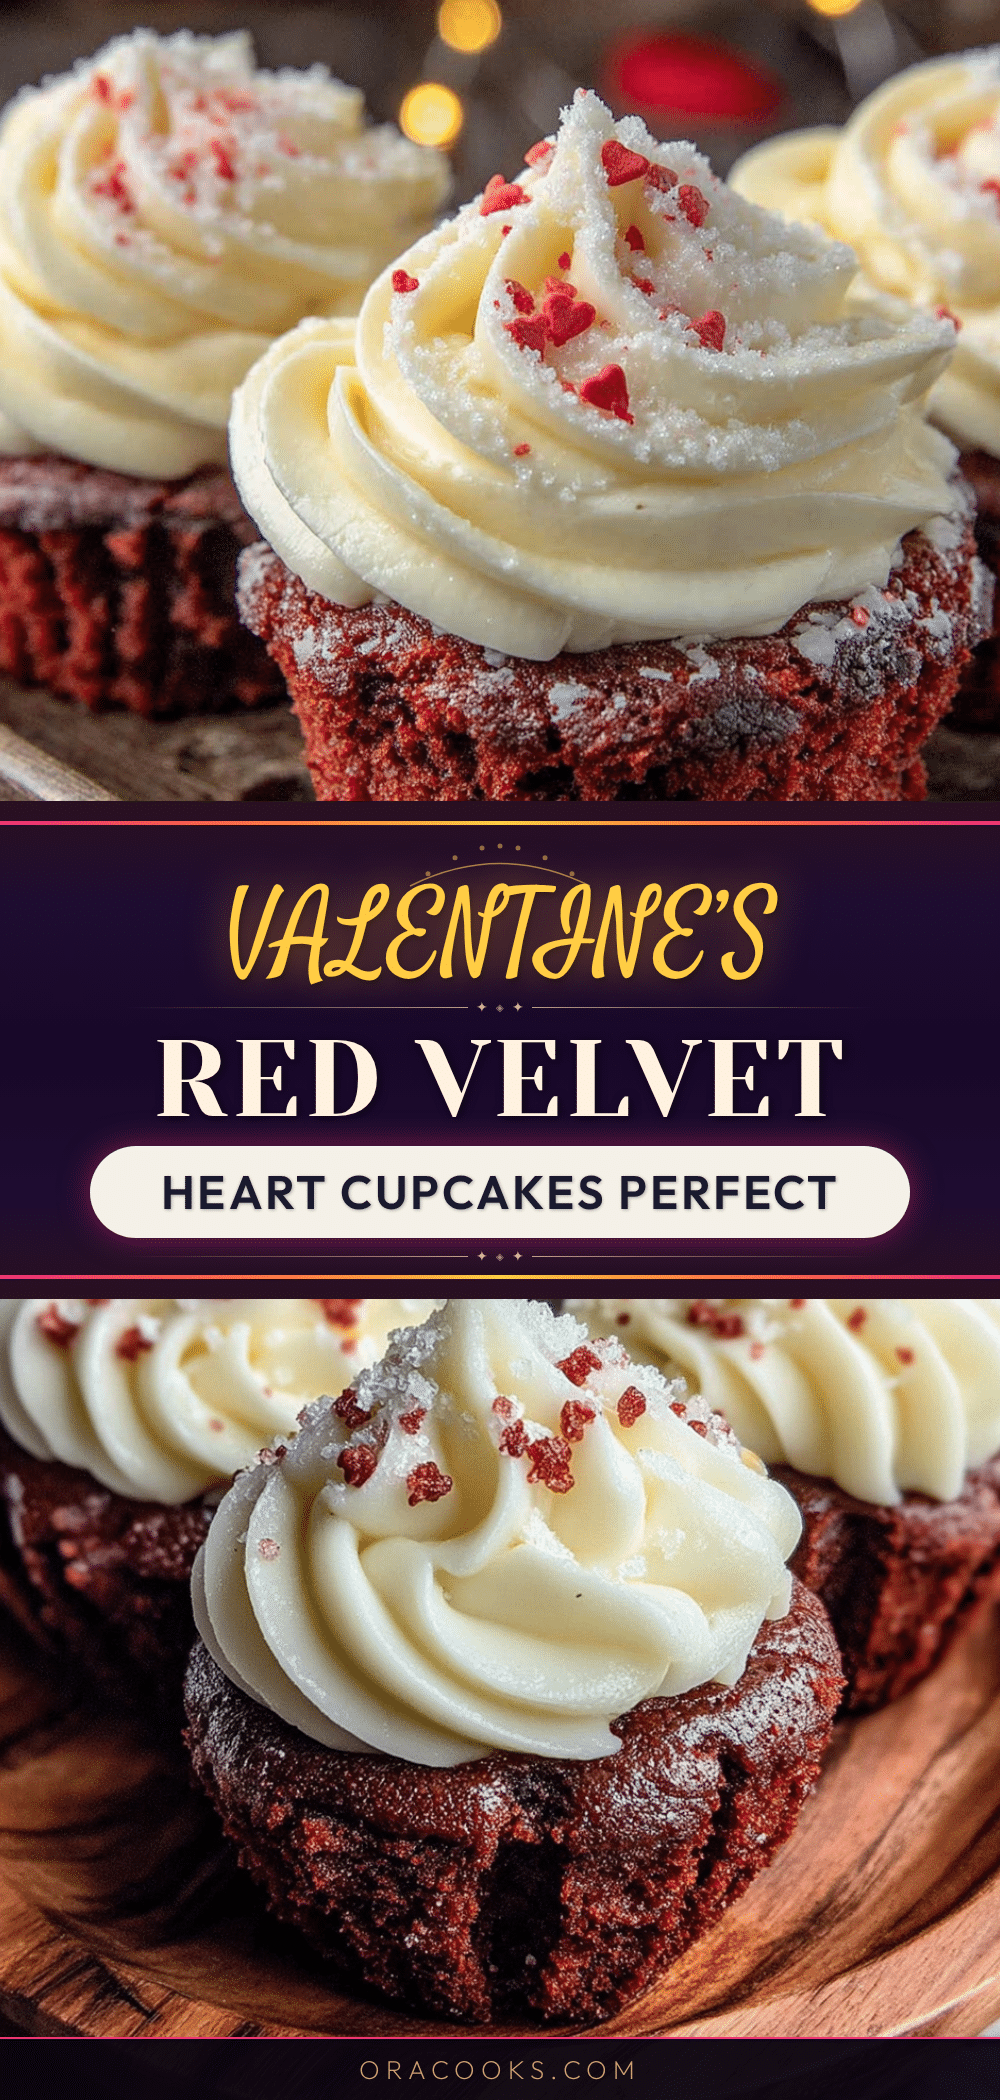
Easy Red Velvet Heart Cupcakes for Valentine’s Day
These red velvet heart cupcakes are a nostalgic tribute to Aunt Josie’s recipe, featuring a tender, tangy crumb and a thick cream cheese frosting. Perfect for Valentine’s Day, they’re quick to make with simple ingredients and guaranteed to impress.
- Prep Time: 15 minutes
- Cook Time: 18 minutes
- Total Time: 45 minutes
- Yield: 12 servings 1x
- Category: Dessert
- Cuisine: American
Ingredients
- 1 ½ cups (190g) all-purpose flour
- 1 cup (200g) granulated sugar
- 1 tablespoon unsweetened cocoa powder
- ½ teaspoon baking soda
- ¼ teaspoon salt
- ½ cup (120ml) buttermilk, room temperature
- ½ cup (120ml) vegetable oil
- 1 large egg, room temperature
- 1 teaspoon vanilla extract
- 1 tablespoon red food coloring (liquid or gel)
- ½ teaspoon white vinegar
- 8 oz (226g) cream cheese, softened
- ½ cup (113g) unsalted butter, softened
- 3 cups (360g) powdered sugar, sifted if desired
- 1 teaspoon vanilla extract
- Pinch of salt
- Heart-shaped sprinkles (optional)
- Red sanding sugar (optional)
- Fresh raspberries or strawberries (optional)
Instructions
- Preheat oven to 350°F (175°C). Line a muffin tin with cupcake liners or place a heart-shaped silicone mold on a baking sheet.
- In a medium bowl, whisk together flour, sugar, cocoa powder, baking soda, and salt. Set aside.
- In a large bowl, whisk together buttermilk, vegetable oil, egg, vanilla extract, and red food coloring until uniform. Add white vinegar and whisk again (mixture will bubble slightly).
- Pour dry ingredients into wet ingredients. Fold gently with a rubber spatula until just combined (a few lumps are fine). Do not overmix.
- Divide batter evenly among liners or heart cavities, filling each about ⅔ full.
- Bake for 15-18 minutes, or until a toothpick inserted in the center comes out clean or with a few moist crumbs. Cool in pan for 5 minutes, then transfer to a wire rack to cool completely.
- While cupcakes cool, make frosting: In a large bowl, beat cream cheese and butter with an electric mixer on medium speed until smooth and creamy (about 2 minutes). Add vanilla and salt; beat again. Gradually add powdered sugar, one cup at a time, beating on low after each addition. Increase speed to medium-high and beat for 2-3 minutes until light and fluffy. If too soft, refrigerate for 10-15 minutes.
- Once cupcakes are completely cool, frost using a piping bag fitted with a star tip (or spread with a knife). Decorate with sprinkles, sanding sugar, or fresh berries as desired.
Notes
Room temperature ingredients are crucial for proper emulsification. Do not overmix the batter. Use gel food coloring for a deeper red. Let cupcakes cool completely before frosting. If frosting is too soft, chill for 15 minutes before piping. Cupcakes can be stored in an airtight container in the refrigerator for up to 5 days. Unfrosted cupcakes can be frozen for up to 3 months.
Nutrition
- Serving Size: 1 cupcake
- Calories: 380
- Sugar: 33
- Fat: 22
- Carbohydrates: 45
- Protein: 4
Keywords: red velvet cupcakes, heart-shaped cupcakes, Valentine's Day cupcakes, cream cheese frosting, easy red velvet


