Love this? Save it for later!
Share the inspiration with your friends
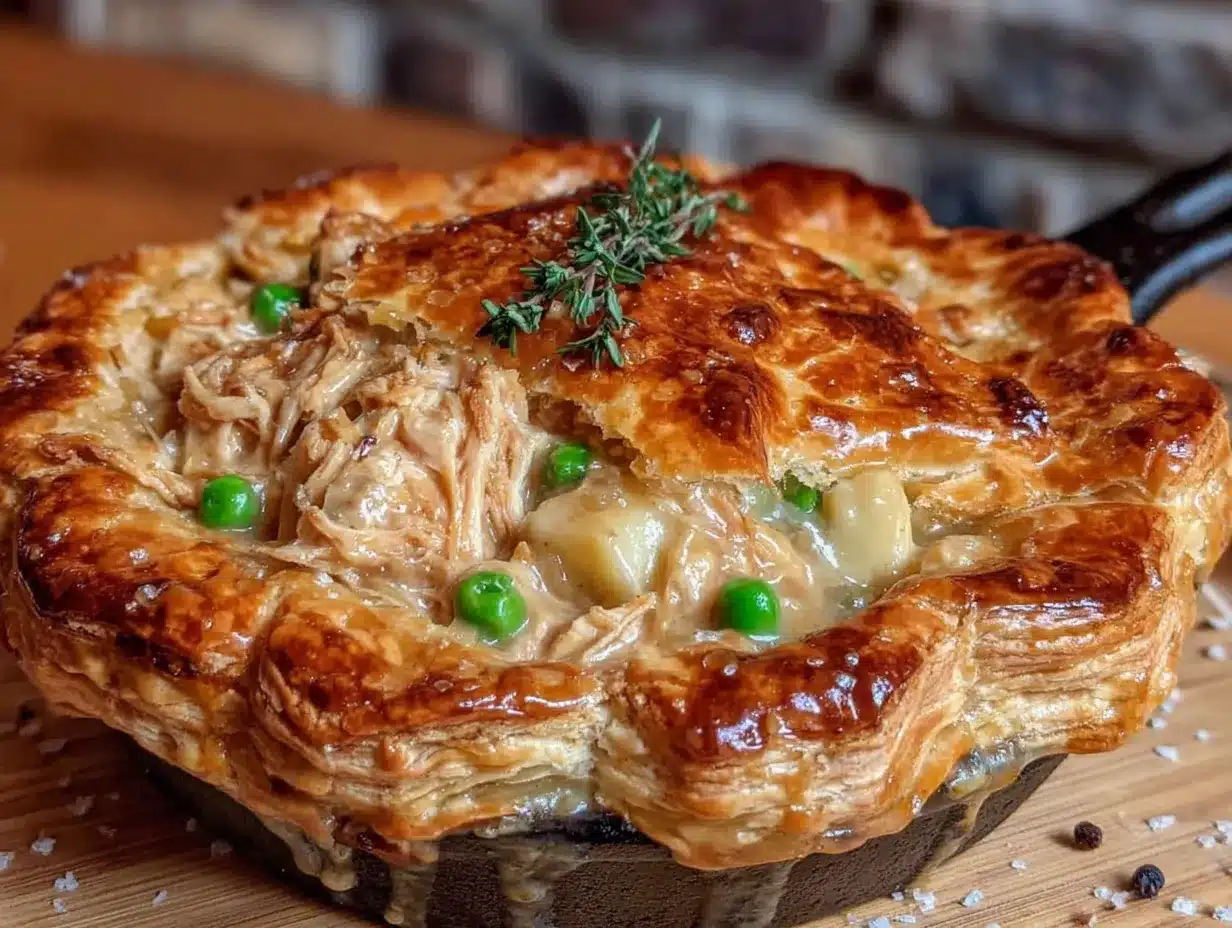
I was digging through the back of my spice cabinet last Tuesday, looking for a jar of smoked paprika I knew I had bought, when the smell of dried thyme and onion powder hit me — and suddenly I was ten years old, standing in my Aunt Carol’s tiny kitchen in St. Louis. The linoleum floor was peeling near the radiator, and she was pulling a cast iron skillet out of the oven, the crust on top of her chicken pot pie bubbling and golden in a way that seemed impossible for a weeknight. I remember watching her spoon it onto my plate, the steam fogging up my glasses, and thinking that this was what grown-up food was supposed to taste like — rich, warm, and like someone had spent all day on it. She passed away a few years ago, and I never got her recipe. I’ve tried a dozen versions since, and honestly? They all felt like imitations. But this one-pan skillet version? It’s the closest I’ve ever come. I’m not gonna lie — the first time I made it for a dinner party, I burned the garlic and the top came out uneven. But my friend Jen said, “I don’t care, this is the best thing I’ve eaten this year,” and I knew I was onto something. Maybe you’ve been chasing a taste like that too — something that feels like a hug but doesn’t require scrubbing a dozen dishes. Let me tell you, this one-pan chicken pot pie skillet is it.
Why You’ll Love This Recipe
This isn’t just another chicken pot pie recipe. I’ve tested this one at least eight times — for potlucks, for my picky in-laws, for a friend who just had a baby — and it never fails. Here’s why it stands out:
- One-Pan Wonder: Everything comes together in a single skillet — no boiling the filling separately, no transferring to a baking dish. Less mess, more time with your guests.
- Simple Ingredients: You probably have most of these in your pantry right now. No heavy cream? Use milk. No frozen peas? Skip ‘em. It’s forgiving.
- Perfect for Hosting: This dish is built for a crowd. It scales beautifully, looks stunning on the table, and you can prep most of it before your guests arrive.
- Crowd-Pleaser: I’ve served it to kids, vegetarians (swap the chicken for mushrooms), and my uncle who “doesn’t do casseroles.” Everyone goes back for seconds.
- Unbelievably Comforting: The filling is creamy without being gluey, the biscuit topping is golden and flaky, and the whole thing tastes like Sunday dinner — on a Tuesday.
What makes this version different? It’s the technique. Instead of a traditional pie crust that can get soggy, I use drop biscuits on top. They soak up just enough of that savory gravy while staying light and tender. And the filling? I finish it with a splash of lemon juice and fresh parsley — a little brightness that cuts through the richness. It’s comfort food, but smart.
I love this recipe because it makes me feel like a hero in the kitchen without the stress. You can make it ahead, reheat beautifully, and it always looks like you tried way harder than you actually did. Perfect for impressing guests without breaking a sweat.
What Ingredients You Will Need
This recipe uses simple, everyday ingredients that work together to create something deeply satisfying. Most of these are pantry staples, which makes it perfect for last-minute entertaining.
For the Filling:
- 2 tablespoons unsalted butter (adds richness; use olive oil for dairy-free)
- 1 medium yellow onion, diced (about 1 cup)
- 3 medium carrots, peeled and diced (about 1 cup)
- 2 celery stalks, diced (about 1/2 cup)
- 3 cloves garlic, minced
- 1/3 cup all-purpose flour (for thickening the gravy)
- 3 cups low-sodium chicken broth (I prefer Swanson or Kitchen Basics for consistent flavor)
- 1/2 cup whole milk or heavy cream (heavy cream makes it richer; milk keeps it lighter)
- 3 cups cooked shredded chicken (rotisserie chicken works great here)
- 1 cup frozen peas (no need to thaw)
- 1 teaspoon dried thyme
- 1/2 teaspoon dried rosemary
- Salt and black pepper to taste
- 1 tablespoon fresh lemon juice (brightens the whole dish)
- 2 tablespoons fresh parsley, chopped
For the Biscuit Topping:
- 1 1/2 cups all-purpose flour
- 1 1/2 teaspoons baking powder
- 1/2 teaspoon baking soda
- 1/2 teaspoon salt
- 1/2 cup cold unsalted butter, cubed (cold butter is key for flaky biscuits)
- 3/4 cup buttermilk (or regular milk with 1 teaspoon lemon juice, let sit 5 minutes)
Ingredient Notes: For the best texture, use fresh thyme if you have it — about 1 tablespoon. If you’re using a rotisserie chicken, shred the meat while it’s still warm; it’s easier and stays juicier. For a gluten-free version, swap the all-purpose flour for a 1:1 gluten-free blend and use a gluten-free biscuit mix for the topping. I’ve tried this with oat milk in the filling, and it works fine — just don’t use skim milk; it can make the gravy thin.
Equipment Needed
The beauty of this recipe is that it’s truly a one-pan meal. Here’s what you’ll need:
- 12-inch oven-safe skillet — cast iron is ideal for even heat and a gorgeous presentation. I use a Lodge 12-inch, and it’s perfect. If you don’t have cast iron, any oven-safe skillet or braiser will work. Avoid non-stick if you can — you want those browned bits on the bottom for flavor.
- Mixing bowls — one for the biscuit dough, one for the flour mixture if you’re prepping ahead.
- Measuring cups and spoons
- Chef’s knife and cutting board
- Wooden spoon or spatula for stirring the filling
- Pastry cutter or two forks for cutting butter into the biscuit dough
- Oven mitts — that skillet handle gets hot!
If you don’t have a pastry cutter, just use your fingertips to rub the butter into the flour — it works just as well, and you get a better feel for the dough. Budget-friendly tip: a 12-inch cast iron skillet can be found for under $30 and will last a lifetime.
Preparation Method
Let’s get cooking. This whole dish comes together in about 45 minutes, and most of that is hands-off time while it bakes.
- Preheat your oven to 425°F (220°C). Position a rack in the middle of the oven.
- Start the filling. Place your 12-inch oven-safe skillet over medium heat and add the 2 tablespoons of butter. Once it’s melted and bubbling, add the diced onion, carrots, and celery. Cook for 6-8 minutes, stirring occasionally, until the vegetables have softened and the onion is translucent. Don’t rush this step — you want them tender, not crunchy.
- Add the garlic and flour. Stir in the minced garlic and cook for 30 seconds until fragrant. Then sprinkle the 1/3 cup of flour over the vegetables and stir constantly for 1-2 minutes. This cooks the raw flour taste out and creates a roux that will thicken your gravy. The mixture will look dry and pasty — that’s normal.
- Slowly add the broth. Pour in the chicken broth a little at a time, whisking continuously to prevent lumps. I use a wooden spoon and keep stirring until the mixture is smooth. Bring it to a gentle simmer — you’ll see bubbles around the edges — and let it cook for 2-3 minutes until it thickens enough to coat the back of a spoon.
- Finish the filling. Stir in the milk or cream, shredded chicken, frozen peas, dried thyme, dried rosemary, and a generous pinch of salt and pepper. Let it simmer for another 2 minutes. Taste it — this is where you adjust seasoning. Add the lemon juice and fresh parsley, then remove the skillet from the heat. The filling should be thick but still saucy; it will thicken more in the oven.
- Make the biscuit topping. In a medium mixing bowl, whisk together the 1 1/2 cups flour, baking powder, baking soda, and salt. Add the cold cubed butter and use a pastry cutter or your fingertips to work it into the flour until the mixture looks like coarse meal with some pea-sized butter pieces remaining. Don’t overwork it — those butter pieces create flaky layers.
- Add the buttermilk. Pour in the buttermilk and stir with a fork just until the dough comes together. It will be shaggy and slightly sticky. That’s perfect. Don’t knead it — just gather it into a ball.
- Drop the biscuits on top. Using a spoon or cookie scoop, drop dollops of biscuit dough over the hot filling. You should have about 8-10 biscuits. They don’t need to be perfect — rustic is the look we’re going for. Leave a little space between them so they can expand.
- Bake. Transfer the skillet to the preheated oven and bake for 18-22 minutes, until the biscuits are golden brown and the filling is bubbling up around the edges. If the biscuits are browning too fast, tent loosely with foil for the last 5 minutes.
- Rest and serve. Let the skillet cool for 5-10 minutes before serving. This allows the filling to set slightly so it’s not too runny. Garnish with extra fresh parsley if you like.
Pro tip for hosts: You can prepare the filling up to step 5, then cover and refrigerate for up to 24 hours. When you’re ready to bake, reheat the filling on the stovetop until simmering, then proceed with the biscuit topping and baking. This is a game-changer for dinner parties.
Cooking Tips & Techniques
I’ve made this recipe enough times to know exactly where things can go wrong — and how to fix them.
Don’t skip browning the vegetables. I once tried to speed things up by just dumping everything in the pan at once. The result? A bland, watery filling. Taking the time to sauté the onion, carrots, and celery until they’re soft and slightly caramelized builds a flavor foundation that makes the whole dish sing.
The roux is your best friend. This is the trick that separates a good pot pie from a great one. When you add the flour to the vegetables, let it cook for a full 2 minutes. You’ll smell it turn nutty and toasty. If you skip this, your gravy will taste like raw flour. Trust me, I learned this the hard way.
Cold butter for the biscuits — no exceptions. I keep my butter in the freezer for 10 minutes before I start the biscuits. If the butter warms up, the biscuits will be dense and flat instead of light and flaky. And don’t overmix the dough — just stir until it comes together. A few lumps are fine.
Timing strategy for hosting: I prep the filling the morning of the party. About 30 minutes before guests arrive, I reheat it, drop the biscuits on top, and pop it in the oven. By the time everyone’s settled with a drink, the kitchen smells incredible, and dinner is ready. No last-minute panic.
What to do if the filling is too thin: Mix 1 tablespoon of cornstarch with 2 tablespoons of cold water, then stir it into the simmering filling. Let it cook for 1 minute, and it will thicken right up.
Variations & Adaptations
This recipe is a canvas — here are some ways to make it your own.
- Vegetarian Version: Swap the chicken for 3 cups of mixed mushrooms (cremini and shiitake work well) and use vegetable broth instead of chicken broth. Sauté the mushrooms with the vegetables until they release their liquid and start to brown. It’s earthy and deeply satisfying.
- Herb Swap: Not a fan of thyme and rosemary? Try tarragon and chives for a lighter, more elegant flavor. Tarragon pairs beautifully with chicken and cream.
- Add Some Heat: Stir in 1/2 teaspoon of red pepper flakes or a diced jalapeño with the garlic. The heat cuts through the richness and keeps people coming back for more.
- Cheese Lovers: Stir 1/2 cup of shredded sharp cheddar into the filling just before adding the biscuits. Or sprinkle Parmesan over the biscuits before baking for a crispy, salty crust.
- Gluten-Free: Use a 1:1 gluten-free flour blend for both the filling and the biscuits. I’ve had good luck with King Arthur Measure for Measure. The texture is slightly different but still delicious.
I once made a version with leftover Thanksgiving turkey and added a splash of white wine to the broth. It was honestly better than the original. Don’t be afraid to experiment.
Serving & Storage Suggestions
This dish is best served hot, straight from the skillet. I put the skillet on a trivet in the center of the table and let everyone serve themselves — it makes for a gorgeous, rustic presentation that always gets compliments.
What to serve alongside: A simple green salad with a lemon vinaigrette cuts through the richness perfectly. I also love serving it with roasted green beans or steamed broccoli. If you’re feeding a crowd, a crusty baguette is great for sopping up any extra gravy.
Storage: Leftovers keep well in an airtight container in the refrigerator for up to 4 days. The biscuits will soften slightly, but it’s still delicious. I actually think it tastes even better the next day — the flavors meld together overnight.
Reheating: The best way to reheat is in a 350°F oven for 10-15 minutes, covered with foil. You can also microwave individual portions, but the biscuits won’t be as crisp. If the filling seems dry, add a splash of chicken broth before reheating.
Freezing: Assemble the entire dish (filling and biscuits) but don’t bake it. Cover tightly with foil and freeze for up to 3 months. To bake, thaw overnight in the refrigerator, then bake at 425°F for 25-30 minutes until bubbly and golden. This is my secret weapon for surprise guests.
Nutritional Information & Benefits
Here’s an approximate breakdown per serving (based on 6 servings):
- Calories: 485
- Protein: 28g
- Fat: 24g
- Carbohydrates: 38g
- Fiber: 4g
- Sugar: 6g
- Sodium: 680mg
This dish is surprisingly balanced. The chicken provides lean protein, the carrots and peas add fiber and vitamins A and C, and the butter and milk offer a dose of calcium. If you’re watching your sodium, use low-sodium broth and skip the added salt until the end. For a lighter version, swap the heavy cream for whole milk and use a mix of whole wheat and all-purpose flour in the biscuits. I’ve made it this way for my health-conscious friends, and no one noticed the difference.
It’s not diet food — it’s comfort food made with real ingredients. And honestly, that’s what makes it good for the soul.
Conclusion
This one-pan chicken pot pie skillet has become my go-to for every gathering, from casual weeknight dinners with friends to holiday potlucks where I need to bring something that travels well. It’s the recipe that makes me look like I spent hours in the kitchen when really, I just followed a few simple steps and let the oven do the work.
What I love most is how adaptable it is. You can make it your own — add more vegetables, swap the herbs, make it spicy or cheesy or light. The base is solid, and it welcomes creativity. That’s the mark of a great recipe, in my book.
I’d love to hear how yours turns out. Did you add something unexpected? Did your guests fight over the last biscuit? Drop a comment below and let me know. And if you loved it, share it with a friend who needs an easy, impressive dinner in their back pocket. Happy cooking!
Frequently Asked Questions
Can I use a store-bought rotisserie chicken?
Absolutely. In fact, I recommend it. Rotisserie chicken is already cooked and seasoned, which saves time and adds flavor. Just shred the meat while it’s still warm for the best texture.
Can I make this in a regular baking dish instead of a skillet?
Yes. If you don’t have an oven-safe skillet, cook the filling on the stovetop in a regular pan, then transfer it to a 9×13-inch baking dish. Drop the biscuits on top and bake as directed. You might need to add 2-3 minutes to the baking time.
Can I use a different vegetable?
Definitely. Green beans, corn, diced potatoes, or even chopped kale work well. Just adjust the cooking time — add potatoes with the carrots, and add greens at the end so they don’t overcook.
Why are my biscuits dense?
Two common culprits: overmixing the dough or using warm butter. Handle the dough as little as possible, and make sure your butter is cold. If the dough feels sticky, that’s okay — don’t add more flour.
Can I double this recipe?
Yes, but you’ll need a larger skillet or a separate baking dish. Use a 14-inch skillet or divide between two 10-inch skillets. The baking time may increase by 5-7 minutes. Keep an eye on the biscuits — they should be golden brown and cooked through.
Pin This Recipe!

One-Pan Chicken Pot Pie Skillet

A comforting one-pan chicken pot pie with a creamy filling and flaky drop biscuit topping. Perfect for weeknight dinners or entertaining, this easy recipe comes together in a single skillet for minimal cleanup.
- Prep Time: 15 minutes
- Cook Time: 30 minutes
- Total Time: 45 minutes
- Yield: 6 servings 1x
- Category: Main Course
- Cuisine: American
Ingredients
- 2 tablespoons unsalted butter
- 1 medium yellow onion, diced (about 1 cup)
- 3 medium carrots, peeled and diced (about 1 cup)
- 2 celery stalks, diced (about 1/2 cup)
- 3 cloves garlic, minced
- 1/3 cup all-purpose flour
- 3 cups low-sodium chicken broth
- 1/2 cup whole milk or heavy cream
- 3 cups cooked shredded chicken (rotisserie chicken works great)
- 1 cup frozen peas (no need to thaw)
- 1 teaspoon dried thyme
- 1/2 teaspoon dried rosemary
- Salt and black pepper to taste
- 1 tablespoon fresh lemon juice
- 2 tablespoons fresh parsley, chopped
- 1 1/2 cups all-purpose flour (for biscuit topping)
- 1 1/2 teaspoons baking powder
- 1/2 teaspoon baking soda
- 1/2 teaspoon salt
- 1/2 cup cold unsalted butter, cubed
- 3/4 cup buttermilk
Instructions
- Preheat your oven to 425°F (220°C). Position a rack in the middle of the oven.
- Start the filling. Place your 12-inch oven-safe skillet over medium heat and add the 2 tablespoons of butter. Once melted and bubbling, add the diced onion, carrots, and celery. Cook for 6-8 minutes, stirring occasionally, until the vegetables have softened and the onion is translucent.
- Add the garlic and flour. Stir in the minced garlic and cook for 30 seconds until fragrant. Then sprinkle the 1/3 cup of flour over the vegetables and stir constantly for 1-2 minutes to cook the raw flour taste out.
- Slowly add the broth. Pour in the chicken broth a little at a time, whisking continuously to prevent lumps. Bring to a gentle simmer and let cook for 2-3 minutes until thickened enough to coat the back of a spoon.
- Finish the filling. Stir in the milk or cream, shredded chicken, frozen peas, dried thyme, dried rosemary, and a generous pinch of salt and pepper. Let simmer for another 2 minutes. Add the lemon juice and fresh parsley, then remove the skillet from the heat.
- Make the biscuit topping. In a medium mixing bowl, whisk together the 1 1/2 cups flour, baking powder, baking soda, and salt. Add the cold cubed butter and use a pastry cutter or your fingertips to work it into the flour until the mixture looks like coarse meal with some pea-sized butter pieces remaining.
- Add the buttermilk. Pour in the buttermilk and stir with a fork just until the dough comes together. It will be shaggy and slightly sticky.
- Drop the biscuits on top. Using a spoon or cookie scoop, drop dollops of biscuit dough over the hot filling. You should have about 8-10 biscuits.
- Bake. Transfer the skillet to the preheated oven and bake for 18-22 minutes, until the biscuits are golden brown and the filling is bubbling up around the edges.
- Rest and serve. Let the skillet cool for 5-10 minutes before serving. Garnish with extra fresh parsley if desired.
Notes
For the best texture, use fresh thyme if available (about 1 tablespoon). If using a rotisserie chicken, shred the meat while still warm for juicier results. For a gluten-free version, swap all-purpose flour for a 1:1 gluten-free blend and use a gluten-free biscuit mix. The filling can be prepared up to 24 hours in advance and refrigerated; reheat on the stovetop before adding biscuits and baking. If the filling is too thin, mix 1 tablespoon cornstarch with 2 tablespoons cold water and stir into the simmering filling.
Nutrition
- Serving Size: 1 serving (1/6 of re
- Calories: 485
- Sugar: 6
- Sodium: 680
- Fat: 24
- Saturated Fat: 12
- Carbohydrates: 38
- Fiber: 4
- Protein: 28
Keywords: chicken pot pie, one-pan dinner, skillet dinner, comfort food, easy dinner, chicken recipe, biscuit topping


