Love this? Save it for later!
Share the inspiration with your friends
I’m not supposed to play favorites with recipes, but these cozy witch finger pretzel rods with white chocolate have me completely smitten. The idea came to me on a drizzly October afternoon when I was staring at a bag of pretzel rods and a block of white chocolate, wondering what spooky but not-too-scary treat I could whip up for my niece’s Halloween visit. I wanted something that felt festive without being terrifying—you know, the kind of thing a seven-year-old would find delightfully creepy rather than nightmare-inducing.
Honestly, I started out just dipping pretzel rods in white chocolate and calling it a day. But then I looked at my almond slivers, and something clicked. Those little pointed almonds looked exactly like witch fingernails! I mean, it was one of those moments where you laugh at your own genius in an empty kitchen. I spent the next hour carefully arranging almond “nails” on cooling chocolate, maybe getting a little too into the witchy aesthetic. Let me tell you, by the time I had a full batch lined up on parchment paper, they actually looked like a coven of tiny green witches had left their snacks behind.
The best part? These cozy witch finger pretzel rods with white chocolate are ridiculously easy to make. No complicated candy thermometers or finicky chocolate tempering—just melt, dip, decorate, and watch them disappear. My niece called them “spooky snack fingers” and asked if we could make them every year. And you know what? I think we will.
Why You’ll Love This Recipe
These cozy witch finger pretzel rods with white chocolate are the kind of treat that makes people do a double-take, then grin. They’re spooky enough for Halloween parties but simple enough that you don’t feel like you need a culinary degree to pull them off. Here’s why they’ve become my go-to for fall gatherings:
- Quick & Easy : From start to finish, you’re looking at about 20 minutes of active work. The hardest part is waiting for the chocolate to set.
- Simple Ingredients : You only need four main ingredients—pretzel rods, white chocolate, green candy melts or food coloring, and sliced almonds. Chances are, you already have most of these in your pantry.
- Perfect for Halloween : These are the star of any Halloween party, movie night, or classroom treat. They’re creepy-cute without being gory.
- Crowd-Pleaser : Kids love the witchy vibe, and adults appreciate that they’re not overwhelmingly sweet. The salty-savory pretzel balances the white chocolate beautifully.
- Unbelievably Delicious : The combination of crunchy pretzel, creamy white chocolate, and nutty almond is honestly addictive. I’ve caught myself reaching for “just one more” more times than I’d like to admit.
What makes these cozy witch finger pretzel rods with white chocolate different from other Halloween treats is the attention to detail. The almond slivers aren’t just stuck on randomly—they’re placed at a slight angle to mimic real fingernails. And the green tint gives them that eerie, otherworldly glow without using artificial-tasting candy melts. I tested this recipe three times before I got the look just right, and trust me, the third batch was the charm. It’s the kind of treat that makes you close your eyes after the first bite, because it tastes like childhood Halloween magic—but better.
What Ingredients You Will Need
This recipe uses simple, wholesome ingredients to deliver that perfect balance of salty, sweet, and slightly spooky. Most of these are pantry staples, which makes these cozy witch finger pretzel rods with white chocolate a last-minute Halloween hero.
- Pretzel rods (12-15 rods) – Look for thick, sturdy pretzel rods that won’t snap easily when you dip them. I prefer the Snyder’s of Hanover brand for their consistent shape and satisfying crunch. Avoid thin pretzel sticks—they’re too delicate for this recipe.
- White chocolate melting wafers (1 cup, about 8 ounces) – These melt smoother than white chocolate chips, which sometimes seize up. Ghirardelli white melting wafers are my go-to for their creamy texture and rich vanilla flavor. If you can only find white chocolate chips, add a teaspoon of coconut oil to help them melt smoothly.
- Green candy melts or green gel food coloring (¼ cup candy melts or 8-10 drops gel coloring) – I recommend Wilton green candy melts for the most consistent color. If using gel food coloring, be sure to use an oil-based one (like Americolor) since water-based coloring can cause white chocolate to seize. Regular liquid food coloring is a no-go here, trust me on this one.
- Sliced almonds (¼ cup) – These become the witch fingernails. Look for raw, blanched sliced almonds that are fairly uniform in shape. I’ve tried using whole almonds cut in half, but the slices look much more nail-like. Toast them lightly for extra flavor, but raw works perfectly fine too.
- Optional: Coconut oil (1 teaspoon) – Only if you’re using white chocolate chips instead of melting wafers. This helps thin the chocolate for smoother dipping.
- Optional: Edible glitter or luster dust (for a magical finish) – A light dusting of gold or iridescent glitter makes these look like they came straight from a witch’s enchanted kitchen. Totally optional, but highly recommended for the wow factor.
One thing I learned the hard way—don’t skip the green coloring. Without it, these just look like white chocolate-covered pretzels with almonds, which is tasty but not exactly witchy. The green tint is what sells the illusion. And if you’re making these for a crowd with nut allergies, you can skip the almonds entirely and use small green candy pearls or even tiny mint leaves cut into nail shapes. They won’t look quite as authentic, but they’ll still be delicious.
Equipment Needed
You don’t need a fancy kitchen to make these cozy witch finger pretzel rods with white chocolate. Here’s what I use every time:
- Microwave-safe bowl – For melting the chocolate. Glass or ceramic works best.
- Parchment paper or silicone baking mat – For setting the dipped pretzels. Wax paper can work in a pinch, but parchment is less likely to stick.
- Baking sheet – To hold the parchment paper and pretzels while they set.
- Small offset spatula or butter knife – For spreading chocolate evenly if needed, and for scraping excess off the pretzels.
- Tweezers – This sounds extra, but trust me, tweezers make placing the almond “nails” so much easier. I use a pair I keep just for kitchen projects.
- Wax paper or small cups – For holding the sliced almonds within easy reach.
- Refrigerator space – To speed up the setting process. A flat space in your fridge is ideal.
If you don’t have an offset spatula, a regular butter knife does the job—just be gentle so you don’t scrape off too much chocolate. And if you’re using candy melts, you can skip the coconut oil entirely. I’ve made these in a friend’s tiny apartment kitchen with just a microwave and a cutting board, so don’t let equipment hold you back.
Preparation Method
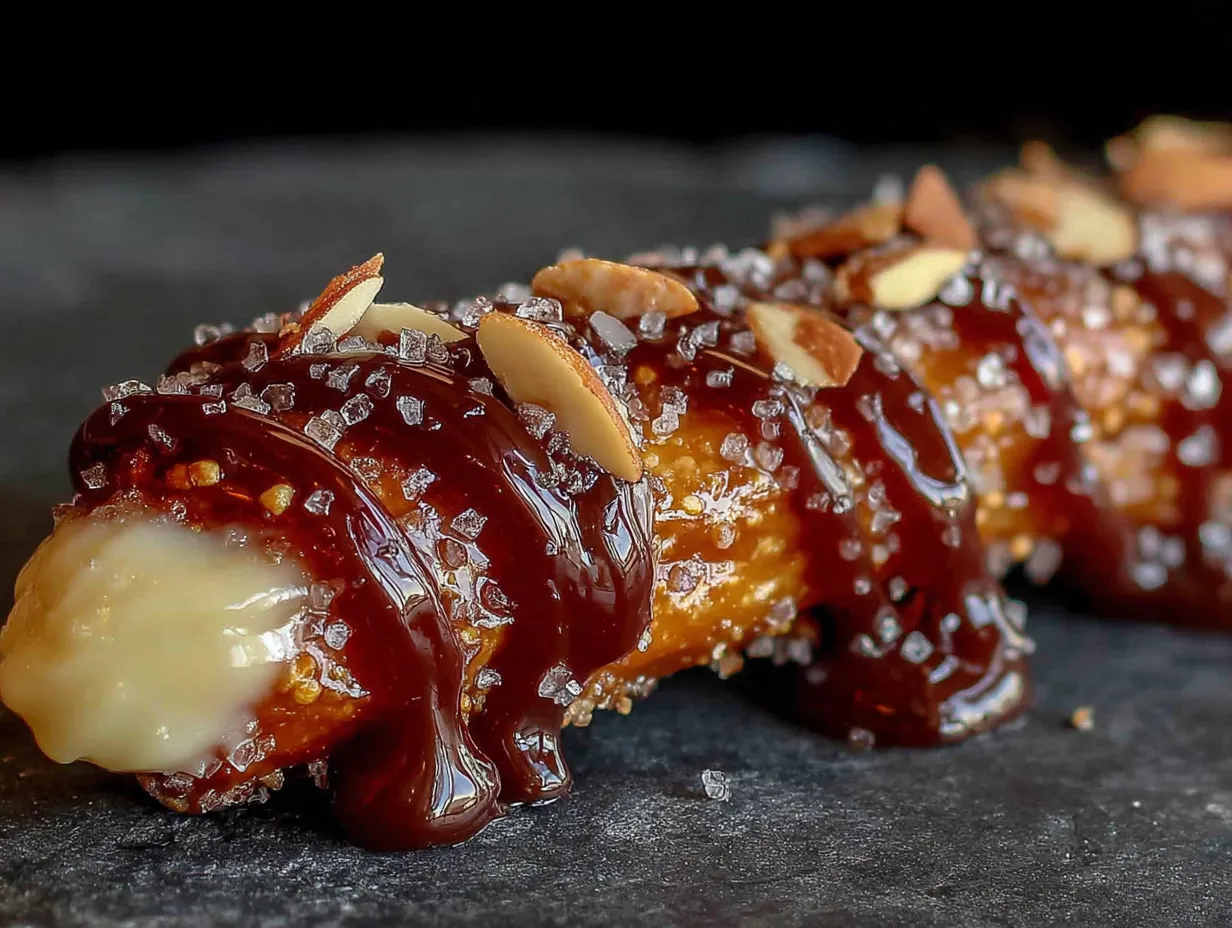
Making these cozy witch finger pretzel rods with white chocolate is straightforward, but a little patience goes a long way. Follow these steps, and you’ll have a batch of spooky treats in no time.
- Prep your workspace – Line a baking sheet with parchment paper. Arrange your pretzel rods, sliced almonds, and green coloring nearby. Make sure your hands are clean and dry—any moisture can mess with the chocolate.
- Melt the white chocolate – Place the white chocolate melting wafers in a microwave-safe bowl. Microwave in 30-second intervals at 50% power, stirring thoroughly after each interval. This usually takes about 2-3 minutes total. The chocolate should be smooth and completely melted with no lumps. If you’re using white chocolate chips, stir in 1 teaspoon of coconut oil after melting to thin it out.
- Add the green color – If using green candy melts, stir them into the melted white chocolate until fully incorporated. If using gel food coloring, add 8-10 drops and stir vigorously. The color should be a pale, sickly green—think witch skin, not lime Jell-O. Add more drops if needed, but go slowly. You can always add, but you can’t take away.
- Dip the pretzels – Hold a pretzel rod by one end and dip it into the green chocolate, tilting the bowl slightly to get full coverage. Rotate the pretzel as you lift it out, letting excess chocolate drip back into the bowl. You want a thin, even coating—not a thick glob. Use your offset spatula or butter knife to gently scrape off any excess from the bottom.
- Place on parchment – Lay the dipped pretzel on the parchment-lined baking sheet. Leave about an inch of space between each pretzel so they don’t stick together. Work quickly while the chocolate is still wet.
- Add the fingernails – Immediately after placing the pretzel on the parchment, use your tweezers to pick up a sliced almond and press it gently into the chocolate at the tip of the pretzel. Angle it slightly upward, like a real fingernail. Press just enough so it stays put—don’t push it all the way through the chocolate. Repeat for each pretzel.
- Add extra details (optional) – If you want to get fancy, use a toothpick to draw small “knuckle” lines on the chocolate before it sets. This gives the pretzels a more finger-like appearance. You can also add a tiny dab of chocolate at the base of the almond to make it look like a cuticle.
- Let them set – Allow the pretzels to set at room temperature for about 30 minutes, or pop them in the refrigerator for 10-15 minutes if you’re in a hurry. The chocolate should be firm to the touch and no longer shiny.
- Add magical sparkle (optional) – Once the chocolate is fully set, lightly dust the pretzels with edible glitter or luster dust. Use a small, soft brush for even application. This step is purely for fun, but it really makes them look special.
- Serve or store – Gently peel the pretzels off the parchment paper. Arrange them on a platter like a handful of witch fingers reaching up from the underworld—or just pile them in a bowl. They’re ready to eat immediately.
A few things I’ve learned through trial and error: If your chocolate starts to thicken while you’re working, pop it back in the microwave for 10 seconds. And if an almond falls off after the chocolate sets, just dab a tiny bit of melted chocolate on the spot and reattach it—no one will know. Also, don’t worry if some pretzels look a little uneven. Homemade treats are supposed to look handmade, and honestly, the slightly imperfect ones have more character.
Cooking Tips & Techniques
After making these cozy witch finger pretzel rods with white chocolate about a dozen times (not exaggerating), I’ve picked up some tricks that make the process smoother and the results more impressive.
Temperature matters – White chocolate is sensitive to heat. If you microwave it on full power, it can scorch and become grainy. Always use 50% power and stir frequently. If your chocolate does seize up (turns thick and lumpy), add a teaspoon of vegetable oil or coconut oil and stir vigorously. Sometimes you can save it, but honestly, it’s better to start fresh if it’s really bad.
Work in small batches – Don’t try to dip all 15 pretzels at once. Melt half the chocolate, dip 6-7 pretzels, add their almonds, and then melt the rest. This keeps the chocolate from cooling and thickening while you work. I learned this the hard way when my last few pretzels ended up with chunky, uneven coating.
Use the right almond placement – The almond slivers should be positioned at the very tip of the pretzel, with the pointed end facing outward. Press them in at a slight upward angle, like a witch’s curved fingernail. If you place them flat against the pretzel, they just look like almonds stuck to chocolate—not nearly as creepy.
Don’t skip the chilling step – Even if you’re in a rush, let the chocolate set fully before handling the pretzels. Warm chocolate smudges easily, and you’ll end up with green fingerprints everywhere. Trust me, I’ve had to redo an entire batch because I got impatient.
Double-dip for extra coverage – If you want a thicker, more opaque coating, dip the pretzels once, let them set for 5 minutes, then dip them again. This gives a more even color and a creamier texture. Just be careful not to double-dip too quickly or the first layer will slide off.
One of my biggest failures? I once tried to use regular food coloring instead of gel. The water in the coloring made the white chocolate seize into a grainy, unworkable mess. I had to throw out the whole bowl and start over. So please, learn from my mistake—oil-based coloring only!
Variations & Adaptations
These cozy witch finger pretzel rods with white chocolate are endlessly adaptable. Here are some variations I’ve tried and loved:
- Dark chocolate witches – Swap the white chocolate for dark or milk chocolate. Skip the green coloring and use white chocolate chips or white candy melts for the “nails” instead of almonds. The contrast is striking and delicious.
- Vampire fang pretzels – Instead of green coloring, keep the white chocolate plain and use two small white candy pearls at the tip of each pretzel to look like vampire fangs. Add a tiny drop of red gel coloring at the base for a bloody effect.
- Gluten-free version – Use gluten-free pretzel rods (yes, they exist!) and follow the same instructions. The taste and texture are nearly identical.
- Vegan option – Use vegan white chocolate (made with cocoa butter alternatives) and skip the almonds if you want a nut-free version. Most dark chocolates are naturally vegan, so that’s an easy swap too.
- Spicy witch fingers – Add a pinch of cayenne pepper or chili powder to the melted chocolate for a sweet-heat kick. The warmth pairs surprisingly well with the salty pretzel.
- Mummy pretzels – Drizzle extra white chocolate in a zigzag pattern over the set green chocolate to look like mummy bandages. Add two tiny candy eyes for maximum cuteness.
My personal favorite variation? I made a batch with orange-colored white chocolate (using orange gel coloring) and called them “Pumpkin Witch Fingers.” I added a tiny green candy stem at the base of each almond nail. They were a hit at my fall book club meeting, and honestly, they looked even more festive than the original green version.
Serving & Storage Suggestions
These cozy witch finger pretzel rods with white chocolate are best served at room temperature, straight from the parchment. Arrange them on a platter with the “fingertips” pointing outward for maximum creep factor. I like to serve them alongside a bowl of warm apple cider or hot chocolate—the contrast between the cold treat and the warm drink is perfect for a cozy fall evening.
For a Halloween party, try standing the pretzels upright in a small vase or jar filled with candy corn or black jelly beans. It looks like a bouquet of witch fingers reaching up from the candy. Kids love this presentation, and adults get a kick out of it too.
Storage – Store leftover pretzels in an airtight container at room temperature for up to 5 days. Layer them between sheets of parchment paper to prevent sticking. Do not refrigerate them once they’re set, as condensation can make the chocolate bloom (develop white streaks). If you live in a humid climate, you can store them in the fridge, but let them come to room temperature before serving to avoid condensation.
Freezing – These freeze beautifully! Place the set pretzels in a single layer on a baking sheet and freeze until solid (about 1 hour). Transfer to a freezer-safe bag or container, separating layers with parchment. They’ll keep for up to 3 months. Thaw at room temperature for 15-20 minutes before serving. The chocolate might look a little dull after thawing, but the taste is still perfect.
One thing I’ve noticed—these pretzels actually get better after a day or two. The flavors meld together, and the chocolate sets into a perfect snap. So don’t stress about making them the day before. In fact, I prefer them on day two.
Nutritional Information & Benefits
Let’s be real—these cozy witch finger pretzel rods with white chocolate are a treat, not a health food. But here’s the estimated nutritional breakdown per pretzel (based on 15 servings):
| Nutrient | Amount per serving |
|---|---|
| Calories | 145 |
| Total Fat | 8g |
| Saturated Fat | 4.5g |
| Carbohydrates | 17g |
| Sugar | 11g |
| Protein | 2g |
| Sodium | 185mg |
While these aren’t exactly a health food, the pretzel base does provide a small amount of iron and B vitamins. The almonds add a touch of vitamin E and healthy fats. And honestly, sometimes you just need a little witchy indulgence. I like to think of these as a mood-boosting treat—the kind that makes you smile and feel a little bit magical, even on a rainy October evening.
For those with dietary concerns: These contain gluten (from the pretzels), dairy (from the white chocolate), and tree nuts (from the almonds). Vegan and gluten-free variations are listed above. Always check your ingredient labels if you’re cooking for someone with allergies.
Conclusion
These cozy witch finger pretzel rods with white chocolate have become a non-negotiable part of my fall baking rotation. They’re fun, they’re festive, and they’re genuinely delicious—not just a gimmick. The combination of crunchy pretzel, creamy white chocolate, and nutty almond is one of those perfect flavor marriages that just works.
I love that this recipe lets me be creative without being complicated. Whether you’re making them for a Halloween party, a cozy night in, or just because you want to surprise your kids with something special, these witch fingers deliver. And honestly, there’s something deeply satisfying about watching people’s faces light up when they realize what they’re eating.
So go ahead—give these a try. Customize them with different colors, add sparkles, or keep them simple. However you make them, I promise they’ll bring a little witchy magic to your kitchen. And when you do make them, I’d love to hear about it. Drop a comment below and tell me how they turned out, or share your own spooky twist on the recipe. Happy Halloween, and happy snacking!
Frequently Asked Questions
Can I use milk chocolate instead of white chocolate?
Absolutely! Milk chocolate or dark chocolate both work beautifully. Just skip the green food coloring, since it won’t show up on dark chocolate. You can use white chocolate chips or white candy melts for the “nails” instead of almonds.
Why did my white chocolate seize up?
White chocolate seizes when it comes into contact with water. This can happen if your bowl had residual moisture, if you used liquid food coloring, or if you overheated the chocolate. Always use oil-based gel coloring and make sure your bowl is completely dry. If it does seize, try adding a teaspoon of vegetable oil and stirring vigorously—sometimes it can be saved.
How far in advance can I make these?
You can make them up to 5 days in advance if stored properly in an airtight container at room temperature. They also freeze beautifully for up to 3 months. I actually prefer making them a day ahead, as the flavors meld together overnight.
Can I use pretzel sticks instead of rods?
You can, but thin pretzel sticks are more fragile and might snap during dipping. If you use them, work very gently and consider adding a bit more coconut oil to thin the chocolate for a lighter coating. The final result will be smaller and more delicate.
My almonds keep falling off! What am I doing wrong?
This usually happens when the chocolate has started to set before you add the almond. Make sure you place the almond immediately after dipping, while the chocolate is still wet. Press gently but firmly. If the chocolate has already started to set, you can dab a tiny bit of fresh melted chocolate on the spot before reattaching the almond.
Pin This Recipe!

Cozy Witch Finger Pretzel Rods: Best White Chocolate Treat

These spooky but not-too-scary witch finger pretzel rods are dipped in green-tinted white chocolate and topped with almond sliver ‘fingernails’. They’re quick, easy, and perfect for Halloween parties or cozy fall gatherings.
- Prep Time: 20 minutes
- Cook Time: 0 minutes
- Total Time: 20 minutes (plus 30 minutes setting time)
- Yield: 15 servings 1x
- Category: Dessert
- Cuisine: American
Ingredients
- 12–15 pretzel rods (thick, sturdy ones like Snyder’s of Hanover)
- 1 cup (8 ounces) white chocolate melting wafers (e.g., Ghirardelli)
- 1/4 cup green candy melts or 8-10 drops green gel food coloring (oil-based, like Americolor)
- 1/4 cup sliced almonds (raw, blanched)
- 1 teaspoon coconut oil (optional, only if using white chocolate chips)
- Edible glitter or luster dust (optional, for magical finish)
Instructions
- Line a baking sheet with parchment paper. Arrange pretzel rods, sliced almonds, and green coloring nearby.
- Place white chocolate melting wafers in a microwave-safe bowl. Microwave in 30-second intervals at 50% power, stirring after each interval, until smooth (about 2-3 minutes total). If using white chocolate chips, stir in 1 teaspoon coconut oil after melting.
- If using green candy melts, stir them into the melted white chocolate until fully incorporated. If using gel food coloring, add 8-10 drops and stir vigorously until the chocolate is a pale, sickly green.
- Hold a pretzel rod by one end and dip it into the green chocolate, tilting the bowl to get full coverage. Rotate as you lift, letting excess drip back. Use an offset spatula or butter knife to scrape off excess from the bottom.
- Lay the dipped pretzel on the parchment-lined baking sheet, leaving about an inch of space between each. Work quickly while the chocolate is still wet.
- Immediately use tweezers to pick up a sliced almond and press it gently into the chocolate at the tip of the pretzel, angled slightly upward like a fingernail. Repeat for each pretzel.
- Optional: Use a toothpick to draw small ‘knuckle’ lines on the chocolate before it sets. Add a tiny dab of chocolate at the base of the almond for a cuticle effect.
- Let pretzels set at room temperature for about 30 minutes, or refrigerate for 10-15 minutes until firm and no longer shiny.
- Optional: Once set, lightly dust with edible glitter or luster dust using a small soft brush.
- Gently peel pretzels off parchment. Serve immediately or store.
Notes
Use oil-based gel food coloring to prevent white chocolate from seizing. Work in small batches to keep chocolate from thickening. If almonds fall off after setting, reattach with a dab of melted chocolate. Store in an airtight container at room temperature for up to 5 days; freeze for up to 3 months.
Nutrition
- Serving Size: 1 pretzel rod
- Calories: 145
- Sugar: 11
- Sodium: 185
- Fat: 8
- Saturated Fat: 4.5
- Carbohydrates: 17
- Protein: 2
Keywords: Halloween treats, witch finger pretzels, white chocolate pretzels, spooky snacks, easy Halloween recipe, no-bake dessert


