Love this? Save it for later!
Share the inspiration with your friends
I had claimed to hate themed food for years. “Just cook the regular thing,” I’d say whenever someone suggested a spiderweb dip or a jack-o’-lantern pizza. It felt gimmicky—like the food was trying too hard to be fun instead of just being good. Then I made this white chocolate Halloween popcorn hands recipe “just for the kids” last October and found my husband sneaking pieces from the bowl before I’d even finished wrapping them. He had a cluster halfway to his mouth, caught red-handed, and all he said was, “Don’t judge me—this is actually incredible.”
That’s the thing about this recipe, honestly. It doesn’t announce itself as a Halloween treat you’ll make once and forget. It sidles up to you as a buttery, salty-sweet popcorn cluster that just happens to look like a creepy little hand. And before you know it, you’re the one picking the candy eyes off the “fingers” while pretending you’re taste-testing for quality control. I mean, we’ve all been there, right?
The first batch I made was a disaster—the white chocolate seized up because I got distracted by a toddler meltdown, and the “hands” looked more like sad, lumpy blobs. But the kids didn’t care. They ate them anyway, sticky fingers and all, and demanded more. So I tried again the next night, this time with a few tricks I’d learned the hard way. And let me tell you, watching their faces light up when they saw the little candy-coated fingernails? That’s the moment this recipe went from “silly seasonal thing” to “new family tradition.”
Why You’ll Love This Recipe
This isn’t just another Halloween snack that looks cute but tastes like cardboard. This white chocolate Halloween popcorn hands recipe delivers on every level—flavor, fun, and zero stress. Here’s why it’s earned a permanent spot in our October rotation:
- Quick & Easy: From start to finish, you’re looking at about 20 minutes of active time. The rest is just waiting for the chocolate to set. Perfect for those evenings when the kids announce they need a class treat tomorrow morning.
- Simple Ingredients: You probably already have popcorn, white chocolate chips, and a few pantry staples on hand. No hunting down specialty stores or spending twenty dollars on weird candy parts.
- Perfect for Halloween Parties: Whether it’s a school celebration, a neighborhood gathering, or just a spooky movie night at home, these popcorn hands are the star of the snack table. They’re portable, too—no melting cupcakes or crumbling cookies.
- Crowd-Pleaser: I’ve seen kids who “don’t like white chocolate” devour three of these in a row. The salty-sweet combo is basically irresistible, and the fun shape makes everyone want to try one.
- Unbelievably Delicious: The texture is what gets you—crunchy popcorn, creamy white chocolate, and little pops of candy crunch from the decorations. It’s next-level comfort food that happens to look like a creepy hand.
What makes this recipe different from all the other Halloween popcorn recipes out there? It’s the technique. Most versions just drizzle chocolate over popcorn and call it a day. But this method uses a gentle folding approach that coats every single kernel without turning everything into a soggy mess. The result is a cluster that snaps when you bite into it, with that perfect balance of butter and sweetness. Plus, the “hand” shape is actually easier than it looks—I promise you don’t need any special molds or fancy tools.
This is the kind of recipe that makes you close your eyes after the first bite. It’s Halloween fun without the Halloween fuss. And honestly? It’s cheap enough that you can make a double batch without wincing at the grocery receipt. For a family feeding picky eaters on a budget, that’s the real magic trick.
What Ingredients You Will Need
This recipe uses simple, wallet-friendly ingredients to deliver that addictive salty-sweet crunch. Most of these are pantry staples, which means you can whip up a batch on a whim without a special shopping trip.
- Popcorn kernels, ½ cup (100g) — I prefer yellow popcorn for its sturdier texture, but white works fine too. (Avoid pre-buttered microwave popcorn; the extra oils mess with the chocolate coating.)
- Vegetable oil, 2 tablespoons (30ml) — For popping. Coconut oil adds a subtle sweetness if you have it, but any neutral oil does the job.
- Unsalted butter, 3 tablespoons (42g) — Melted and drizzled over the popcorn for that classic buttery flavor. I use salted butter in a pinch and just skip adding extra salt.
- Salt, ½ teaspoon (3g) — Fine sea salt works best. This is crucial—don’t skip it, even if you’re using salted butter. The salt balances the sweet white chocolate.
- White chocolate chips or melting wafers, 12 ounces (340g) — Ghirardelli white chocolate chips are my go-to for smooth melting. Avoid white chocolate “baking bars” that contain cocoa butter substitutes; they tend to seize up. If you’re on a tight budget, store-brand white melting wafers work great too.
- Coconut oil or shortening, 1 teaspoon (5ml) — This tiny addition keeps the white chocolate from seizing and gives it a beautiful glossy finish. Don’t skip it—learned that one the hard way.
- Candy eyeballs, about 30 pieces — You can find these at any craft store or in the baking aisle around Halloween. They’re cheap and last forever in the pantry.
- Orange and black candy-coated chocolates, about ¼ cup (45g) — M&M’s or similar. These become the “fingernails” on the hands. Pick out the Halloween colors if you can find a seasonal bag.
- Pretzel sticks, about 30 (optional) — These can be tucked into the clusters to look like little finger bones. Totally optional, but adds to the creepy factor.
Equipment Needed
You don’t need a fancy kitchen to pull off these white chocolate Halloween popcorn hands. Here’s what you’ll actually use:
- Large pot with lid (5-quart or bigger) — For popping the popcorn. A Dutch oven works beautifully. Avoid nonstick pots with scratched surfaces; the kernels need even heat distribution.
- Baking sheet (half-sheet size) — Lined with parchment paper or a silicone baking mat. This is where your popcorn hands will set.
- Medium microwave-safe bowl — For melting the white chocolate. Glass or ceramic works best; plastic bowls can hold onto odors.
- Spatula or wooden spoon — For folding the popcorn and chocolate together. Use a silicone spatula if you have one—less sticking, easier cleanup.
- Piping bag or small zip-top bag — For drizzling extra white chocolate details. If you don’t have a piping bag, a sandwich bag with the corner snipped off works perfectly.
- Measuring cups and spoons — For accuracy, especially with the oil and salt.
If you don’t have a large pot, you can use an air popper or even microwave popcorn (just get the plain, unsalted kind). I’ve made these in a tiny apartment kitchen with a beat-up pot and a butter knife—it still worked. Don’t let missing equipment stop you.
Preparation Method
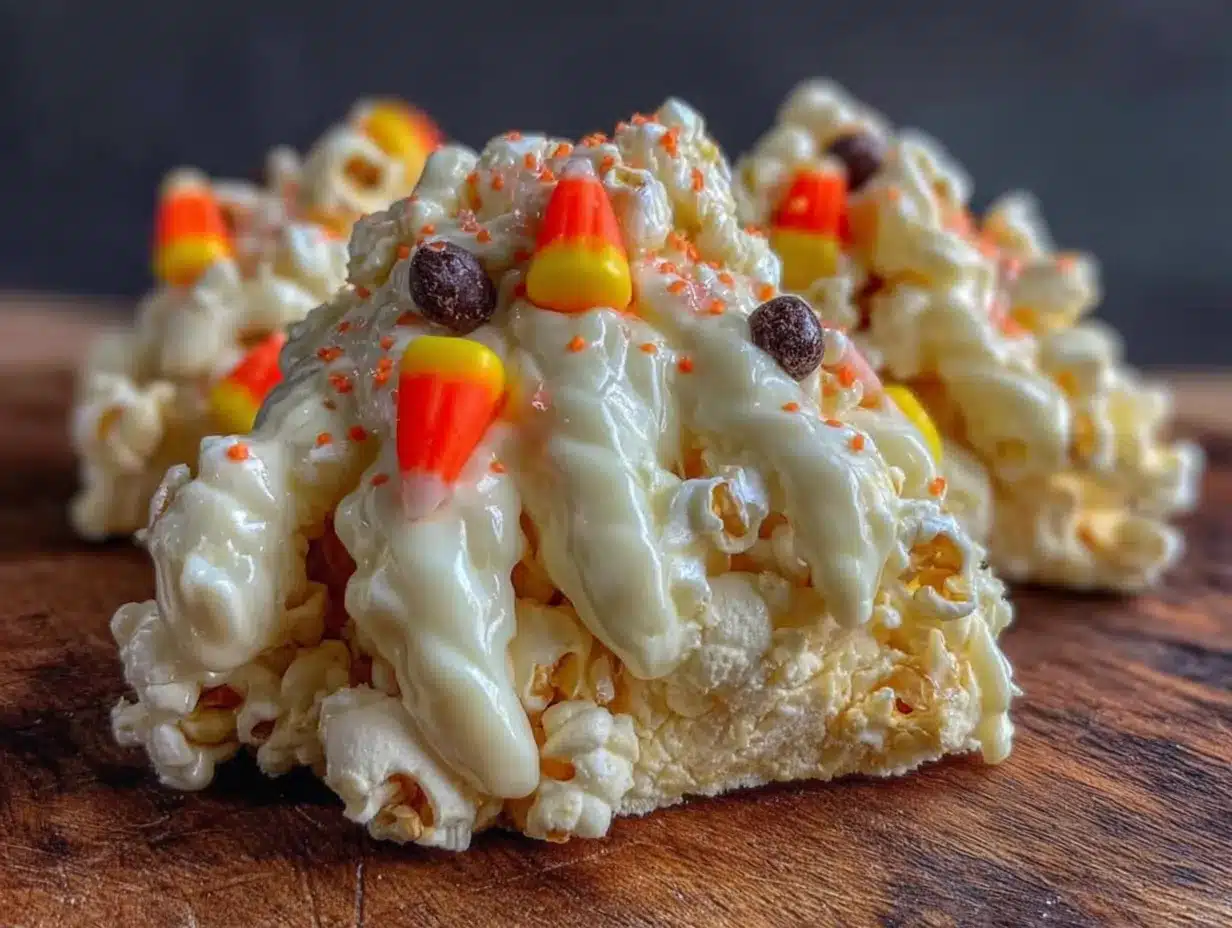
- Pop the popcorn. Heat the vegetable oil in your large pot over medium-high heat with 3 kernels inside. When those pop, add the remaining kernels, cover, and shake the pot gently every 10 seconds. Once the popping slows to about 2 seconds between pops, remove from heat. This takes about 3-4 minutes total. You should end up with about 8 cups of popped popcorn.
- Pick out the unpopped kernels. This is tedious but important—nobody wants to crack a tooth on a Halloween treat. Spread the popcorn on your baking sheet and sift through it. I usually find about 10-15 stubborn kernels hiding in there.
- Season the popcorn. Drizzle the melted butter over the warm popcorn and sprinkle with salt. Toss gently with your hands (clean hands, obviously) to distribute evenly. Let it cool for about 5 minutes—you want it warm but not hot when you add the chocolate.
- Melt the white chocolate. Place the white chocolate chips and coconut oil in a microwave-safe bowl. Microwave in 30-second intervals at 50% power, stirring thoroughly after each interval. It usually takes 2-3 intervals total. The chocolate should be smooth and glossy—if it looks grainy or stiff, you’ve overheated it. (If that happens, stir in another teaspoon of coconut oil and hope for the best. I’ve saved seized chocolate this way more times than I’d like to admit.)
- Combine popcorn and chocolate. Pour the melted white chocolate over the seasoned popcorn. Fold gently with your spatula, lifting from the bottom and turning over. Don’t stir aggressively—you’ll crush the popcorn. Keep folding until every kernel has a coating of white chocolate. Some clusters will form naturally; that’s perfect.
- Shape the hands. Working quickly before the chocolate sets, scoop a generous spoonful of the coated popcorn mixture onto your parchment-lined baking sheet. Gently press it into a rough hand shape—a round palm with five finger-like extensions. Don’t worry about perfection; the lumpy, organic shapes actually look more like creepy hands. You should get about 8-10 hands from one batch.
- Add the decorations. While the chocolate is still wet, press two candy eyeballs into the “palm” area for the eyes. Place one orange or black candy at the tip of each “finger” for the fingernails. If you’re using pretzel sticks, tuck one into each finger before adding the candy nail. Work quickly—the chocolate sets faster than you’d think.
- Drizzle with extra chocolate (optional). Transfer any remaining melted white chocolate to your piping bag or zip-top bag. Snip a tiny corner off and drizzle zigzag patterns over the hands. This adds visual interest and covers any bare spots.
- Let them set. Place the baking sheet in the refrigerator for 15-20 minutes, or leave at room temperature for about 45 minutes. The white chocolate should be firm and snap when you break a piece off.
- Serve or store. Gently peel the parchment away from each popcorn hand. They’re ready to eat immediately, or you can store them for later.
Cooking Tips & Techniques
I’ve messed up this recipe more times than I’ve gotten it right on the first try. Here’s what I’ve learned so you don’t have to repeat my mistakes:
Temper your chocolate properly. White chocolate is finicky—it hates heat. Always melt it at 50% power and stir frequently. If it starts to look thick and pasty, you’ve gone too far. Adding a teaspoon of coconut oil at the beginning helps stabilize it and gives you more working time.
Don’t overwork the popcorn. When you’re folding the chocolate into the popcorn, gentle is the keyword. Heavy-handed stirring crushes the kernels and turns your beautiful hands into sad, flat discs. Use a light lifting-and-turning motion, the way you’d fold whipped cream into a batter.
Work in batches. If you try to shape all the hands at once, the chocolate will set before you finish. I shape 3-4 hands, add their decorations, then move on to the next batch. It keeps everything looking fresh and the decorations actually stick.
Keep your hands clean but slightly oiled. White chocolate is sticky. Lightly grease your palms with a drop of coconut oil before shaping, and the mixture won’t cling to you. I learned this after a particularly frustrating session where I had more chocolate on my fingers than on the baking sheet.
Use the fridge strategically. If your kitchen is warm (anything above 70°F), the chocolate might not set properly at room temperature. Pop the baking sheet in the fridge for 15 minutes, but no longer—any more and the popcorn can absorb moisture and turn chewy instead of crunchy.
Multitask wisely. While the white chocolate is melting, have your decorations laid out and your baking sheet ready. Once you start shaping, there’s no time to hunt for the candy eyeballs under the couch cushions. Trust me on this one.
Variations & Adaptations
This white chocolate Halloween popcorn hands recipe is endlessly adaptable. Here are a few ways I’ve tweaked it over the years:
Dairy-Free Version: Use dairy-free white chocolate chips (Enjoy Life makes a good one) and replace the butter with coconut oil. The flavor is slightly different—more tropical—but still delicious. My sister-in-law is dairy-free, and she actually prefers this version now.
Spicy-Sweet Variation: Add a pinch of cayenne pepper and a sprinkle of cinnamon to the melted white chocolate. The heat sneaks up on you, which is fun for adults. I made this for a Halloween party once, and it was the first bowl emptied. Just keep the spicy batch separate from the kid-friendly one, obviously.
Monster Mash Version: Instead of hands, shape the popcorn into monster faces—round blobs with two eyes and a mouth made from a red licorice strip. My youngest son loves this variation because he says the monsters “look friendlier than the hands.” Same recipe, different shape, same delicious result.
Nutty Crunch: Fold in ½ cup of chopped peanuts or slivered almonds along with the white chocolate. The extra crunch is fantastic, and it stretches the batch further—always a win when feeding a crowd on a budget.
Color-Changing Magic: Add a few drops of purple or green gel food coloring to the white chocolate before mixing. The color swirls through the popcorn and makes the hands look even more otherworldly. My daughter insists on green every single year now.
Serving & Storage Suggestions
These popcorn hands are best served at room temperature, right after the chocolate has set. The contrast between the crunchy popcorn and the creamy white chocolate is at its peak within the first few hours. Arrange them on a platter with the “fingers” pointing outward for maximum creepiness—kids love that detail.
For a Halloween party, pair them with a bowl of caramel popcorn for a sweet-sweet combo, or set them next to a plate of salty pretzels to balance the flavors. A pitcher of apple cider or a bowl of fruit punch makes the perfect beverage companion. If you’re feeling extra festive, serve them on a black platter with fake spiderwebs draped around the edges.
Storage: Place the popcorn hands in an airtight container, layered between sheets of parchment paper. They’ll stay fresh at room temperature for up to 5 days—if they last that long. Do not refrigerate them long-term; the moisture in the fridge will soften the popcorn. If you live in a humid climate, add a food-safe silica gel packet to the container to keep everything crunchy.
Freezing: These freeze surprisingly well. Arrange the hands in a single layer on a baking sheet and freeze for 2 hours, then transfer to a freezer-safe bag. They’ll keep for up to 2 months. Thaw at room temperature for about 15 minutes before serving. The texture is slightly less crunchy after freezing, but still delicious—perfect for making ahead of Halloween week.
Reheating: Honestly, you don’t need to reheat these. They’re meant to be eaten cold or at room temperature. If you somehow end up with leftover hands that have gone soft (it happens), spread them on a baking sheet and pop them in a 300°F oven for 5 minutes. Let them cool completely, and the crunch comes back. It’s not perfect, but it works in a pinch.
One thing I love about this recipe is that the flavors actually deepen slightly after a day. The salt and butter meld into the white chocolate, and the whole thing tastes even more balanced on day two. Not that there’s usually any left by then.
Nutritional Information & Benefits
Let’s be real—this is a treat, not a health food. But here’s the estimated breakdown per hand (assuming 10 hands per batch):
| Nutrient | Amount per hand |
|---|---|
| Calories | 210 |
| Total Fat | 12g |
| Saturated Fat | 7g |
| Carbohydrates | 24g |
| Sugar | 18g |
| Protein | 3g |
| Sodium | 180mg |
On the bright side, popcorn is a whole grain—it contains fiber and polyphenols, which are antioxidants. White chocolate isn’t exactly a superfood, but it does contain calcium and a small amount of protein from the milk solids. The butter adds vitamin A. So, you know, it’s not nothing.
For dietary considerations: This recipe contains dairy (white chocolate, butter) and gluten (popcorn is naturally gluten-free, but check your white chocolate brand for cross-contamination warnings). It’s not suitable for vegans unless you use the substitutions mentioned above. The candy eyeballs may contain soy lecithin, so check labels if you have soy sensitivities.
My personal take? This is a once-a-year indulgence that brings genuine joy to my kids. I don’t stress about the sugar content because it’s a special occasion treat. Balance, you know?
Conclusion
This white chocolate Halloween popcorn hands recipe is proof that themed food doesn’t have to be a compromise between “looks cool” and “tastes amazing.” It’s buttery, salty, sweet, and just creepy enough to delight the kids without giving the preschoolers nightmares. And honestly? It’s one of the easiest Halloween treats I’ve ever made—no baking, no complicated techniques, no expensive ingredients.
I love that this recipe lets me be creative without stressing. The hands never look exactly the same twice, and that’s part of the charm. Some years they’re chubby and friendly; other years they’re long and skeletal. The kids don’t care—they just want to eat them.
So grab your popcorn, your white chocolate, and your bag of candy eyeballs. Make a mess. Laugh at the lumpy ones. And when your husband gets caught sneaking one before you’ve even finished decorating, just smile and hand him another. That’s what Halloween is really about, anyway.
I’d love to see your popcorn hands! Tag me when you make them, and tell me which variation your family loved most. Happy Halloween, friends—may your treats be delicious and your tricks be minimal.
Frequently Asked Questions
Can I use microwave popcorn for this recipe?
Yes, but use the plain, unsalted variety. Butter-flavored microwave popcorn has artificial flavors and extra oils that can make the white chocolate coating greasy and prevent it from setting properly. If that’s all you have, it’ll still work—just expect a slightly different texture.
Why did my white chocolate turn grainy?
You likely overheated it. White chocolate is sensitive—it seizes up when exposed to high heat or even a drop of water. Always melt at 50% power in short bursts, and make sure your bowl is completely dry. Adding a teaspoon of coconut oil before melting helps stabilize it and gives you more room for error.
Can I make these ahead of time?
Absolutely. They keep at room temperature in an airtight container for up to 5 days. You can also freeze them for up to 2 months—just thaw at room temperature before serving. I usually make a double batch the weekend before Halloween and stash half in the freezer for the big day.
How do I get the hands to look more realistic?
Use your fingers to gently press indentations between each “finger” on the popcorn cluster before the chocolate sets. This creates the webbing effect between fingers. Also, vary the length of the fingers—make the middle finger slightly longer than the others. It sounds silly, but it really does make them look more hand-like.
My kids have nut allergies—are these safe?
This recipe as written is nut-free if you use nut-free white chocolate and plain popcorn. However, always check the labels on your white chocolate chips and candy decorations—some brands process nuts in the same facility. For absolute safety, use certified nut-free brands. The pretzel sticks are optional and can be omitted without affecting the recipe.
Pin This Recipe!
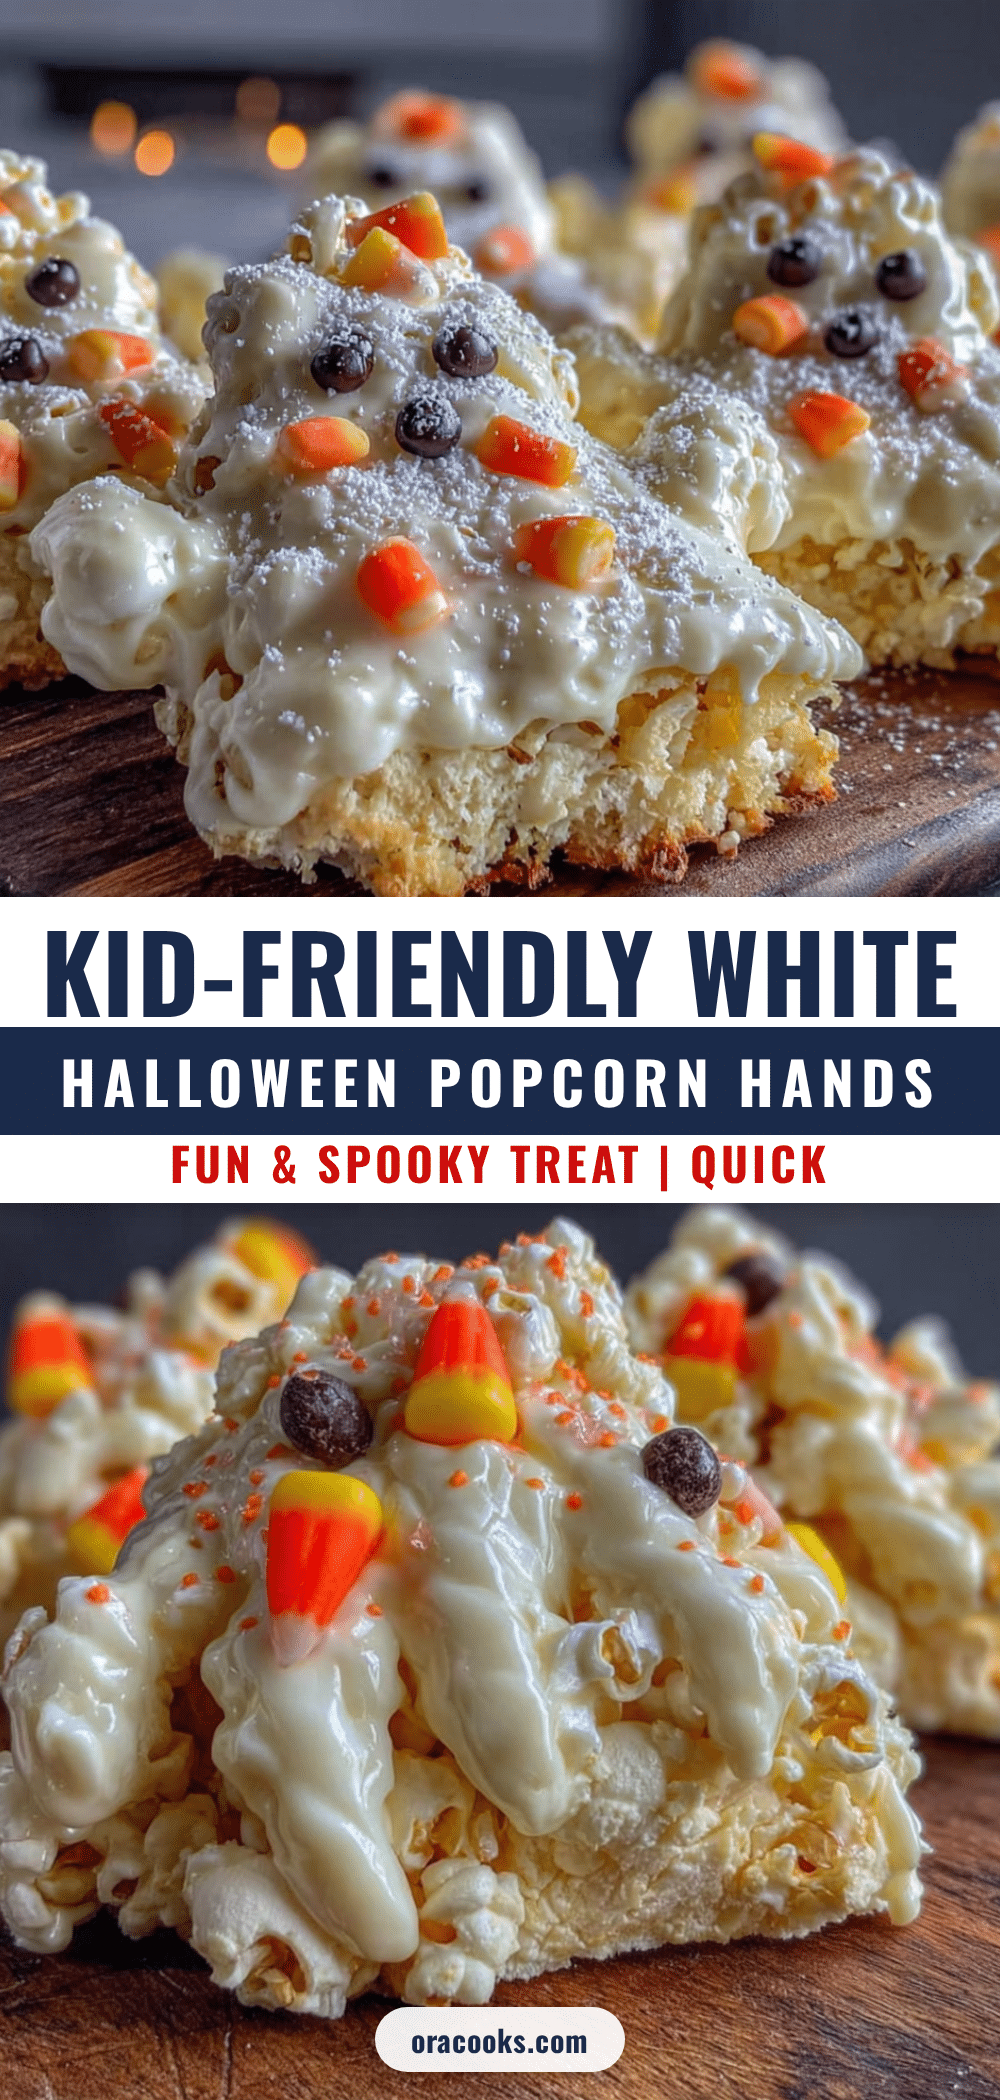
Kid-Friendly White Chocolate Halloween Popcorn Hands – Easy & Fun

Buttery, salty-sweet popcorn clusters shaped like creepy little hands, coated in creamy white chocolate and decorated with candy eyeballs and fingernails. An easy, no-bake Halloween treat that kids and adults alike will devour.
- Prep Time: 20 minutes
- Cook Time: 5 minutes
- Total Time: 25 minutes (plus setting time)
- Yield: 8-10 hands 1x
- Category: Dessert
- Cuisine: American
Ingredients
- ½ cup (100g) popcorn kernels
- 2 tablespoons (30ml) vegetable oil
- 3 tablespoons (42g) unsalted butter, melted
- ½ teaspoon (3g) fine sea salt
- 12 ounces (340g) white chocolate chips or melting wafers
- 1 teaspoon (5ml) coconut oil or shortening
- About 30 candy eyeballs
- ¼ cup (45g) orange and black candy-coated chocolates (e.g., M&M’s)
- About 30 pretzel sticks (optional)
Instructions
- Pop the popcorn: Heat vegetable oil in a large pot over medium-high heat with 3 kernels inside. When those pop, add remaining kernels, cover, and shake gently every 10 seconds. Once popping slows to about 2 seconds between pops, remove from heat (about 3-4 minutes). You should have about 8 cups of popped popcorn.
- Pick out unpopped kernels: Spread popcorn on a baking sheet and remove any unpopped kernels.
- Season the popcorn: Drizzle melted butter over warm popcorn and sprinkle with salt. Toss gently with clean hands to distribute evenly. Let cool for about 5 minutes until warm but not hot.
- Melt the white chocolate: Place white chocolate chips and coconut oil in a microwave-safe bowl. Microwave in 30-second intervals at 50% power, stirring thoroughly after each interval, until smooth and glossy (about 2-3 intervals).
- Combine popcorn and chocolate: Pour melted white chocolate over seasoned popcorn. Fold gently with a spatula, lifting from the bottom and turning over, until every kernel is coated. Some clusters will form naturally.
- Shape the hands: Working quickly, scoop a generous spoonful of coated popcorn mixture onto a parchment-lined baking sheet. Gently press into a rough hand shape—a round palm with five finger-like extensions. Repeat to make 8-10 hands.
- Add decorations: While chocolate is still wet, press two candy eyeballs into the ‘palm’ area. Place one orange or black candy at the tip of each ‘finger’ for fingernails. If using pretzel sticks, tuck one into each finger before adding the candy nail.
- Drizzle with extra chocolate (optional): Transfer remaining melted white chocolate to a piping bag or zip-top bag. Snip a tiny corner off and drizzle zigzag patterns over the hands.
- Let them set: Place baking sheet in the refrigerator for 15-20 minutes, or leave at room temperature for about 45 minutes, until white chocolate is firm.
- Serve or store: Gently peel parchment away from each popcorn hand. Serve immediately or store for later.
Notes
White chocolate is sensitive to heat; melt at 50% power in short bursts to avoid seizing. Adding coconut oil helps stabilize the chocolate. Work in batches when shaping hands to prevent chocolate from setting too quickly. Lightly grease hands with coconut oil to prevent sticking. For best texture, serve within a few hours of making. Store in an airtight container at room temperature for up to 5 days; freeze for up to 2 months.
Nutrition
- Serving Size: 1 hand
- Calories: 210
- Sugar: 18
- Sodium: 180
- Fat: 12
- Saturated Fat: 7
- Carbohydrates: 24
- Fiber: 1
- Protein: 3
Keywords: Halloween popcorn, white chocolate popcorn, popcorn hands, Halloween treat, kid-friendly Halloween, no-bake dessert, spooky snack


