Love this? Save it for later!
Share the inspiration with your friends
I was at the hardware store, of all places, buying a new showerhead. The guy behind the counter, name tag said “Mort,” was probably seventy-five if he was a day, and he had flour dust on his flannel shirt. While he rang me up, he just started talking. Not about pipe threads or water pressure, but about pie. Specifically, about the pumpkin pie his wife, Gert, had been making since 1962. I didn’t ask. He just volunteered it, like he was passing along a secret handshake. “She uses a pinch of black pepper,” he said, squinting at me. “And she won’t let anyone near the oven when it’s in there.” I stood there, holding my receipt, and he’d already moved on to explaining the crust. I wasn’t expecting cooking advice from a man named Mort at Ace Hardware, but there I was, listening to him describe exactly how to make the best pumpkin pie I’d ever tasted. Honestly, I almost forgot to buy the showerhead.
That conversation stuck with me. I went home, jotted down what I remembered—which wasn’t much, honestly. “Black pepper” and “don’t peek in the oven” were the main takeaways. So I did what any reasonable person would do: I spent the next three Thanksgivings trying to reverse-engineer Gert’s pie. I made dry crusts, soggy bottoms, fillings that tasted more like pumpkin soup than pie. There was one year where I forgot the sugar entirely—let me tell you, that was a memorable dessert. Nobody said a word, but the silence was deafening. But slowly, pie by pie, I figured it out. That pinch of black pepper? It doesn’t make it spicy. It just makes the pumpkin taste more like… pumpkin. It rounds out the sweetness in a way you can’t quite name.
This recipe is the result of those messy, flour-covered years. It’s the pie I bring to every gathering now, the one people hover around before dinner is even served. It’s not complicated, but it is particular. You have to trust the process, especially when it comes to that filling. Maybe you’ve been there—standing over a pie, wondering if it’s set, second-guessing every step. I get it. But this one works. It’s the kind of recipe that turns a good dinner party into a great one, the kind your friends will text you about the next day asking for the details. It’s the pie that made Mort proud, and I never even got to tell him that.
Why You’ll Love This Recipe
Let’s be honest—there are a million pumpkin pie recipes out there. But this one? It’s the one you’ll come back to year after year. It’s not just another version; it’s the version. Here’s why this pie stands out from the crowd, especially when you’re cooking to impress.
- Show-Stopping Flavor: The secret blend of warm spices—including that pinch of black pepper—creates a depth of flavor that’s miles ahead of the canned stuff. It’s the kind of pie that makes people close their eyes after the first bite.
- Perfectly Creamy Texture: No more cracks, no more weeping. This filling sets up silky smooth every single time, thanks to a gentle baking method and a few key tricks I learned the hard way.
- Simple, Real Ingredients: You don’t need a specialty grocery store for this one. Butter, eggs, cream, sugar, and a pumpkin. That’s it. Your pantry is ready for this.
- Impressive Without the Stress: This pie looks like a million bucks on the dessert table, but it’s surprisingly forgiving. It’s perfect for when you’re juggling a turkey, sides, and a house full of guests.
- Make-Ahead Magic: This pie actually tastes better the next day. Bake it a day before your gathering, and you’ll free up oven space and your sanity on the big day.
- Crowd-Pleaser Guaranteed: Kids love it, adults rave about it, and even the picky eaters go back for seconds. It’s the safest bet on any Thanksgiving or holiday table.
This isn’t just a recipe; it’s a system. It’s designed to work for the home cook who wants to serve something memorable without spending all day in the kitchen. The technique of pre-cooking the filling on the stovetop before baking is my little secret—it concentrates the flavor and guarantees a custard that’s luscious, not rubbery. It’s comfort food at its finest, the kind that makes a busy holiday feel a little more like home.
What Ingredients You Will Need
This recipe uses simple, honest ingredients to create something truly special. Most of these are pantry staples, but a few key choices will make all the difference. Let’s break down what you need and why each ingredient matters.
For the All-Butter Pie Crust:
- 1 ¼ cups (160g) all-purpose flour – I prefer King Arthur Flour for its consistent protein content. Don’t use self-rising flour here; it will throw off the texture.
- ½ teaspoon salt – Fine sea salt works best. It dissolves evenly and doesn’t leave crunchy bits in your crust.
- 1 teaspoon granulated sugar – Just a touch to help with browning and balance the savory notes.
- ½ cup (113g) unsalted butter, very cold and cubed – This is non-negotiable. The butter must be ice-cold. I pop my cubed butter in the freezer for 15 minutes before I start. European-style butter (like Plugrà) has a higher fat content, which makes for an even flakier crust.
- 3-4 tablespoons ice water – You’ll need just enough to bring the dough together. The water should be so cold it hurts your fingers.
For the Homemade Pumpkin Purée:
- 1 medium sugar pumpkin (about 3-4 lbs) – Do not use a carving pumpkin! They’re watery and stringy. Look for “pie pumpkins” or “sugar pumpkins” at the market. They’re smaller, denser, and much sweeter.
- 1 tablespoon olive oil – For roasting the pumpkin. It helps caramelize the natural sugars.
For the Luscious Pumpkin Filling:
- 2 cups (460g) homemade pumpkin purée (or one 15-oz can) – Homemade is incredible, but good-quality canned pumpkin (like Libby’s) works beautifully too. Never buy “pumpkin pie filling”—that’s pre-sweetened and spiced.
- 1 ¼ cups (300ml) heavy cream – Full-fat is essential for that velvety texture. You can substitute half-and-half in a pinch, but the pie won’t be as rich.
- ¾ cup (150g) packed light brown sugar – Brown sugar adds moisture and a subtle molasses flavor that pairs perfectly with pumpkin. Dark brown sugar will work, but it will have a more intense flavor.
- 2 large eggs, plus 1 large egg yolk – The extra yolk adds richness and helps the custard set without becoming rubbery. Bring them to room temperature before using.
- 2 teaspoons vanilla extract – Use pure vanilla extract, not imitation. It makes a noticeable difference in the final flavor.
- 1 ½ teaspoons ground cinnamon – The backbone of the spice blend. I use Ceylon cinnamon for a milder, more complex flavor.
- 1 teaspoon ground ginger – Adds a warm, slightly peppery kick.
- ½ teaspoon ground nutmeg – Freshly grated is a game-changer. A whole nutmeg will last forever, and the flavor is incomparable.
- ¼ teaspoon ground cloves – A little goes a long way. It adds that classic “pumpkin pie” aroma.
- ¼ teaspoon freshly ground black pepper – This is the Mort secret! It doesn’t make the pie spicy; it just makes all the other flavors pop. Trust me on this one.
- ½ teaspoon salt – To balance the sweetness and enhance the spices.
Equipment Needed
You don’t need a professional pastry kitchen to make this pie, but having the right tools makes the job a whole lot easier. Here’s what you’ll need:
- 9-inch pie dish: A standard glass or ceramic pie dish works perfectly. I prefer a deep-dish pan for this recipe because the filling is generous. A metal pie pan will work, but it conducts heat faster, so keep an eye on the crust.
- Rolling pin: A French-style tapered pin gives you more control, but any rolling pin will do. If you don’t have one, a clean wine bottle works in a pinch!
- Parchment paper: Essential for blind baking the crust. It prevents the crust from puffing up and sticking to your pie weights.
- Pie weights or dried beans: You need something heavy to hold the crust down while it bakes. I keep a bag of dried black beans just for this purpose. They’re reusable for years.
- Large mixing bowls: One for the crust and one for the filling.
- Whisk: For smoothing out the filling. A balloon whisk is best for incorporating air without overmixing.
- Pastry cutter or two forks: For cutting the butter into the flour for the crust. A food processor works too, but be careful not to over-process.
- Sharp knife or kitchen shears: For trimming the excess dough from the pie dish.
- Baking sheet: Place the pie dish on a baking sheet before baking. It catches any drips and helps the bottom crust cook more evenly.
If you’re making the pumpkin purée from scratch, you’ll also need a baking sheet for roasting the pumpkin and a food processor or blender to purée it. I’ve been using my old Cuisinart for years, and it handles the job beautifully without breaking the bank.
Preparation Method
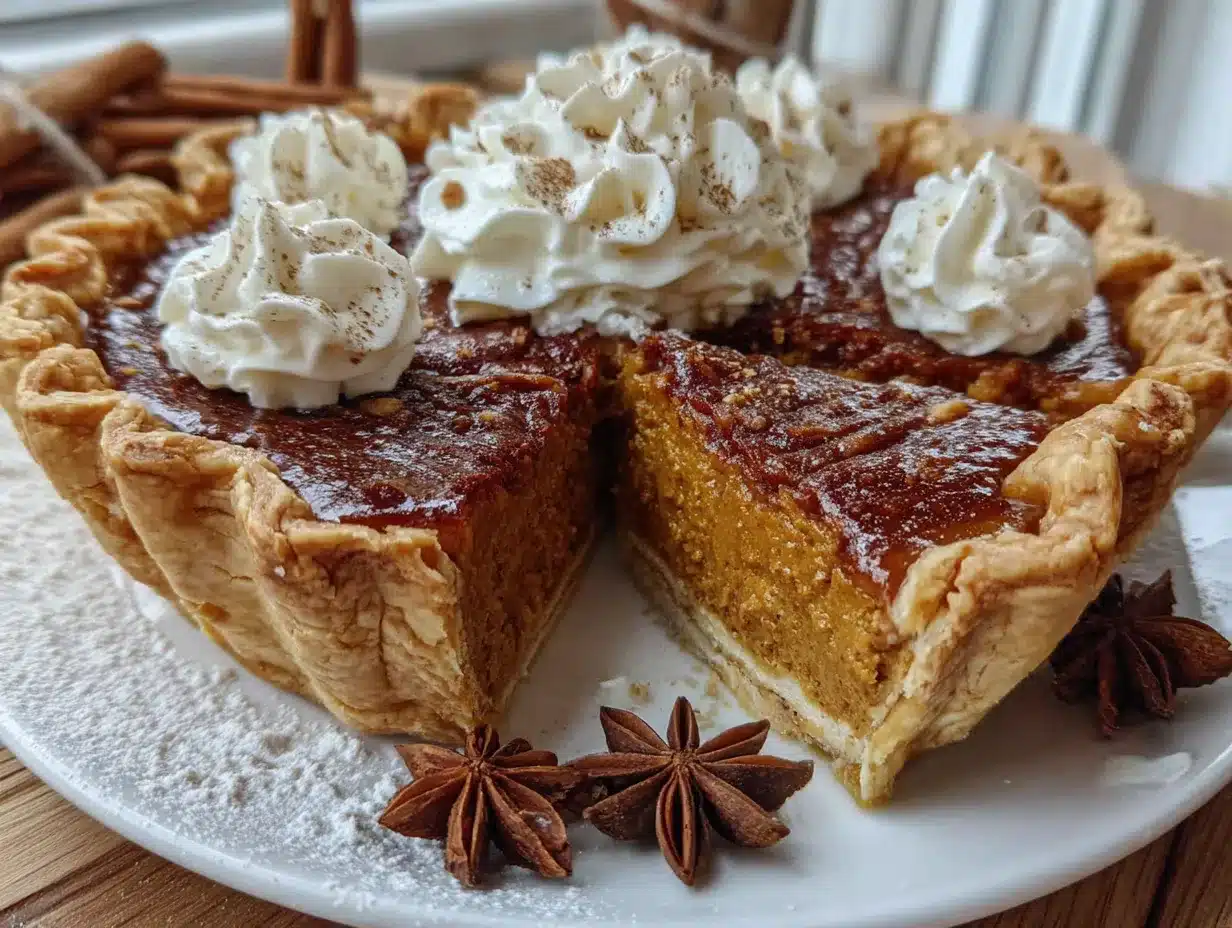
Let’s get down to business. This recipe is broken into two main parts: the crust and the filling. Take your time, and don’t rush. Good pie is patient.
Part 1: The All-Butter Crust
- Mix the dry ingredients: In a large bowl, whisk together the flour, salt, and sugar. Make sure there are no lumps.
- Cut in the butter: Add the cold, cubed butter to the flour mixture. Using a pastry cutter or two forks, cut the butter into the flour until the mixture looks like coarse meal with some pea-sized butter pieces remaining. It’s okay if some bits are a little bigger—those are what create flaky layers.
- Add the ice water: Drizzle 3 tablespoons of ice water over the mixture. Toss it gently with a fork until the dough starts to come together. Squeeze a small piece—if it holds together without crumbling, it’s ready. If it’s too dry, add the remaining tablespoon of water, one teaspoon at a time.
- Form the disc: Turn the dough out onto a lightly floured surface. Gently bring it together into a ball, then flatten it into a 1-inch thick disc. Wrap it tightly in plastic wrap and refrigerate for at least 1 hour (or up to 3 days). This rest is crucial—it relaxes the gluten and keeps the crust tender.
- Roll it out: On a floured surface, roll the dough from the center outward, rotating it a quarter turn after each roll. Aim for a 12-inch circle, about ⅛-inch thick. Don’t worry if the edges crack—just patch them with a little water and extra dough. I’ve patched many a crust, and nobody has ever noticed.
- Fit the pan: Carefully transfer the dough to your pie dish by rolling it around your rolling pin. Gently press it into the bottom and up the sides. Trim the overhang to about ½ inch, then fold it under and crimp the edges with your fingers or a fork. Pop it back in the fridge for 30 minutes while you preheat the oven to 375°F (190°C).
- Blind bake: Line the chilled crust with parchment paper, making sure it goes all the way to the edges. Fill it with pie weights or dried beans. Bake for 15 minutes, then carefully remove the parchment and weights. Bake for another 8-10 minutes, until the bottom looks dry and lightly golden. Set aside to cool slightly.
Part 2: The Filling and Baking
- Make the pumpkin purée (if using fresh): Preheat your oven to 400°F (200°C). Cut the sugar pumpkin in half, scoop out the seeds and stringy bits, and rub the cut sides with olive oil. Place them cut-side down on a baking sheet. Roast for 45-50 minutes, until the flesh is tender when pierced with a fork. Let it cool, then scoop the flesh into a food processor and blend until completely smooth. You should have about 2 cups.
- Bloom the spices: In a small saucepan over medium heat, combine the brown sugar, cinnamon, ginger, nutmeg, cloves, black pepper, and salt. Stir for about 1 minute until the mixture is fragrant and the sugar starts to look sandy. This step wakes up the spices and deepens their flavor.
- Build the custard base: In a large bowl, whisk together the pumpkin purée, heavy cream, eggs, egg yolk, and vanilla extract until smooth. Pour in the spiced sugar mixture and whisk until everything is fully combined. The filling should be a beautiful, deep orange color.
- Pre-cook the filling (my secret step!): Pour the filling into the same saucepan you used for the spices. Cook over medium-low heat, stirring constantly with a wooden spoon or silicone spatula, for about 5-7 minutes. You’re not scrambling the eggs—you’re just gently heating the mixture until it thickens slightly and coats the back of the spoon. This step concentrates the flavor and ensures a silky, crack-free top. Don’t rush it, and don’t let it boil.
- Fill the crust: Place your blind-baked crust on a baking sheet. Give the filling one last whisk, then carefully pour it into the warm crust. The crust should still be warm—this helps prevent a soggy bottom.
- Bake low and slow: Carefully transfer the baking sheet to the oven and bake at 375°F (190°C) for 15 minutes. Then, without opening the oven, reduce the temperature to 325°F (165°C) and bake for another 35-45 minutes. The pie is done when the edges are set but the center still jiggles slightly—like firm Jell-O, not liquid. A knife inserted 1 inch from the edge should come out clean.
- Cool completely: Turn off the oven and crack the door open. Let the pie sit in the cooling oven for 1 hour. This gentle cooling prevents cracking. Then, transfer it to a wire rack to cool completely, at least 2 hours. For best results, refrigerate overnight. The flavors meld and the texture becomes perfect.
Cooking Tips & Techniques
I’ve made every mistake in the book with this pie, so you don’t have to. Here are the lessons I learned the hard way.
- Don’t skip the blind bake. A soggy bottom is the number one complaint with pumpkin pie. Blind baking the crust gives it a head start, creating a barrier that keeps the filling from turning the crust into mush. Trust me, I learned this after a particularly sad Thanksgiving where the crust was basically paste.
- Keep everything cold for the crust. Warm butter is the enemy of flaky pastry. If your kitchen is warm, chill your bowl and flour for 10 minutes before you start. If at any point the dough feels greasy or sticky, pop it back in the fridge for 15 minutes.
- Don’t overmix the filling. Once you add the eggs, whisk just until combined. Overmixing incorporates too much air, which can cause the filling to puff up and then collapse, leading to cracks.
- Use a baking sheet. Always place your pie on a baking sheet before putting it in the oven. It catches any spills (which happen more often than you’d think) and helps the bottom crust cook more evenly by distributing the heat.
- The jiggle test is your friend. Don’t rely solely on a timer. Every oven is different. Gently shake the pie—the center should wobble like a gelatin dessert, not slosh like a liquid. It will continue to set as it cools.
- Patience with cooling. I know it’s hard, but let the pie cool completely. Cutting into a warm pumpkin pie is a guaranteed way to get a runny mess. The custard needs time to fully set. Overnight in the fridge is the gold standard.
Variations & Adaptations
This classic recipe is a fantastic base, but don’t be afraid to make it your own. Here are some variations I’ve tried and loved.
- Gluten-Free Crust: Swap the all-purpose flour with a 1:1 gluten-free baking flour blend (like Bob’s Red Mill). Add ¼ teaspoon of xanthan gum if your blend doesn’t already include it. The rest of the recipe remains the same.
- Dairy-Free Version: Use a high-quality vegan butter (like Miyoko’s) for the crust and full-fat canned coconut milk for the heavy cream. The coconut flavor is subtle and actually complements the pumpkin beautifully.
- Spice It Up: Add a pinch of cayenne pepper or chipotle powder along with the black pepper for a smoky, spicy kick. It’s unexpected and absolutely delicious, especially if you’re serving it with a bourbon whipped cream.
- Bourbon Maple Twist: Replace ¼ cup of the heavy cream with 2 tablespoons of bourbon and 2 tablespoons of pure maple syrup. Reduce the brown sugar by 2 tablespoons. The bourbon adds warmth, and the maple deepens the sweetness.
- Ginger Snap Crust: For a quick and crunchy alternative, skip the pastry crust and make a crust with 2 cups of crushed ginger snaps mixed with 6 tablespoons of melted butter. Press it into the pie dish and bake at 350°F for 10 minutes before filling. It’s a crowd-pleaser.
I once made a version with a pecan praline topping for a Friendsgiving, and it was gone in ten minutes. Just sprinkle ½ cup of chopped pecans and 2 tablespoons of brown sugar over the top of the pie during the last 10 minutes of baking.
Serving & Storage Suggestions
This pie is a star on its own, but a few thoughtful touches can make it truly unforgettable.
Serving: Serve the pie at room temperature or slightly chilled. Cold pie slices more cleanly, but room temperature allows the flavors to shine. Top each slice with a generous dollop of lightly sweetened whipped cream (I add a splash of vanilla and a pinch of cinnamon to mine). For a truly decadent presentation, drizzle with warm caramel sauce and a sprinkle of flaky sea salt.
What to Serve Alongside: This pie is the perfect ending to a hearty meal. It pairs beautifully with a cup of strong black coffee or a glass of bourbon. If you’re hosting a gathering, it’s wonderful alongside a classic apple crisp for a dessert spread that offers variety. For a lighter option, serve with a scoop of vanilla bean ice cream.
Storage: Once the pie has cooled completely, cover it loosely with plastic wrap or aluminum foil and store it in the refrigerator. It will keep well for up to 4 days. In fact, the flavor improves after a day or two as the spices meld.
Freezing: You can freeze the fully baked and cooled pie for up to 3 months. Wrap it tightly in a layer of plastic wrap, then a layer of aluminum foil. Thaw it overnight in the refrigerator before serving. I don’t recommend freezing the unbaked pie, as the texture of the custard can become grainy.
Reheating: If you prefer your pie warm, place individual slices on a baking sheet and warm them in a 300°F (150°C) oven for 10-15 minutes. Avoid the microwave—it will make the crust soggy and the filling rubbery.
Nutritional Information & Benefits
Let’s be real: this is a dessert, and it’s meant to be enjoyed. But there are some surprising benefits hidden in that slice.
| Nutrient | Amount Per Serving (1/8 of pie) |
|---|---|
| Calories | ~380 |
| Fat | 24g |
| Carbohydrates | 38g |
| Protein | 6g |
| Fiber | 3g |
| Vitamin A | 170% DV |
Pumpkin is packed with Vitamin A, which is fantastic for your eyesight and immune system. It’s also a good source of fiber and potassium. The eggs provide high-quality protein, and the spices like ginger and cinnamon have anti-inflammatory properties. Of course, this is still a treat, but it’s one that offers a little more nutritional value than your average slice of cake. I believe in balance—enjoy a generous slice, savor every bite, and don’t feel an ounce of guilt.
Conclusion
This Classic Homemade Pumpkin Pie is more than just a recipe—it’s a piece of Thanksgiving tradition, a conversation starter, and a way to bring people together. It’s the pie that makes people pause, close their eyes, and say, “Wow.” And it all started with a chat at a hardware store with a man named Mort.
I hope you give this recipe a try. Don’t be afraid to make it your own—add a little extra cinnamon, swap in a different crust, or top it with that pecan praline. The best recipes are the ones that evolve with the cook. And please, when you make it, drop a comment below and let me know how it turned out. Did your family love it? Did you try the black pepper? I’d love to hear your stories.
So go ahead, preheat that oven, and get ready to make the pie that will steal the show at your next gathering. Happy baking, friends!
Frequently Asked Questions
Can I use canned pumpkin instead of making my own purée?
Absolutely! A 15-ounce can of 100% pure pumpkin purée (not pumpkin pie filling) works perfectly. Libby’s is my go-to brand. The flavor will be slightly different—homemade is a bit more vibrant—but the texture will be just as silky.
Why did my pie crust shrink during blind baking?
This usually happens when the dough isn’t chilled enough before baking, or if it was overworked. Make sure you refrigerate the shaped crust for at least 30 minutes before blind baking. Also, be gentle when rolling and fitting the dough—overworking develops gluten, which causes shrinkage.
How do I prevent cracks in my pumpkin pie?
Two things: don’t overbake, and cool it slowly. The pie is done when the center still jiggles slightly. Then, let it cool in the turned-off oven with the door cracked for an hour. This gradual temperature change prevents the custard from cracking as it contracts.
Can I make this pie ahead of time?
Yes, and I actually recommend it! The pie tastes better the next day. Bake it up to 2 days in advance, let it cool completely, and store it covered in the refrigerator. Just add the whipped cream right before serving.
My filling turned out watery. What went wrong?
This is usually caused by underbaking or using a pumpkin that’s too watery. If using fresh pumpkin, make sure to roast it long enough to evaporate excess moisture. You can also strain the purée through a cheesecloth-lined sieve for 30 minutes before using. And always blind bake the crust to create a barrier against moisture.
Pin This Recipe!
Classic Homemade Pumpkin Pie: Easy Best Thanksgiving Recipe
This classic pumpkin pie features a silky, perfectly spiced filling with a secret pinch of black pepper, all nestled in a flaky all-butter crust. It’s the result of years of trial and error, and it’s guaranteed to be the star of your Thanksgiving table.
- Prep Time: 30 minutes
- Cook Time: 1 hour 30 minutes
- Total Time: 2 hours (plus chilling and cooling time)
- Yield: 8 servings 1x
- Category: Dessert
- Cuisine: American
Ingredients
- 1 ¼ cups (160g) all-purpose flour
- ½ teaspoon fine sea salt
- 1 teaspoon granulated sugar
- ½ cup (113g) unsalted butter, very cold and cubed
- 3–4 tablespoons ice water
- 1 medium sugar pumpkin (about 3–4 lbs)
- 1 tablespoon olive oil
- 2 cups (460g) homemade pumpkin purée (or one 15-oz can)
- 1 ¼ cups (300ml) heavy cream
- ¾ cup (150g) packed light brown sugar
- 2 large eggs, plus 1 large egg yolk, room temperature
- 2 teaspoons pure vanilla extract
- 1 ½ teaspoons ground cinnamon
- 1 teaspoon ground ginger
- ½ teaspoon ground nutmeg
- ¼ teaspoon ground cloves
- ¼ teaspoon freshly ground black pepper
- ½ teaspoon salt
Instructions
- Mix the dry ingredients: In a large bowl, whisk together the flour, salt, and sugar.
- Cut in the butter: Add the cold, cubed butter to the flour mixture. Using a pastry cutter or two forks, cut the butter into the flour until the mixture looks like coarse meal with some pea-sized butter pieces remaining.
- Add the ice water: Drizzle 3 tablespoons of ice water over the mixture. Toss gently with a fork until the dough starts to come together. Squeeze a small piece—if it holds together without crumbling, it’s ready. If too dry, add the remaining tablespoon of water, one teaspoon at a time.
- Form the disc: Turn the dough out onto a lightly floured surface. Gently bring it together into a ball, then flatten into a 1-inch thick disc. Wrap tightly in plastic wrap and refrigerate for at least 1 hour (or up to 3 days).
- Roll it out: On a floured surface, roll the dough from the center outward, rotating it a quarter turn after each roll. Aim for a 12-inch circle, about ⅛-inch thick.
- Fit the pan: Carefully transfer the dough to a 9-inch pie dish. Gently press into the bottom and up the sides. Trim the overhang to about ½ inch, then fold under and crimp the edges. Refrigerate for 30 minutes while preheating the oven to 375°F (190°C).
- Blind bake: Line the chilled crust with parchment paper and fill with pie weights or dried beans. Bake for 15 minutes, then remove parchment and weights. Bake for another 8-10 minutes until the bottom looks dry and lightly golden. Set aside to cool slightly.
- Make the pumpkin purée (if using fresh): Preheat oven to 400°F (200°C). Cut the sugar pumpkin in half, scoop out seeds and stringy bits, rub cut sides with olive oil. Place cut-side down on a baking sheet. Roast for 45-50 minutes until tender. Cool, then scoop flesh into a food processor and blend until smooth. You should have about 2 cups.
- Bloom the spices: In a small saucepan over medium heat, combine the brown sugar, cinnamon, ginger, nutmeg, cloves, black pepper, and salt. Stir for about 1 minute until fragrant and the sugar looks sandy.
- Build the custard base: In a large bowl, whisk together the pumpkin purée, heavy cream, eggs, egg yolk, and vanilla extract until smooth. Pour in the spiced sugar mixture and whisk until fully combined.
- Pre-cook the filling: Pour the filling into the same saucepan. Cook over medium-low heat, stirring constantly, for about 5-7 minutes until it thickens slightly and coats the back of a spoon. Do not let it boil.
- Fill the crust: Place the blind-baked crust on a baking sheet. Give the filling one last whisk, then carefully pour it into the warm crust.
- Bake low and slow: Bake at 375°F (190°C) for 15 minutes. Then, without opening the oven, reduce the temperature to 325°F (165°C) and bake for another 35-45 minutes. The pie is done when the edges are set but the center still jiggles slightly.
- Cool completely: Turn off the oven and crack the door open. Let the pie sit in the cooling oven for 1 hour. Then transfer to a wire rack to cool completely, at least 2 hours. For best results, refrigerate overnight.
Notes
Don’t skip the blind bake to avoid a soggy bottom. Keep everything cold for the crust. Don’t overmix the filling. Use a baking sheet. The jiggle test is your friend. Patience with cooling is key. The pie tastes better the next day.
Nutrition
- Serving Size: 1 slice (1/8 of pie)
- Calories: 380
- Sugar: 22
- Sodium: 320
- Fat: 24
- Saturated Fat: 14
- Carbohydrates: 38
- Fiber: 3
- Protein: 6
Keywords: pumpkin pie, Thanksgiving, classic, homemade, easy, best, holiday dessert, pumpkin, pie, from scratch