Love this? Save it for later!
Share the inspiration with your friends
It was 11:47 PM on a drizzly Thursday in early October, and I had a very specific, almost ridiculous craving. I wanted mac and cheese—the good, baked, bubbly kind—but I also wanted it to feel like fall was happening inside my mouth. The problem? I had no cheddar. None. I had a block of sharp white cheddar with exactly two bites left in it, and a sad, single slice of provolone. But I did have a butternut squash sitting on my counter that I’d bought with grand plans for soup that never materialized. And that’s when the idea hit me—what if I just… roasted the squash, blended it into a sauce, and pretended it was cheese? Honestly, I was too tired to overthink it. I mean, what was the worst that could happen? A weird, orange, slightly sweet mess?
I grabbed the squash, hacked it in half with a knife that was definitely not sharp enough, and scooped out the seeds like I was performing emergency surgery. I drizzled it with olive oil, sprinkled on some salt, and threw it in the oven while I boiled pasta in my pajamas. The whole thing felt a little unhinged, but also kind of genius. By the time the squash was soft and caramelized, I had a plan. I blended it with milk, a handful of the sad leftover cheddar, some garlic powder, and a pinch of nutmeg—because when in doubt, nutmeg makes everything taste intentional. The sauce turned this gorgeous, velvety orange-gold. I poured it over the pasta, topped it with breadcrumbs I found in the back of the freezer, and baked it until it was bubbling and brown on top. Maybe you’ve been there—when a late-night experiment turns into something you can’t stop thinking about.
That first bite was a surprise. It wasn’t just “good for a healthy mac and cheese.” It was genuinely, deeply satisfying. The squash didn’t disappear into the background—it added this subtle, earthy sweetness that made the whole thing feel cozy and special. The cheese was just enough to give it that savory, salty punch. I ate it straight from the dish, standing at the counter, at midnight, and I knew I’d stumbled onto something. This recipe stayed with me because it wasn’t just comfort food; it was comfort food with a story. A story about a rainy night, a lonely squash, and a cook who decided to break the rules.
Why You’ll Love This Recipe
Let me tell you why this butternut squash mac and cheese is about to become your new fall favorite. I’ve made this recipe at least a dozen times since that first late-night experiment, tweaking the ratios and testing it on skeptical friends. Trust me when I say—this is the version that works.
- Quick & Easy : From start to finish, this comes together in about 45 minutes. Most of that is hands-off oven time while the squash roasts. Perfect for a busy weeknight when you need something warm and comforting fast.
- Simple Ingredients : You don’t need a specialty grocery run. A butternut squash, some pasta, milk, a little cheese, and pantry staples. No weird ingredients you’ll use once and forget about.
- Perfect for Fall Evenings : This is the dish you want when the temperature drops, the leaves are changing, and you just want to curl up on the couch. It’s like a hug in a baking dish.
- Crowd-Pleaser : I’ve served this to kids, picky eaters, and even a friend who swore she hated squash. Every single person went back for seconds. The squash is sneaky—it adds creaminess without screaming “vegetable.”
- Unbelievably Delicious : The texture is what gets me. The sauce is velvety smooth, the pasta is tender, and the breadcrumb topping adds that perfect crunch. It’s comfort food that feels a little fancy but is actually dead simple.
What makes this recipe different from the rest? It’s the balance. Most squash mac and cheese recipes are either too healthy-tasting (you know, that faint “this is good for me” vibe) or they bury the squash under so much cheese you wonder why you bothered. This one hits the sweet spot. The roasted squash provides a natural creaminess that lets you use less cheese without sacrificing richness. And the nutmeg? That’s my secret weapon. It pulls everything together and makes the whole dish taste like autumn in a bowl. This isn’t just another version—it’s the version I keep coming back to, and I think you will too.
What Ingredients You Will Need
This recipe uses simple, wholesome ingredients to deliver bold flavor and satisfying texture without the fuss. Most of these are pantry staples or easy to find at any grocery store. Here’s what you’ll need:
For the Roasted Butternut Squash
- 1 medium butternut squash (about 2-2.5 pounds) — peeled, seeded, and cubed into 1-inch pieces. Look for one that feels heavy for its size. I prefer organic when I can find it, but conventional works just fine.
- 2 tablespoons olive oil — for roasting. A good quality extra virgin adds flavor, but regular is fine too.
- 1/2 teaspoon salt — I use fine sea salt for even distribution.
- 1/4 teaspoon black pepper — freshly ground is best.
For the Pasta
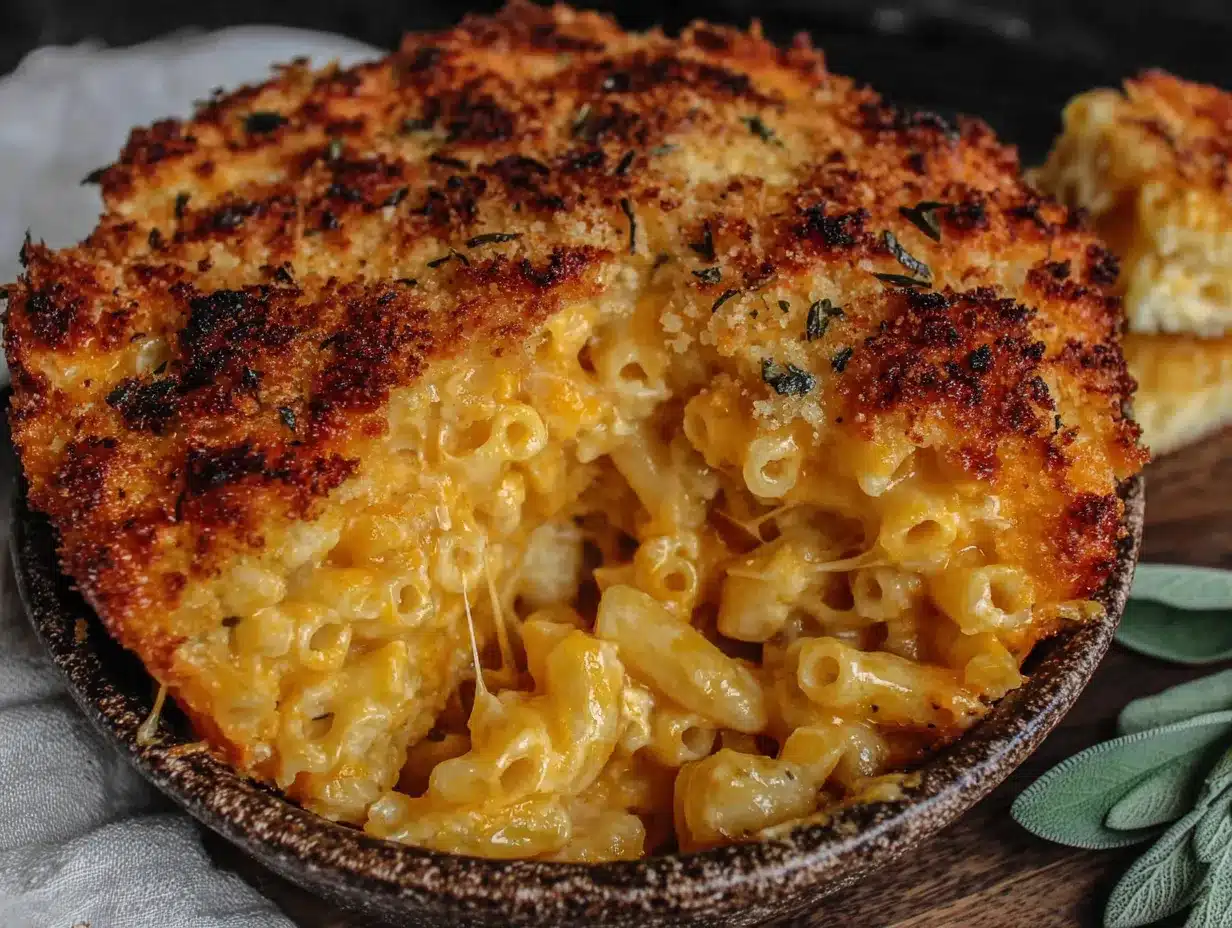
- 12 ounces (340g) elbow macaroni — or any short pasta you like. Cavatappi, shells, or rotini all work great. The ridges and curves help hold the sauce.
For the Creamy Squash Cheese Sauce
- 2 tablespoons unsalted butter — adds richness. You can use salted butter and just reduce the added salt slightly.
- 2 cloves garlic — minced. Fresh is non-negotiable here; it adds a warmth that powdered garlic just can’t match.
- 2 tablespoons all-purpose flour — to thicken the sauce. For a gluten-free version, use a 1:1 gluten-free flour blend.
- 1 1/2 cups (360ml) whole milk — whole milk gives the creamiest result, but 2% works too. For a dairy-free option, I’ve had good luck with unsweetened oat milk or full-fat canned coconut milk (though the coconut flavor is noticeable).
- 1 cup (240ml) low-sodium chicken or vegetable broth — adds savory depth. I recommend Better Than Bouillon for the best flavor.
- 1 1/2 cups (170g) sharp cheddar cheese — freshly shredded. Pre-shredded cheese has anti-caking agents that prevent smooth melting. Trust me on this—grate it yourself. It takes two minutes and makes a huge difference.
- 1/2 cup (55g) Parmesan cheese — finely grated. Adds a salty, nutty kick.
- 1/2 teaspoon ground nutmeg — this is the magic ingredient. Don’t skip it. Freshly grated is even better if you have it.
- 1/2 teaspoon smoked paprika — optional, but adds a lovely subtle smokiness.
- Salt and pepper to taste — I usually add about 1/2 teaspoon salt and 1/4 teaspoon pepper, but adjust based on your cheese and broth.
For the Topping
- 1/2 cup (50g) panko breadcrumbs — they get crunchier than regular breadcrumbs. Gluten-free panko works perfectly.
- 2 tablespoons melted butter — to toss with the breadcrumbs for that golden, crispy finish.
- 2 tablespoons fresh parsley — chopped, for garnish. Optional but pretty.
Equipment Needed
You don’t need a fancy kitchen to make this recipe. Here’s what you’ll need:
- Large baking sheet — for roasting the squash. A half-sheet pan (18×13 inches) is ideal. Line it with parchment paper for easy cleanup.
- Large pot — for boiling pasta. At least 4-quart capacity.
- Medium saucepan — for making the sauce. A heavy-bottomed one prevents scorching.
- Blender or immersion blender — to puree the roasted squash. An immersion blender is easier (you can blend right in the saucepan), but a regular blender works too. Just be careful with hot liquids—vent the lid.
- 9×13 inch baking dish — or a similar 3-quart casserole dish. Glass or ceramic works best.
- Cheese grater — because we’re grating our own cheese, remember?
- Wooden spoon or silicone spatula — for stirring the sauce.
- Mixing bowl — small one for the breadcrumb topping.
If you don’t have a blender, you can mash the roasted squash with a potato masher or fork. The texture won’t be as silky smooth, but it’ll still taste great. And if you don’t have a 9×13 dish, you can use two smaller dishes or even a cast-iron skillet. I’ve made this in a 10-inch cast iron before and it worked beautifully—just keep an eye on the baking time.
Preparation Method
Let’s get cooking! Here’s the step-by-step method for making the coziest butternut squash mac and cheese of your life.
Step 1: Roast the Squash
Preheat your oven to 400°F (200°C). While it’s heating up, peel your butternut squash. I know peeling squash can be a pain—the skin is tough and the shape is awkward. Here’s my trick: cut off the stem end and the bottom, then use a sharp vegetable peeler to strip off the skin in long strokes. Once peeled, cut the squash in half lengthwise, scoop out the seeds with a spoon, and cut the flesh into 1-inch cubes. Toss the cubes on your baking sheet with the olive oil, salt, and pepper. Spread them in a single layer—don’t crowd them, or they’ll steam instead of caramelizing. Roast for 25-30 minutes, flipping halfway through, until the squash is fork-tender and the edges are golden brown. The smell at this point is incredible—sweet and nutty.
Step 2: Cook the Pasta
While the squash roasts, bring a large pot of salted water to a boil. Cook the macaroni according to package directions until al dente—usually about 7-8 minutes. You want it slightly firm because it’ll continue cooking in the oven. Drain the pasta, but don’t rinse it. Rinsing removes the starch that helps the sauce cling to the noodles. Set the pasta aside.
Step 3: Make the Sauce Base
In a medium saucepan over medium heat, melt the 2 tablespoons of butter. Add the minced garlic and cook for about 30 seconds until fragrant—don’t let it brown or it’ll get bitter. Sprinkle in the flour and whisk constantly for 1-2 minutes. This is your roux, and it’s the foundation of a smooth sauce. It should look like a thick, golden paste. Slowly pour in the milk while whisking, then add the broth. Keep whisking until the mixture is smooth and starts to thicken, about 3-4 minutes. It should coat the back of a spoon.
Step 4: Blend the Squash
Once the squash is done roasting, let it cool for a couple of minutes. Transfer it to your blender or use an immersion blender right in the saucepan. Add about 1/2 cup of the milk mixture to the blender with the squash and blend until completely smooth. If you’re using a regular blender, work in batches and vent the lid to let steam escape. The puree should be thick and velvety, like pumpkin pie filling.
Step 5: Combine and Cheese It Up
Pour the squash puree back into the saucepan with the remaining milk mixture. Whisk until fully combined. Reduce the heat to low and add the shredded cheddar, Parmesan, nutmeg, and smoked paprika. Stir gently until all the cheese is melted and the sauce is smooth. Taste it—yes, right now. Add salt and pepper as needed. The sauce should be rich, creamy, and just slightly sweet from the squash. If it seems too thick, add a splash more milk. Too thin? Let it simmer for another minute or two.
Step 6: Assemble the Bake
Preheat your oven to 375°F (190°C). In a large bowl, combine the cooked pasta and the cheese sauce. Stir until every noodle is coated. Pour the mixture into your greased 9×13 baking dish and spread it evenly. In a small bowl, mix the panko breadcrumbs with the melted butter until the crumbs are evenly moistened. Sprinkle this over the top of the mac and cheese. Don’t press it down—you want a loose, crunchy layer.
Step 7: Bake and Finish
Bake for 20-25 minutes, until the edges are bubbly and the top is golden brown. If you want an extra-crispy topping, switch the oven to broil for the last 2 minutes—but watch it closely, because breadcrumbs can burn fast. Let the dish rest for 5 minutes before serving. This is important—it lets the sauce set up so you get clean, beautiful servings instead of a soupy mess. Garnish with fresh parsley if you’re feeling fancy, and dig in.
Cooking Tips & Techniques
I’ve made this recipe enough times to know where things can go sideways. Here are my hard-earned tips to make sure yours turns out perfect.
Don’t skip roasting the squash. I know it’s tempting to just boil or microwave it to save time, but roasting concentrates the natural sugars and adds a depth of flavor you just can’t get any other way. The caramelized edges are where the magic happens. Trust the process.
Grate your own cheese. I cannot stress this enough. Pre-shredded cheese is coated with cellulose and starches to prevent clumping, which also prevents it from melting smoothly. Your sauce will be grainy instead of silky. Spend the two minutes grating a block of cheddar—your taste buds will thank you.
Season in layers. Add salt at every stage—to the roasting squash, to the pasta water, to the sauce. Each layer builds flavor. If you only salt at the end, your dish will taste flat no matter how much you add.
Watch your heat. When making the cheese sauce, keep the heat on low after you add the cheese. High heat can cause the sauce to break or become grainy. Patience is key here. I once rushed this step because I was starving, and I ended up with a sauce that looked like scrambled eggs in milk. Not cute.
Make ahead tip. You can assemble the entire dish (without the breadcrumb topping) up to 24 hours in advance. Just cover and refrigerate. When you’re ready to bake, add the breadcrumbs and add about 10 minutes to the baking time since you’re starting from cold. This is a lifesaver for holidays or dinner parties.
Multitasking strategy. Start the squash roasting first, then boil the pasta while the squash is in the oven. While the pasta cooks, make the sauce base. By the time the pasta is done, the squash should be ready to blend. This way, everything comes together in about 45 minutes with no downtime.
Variations & Adaptations
One of the best things about this recipe is how flexible it is. Here are some ways to make it your own.
Make it vegetarian or vegan. Use vegetable broth instead of chicken broth, and swap the cheeses for your favorite plant-based alternatives. I’ve used a combination of vegan cheddar shreds and nutritional yeast (about 3 tablespoons) with great results. The nutritional yeast adds that cheesy, umami flavor. For the butter, use a plant-based butter or coconut oil.
Add protein. This mac and cheese is amazing with shredded rotisserie chicken stirred in before baking. I also love adding crispy bacon bits on top—just cook 4-5 slices of bacon, crumble them, and sprinkle over the breadcrumb topping. For a vegetarian protein, try adding a can of drained and rinsed white beans or some sautéed mushrooms.
Switch up the vegetables. You can swap the butternut squash for roasted sweet potato, pumpkin, or even carrots. Each will give a slightly different flavor—sweet potato is sweeter, pumpkin is earthier, carrots are milder. Roast them the same way. I’ve also added a cup of steamed broccoli or sautéed spinach to the mix before baking for extra greens.
Change the cheese profile. The sharp cheddar and Parmesan are a classic combo, but feel free to experiment. Smoked gouda adds a lovely smoky depth. Gruyère melts beautifully and adds a nutty flavor. Or try a mix of Monterey Jack and pepper jack for a little heat. Just keep the total cheese amount the same.
Gluten-free version. Use gluten-free pasta (I like the chickpea or brown rice varieties) and a 1:1 gluten-free flour blend for the roux. For the topping, use gluten-free panko. The texture will be slightly different, but the flavor is just as good.
Spice it up. Add 1/4 teaspoon of cayenne pepper or red pepper flakes to the sauce for a little kick. Or stir in a tablespoon of Dijon mustard—it doesn’t make it taste mustardy, but it adds a tangy brightness that cuts through the richness.
Serving & Storage Suggestions
This mac and cheese is best served hot, straight from the oven, when the topping is still crunchy and the sauce is bubbling. Let it rest for 5 minutes after baking—I know it’s hard to wait, but it makes a difference. Serve it as a main dish with a simple green salad on the side (the acidity of a lemony vinaigrette cuts through the richness perfectly) or as a hearty side dish alongside roasted chicken, pork chops, or meatloaf. For a cozy fall dinner, I love pairing it with roasted Brussels sprouts or a crisp apple and fennel slaw.
Storing leftovers: Transfer any leftovers to an airtight container and refrigerate for up to 4 days. The flavors actually get better as they meld together overnight. To reheat, I recommend the oven or toaster oven for best texture. Place individual portions in a small baking dish, add a splash of milk, cover with foil, and bake at 350°F (175°C) for 15-20 minutes. The microwave works in a pinch, but the topping will get soggy and the sauce can separate.
Freezing instructions: This dish freezes beautifully. Assemble the mac and cheese completely (including the breadcrumb topping) in a freezer-safe baking dish, but don’t bake it. Wrap tightly with plastic wrap, then a layer of aluminum foil. Freeze for up to 3 months. When you’re ready to bake, thaw overnight in the refrigerator, then bake as directed, adding about 10-15 minutes to the baking time. You can also bake from frozen—just add 20-30 minutes and cover with foil for the first half of baking to prevent the topping from burning.
Nutritional Information & Benefits
Here’s the approximate nutritional breakdown per serving (based on 8 servings):
- Calories: 410
- Protein: 16g
- Carbohydrates: 45g
- Fat: 19g
- Saturated Fat: 10g
- Fiber: 4g
- Sugar: 7g
- Sodium: 520mg
- Vitamin A: 180% of the Daily Value
- Vitamin C: 25% of the Daily Value
- Calcium: 30% of the Daily Value
- Iron: 10% of the Daily Value
The star ingredient here is butternut squash, and it’s doing some heavy lifting nutritionally. It’s packed with vitamin A (mostly in the form of beta-carotene), which is fantastic for eye health and immune function. It’s also a good source of vitamin C, potassium, and fiber. By using squash as the base of the sauce, you’re getting a serving of vegetables in every bowl, plus the fiber helps slow down digestion so you feel satisfied longer. The cheese adds calcium and protein, while the whole milk provides vitamin D and more calcium. This isn’t health food in the strict sense, but it’s a comfort dish that actually brings something to the table nutritionally. I feel good serving this to my family because I know they’re getting real nourishment along with the indulgence.
Dietary considerations: This recipe contains dairy and gluten. For dairy-free and gluten-free adaptations, see the variations section above. It’s naturally vegetarian and can be made vegan with the substitutions noted. It’s also nut-free as written.
Conclusion
This butternut squash mac and cheese is more than just a recipe—it’s a reminder that the best dishes often come from a little bit of improvisation and a willingness to try something different. That rainy Thursday night could have ended with a sad bowl of plain pasta, but instead, it gave me a new fall tradition. The sweetness of the roasted squash, the sharpness of the cheddar, the warmth of the nutmeg, and that irresistible crunchy topping—it all comes together in a way that feels both familiar and fresh.
I hope you’ll give this recipe a try, especially on a night when you need a little extra comfort. Don’t be afraid to make it your own—swap in your favorite cheese, add some veggies, or pile on the bacon. That’s the beauty of cooking: the recipe is just a starting point. I’d love to hear how yours turns out. Did you try a variation? Did your family go back for thirds? Drop a comment below and let me know. And if you share a photo on Pinterest, tag me—I want to see your cozy creations. Until next time, happy cooking, and may your kitchen always smell like roasted squash and melted cheese.
Frequently Asked Questions
Can I use frozen butternut squash instead of fresh?
Yes, you can! Frozen butternut squash is a great time-saver. Just thaw it first, pat it dry with paper towels to remove excess moisture, and roast it at 400°F for about 20 minutes. It won’t caramelize as beautifully as fresh, but the flavor will still be good. You can also skip the roasting step entirely and just cook the frozen squash in the microwave until soft, then blend it directly into the sauce. The texture will be a little less rich, but it works in a pinch.
Why did my sauce turn out grainy?
Grainy sauce usually happens for one of two reasons: the heat was too high when you added the cheese, or you used pre-shredded cheese. High heat causes the proteins in the cheese to tighten up and separate from the fat, resulting in a gritty texture. Always melt cheese over low heat, and always grate it yourself from a block. If your sauce does get grainy, try whisking in a tablespoon of cold butter or a splash of heavy cream—sometimes that can smooth it out.
Can I make this recipe without a blender?
Absolutely. If you don’t have a blender or immersion blender, you can mash the roasted squash with a potato masher or even a fork. It won’t be perfectly smooth—you’ll have some small chunks—but it adds a nice rustic texture. Another option is to push the roasted squash through a fine-mesh sieve or food mill. It takes a little more elbow grease, but the result is a silky puree.
How do I prevent the breadcrumb topping from burning?
Breadcrumbs can go from golden to burnt in seconds, especially under the broiler. To prevent this, make sure your breadcrumbs are evenly mixed with melted butter—dry spots burn faster. If you notice the topping browning too quickly in the oven, tent the dish loosely with aluminum foil for the remaining bake time. And if you’re using the broiler at the end, never walk away. Stay right there and watch it like a hawk.
Can I double this recipe for a crowd?
Yes, this recipe doubles beautifully. Use a larger baking dish (like a 10×15 or two 9×13 dishes) and increase the roasting time for the squash slightly since you’ll have more on the pan. The sauce might take a few extra minutes to come together, but the proportions scale perfectly. If you’re making a double batch, I recommend baking it in two separate dishes so it cooks evenly. Leftovers freeze great, so you can also make one to eat now and one to save for later.
Pin This Recipe!
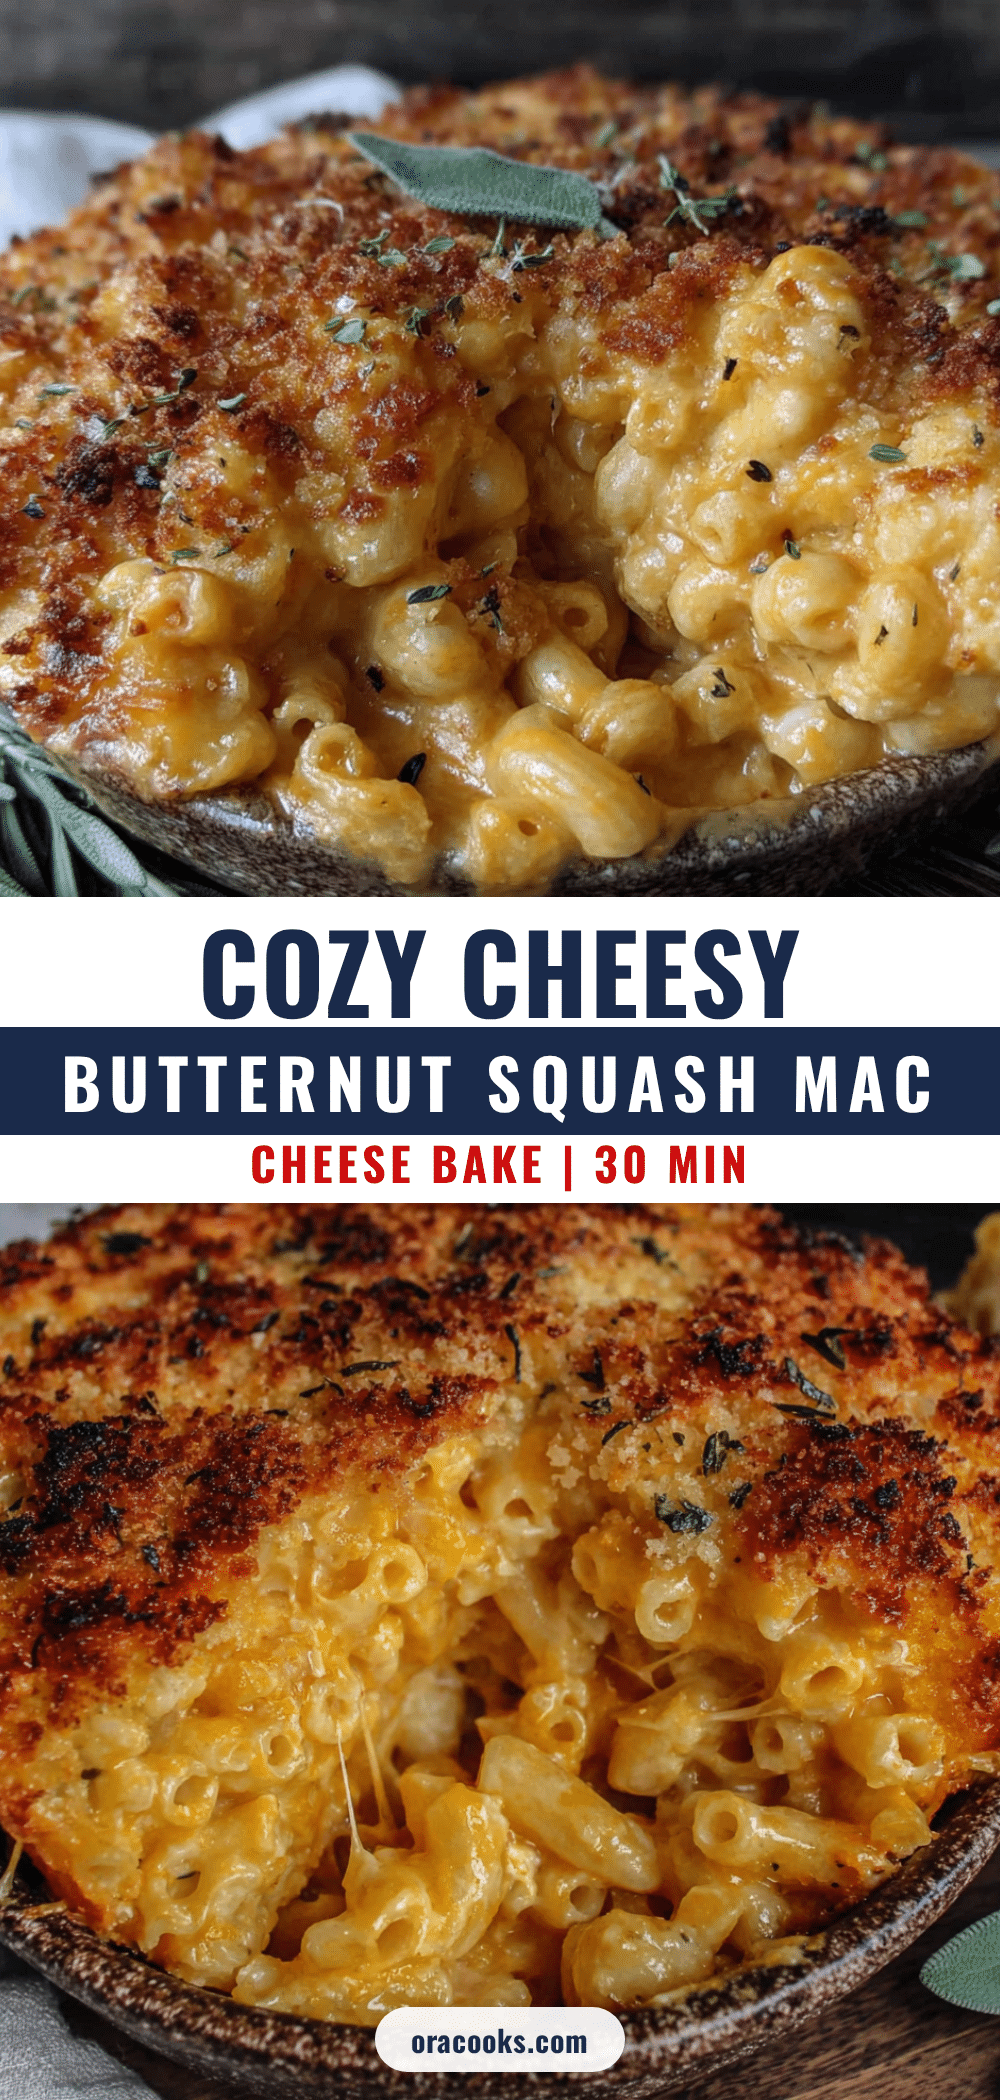
Cozy Cheesy Butternut Squash Mac and Cheese Bake – Easy Fall Dinner
A creamy, comforting mac and cheese made with roasted butternut squash for a subtle sweetness, sharp cheddar, and a crunchy panko topping. Perfect for fall evenings.
- Prep Time: 15 minutes
- Cook Time: 30 minutes
- Total Time: 45 minutes
- Yield: 8 servings 1x
- Category: Main Course
- Cuisine: American
Ingredients
- 1 medium butternut squash (about 2–2.5 pounds), peeled, seeded, and cubed into 1-inch pieces
- 2 tablespoons olive oil
- 1/2 teaspoon salt
- 1/4 teaspoon black pepper
- 12 ounces (340g) elbow macaroni
- 2 tablespoons unsalted butter
- 2 cloves garlic, minced
- 2 tablespoons all-purpose flour
- 1 1/2 cups (360ml) whole milk
- 1 cup (240ml) low-sodium chicken or vegetable broth
- 1 1/2 cups (170g) sharp cheddar cheese, freshly shredded
- 1/2 cup (55g) Parmesan cheese, finely grated
- 1/2 teaspoon ground nutmeg
- 1/2 teaspoon smoked paprika (optional)
- Salt and pepper to taste
- 1/2 cup (50g) panko breadcrumbs
- 2 tablespoons melted butter
- 2 tablespoons fresh parsley, chopped (optional)
Instructions
- Preheat oven to 400°F (200°C). Peel and cube butternut squash into 1-inch pieces. Toss with olive oil, salt, and pepper. Spread in a single layer on a baking sheet. Roast for 25-30 minutes, flipping halfway, until fork-tender and golden.
- While squash roasts, bring a large pot of salted water to a boil. Cook macaroni according to package directions until al dente. Drain (do not rinse) and set aside.
- In a medium saucepan over medium heat, melt 2 tablespoons butter. Add minced garlic and cook for 30 seconds until fragrant. Whisk in flour and cook for 1-2 minutes to form a roux. Slowly whisk in milk and broth. Continue whisking until smooth and thickened, about 3-4 minutes.
- Transfer roasted squash to a blender. Add about 1/2 cup of the milk mixture and blend until smooth. Pour squash puree back into the saucepan with the remaining milk mixture. Whisk to combine.
- Reduce heat to low. Add shredded cheddar, Parmesan, nutmeg, and smoked paprika. Stir until cheese is melted and sauce is smooth. Season with salt and pepper to taste.
- Preheat oven to 375°F (190°C). In a large bowl, combine cooked pasta and cheese sauce. Stir until well coated. Pour into a greased 9×13-inch baking dish.
- In a small bowl, mix panko breadcrumbs with melted butter until evenly moistened. Sprinkle over the mac and cheese.
- Bake for 20-25 minutes until bubbly and golden brown. For extra crispiness, broil for the last 2 minutes, watching closely. Let rest for 5 minutes before serving. Garnish with fresh parsley if desired.
Notes
For best results, grate your own cheese and don’t skip roasting the squash. The sauce can be made ahead and refrigerated for up to 24 hours. Add breadcrumbs just before baking. For a gluten-free version, use gluten-free pasta and flour blend.
Nutrition
- Serving Size: 1 serving
- Calories: 410
- Sugar: 7
- Sodium: 520
- Fat: 19
- Saturated Fat: 10
- Carbohydrates: 45
- Fiber: 4
- Protein: 16
Keywords: butternut squash mac and cheese, fall dinner, baked mac and cheese, easy mac and cheese, comfort food, vegetarian mac and cheese