Love this? Save it for later!
Share the inspiration with your friends
The woman at the community garden plot next to mine watched me hauling a bag of potting soil past her tomato plants. She didn’t say anything at first. Then she called out, “You know, the worms in the ground are the lucky ones. They get to live in chocolate.” I laughed, thinking she was joking about my gardening struggles. But she walked over and told me about the Halloween tradition her kids had grown up with—little cups of crushed cookies and pudding that looked like graveyard dirt, complete with gummy worms poking out. She said it was the one dessert that made her kids actually excited about setting the table.
Honestly, I was a little skeptical at first. I mean, crushed cookies and pudding? It sounded too simple to be special. But then I made them for a Halloween gathering, and let me tell you—something magical happens when you layer chocolate pudding over crushed Oreos and stick a few gummy worms in there. The kids went absolutely wild. The adults too, if I’m being honest. There’s something about eating pretend dirt that brings out the kid in everyone, you know?
The thing that stayed with me wasn’t just how easy they were to make. It was how that neighbor shared the recipe like it was no big deal—just a casual thing she’d been doing for years. She didn’t act like she was passing down some ancient family secret. She just said, “Try it. The kids will love it.” And she was right. I’ve tweaked her version a little over the years, adding a cream cheese layer for extra richness and using dark chocolate cookies for a more intense flavor. But the heart of it is still hers. These cozy graveyard dirt cups are the kind of dessert that makes Halloween feel less about scary things and more about happy things—like sitting around a table with people you love, eating chocolate dirt out of a cup and pretending you’re a kid again.
Why You’ll Love This Recipe
These cozy graveyard dirt cups with gummy worms are more than just a Halloween dessert—they’re an experience. I’ve tested this recipe countless times, and every single batch has disappeared within minutes. Here’s why this version stands out from the rest:
- Quick & Easy: Comes together in under 20 minutes of active prep time. No baking required. Seriously, if you can stir and layer, you can make these.
- Simple Ingredients: You probably have most of these in your kitchen already. No fancy grocery store trips needed—just pudding, cookies, cream cheese, and gummy worms.
- Perfect for Halloween: Whether it’s a classroom party, a spooky movie night, or a Halloween potluck, these little cups are always the star of the show.
- Crowd-Pleaser: Kids love the gummy worms and the “dirt.” Adults love the creamy, chocolatey layers. Everyone wins.
- Unbelievably Delicious: The combination of silky pudding, tangy cream cheese, and crunchy cookie crumbs is pure comfort food magic. It’s like eating a fancy dessert that tastes like childhood.
What makes my version different? It’s the cream cheese layer. Most recipes just use pudding and cookies, but adding that creamy, slightly tangy middle layer takes these from good to unforgettable. It gives the dessert a richness that balances the sweetness perfectly. Plus, I use dark chocolate Oreos instead of regular ones—it cuts the sugar and adds a deeper, more sophisticated chocolate flavor. Trust me, once you try it this way, you won’t go back.
This recipe isn’t just good—it’s the kind that makes you close your eyes after the first bite. It’s comfort food reimagined for Halloween: spooky on the outside, cozy on the inside. Perfect for impressing guests without stress, or turning a simple October evening into something memorable.
What Ingredients You Will Need
This recipe uses simple, wholesome ingredients to create a dessert that feels both indulgent and nostalgic. Most of these are pantry staples, and the rest are easy to find at any grocery store. Here’s what you’ll need:
For the Dirt Layer
- 1 package (14.3 ounces) Oreo cookies (regular or dark chocolate—I prefer dark chocolate for a less sweet, more intense flavor)
- 2 tablespoons unsalted butter, melted (optional—adds a slightly richer texture to the crumbs)
For the Cream Cheese Layer
- 8 ounces cream cheese, softened (full-fat works best for that creamy texture)
- 1/2 cup powdered sugar
- 1 teaspoon vanilla extract
- 1 cup heavy whipping cream (or 2 cups Cool Whip for a lighter option)
For the Pudding Layer
- 2 boxes (3.9 ounces each) instant chocolate pudding mix (I recommend Jell-O brand for the smoothest texture)
- 3 cups cold whole milk (2% works too, but whole milk gives a creamier pudding)
For the Topping & Decoration
- 1 cup gummy worms (or more, depending on how many you want poking out of the “dirt”)
- Optional: crushed graham crackers for extra “dirt” texture
- Optional: candy pumpkins or candy corn for a festive touch
- Optional: small tombstone cookies or chocolate gravestones (you can find these at most grocery stores around Halloween)
Ingredient Selection Tips: For the best texture, make sure your cream cheese is truly softened—leave it on the counter for at least 30 minutes before starting. Cold cream cheese will leave lumps in your creamy layer, and nobody wants that. For the gummy worms, I like the sour ones because they add a nice tangy contrast to the sweet chocolate. But regular ones work perfectly too.
Substitution Guidance: If you’re dairy-free, use dairy-free cream cheese and a plant-based milk for the pudding. Coconut cream can replace the heavy whipping cream—just chill it first and whip it like regular cream. For a gluten-free version, use gluten-free chocolate sandwich cookies (there are several good options available now). And if you want to skip the cream cheese layer entirely, just double the pudding recipe and layer it directly with the cookie crumbs—it’ll still be delicious, just less rich.
Equipment Needed
You don’t need any fancy equipment for these cozy graveyard dirt cups, which is part of what makes them so great. Here’s what you’ll need:
- 8 to 10 small cups or jars: I use 8-ounce mason jars because they look adorable and show off the layers beautifully. But any small cup, bowl, or even a clear plastic cup works. You can also make one large dish if you prefer.
- Food processor or zip-top bag: For crushing the Oreos into fine crumbs. A food processor gives you the most consistent texture, but a zip-top bag and a rolling pin work just as well—and it’s oddly satisfying to smash them yourself.
- Electric mixer or whisk: For whipping the cream cheese layer until smooth and fluffy. A hand mixer works great, but a stand mixer is even easier. If you’re feeling ambitious, you can whisk by hand—just prepare for a workout.
- Medium mixing bowls: You’ll need at least two—one for the pudding and one for the cream cheese mixture.
- Measuring cups and spoons: For accurate measurements, especially for the milk and powdered sugar.
- Spatula: For scraping every last bit of that creamy goodness into the cups.
- Spoon or piping bag: For layering the pudding and cream cheese mixture. A piping bag gives you cleaner layers, but a spoon works perfectly fine.
Budget-Friendly Options: Don’t have a food processor? No problem. Place the Oreos in a zip-top bag, seal it, and go to town with a rolling pin or even a heavy saucepan. It takes a little longer, but it’s oddly therapeutic. And if you don’t have an electric mixer, a whisk and some elbow grease will get the job done—just make sure your cream cheese is really soft.
Personal Note: I’ve made these in everything from fancy mason jars to old yogurt containers (don’t judge—it was a last-minute school party situation). They always turn out great. The container doesn’t matter. The chocolate does.
Preparation Method
- Crush the Oreos (5 minutes): Place the entire package of Oreos (filling included) in a food processor and pulse until you have fine, crumbly “dirt.” If you’re using a zip-top bag, seal it tightly and crush the cookies with a rolling pin until you get a uniform texture. You want some tiny pieces mixed in with the fine crumbs—it looks more like real dirt that way. Set the crumbs aside in a bowl.
- Make the cream cheese layer (10 minutes): In a medium bowl, beat the softened cream cheese with an electric mixer until smooth and fluffy, about 2 minutes. Add the powdered sugar and vanilla extract, and beat until well combined, scraping down the sides as needed. In a separate bowl, whip the heavy cream until stiff peaks form (about 3-4 minutes with an electric mixer). Gently fold the whipped cream into the cream cheese mixture until smooth and creamy. Be gentle here—you don’t want to deflate all that air you just whipped in. Set aside.
- Prepare the chocolate pudding (5 minutes): In another medium bowl, whisk together the instant chocolate pudding mix and cold milk. Whisk vigorously for about 2 minutes until the pudding starts to thicken. It will be soft at first—that’s normal. Let it sit for 5 minutes to fully set. The pudding should be thick and creamy, not runny.
- Layer the cups (10 minutes): Now comes the fun part. Grab your cups or jars and start layering. Begin with a layer of crushed Oreos at the bottom of each cup—about 2 tablespoons per cup. Press it down gently with the back of a spoon to create a firm base. Next, add a layer of the cream cheese mixture—about 3 tablespoons per cup. Spread it evenly. Then add a layer of chocolate pudding—about 3 tablespoons per cup. Repeat the layers: another thin layer of Oreo crumbs, another layer of cream cheese mixture, and another layer of pudding. End with a final generous layer of Oreo crumbs on top. The goal is to have visible layers when you look at the side of the cup—it looks so satisfying.
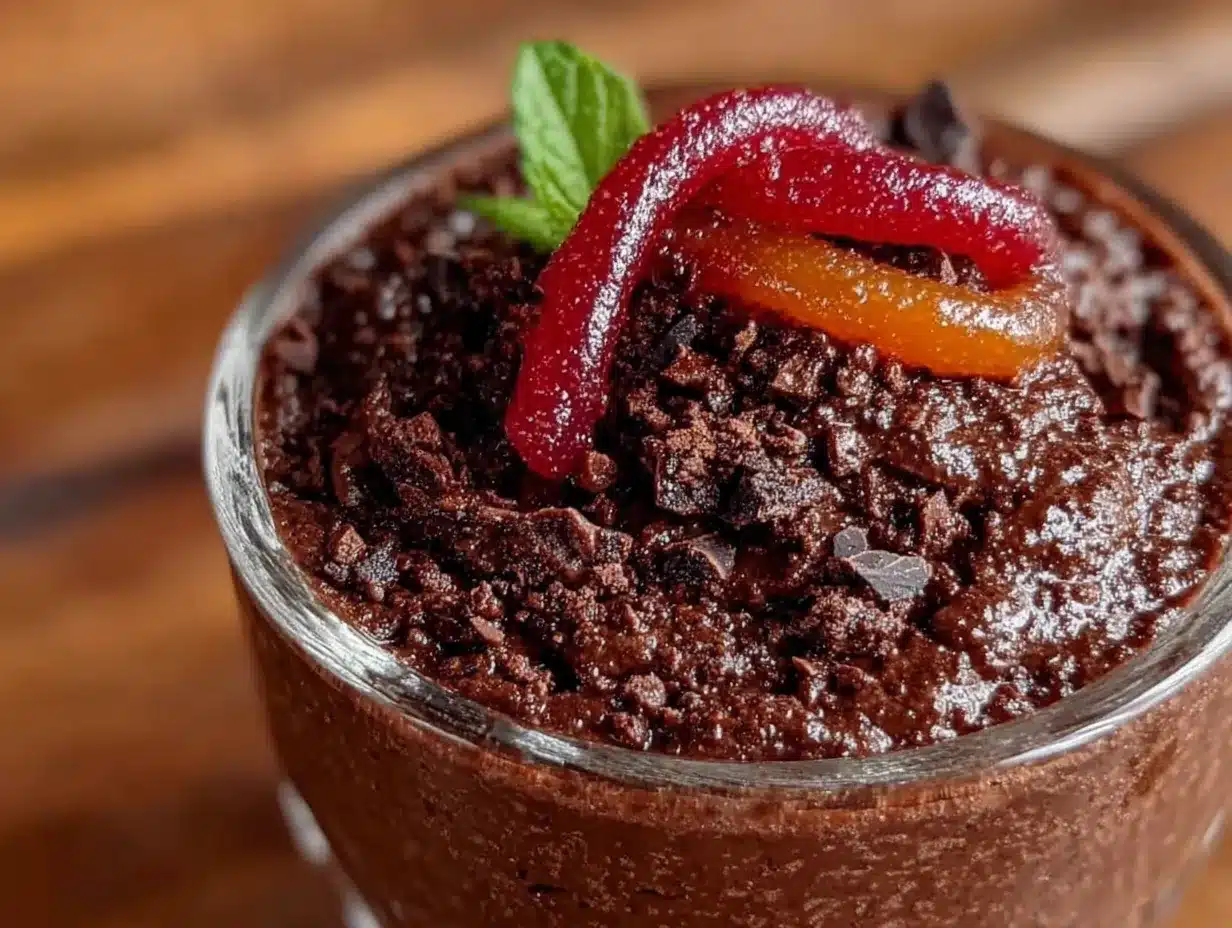
- Add the gummy worms (5 minutes): Here’s where the graveyard comes to life. Gently poke gummy worms into the top layer of Oreo crumbs so they look like they’re crawling out of the dirt. You can also stick a few into the sides of the cups so they’re visible through the glass. Don’t be shy—add as many as you like. This is the part that makes kids (and adults) light up.
- Decorate (optional, 5 minutes): If you want to go all out, add small tombstone cookies or candy pumpkins on top. You can even write “RIP” on small pieces of white chocolate or use store-bought candy tombstones. This step is completely optional, but it takes the presentation to the next level.
- Chill (at least 2 hours): Place the cups in the refrigerator for at least 2 hours, preferably overnight. This allows the layers to set and the flavors to meld together. The cookie crumbs will soften slightly, creating a texture that’s almost like real dirt—but way tastier. Don’t skip this step. The chilling time is what transforms these from good to incredible.
- Serve and enjoy: Take the cups out of the fridge about 10 minutes before serving to take the chill off. Serve them with a spoon and watch the smiles appear. These are best enjoyed cold, straight from the fridge, on a cozy Halloween night.
Pro tip: If you’re making these for a party, assemble them the night before. The flavors get better overnight, and it’s one less thing to worry about on the day of the event. Just add the gummy worms right before serving so they stay firm and don’t get too soft.
Cooking Tips & Techniques
I’ve made these cozy graveyard dirt cups more times than I can count, and I’ve learned a few things along the way. Here are my best tips for getting them perfect every time:
Don’t overmix the pudding. I know it’s tempting to keep whisking until it’s perfectly smooth, but overmixing can make the pudding grainy. Whisk just until it starts to thicken, then let it sit. Trust the process.
Crush the Oreos to the right consistency. You want a mix of fine crumbs and slightly larger pieces. If you pulse too long in the food processor, you’ll end up with powder, which doesn’t look like dirt. If you don’t pulse enough, you’ll have big chunks that don’t layer well. Aim for a texture similar to coarse sand.
Let the cream cheese soften completely. This is non-negotiable. Cold cream cheese will leave lumps in your creamy layer, and nobody wants lumpy dirt. Take it out of the fridge at least 30 minutes before you start. If you’re in a hurry, cut it into small cubes and let it sit for 15 minutes—it softens faster that way.
Use a piping bag for the cream cheese layer. I learned this the hard way after making a mess with a spoon. A piping bag gives you clean, even layers and keeps the sides of the cups tidy. If you don’t have a piping bag, use a zip-top bag with the corner snipped off. It works just as well.
Make sure your cups are completely dry. Any moisture in the cups will make the cookie crumbs soggy before you want them to be. Give them a good wipe before you start layering.
One mistake I made: The first time I made these, I added the gummy worms before chilling the cups. They sank into the pudding and disappeared. Now I always add them after the cups have set in the fridge for at least an hour. The worms stay on top where they belong—crawling out of the dirt like they’re supposed to.
Timing strategy: Make the pudding first so it has time to set while you prepare the cream cheese layer. Then crush the Oreos while the cream cheese is softening. Multitasking makes this recipe come together in no time.
Variations & Adaptations
One of the best things about these cozy graveyard dirt cups is how easy they are to customize. Here are some variations I’ve tried and loved:
Peanut Butter Dirt Cups: Add 1/2 cup of creamy peanut butter to the cream cheese layer and beat until smooth. The peanut butter and chocolate combination is absolutely divine. My kids beg for this version every Halloween.
Vegan Dirt Cups: Use dairy-free cream cheese, coconut cream (chilled and whipped) instead of heavy cream, and almond milk for the pudding. Most Oreos are actually vegan, so you’re good there. The texture is slightly different—a little lighter—but still incredibly delicious.
Pumpkin Spice Dirt Cups: Add 1/2 cup of pumpkin puree and 1 teaspoon of pumpkin pie spice to the cream cheese layer. It gives the dessert a fall-flavored twist that pairs beautifully with the chocolate. Top with a sprinkle of cinnamon instead of extra cookie crumbs.
Gluten-Free Version: Use gluten-free chocolate sandwich cookies (Kinnikinnick makes a good one) and ensure your pudding mix is gluten-free (most are, but check the label). Everything else is naturally gluten-free.
No-Bake Cheesecake Style: Double the cream cheese layer and skip the pudding layer entirely. The result is a rich, creamy cheesecake-like dessert with a crunchy cookie topping. It’s less “dirt” and more “cheesecake in a cup,” but it’s equally amazing.
My personal favorite variation: I once made these with a layer of fresh raspberries between the cream cheese and pudding. The tartness of the berries cuts through the sweetness perfectly. It’s not exactly traditional Halloween fare, but it’s absolutely delicious. Sometimes I do it just because.
Serving & Storage Suggestions
These cozy graveyard dirt cups are best served cold, straight from the refrigerator. The contrast between the cool, creamy layers and the slightly crunchy cookie crumbs is what makes them so satisfying. Take them out about 10 minutes before serving to take the edge off the chill—it lets the flavors open up a bit.
Presentation ideas: Serve them in clear cups or mason jars so the layers are visible. Add a small plastic spider or a candy eyeball on top for an extra spooky touch. If you’re feeling fancy, you can even add a small paper tombstone with “RIP” written on it—just stick it into the top layer of cookie crumbs.
What to serve with them: These are rich, so they pair well with something light and refreshing. A glass of cold milk is the classic choice—it balances the sweetness perfectly. For an adult gathering, a cup of black coffee or a dark stout beer complements the chocolate beautifully. If you’re serving these at a Halloween party, set them out alongside a bowl of popcorn or a cheese platter for contrast.
Storage instructions: These keep well in the refrigerator for up to 3 days. Cover each cup with plastic wrap or a lid to prevent the cookie crumbs from absorbing moisture from the fridge. The texture will change slightly over time—the crumbs will soften more—but the flavor actually gets better after a day or two.
Freezer instructions: You can freeze these for up to 2 months. Wrap each cup tightly in plastic wrap and then in aluminum foil. To serve, thaw them in the refrigerator overnight. The texture will be a little softer after freezing, but they’re still delicious. I wouldn’t freeze them with the gummy worms on top—add those after thawing.
Reheating: These are meant to be eaten cold, so no reheating needed. But if you want a slightly different experience, you can microwave a cup for about 15 seconds—the pudding will get warm and gooey while the cookie crumbs stay cool. It’s like a warm dirt cup. Not traditional, but interesting.
Flavor development note: The flavors really meld together after a day in the fridge. The cookie crumbs absorb some moisture from the pudding and cream cheese, creating a texture that’s almost like a soft, fudgy cake. If you have the patience, make these a day ahead. You won’t regret it.
Nutritional Information & Benefits
Let’s be honest—these cozy graveyard dirt cups are a treat, not a health food. But that doesn’t mean they can’t have a place in a balanced diet. Here’s what you need to know:
Estimated nutritional values per serving (1 cup, based on 8 servings):
- Calories: 420
- Total Fat: 24g
- Saturated Fat: 14g
- Cholesterol: 65mg
- Sodium: 380mg
- Total Carbohydrates: 48g
- Dietary Fiber: 2g
- Sugars: 34g
- Protein: 7g
Health benefits of key ingredients: The cream cheese and heavy cream provide calcium and protein, which are good for bone health. The dark chocolate cookies (if you use them) contain antioxidants called flavonoids, which are linked to heart health. And the gummy worms? Well, they make you smile, and that counts for something.
Dietary considerations: This recipe contains dairy and gluten. For a dairy-free version, use dairy-free cream cheese and milk alternatives. For a gluten-free version, use gluten-free sandwich cookies. The recipe can be made nut-free by checking your ingredients carefully—most are naturally nut-free, but always read labels.
Potential allergens: This recipe contains milk, wheat, and soy (in the cookies). It may also contain traces of nuts depending on the brands you use. Always check labels if you’re serving someone with allergies.
My personal perspective: I believe in enjoying treats in moderation. These dirt cups are a special occasion dessert—they’re meant for Halloween parties and cozy nights in. They’re not an everyday thing, and that’s okay. Sometimes you just need a little chocolate dirt in your life. Balance is about making room for the things that bring you joy, even if they’re not the most nutritious choice. And honestly, a dessert that makes kids (and adults) giggle is good for the soul.
Conclusion
These cozy graveyard dirt cups with gummy worms are everything I love about Halloween desserts. They’re fun, they’re easy, and they taste incredible. The combination of creamy pudding, tangy cream cheese, crunchy cookie crumbs, and chewy gummy worms is pure comfort in a cup. Plus, they look adorable—like a tiny graveyard that’s somehow both spooky and inviting.
What I love most about this recipe is how it brings people together. I’ve made these for Halloween parties, classroom celebrations, and quiet nights at home with my family. Every single time, people light up when they see them. There’s something about eating pretend dirt that makes everyone feel like a kid again. And in a world that can feel pretty heavy sometimes, that’s a gift.
I encourage you to make these your own. Add extra gummy worms. Use different cookie flavors. Experiment with the cream cheese layer. The beauty of this recipe is that it’s forgiving—you really can’t mess it up. And even if you do, it’ll still taste amazing.
So go ahead. Grab some Oreos, some pudding, and a bag of gummy worms. Make a mess in your kitchen. Poke worms into chocolate dirt. And when you take that first bite, let yourself feel like a kid again. You deserve it.
If you make these, I’d love to hear about it. Leave a comment below or tag me in your photos. Happy Halloween, friends. May your dirt be chocolatey and your worms be plenty.
Frequently Asked Questions
Can I make these dirt cups ahead of time?
Absolutely! In fact, they taste even better the next day. Assemble the cups up to 24 hours in advance, but wait to add the gummy worms until just before serving. This keeps the worms firm and prevents them from getting too soft. Store them covered in the refrigerator.
Can I use sugar-free pudding mix?
Yes, you can use sugar-free instant chocolate pudding mix. The texture will be slightly different—a little less creamy—but it works fine. Just follow the package directions for the milk amount. The rest of the recipe stays the same.
How many cups does this recipe make?
This recipe makes 8 to 10 servings, depending on the size of your cups. If you’re using 8-ounce mason jars, you’ll get about 8 generous cups. If you’re using smaller 4-ounce cups, you’ll get closer to 12. You can also make one large dish instead of individual cups—just layer everything in a 9×13 pan and scoop it out.
Can I use Cool Whip instead of heavy cream?
Yes, you can substitute 2 cups of Cool Whip for the heavy whipping cream and powdered sugar. The texture will be lighter and fluffier, and it’s a great shortcut if you’re short on time. Just fold it into the cream cheese mixture gently. The flavor will be slightly different—less rich—but still delicious.
How do I keep the gummy worms from sinking?
This is a common issue! The key is to add the gummy worms after the cups have been chilling for at least an hour. The pudding and cream cheese layers need time to set so they’re firm enough to hold the worms in place. You can also gently press the worms into the top cookie layer instead of pushing them all the way down. And if a few sink, just call them “buried treasure.”
Pin This Recipe!
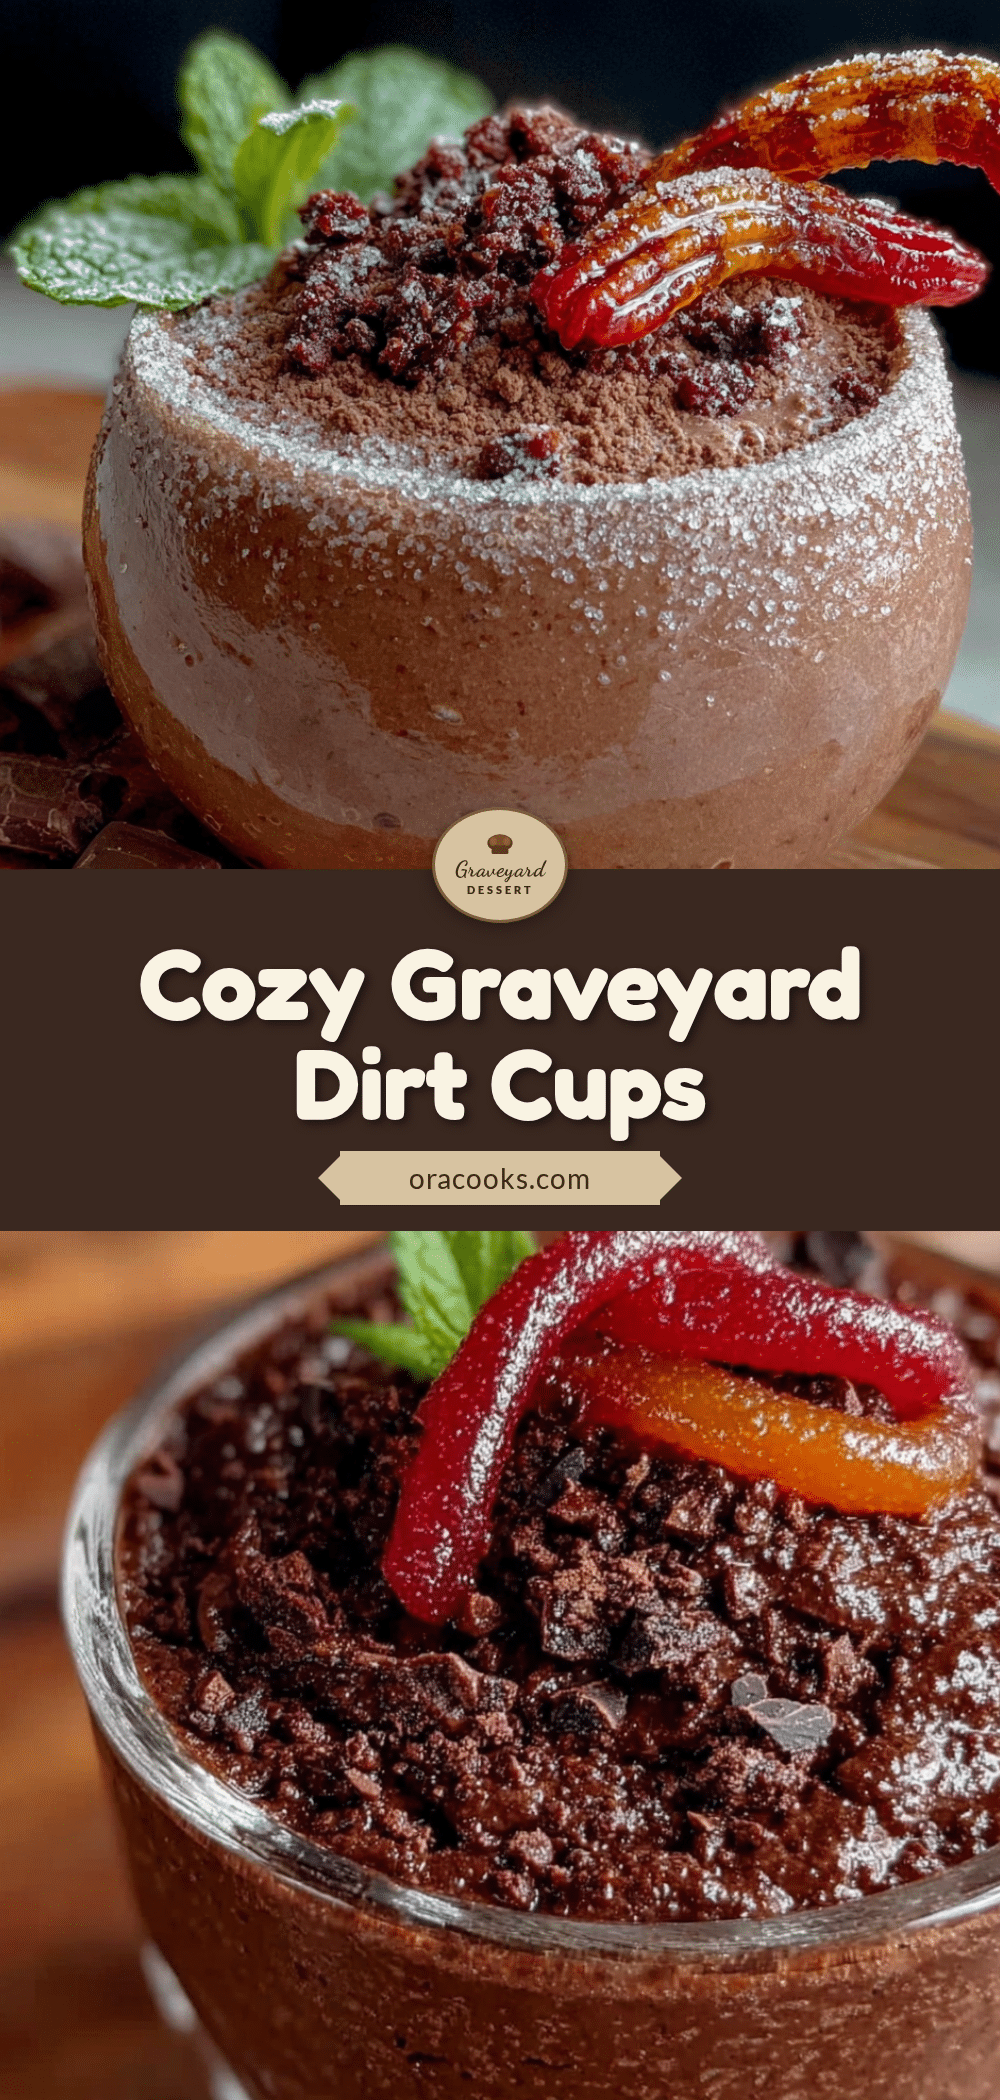
Cozy Graveyard Dirt Cups with Gummy Worms (Easy Halloween Dessert)

These no-bake graveyard dirt cups feature layers of chocolate pudding, creamy cheesecake filling, and crushed Oreo ‘dirt,’ topped with gummy worms for a fun and spooky Halloween treat that kids and adults love.
- Prep Time: 20 minutes
- Cook Time: 0 minutes
- Total Time: 2 hours 20 minutes (includes chilling)
- Yield: 8 servings 1x
- Category: Dessert
- Cuisine: American
Ingredients
- 1 package (14.3 ounces) Oreo cookies (regular or dark chocolate)
- 2 tablespoons unsalted butter, melted (optional)
- 8 ounces cream cheese, softened
- 1/2 cup powdered sugar
- 1 teaspoon vanilla extract
- 1 cup heavy whipping cream (or 2 cups Cool Whip for a lighter option)
- 2 boxes (3.9 ounces each) instant chocolate pudding mix
- 3 cups cold whole milk (2% works too)
- 1 cup gummy worms (or more)
- Optional: crushed graham crackers for extra ‘dirt’ texture
- Optional: candy pumpkins or candy corn for a festive touch
- Optional: small tombstone cookies or chocolate gravestones
Instructions
- Crush the Oreos (5 minutes): Place the entire package of Oreos (filling included) in a food processor and pulse until you have fine, crumbly ‘dirt.’ If using a zip-top bag, seal tightly and crush with a rolling pin until uniform. Set aside.
- Make the cream cheese layer (10 minutes): In a medium bowl, beat softened cream cheese with an electric mixer until smooth and fluffy, about 2 minutes. Add powdered sugar and vanilla extract, beat until combined. In a separate bowl, whip heavy cream until stiff peaks form (3-4 minutes). Gently fold whipped cream into cream cheese mixture until smooth. Set aside.
- Prepare the chocolate pudding (5 minutes): In another medium bowl, whisk together instant chocolate pudding mix and cold milk. Whisk vigorously for about 2 minutes until pudding starts to thicken. Let sit for 5 minutes to fully set.
- Layer the cups (10 minutes): In each cup, start with a layer of crushed Oreos (about 2 tablespoons), press down gently. Add a layer of cream cheese mixture (about 3 tablespoons), spread evenly. Add a layer of chocolate pudding (about 3 tablespoons). Repeat layers: another thin layer of Oreo crumbs, cream cheese mixture, and pudding. End with a final generous layer of Oreo crumbs on top.
- Add the gummy worms (5 minutes): Gently poke gummy worms into the top layer of Oreo crumbs so they look like they’re crawling out of the dirt. You can also stick a few into the sides of the cups.
- Decorate (optional, 5 minutes): Add small tombstone cookies or candy pumpkins on top if desired.
- Chill (at least 2 hours): Place cups in the refrigerator for at least 2 hours, preferably overnight, to allow layers to set and flavors to meld.
- Serve and enjoy: Take cups out of the fridge about 10 minutes before serving. Serve cold.
Notes
For best results, let cream cheese soften completely before using. Add gummy worms after chilling for at least an hour to prevent sinking. Make ahead: assemble the night before and add gummy worms just before serving. For dairy-free, use dairy-free cream cheese and plant-based milk. For gluten-free, use gluten-free sandwich cookies.
Nutrition
- Serving Size: 1 cup (8-ounce mason
- Calories: 420
- Sugar: 34
- Sodium: 380
- Fat: 24
- Saturated Fat: 14
- Carbohydrates: 48
- Fiber: 2
- Protein: 7
Keywords: Halloween dessert, dirt cups, gummy worms, no-bake dessert, chocolate pudding, Oreo, graveyard, spooky treat, easy dessert, kid-friendly