Love this? Save it for later!
Share the inspiration with your friends
This was supposed to be a big, slow-simmered chili. The kind where you brown the meat in batches, toast whole dried chiles, and let it bubble away on the back burner for three hours while your house smells like a Texas roadhouse. I had the afternoon planned for it. But then my kid’s school called—early dismissal, forgot my calendar, and suddenly I was staring at a pound of ground beef that needed cooking and a family that needed feeding in thirty minutes flat.
I grabbed the wrong pan. I used the wrong spice blend. I skipped the step where you let the chili rest before serving because, honestly, who has time? And what came out of that pan was nothing like the plan. It was better. It was the chili I’ve been making ever since—the one my husband asks for by name, the one that gets requested for Super Bowl parties and sick-day dinners alike. Maybe you’ve been there, standing in your kitchen, realizing the clock is your enemy and dinner still needs to happen. Let me tell you, this chili was born from that exact moment. And I’m so glad it was.
This 30-minute no-bean chili is the weeknight hero you didn’t know you needed. It’s thick, it’s meaty, it’s got that deep, slow-cooked flavor without the slow cook. I mean, I still make the long-simmered version on weekends sometimes, but this quick classic no-bean chili is the one that actually gets made on Tuesday nights when everyone is tired and hungry and the last thing you want to do is spend hours in the kitchen.
Why You’ll Love This Recipe
Let’s be real—there are a million chili recipes out there. But this one is different because it was built for the way we actually live. Here’s why it works:
- Quick & Easy: From fridge to table in 30 minutes flat. No soaking, no simmering for hours, no complicated techniques.
- Simple Ingredients: You probably have most of these in your pantry right now. Ground beef, canned tomatoes, chili powder, cumin—nothing fancy required.
- Perfect for Weeknights: This is the definition of a busy-day dinner. One pot, minimal cleanup, maximum flavor.
- Crowd-Pleaser: My picky-eater nephew went back for thirds. My neighbor, who swears she doesn’t like chili, asked for the recipe.
- Unbelievably Delicious: The secret is in the technique—browning the beef properly and letting the spices bloom in the hot fat. It gives you that deep, complex flavor in a fraction of the time.
This isn’t just another chili recipe. It’s the one you’ll reach for when you need dinner on the table fast and you don’t want to compromise on taste. It’s comfort food that respects your time—and honestly, isn’t that what we all need?
What Ingredients You Will Need
This recipe uses straightforward, everyday ingredients to deliver big flavor without the fuss. Most of these are pantry staples, which is exactly what you want on a busy weeknight.
- For the Chili Base:
- 2 pounds ground beef (80/20 is ideal for flavor; drain excess fat if needed)
- 1 large yellow onion, diced (about 2 cups)
- 4 cloves garlic, minced
- 2 tablespoons tomato paste (adds richness and depth)
- 1 (14.5-ounce) can diced tomatoes, undrained
- 1 (15-ounce) can tomato sauce
- 1 cup beef broth (low-sodium preferred so you can control the salt)
- For the Seasoning Blend:
- 3 tablespoons chili powder (I prefer a mild blend like McCormick, but use your favorite)
- 1 tablespoon ground cumin
- 1 teaspoon smoked paprika (regular paprika works too, but smoked adds that campfire vibe)
- 1 teaspoon dried oregano
- 1/2 teaspoon cayenne pepper (adjust to your heat preference)
- 1 teaspoon salt, plus more to taste
- 1/2 teaspoon black pepper
- For Finishing (Optional but Recommended):
- 1 tablespoon brown sugar (balances acidity from the tomatoes)
- 1 tablespoon apple cider vinegar (brightens everything up)
- Shredded cheddar cheese, sour cream, and fresh cilantro for serving
A quick note on the beef: I’ve made this with ground turkey and it works fine, but you’ll want to add a tablespoon of olive oil since turkey is leaner. For the chili powder, make sure it’s fresh—old chili powder loses its punch and your chili will taste flat. And if you’re sensitive to heat, start with 1/4 teaspoon of cayenne and taste before adding more.
Equipment Needed
One of the best things about this recipe is how little equipment it requires. Here’s what you’ll need:
- A large, heavy-bottomed pot or Dutch oven – A 5- to 6-quart pot is ideal. I use my trusty Lodge enameled Dutch oven, but a stainless steel stockpot works just fine. The key is even heat distribution so the meat browns properly.
- A wooden spoon or spatula – For breaking up the ground beef and stirring. I prefer a wooden spoon because it feels right for chili.
- A sharp knife and cutting board – For dicing the onion and mincing the garlic. Nothing fancy needed.
- Measuring spoons – For the spices. Yes, you can eyeball it, but measuring ensures consistency.
- A can opener – Unless you’re using pull-tab cans, which I highly recommend for speed.
If you don’t have a Dutch oven, don’t worry. A deep skillet or sauté pan with high sides will work—just make sure it’s at least 4 quarts. The most important thing is that the pot is heavy enough to prevent scorching. I learned this the hard way when I used a thin-bottomed pan and ended up with burnt chili that tasted like a campfire.
Preparation Method
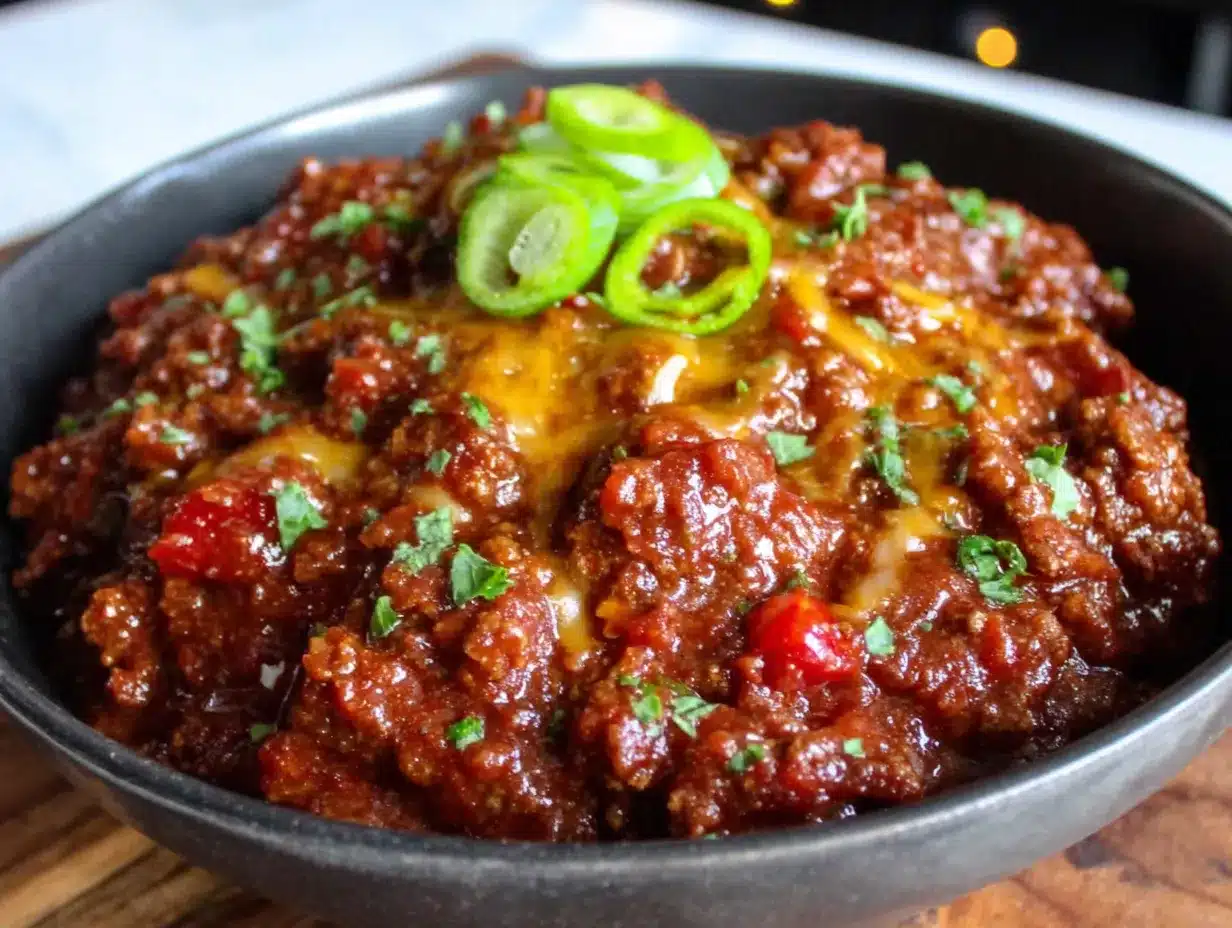
This comes together faster than you think. Here’s how to do it:
- Brown the beef (5 minutes). Place your pot over medium-high heat. Add the ground beef and break it apart with your spoon. Cook, stirring occasionally, until no longer pink—about 5 minutes. Don’t rush this step. If you crowd the pan or stir too often, the meat will steam instead of brown, and you’ll lose that deep flavor. If there’s more than a tablespoon of fat, drain it off (leave a little for flavor).
- Sauté the aromatics (3 minutes). Reduce heat to medium. Add the diced onion and cook for 2 minutes, until it starts to soften. Add the minced garlic and cook for 30 seconds more, until fragrant. The smell at this point should be incredible—if it’s not, your garlic might be old.
- Bloom the spices (1 minute). Add the chili powder, cumin, smoked paprika, oregano, cayenne, salt, and pepper directly to the pot. Stir constantly for about 1 minute. This is where the magic happens—the heat releases the oils in the spices, making them more flavorful. Your kitchen will smell like a chili cook-off.
- Add the tomato paste (1 minute). Push the meat mixture to one side and add the tomato paste to the hot spot. Cook it for about a minute, stirring, until it darkens slightly. This caramelization adds another layer of depth.
- Add the liquids (5 minutes). Pour in the diced tomatoes (with their juices), tomato sauce, and beef broth. Stir everything together, scraping up any browned bits from the bottom of the pot. Bring to a simmer, then reduce heat to medium-low.
- Simmer and thicken (15-20 minutes). Let the chili bubble gently, stirring occasionally. The longer it simmers, the thicker it gets and the more the flavors meld. After 15 minutes, taste it. If it needs more depth, stir in the brown sugar and apple cider vinegar. These two ingredients balance the acidity and round out the flavor.
- Taste and adjust. This is the most important step. Add more salt if needed, more cayenne if you want heat, or a splash more broth if it’s too thick. The chili should be thick enough to coat a spoon but still slightly saucy.
- Serve immediately. Ladle into bowls and top with shredded cheddar, a dollop of sour cream, and a sprinkle of fresh cilantro. Or keep it simple with just a few saltines on the side.
A few visual cues: The chili is ready when it’s darkened in color and the liquid has reduced by about a third. You should see little bubbles popping through the surface, not a rolling boil. If it looks watery, just let it simmer another 5 minutes uncovered.
Cooking Tips & Techniques
Over the years, I’ve made this chili dozens of times, and I’ve learned a few things the hard way. Here are my best tips:
- Don’t skip the spice blooming step. This is the number one mistake people make. Adding dry spices directly to the liquid means they never fully release their oils. Blooming them in the hot fat for even 30 seconds makes a huge difference in flavor.
- Use a heavy pot. Thin pans create hot spots that burn the bottom of the chili. A Dutch oven or heavy-bottomed pot distributes heat evenly and prevents scorching.
- Let it rest if you can. I know this is a 30-minute recipe, but if you have an extra 10 minutes, turn off the heat and let the chili sit covered. The flavors continue to meld and deepen.
- Double the recipe. This chili freezes beautifully. I always make a double batch and freeze half in quart-sized bags for nights when I really don’t feel like cooking.
- Taste as you go. This sounds obvious, but so many people skip it. Salt levels vary depending on your broth and tomatoes, so adjust at the end, not the beginning.
I once forgot to add the chili powder entirely. I realized it when I tasted the chili and it was just… sad. So I stirred it in at the end and simmered for an extra 10 minutes. It worked, but it wasn’t as good as when you bloom the spices first. Learn from my mistake.
Variations & Adaptations
This recipe is a great starting point, but it’s also easy to customize. Here are some of my favorite variations:
- Spicy Texas Chili: Add 2 chopped chipotle peppers in adobo sauce (from a can) along with the tomatoes. This gives it a smoky, fiery kick that’s absolutely addictive.
- Mild Family-Friendly: Skip the cayenne and use sweet paprika instead of smoked. Serve with a bowl of shredded cheese and let everyone add their own heat.
- Vegetarian Version: Substitute the ground beef with 2 cans of black beans (rinsed) and 1 cup of textured vegetable protein (TVP) rehydrated in hot broth. The TVP mimics the texture of ground meat.
- Slow Cooker Adaptation: Brown the beef and sauté the aromatics on the stovetop, then transfer everything to a slow cooker and cook on low for 6-8 hours. The flavor will be even deeper.
- Keto/Low-Carb: This recipe is already low-carb since it has no beans. Just skip the brown sugar and check that your tomato sauce has no added sugar.
My personal favorite variation is the one with chipotle peppers. I tried it on a whim after a bad day at work, and it turned my whole mood around. Something about that smoky heat just hits different.
Serving & Storage Suggestions
This chili is incredibly versatile when it comes to serving. Here’s how I like to do it:
- Serving Temperature: Serve piping hot, straight from the pot. It’s also great at room temperature on a summer evening.
- Toppings Bar: Set out bowls of shredded cheddar, sour cream, diced avocado, sliced jalapeños, fresh cilantro, and lime wedges. Let everyone build their own bowl.
- Side Dishes: A side of buttery cornbread, crispy tortilla chips for dipping, or a simple green salad with lime vinaigrette. I’m partial to saltines crumbled on top—it’s how my grandma ate chili.
- Storing Leftovers: Cool completely, then transfer to an airtight container. Refrigerate for up to 5 days. The flavor actually gets better after a day or two.
- Freezing: Portion into freezer-safe bags or containers, leaving some room for expansion. Freeze for up to 3 months. Thaw overnight in the fridge before reheating.
- Reheating: Warm in a pot over medium-low heat, stirring occasionally. Add a splash of broth or water if it’s too thick. You can also microwave individual portions in 30-second bursts, stirring between each.
One thing I love about this chili is how the flavors develop. The second day, it’s even better—the spices have fully melded, and the texture thickens perfectly. I always make extra just for leftover lunches.
Nutritional Information & Benefits
Here’s an approximate nutritional breakdown per serving (based on 6 servings, without toppings):
- Calories: 380
- Protein: 32g
- Fat: 22g
- Carbohydrates: 12g
- Fiber: 3g
- Sugar: 6g
- Sodium: 780mg
This chili is naturally gluten-free (check your broth and tomato products to be sure) and low-carb. The beef provides high-quality protein and iron, while the tomatoes are packed with lycopene, an antioxidant linked to heart health. The spices—especially cumin and chili powder—have anti-inflammatory properties.
From a wellness perspective, this is the kind of meal that feels indulgent but is actually pretty balanced. It’s hearty enough to satisfy without being heavy, and it’s packed with nutrients that support energy and immunity. I feel good serving this to my family on a busy night.
Conclusion
This 30-minute no-bean chili is proof that you don’t need hours to make something truly delicious. It came from a moment of chaos, but it’s become a staple in my kitchen—and I think it will become one in yours too. The deep, meaty flavor, the perfect spice level, the way it comes together in one pot with minimal fuss—it’s everything you want in a weeknight dinner.
I’d love to hear how it turns out for you. Did you add your own twist? Serve it with something unexpected? Leave a comment below and let me know—I read every single one. And if you loved it, please share this recipe with a friend who needs a quick dinner win. Happy cooking, friends!
Frequently Asked Questions
Can I use ground turkey or chicken instead of beef?
Absolutely. Just add a tablespoon of olive oil when browning, since poultry is leaner than beef. The flavor will be slightly different, but it still works great.
How can I make this chili thicker?
Let it simmer uncovered for an additional 10-15 minutes. The liquid will reduce and the chili will thicken naturally. You can also mash a few of the diced tomatoes against the side of the pot.
Can I add beans to this recipe?
Sure! If you want beans, add one can of drained and rinsed kidney beans or pinto beans along with the tomatoes. Just note that it won’t be a “no-bean” chili anymore.
How spicy is this chili?
With the recommended amount of cayenne, it’s mild to medium. If you’re sensitive to heat, skip the cayenne entirely. If you like it hot, add an extra teaspoon of chili powder and a pinch more cayenne.
Can I make this in an Instant Pot?
Yes. Use the Sauté function to brown the beef and cook the aromatics, then add the remaining ingredients. Pressure cook on High for 10 minutes, then do a quick release. It’s even faster than the stovetop version.
Pin This Recipe!