Love this? Save it for later!
Share the inspiration with your friends
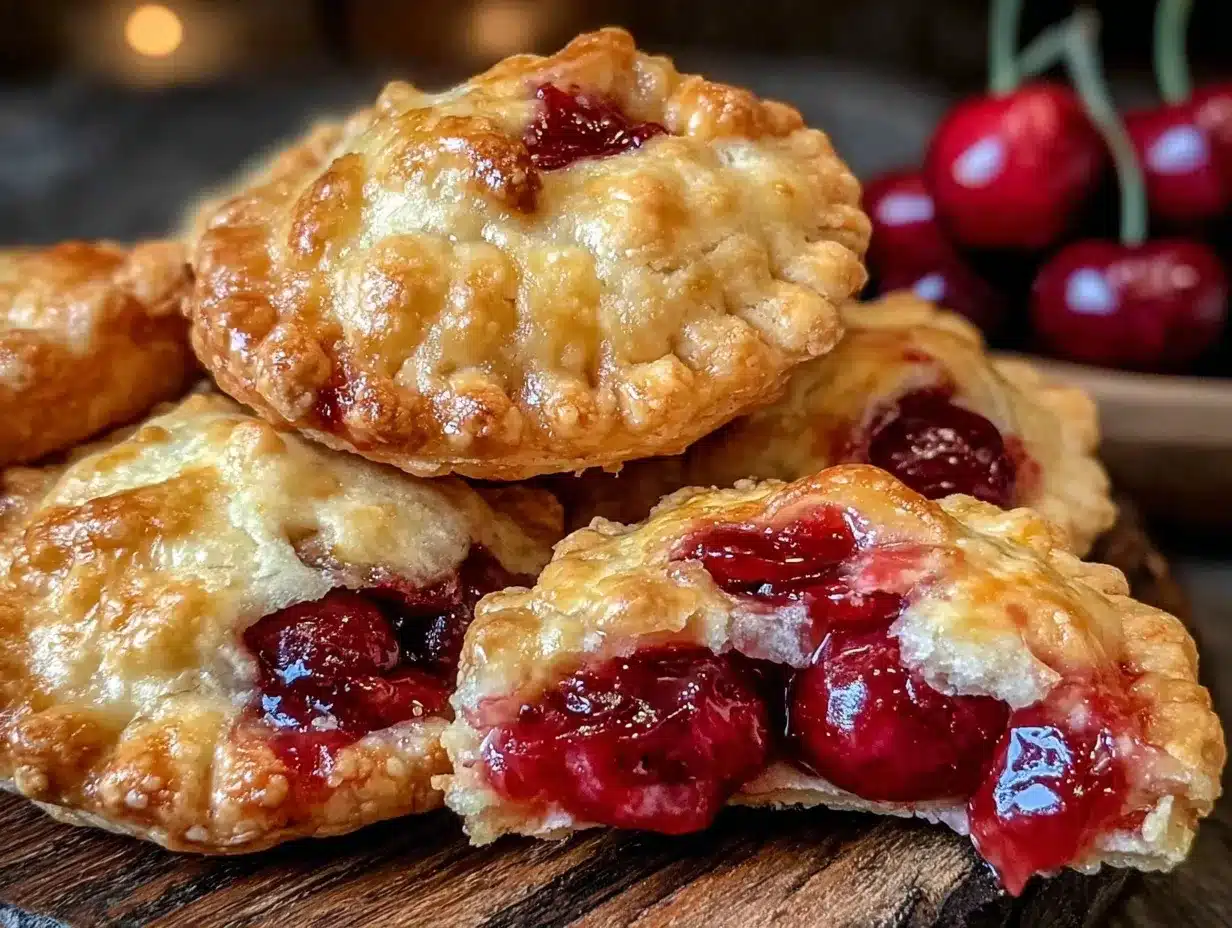
Introduction
“You won’t believe how these little hand pies came to be my go-to summer treat,” my friend Lisa said, sliding a plate across the kitchen counter. It was a lazy Saturday afternoon, and I was helping her prep for a small garden party. I wasn’t expecting much when I saw the simple ingredients laid out, but the moment I bit into one of these Easy Fresh Cherry Hand Pies with Flaky Biscuit Crust, I was hooked.
Honestly, it was one of those unexpected wins in the kitchen. Lisa confessed she whipped them up on a whim when she found a basket of fresh cherries at the farmer’s market, not wanting to fuss with a whole pie. The flaky biscuit crust was a surprise—comforting but light, with just the right amount of buttery layers that melted in your mouth.
Maybe you’ve been there: craving something sweet but not wanting to spend hours baking. These hand pies are exactly that kind of recipe. The kitchen smelled like a cozy bakery after they came out of the oven, and yes, I might have eaten three before the party even started. What I love most is that you don’t have to be a pastry pro to pull these off. I mean, the biscuit dough is forgiving, and the fresh cherry filling is vibrant without any complicated steps.
So, if you’re looking for a fresh summer dessert or a quick sweet snack that feels homemade and special, stick around. Let me tell you why these Easy Fresh Cherry Hand Pies with Flaky Biscuit Crust have a permanent spot in my recipe box—and why they might soon be in yours too.
Why You’ll Love This Recipe
After testing and tweaking this recipe through several summer seasons, I can confidently say it’s a keeper. Here’s why these Easy Fresh Cherry Hand Pies with Flaky Biscuit Crust stand out:
- Quick & Easy: From start to finish, these pies come together in under 45 minutes—perfect for busy afternoons or last-minute get-togethers.
- Simple Ingredients: You probably already have everything on hand, with the fresh cherries being the star. No fancy or hard-to-find items needed.
- Perfect for Seasonal Celebrations: These hand pies shine at summer picnics, casual brunches, or when you just want a sweet bite without the fuss.
- Crowd-Pleaser: Kids, adults, cherry lovers, and even those who usually prefer chocolate all agree—these little pies disappear fast.
- Unbelievably Delicious: The biscuit crust’s flakiness balances perfectly with the juicy cherry filling, creating that comfort food feel but with a fresh twist.
What makes this recipe different? The biscuit crust isn’t your typical pie dough fluff—it’s tender and flaky but doesn’t require chilling for hours. Plus, the filling is made with fresh cherries and just a touch of natural sweetness, so it’s not overly sugary or heavy. It’s honestly the kind of dessert that makes you close your eyes after the first bite and smile.
This recipe isn’t just about flavor; it’s about ease and joy in baking. Whether you’re a beginner or an experienced baker, these hand pies bring a little homemade magic without the hassle. And, if you’re looking for a way to impress guests without turning your kitchen into a mess, this is it.
What Ingredients You Will Need
This recipe uses simple, wholesome ingredients to deliver bold flavor and satisfying texture without the fuss. The fresh cherries provide natural sweetness and tang, while the biscuit crust offers that perfect flaky bite. Most of these are pantry staples, and the fresh cherries can be swapped with frozen if needed (just thaw and drain).
- For the Biscuit Crust:
- 2 cups (250g) all-purpose flour, plus extra for dusting
- 1 tablespoon baking powder (for lightness)
- 1 teaspoon sugar (balances the tartness)
- ½ teaspoon salt
- ½ cup (115g) unsalted butter, cold and cubed (I prefer Kerrygold for richness)
- ¾ cup (180ml) whole milk or buttermilk, cold (buttermilk adds tenderness)
- For the Cherry Filling:
- 2 cups (300g) fresh cherries, pitted and halved (dark Bing cherries work wonderfully)
- ¼ cup (50g) granulated sugar (adjust based on cherry sweetness)
- 1 tablespoon cornstarch (helps thicken the juice)
- 1 teaspoon lemon juice (brightens the flavor)
- ½ teaspoon vanilla extract (optional, adds depth)
- For Assembly & Finishing:
- 1 egg, beaten (for egg wash, gives golden crust)
- Coarse sugar, for sprinkling (adds a bit of sparkle and crunch)
If you’re looking for substitutions, almond flour can replace some of the all-purpose flour for a nuttier crust, though the texture will be different. For dairy-free options, use coconut milk instead of regular milk and a vegan butter substitute.
Equipment Needed
- Mixing bowls – a large one for the dough and a smaller one for the filling
- Pastry cutter or two forks – to cut the butter into the flour (or your fingers if you don’t mind the mess!)
- Rolling pin – for rolling out the biscuit dough evenly (a wine bottle works in a pinch)
- Baking sheet – lined with parchment paper or a silicone mat
- Sharp knife or round biscuit cutter (about 4 inches diameter) – to shape the hand pies
- Pastry brush – to apply the egg wash evenly
- Cooling rack – to let the pies cool without sogginess
I once tried using a food processor to make the dough, but honestly, the texture was a bit off. Hand-mixing with a pastry cutter gives better control over the crumbly, flaky texture. If you don’t have a pastry brush, a clean paintbrush or even your fingertips work for the egg wash. Budget-wise, you can find affordable rolling pins and cutters at most kitchen stores or online.
Preparation Method
- Prepare the Biscuit Dough: In a large bowl, whisk together the all-purpose flour, baking powder, sugar, and salt. Add the cold, cubed butter. Use a pastry cutter or two forks to cut the butter into the dry ingredients until the mixture resembles coarse crumbs with pea-sized butter bits. This step is key for flakiness—small butter pieces create layers as they melt. (10 minutes)
- Add Milk: Pour in the cold milk or buttermilk and stir gently with a spoon or spatula just until the dough comes together. It will be slightly sticky but not wet. Avoid overmixing here to keep the dough tender. (2-3 minutes)
- Chill the Dough (Optional): For easier rolling, wrap the dough in plastic wrap and chill for 20 minutes. I sometimes skip this if I’m in a hurry, but chilling helps the butter firm up again for extra flakiness. (20 minutes)
- Make the Cherry Filling: While the dough chills, combine fresh cherries, sugar, cornstarch, lemon juice, and vanilla extract in a bowl. Toss gently so the cherries are evenly coated and the cornstarch starts absorbing moisture. Let it sit to thicken slightly while you roll out the dough. (10 minutes)
- Roll Out the Dough: Lightly flour your work surface and rolling pin. Roll the dough into about a ¼-inch (6mm) thickness. Use a round biscuit cutter or sharp knife to cut out circles approximately 4 inches (10 cm) in diameter. Gather scraps and gently re-roll to cut more circles. (10 minutes)
- Fill and Seal: Spoon about 1 to 1½ tablespoons (15-22g) of cherry filling onto the center of each dough circle, leaving about ½ inch (1.25 cm) border. Fold the dough over the filling to create a half-moon shape. Press edges with a fork to seal tightly (this keeps the juice from leaking). (15 minutes)
- Apply Egg Wash and Sugar: Transfer hand pies to the lined baking sheet. Brush the tops with beaten egg and sprinkle a little coarse sugar for a lovely golden finish and crunch. (5 minutes)
- Bake: Preheat your oven to 400°F (200°C). Bake the hand pies for 18-22 minutes or until golden brown and bubbling. You’ll know they’re done when the crust is flaky and the cherry filling peeks out slightly. (20 minutes)
- Cool and Serve: Let the pies cool on a wire rack for at least 10 minutes before enjoying. This helps the filling thicken and prevents burns. (10 minutes)
Pro tip: If your filling seems too runny, add a bit more cornstarch next time or bake a few extra minutes. And don’t worry if some filling escapes—it just means extra caramelized cherry goodness on the baking sheet!
Cooking Tips & Techniques
Making flaky crust with biscuit dough is easier than you think, but here are some tips I’ve learned from trial and error:
- Keep Butter Cold: Cold butter is the secret to flaky layers. If it melts too soon, the dough turns dense. I often keep my butter in the freezer until right before use.
- Don’t Overmix: Once you add the liquid, mix just enough to bring the dough together. Overworking develops gluten, making the crust tough.
- Seal Crust Edges Well: Using a fork to crimp the edges prevents filling leaks. If your dough is sticky, wetting your fingers slightly can help seal better.
- Even Thickness: Roll the dough to an even thickness for uniform baking. Thicker spots may stay doughy; thinner spots might burn.
- Watch the Oven: Ovens vary, so start checking around 18 minutes. The crust should be golden and the filling bubbling slightly.
- Multitasking: While the pies bake, clean up or prepare a simple whipped cream or vanilla ice cream to serve alongside—trust me, it’s a game-changer.
One time, I forgot the egg wash and ended up with pale pies. They still tasted great, but the golden color adds that perfect bakery look. So, don’t skip it if you want that extra wow factor!
Variations & Adaptations
There’s plenty of room to make these hand pies your own. Here are some of my favorite twists:
- Dietary: Use gluten-free all-purpose flour blend to make the crust gluten-free. For dairy-free, swap milk with almond or oat milk and use vegan butter.
- Flavor Twists: Add a sprinkle of cinnamon or nutmeg to the cherry filling for warm spice notes. Or mix in a handful of chopped dark chocolate for a luscious surprise.
- Seasonal: Swap cherries for fresh blueberries, peaches, or apples with a touch of lemon zest. Each fruit brings its own magic to the flaky crust.
- Cooking Method: If you’re short on time, try baking these on a pizza stone for a crispier crust, or cook them in an air fryer at 375°F (190°C) for 12-15 minutes, checking halfway.
- Personal Variation: One summer, I added a touch of almond extract to the dough and used frozen cherries straight from the freezer (thawed and drained). The flavor was so nutty and fresh. Definitely a keeper.
Serving & Storage Suggestions
These hand pies are best served warm—right out of the oven or gently reheated. I like to plate them with a scoop of vanilla ice cream or a dollop of whipped cream, but honestly, they’re delightful on their own.
For a casual brunch or picnic, pack them in a container lined with parchment paper. They travel well and are less messy than a full pie.
Store leftovers in an airtight container at room temperature for up to two days, or refrigerate for up to five days. To keep the crust flaky, reheat in a toaster oven or conventional oven at 350°F (175°C) for 5-7 minutes instead of a microwave.
These pies taste even better the next day as the flavors meld, though the crust might lose a bit of its crispness. A quick reheat brings back that fresh-baked feeling.
Nutritional Information & Benefits
Each Easy Fresh Cherry Hand Pie contains approximately:
| Calories | 220 kcal |
|---|---|
| Fat | 11g (mostly from butter) |
| Carbohydrates | 28g |
| Fiber | 2g |
| Sugar | 12g (natural sugars from cherries and added sugar) |
| Protein | 3g |
Cherries are rich in antioxidants and vitamin C, which support immune health and reduce inflammation. Using fresh fruit keeps this dessert lighter and less processed than many store-bought sweets. The biscuit crust’s simple ingredients mean you’re not loading up on preservatives or artificial flavors.
For those watching carbs or calories, you can reduce sugar slightly or try using a sugar alternative. Just keep in mind it might alter the texture or sweetness balance.
Conclusion
If you’re looking for a charming, approachable dessert that doesn’t require pastry expertise or endless ingredients, these Easy Fresh Cherry Hand Pies with Flaky Biscuit Crust are it. They bring together fresh summer fruit with a tender, buttery crust that’s just plain satisfying.
Try customizing the filling or crust to suit your taste, and don’t be afraid to get a little messy sealing those edges—it’s part of the fun! I love making these when I want a quick homemade treat that feels special, and I bet you will too.
Let me know in the comments how your hand pies turn out or if you’ve added your own twist. Sharing your baking wins always makes my day. Happy baking!
Frequently Asked Questions (FAQs)
Can I use frozen cherries instead of fresh?
Yes! Just thaw and drain them well before using. You might need to add a bit more cornstarch if the filling is too runny.
How do I prevent the filling from leaking during baking?
Make sure to seal the edges tightly with a fork and avoid overfilling the pies. Chilling the filled pies for 10 minutes before baking can also help.
Can I make the dough ahead of time?
Absolutely! The dough can be made and refrigerated for up to 2 days or frozen for longer storage. Just bring it back to cool before rolling out.
What size cutter should I use for the hand pies?
A 4-inch (10 cm) diameter cutter works great for individual pies. If you want smaller or larger pies, adjust baking time accordingly.
Are these hand pies freezer-friendly?
Yes, you can freeze baked or unbaked hand pies. Freeze unbaked ones on a tray, then transfer to a bag. Bake from frozen, adding a few extra minutes to the baking time.
For a fun twist, if you enjoy this recipe, you might appreciate trying crispy garlic chicken for a savory meal or blueberry lemon muffins for another fruity baked delight!
Pin This Recipe!

Easy Fresh Cherry Hand Pies with Flaky Biscuit Crust

These easy fresh cherry hand pies feature a tender, flaky biscuit crust and a vibrant cherry filling, perfect for a quick summer dessert or snack. Ideal for beginners, they come together in under 45 minutes with simple ingredients.
- Prep Time: 15 minutes
- Cook Time: 20 minutes
- Total Time: 45 minutes
- Yield: 8 hand pies 1x
- Category: Dessert
- Cuisine: American
Ingredients
- 2 cups (250g) all-purpose flour, plus extra for dusting
- 1 tablespoon baking powder
- 1 teaspoon sugar
- ½ teaspoon salt
- ½ cup (115g) unsalted butter, cold and cubed
- ¾ cup (180ml) whole milk or buttermilk, cold
- 2 cups (300g) fresh cherries, pitted and halved
- ¼ cup (50g) granulated sugar
- 1 tablespoon cornstarch
- 1 teaspoon lemon juice
- ½ teaspoon vanilla extract (optional)
- 1 egg, beaten
- Coarse sugar, for sprinkling
Instructions
- In a large bowl, whisk together the all-purpose flour, baking powder, sugar, and salt. Add the cold, cubed butter. Use a pastry cutter or two forks to cut the butter into the dry ingredients until the mixture resembles coarse crumbs with pea-sized butter bits. (10 minutes)
- Pour in the cold milk or buttermilk and stir gently with a spoon or spatula just until the dough comes together. Avoid overmixing. (2-3 minutes)
- Optional: Wrap the dough in plastic wrap and chill for 20 minutes for easier rolling and flakier crust. (20 minutes)
- While the dough chills, combine fresh cherries, sugar, cornstarch, lemon juice, and vanilla extract in a bowl. Toss gently and let sit to thicken slightly. (10 minutes)
- Lightly flour your work surface and rolling pin. Roll the dough to about ¼-inch thickness. Use a 4-inch round biscuit cutter or sharp knife to cut out circles. Gather scraps and re-roll as needed. (10 minutes)
- Spoon about 1 to 1½ tablespoons of cherry filling onto the center of each dough circle, leaving a ½ inch border. Fold dough over filling to create a half-moon shape. Press edges with a fork to seal tightly. (15 minutes)
- Transfer hand pies to a lined baking sheet. Brush tops with beaten egg and sprinkle with coarse sugar. (5 minutes)
- Preheat oven to 400°F (200°C). Bake hand pies for 18-22 minutes or until golden brown and bubbling. (20 minutes)
- Let pies cool on a wire rack for at least 10 minutes before serving. (10 minutes)
Notes
Keep butter cold for flaky layers. Avoid overmixing dough after adding liquid. Seal edges well with a fork to prevent leaks. Chill dough optionally for easier rolling. If filling is too runny, add more cornstarch or bake a few extra minutes. Egg wash gives a golden crust but can be skipped.
Nutrition
- Serving Size: 1 hand pie
- Calories: 220
- Sugar: 12
- Fat: 11
- Carbohydrates: 28
- Fiber: 2
- Protein: 3
Keywords: cherry hand pies, biscuit crust, fresh cherry dessert, easy hand pies, summer dessert, flaky crust, beginner baking