Love this? Save it for later!
Share the inspiration with your friends
“Last Fourth of July, I found myself staring at a melting mess of bomb pop popsicles on my kitchen counter—classic red, white, and blue drips everywhere, and the kids already begging for something cold and festive. I wasn’t exactly in the mood to turn on the oven or fuss with complicated recipes in the summer heat, so I thought, why not turn those nostalgic popsicles into a cake? Honestly, it sounded a bit crazy at first, but that’s how the Easy No-Bake Bomb Pop Popsicle Cake was born. It was a happy accident, really—half the fun was figuring out how to layer those vibrant colors into a dessert that didn’t require baking or much prep.
You know that feeling when a simple idea turns into everyone’s favorite summer treat? Yeah, that happened. I remember the first bite I took, sticky fingers and all, and thinking, “This is going to be a staple for every backyard barbecue and pool party from now on.” Maybe you’ve been there—scrambling for a dessert that’s as fun as it is easy, but without the usual fuss. This recipe hits that sweet spot, combining childhood nostalgia with grown-up simplicity.
Plus, it’s no secret that the summer heat can zap your motivation to cook, so having a cool, vibrant, and festive dessert that comes together without turning on the oven is a game changer. I mean, who doesn’t love a bomb pop? Now imagine it in cake form—layers of creamy, fruity, icy goodness that’s as much fun to make as it is to eat. It’s colorful, playful, and honestly, it’s stuck around in my recipe rotation ever since that hectic holiday afternoon with the melting mess. Let me tell you, this Easy No-Bake Bomb Pop Popsicle Cake is one you’ll want to make again and again.”
Why You’ll Love This Recipe
Having tried countless summer desserts, I can say with confidence that this Easy No-Bake Bomb Pop Popsicle Cake holds a special place in my heart—and my freezer! Here’s why it’s become a crowd favorite around here:
- Quick & Easy: You can whip this up in under 30 minutes, perfect for those last-minute summer gatherings or when you just want a no-fuss sweet treat.
- Simple Ingredients: No need to hunt down exotic items; most are pantry staples or easy-to-find items at your local store.
- Perfect for Summer Celebrations: Whether it’s Independence Day, a pool party, or just a sunny afternoon, this cake screams festive fun.
- Crowd-Pleaser: Kids and adults alike can’t get enough of the nostalgic flavors and colorful presentation.
- Unbelievably Delicious: The creamy layers combined with the fruity bomb pop surprise create a texture and flavor combo that feels like summer on a plate.
What really makes this recipe stand out is the layering technique that keeps the popsicle flavors distinct yet perfectly melded with the creamy base. I’ve tested it multiple times to get that texture just right—neither too icy nor too heavy. Plus, the no-bake aspect means it’s as easy as assembling and freezing, which is ideal when the thermometer’s climbing. Honestly, every time I serve this, I see those delighted looks, and it reminds me why sometimes the simplest ideas are the best.
What Ingredients You Will Need
This recipe relies on straightforward, wholesome ingredients to create a delightful balance of fruity popsicle flavor and creamy cake texture. You probably already have most of these in your kitchen:
- Bomb Pop Popsicles (red, white, and blue layers) – about 8 to 10 popsicles, slightly softened for layering
- Whipped Topping (like Cool Whip) – 2 cups (approximately 480 ml), for that light, airy creaminess
- Vanilla Pudding Mix – 1 package (3.4 oz / 96 g), instant type works best for quick prep
- Milk – 2 cups (480 ml), preferably whole or 2%, but skim works fine too
- Graham Cracker Crumbs – 1 ½ cups (150 g), for a crunchy, slightly sweet crust base
- Butter – 6 tablespoons (85 g), melted, to bind the crust
- Fresh Strawberries – optional, sliced for garnish or extra fruity layers
For the pudding mix, I usually go with brands like Jell-O or Kozy Shack Instant Vanilla Pudding because they give a smooth, velvety texture without fuss. If you want a dairy-free twist, almond or oat milk works just fine in place of regular milk. The graham cracker crust adds an essential texture contrast to the creamy layers, so don’t skip it! And if you want to get fancy, adding fresh strawberries on top amps up the freshness and color.
Feel free to swap the bomb pop popsicles with any red, white, and blue popsicles if you want to experiment, but the original flavor combo really brings that nostalgic vibe to life.
Equipment Needed
- 9×9 inch (23×23 cm) square baking dish – glass or plastic works; glass helps you see the colorful layers
- Mixing bowls – one for pudding and one for whipped topping
- Electric mixer or whisk – to mix pudding and whipped topping smoothly
- Spatula – for folding and spreading layers evenly
- Measuring cups and spoons – for precise ingredient amounts
If you don’t have a square baking dish, a similar-sized round pan will do—just expect a slightly different shape. When mixing the pudding, an electric mixer speeds things up, but a good whisk and some elbow grease will work just fine. The spatula is a must-have for gentle folding to keep the whipped topping light and fluffy. Honestly, this recipe doesn’t call for any fancy gadgets, making it perfect for kitchens of all levels.
Preparation Method
- Prepare the crust: In a medium bowl, combine the graham cracker crumbs with the melted butter until the mixture resembles wet sand. Press this evenly into the bottom of your 9×9 inch (23×23 cm) baking dish. Use the back of a spoon or your fingers to compact it firmly. Chill in the fridge for 10 minutes while you prepare the pudding. (This step helps the crust set and makes cutting the cake cleaner.)
- Make the pudding layer: In a large bowl, whisk together the vanilla pudding mix and 2 cups (480 ml) of milk. Use an electric mixer on medium speed for about 2 minutes until thickened. Let it sit for 5 minutes to fully set.
- Fold in whipped topping: Gently fold 2 cups (480 ml) of whipped topping into the pudding until fully combined and smooth. Be careful not to overmix; you want to keep it light and airy.
- Layer the popsicles: Remove the bomb pop popsicles from their sticks and slice them into thin discs (about ¼ inch / 0.6 cm thick). Arrange a layer of these slices over the chilled graham cracker crust. This creates the first colorful, fruity layer of the cake.
- Add pudding cream layer: Spoon half of the pudding and whipped topping mixture over the popsicle layer. Spread gently and evenly with a spatula, taking care not to disturb the popsicles underneath.
- Repeat layering: Add another layer of sliced popsicles over the pudding cream, then top with the remaining pudding mixture. Smooth the top layer carefully.
- Freeze: Cover the dish with plastic wrap and freeze for at least 4 hours or overnight. This allows the popsicle layers to freeze again and the cake to firm up for clean slicing.
- Serve: Remove from the freezer about 10 minutes before serving to soften slightly for easier cutting. Garnish with fresh strawberries or extra whipped topping if desired.
Pro tip: If your popsicles are too hard to slice, let them sit out for a minute or two before cutting. Also, using a warm knife (run under hot water and wiped dry) helps get cleaner slices without cracking the cake.
Cooking Tips & Techniques
One thing I learned early on: temperature control is key here. Letting the popsicles soften just enough to slice without melting is a balancing act. If they’re too frozen, you’ll get uneven slices; too soft, and they’ll turn into a puddle. Patience is your friend.
When folding the whipped topping into the pudding, use a gentle hand. Overmixing can deflate the airy texture, which is what gives this cake its dreamy lightness. I usually fold with a spatula in slow, sweeping motions—kind of like tucking in a cozy blanket.
Another tip is about layering. Don’t rush it. Take a moment to arrange the popsicle slices neatly — it’s worth it because the visual impact is half the fun of this cake. Also, pressing the graham cracker crust firmly into the pan helps prevent crumbling when slicing.
Freezing overnight isn’t just about convenience; it really helps the layers meld and makes serving easier. But I’ll admit, I’ve been guilty of sneaking a slice after just a few hours—it’s still delicious, just a bit softer.
Lastly, when slicing, a warm knife is your best tool for neat pieces. Dip your knife in hot water and wipe it dry between cuts. It prevents sticking and keeps the layers intact. Trust me, it’s a small step that makes a big difference.
Variations & Adaptations
Want to switch things up? This recipe is surprisingly flexible:
- Dairy-Free Version: Use coconut whipped topping and almond or oat milk for the pudding. Make sure to pick a dairy-free instant pudding mix or make your own with cornstarch and flavorings.
- Fruit Swaps: Instead of bomb pop popsicles, try layering with strawberry, blueberry, and vanilla popsicles to keep the patriotic colors but with a twist on flavor.
- Adult Twist: Add a splash of vodka or rum to the pudding mixture for a boozy summer dessert. Just be cautious with amounts to keep the pudding texture intact.
- Gluten-Free: Swap the graham cracker crust for gluten-free graham crumbs or finely crushed gluten-free cookies. It works just as well and keeps the cake accessible.
- Extra Crunch: Sprinkle chopped nuts or toasted coconut on top before freezing for an added texture layer.
One personal favorite variation I tried involved adding a thin layer of lemon curd between the pudding and popsicle layers. It added a tangy brightness that cut through the sweetness and brought a little zing to every bite. Definitely worth experimenting if you like that balance.
Serving & Storage Suggestions
The Easy No-Bake Bomb Pop Popsicle Cake is best served chilled straight from the freezer, but letting it sit 5–10 minutes at room temperature softens it just enough for smooth, clean slices. Serve on colorful plates to match the festive vibe!
This cake pairs beautifully with fresh berries or a simple berry compote to complement the fruity popsicle flavors. For beverages, think iced tea, lemonade, or a sparkling punch to keep the summer mood going.
Store leftovers tightly wrapped in plastic wrap or covered with a lid in the freezer for up to a week. When reheating, avoid microwaving—just let it thaw in the fridge for an hour or so before serving again. The flavors actually mellow and meld nicely over a day or two, making it a great make-ahead dessert for parties.
Nutritional Information & Benefits
This popsicle cake is a lighter summer dessert compared to many traditional cakes, thanks to the no-bake method and use of whipped topping and pudding. Per serving (based on 9 servings), you’re looking at roughly:
- Calories: 220-250
- Fat: 12g (mostly from butter and whipped topping)
- Carbohydrates: 28g
- Protein: 3g
Key ingredients like milk provide calcium and vitamin D, while the fresh fruit popsicles contribute hydration and natural sweetness without added sugars. Using instant pudding keeps prep quick and light. For those watching allergens, be mindful of dairy and gluten in the crust, but substitutions are easy.
In my experience, this recipe offers a refreshing alternative to heavy summer desserts while still satisfying sweet cravings. It’s a fun way to share nostalgic flavors with a modern twist that everyone can enjoy.
Conclusion
The Easy No-Bake Bomb Pop Popsicle Cake is one of those rare recipes that makes you smile before you even take a bite. It’s fun, festive, and perfect for cooling off on hot summer days without turning on the oven. I love how it brings back childhood memories while feeling fresh and new.
Honestly, it’s a recipe that invites creativity—you can tweak the flavors, switch up the popsicles, or add your favorite toppings to make it truly yours. I encourage you to give it a try this summer and see how it becomes a favorite in your household too.
If you try this cake, I’d love to hear how you make it your own—drop a comment below or share your photos! There’s nothing better than swapping ideas and hearing about your kitchen wins. Happy summer baking (or, in this case, no baking)!
FAQs
Can I make this cake without bomb pop popsicles?
Yes! You can use any red, white, and blue popsicles or even fruit-flavored popsicles to suit your taste. Just slice them thinly for layering.
How long does the cake need to freeze before serving?
For best results, freeze the cake for at least 4 hours or overnight to allow the layers to firm up and slice cleanly.
Can I prepare this cake ahead of time for a party?
Absolutely! It keeps well frozen for up to a week. Just thaw for about 10 minutes before serving.
Is there a dairy-free version of this recipe?
Yes, swap the whipped topping and milk for dairy-free alternatives like coconut whipped cream and almond or oat milk. Make sure to use a dairy-free pudding mix or homemade pudding.
What’s the best way to slice the cake neatly?
Use a warm knife (dip in hot water and dry) between cuts to prevent sticking and achieve clean slices.
Pin This Recipe!
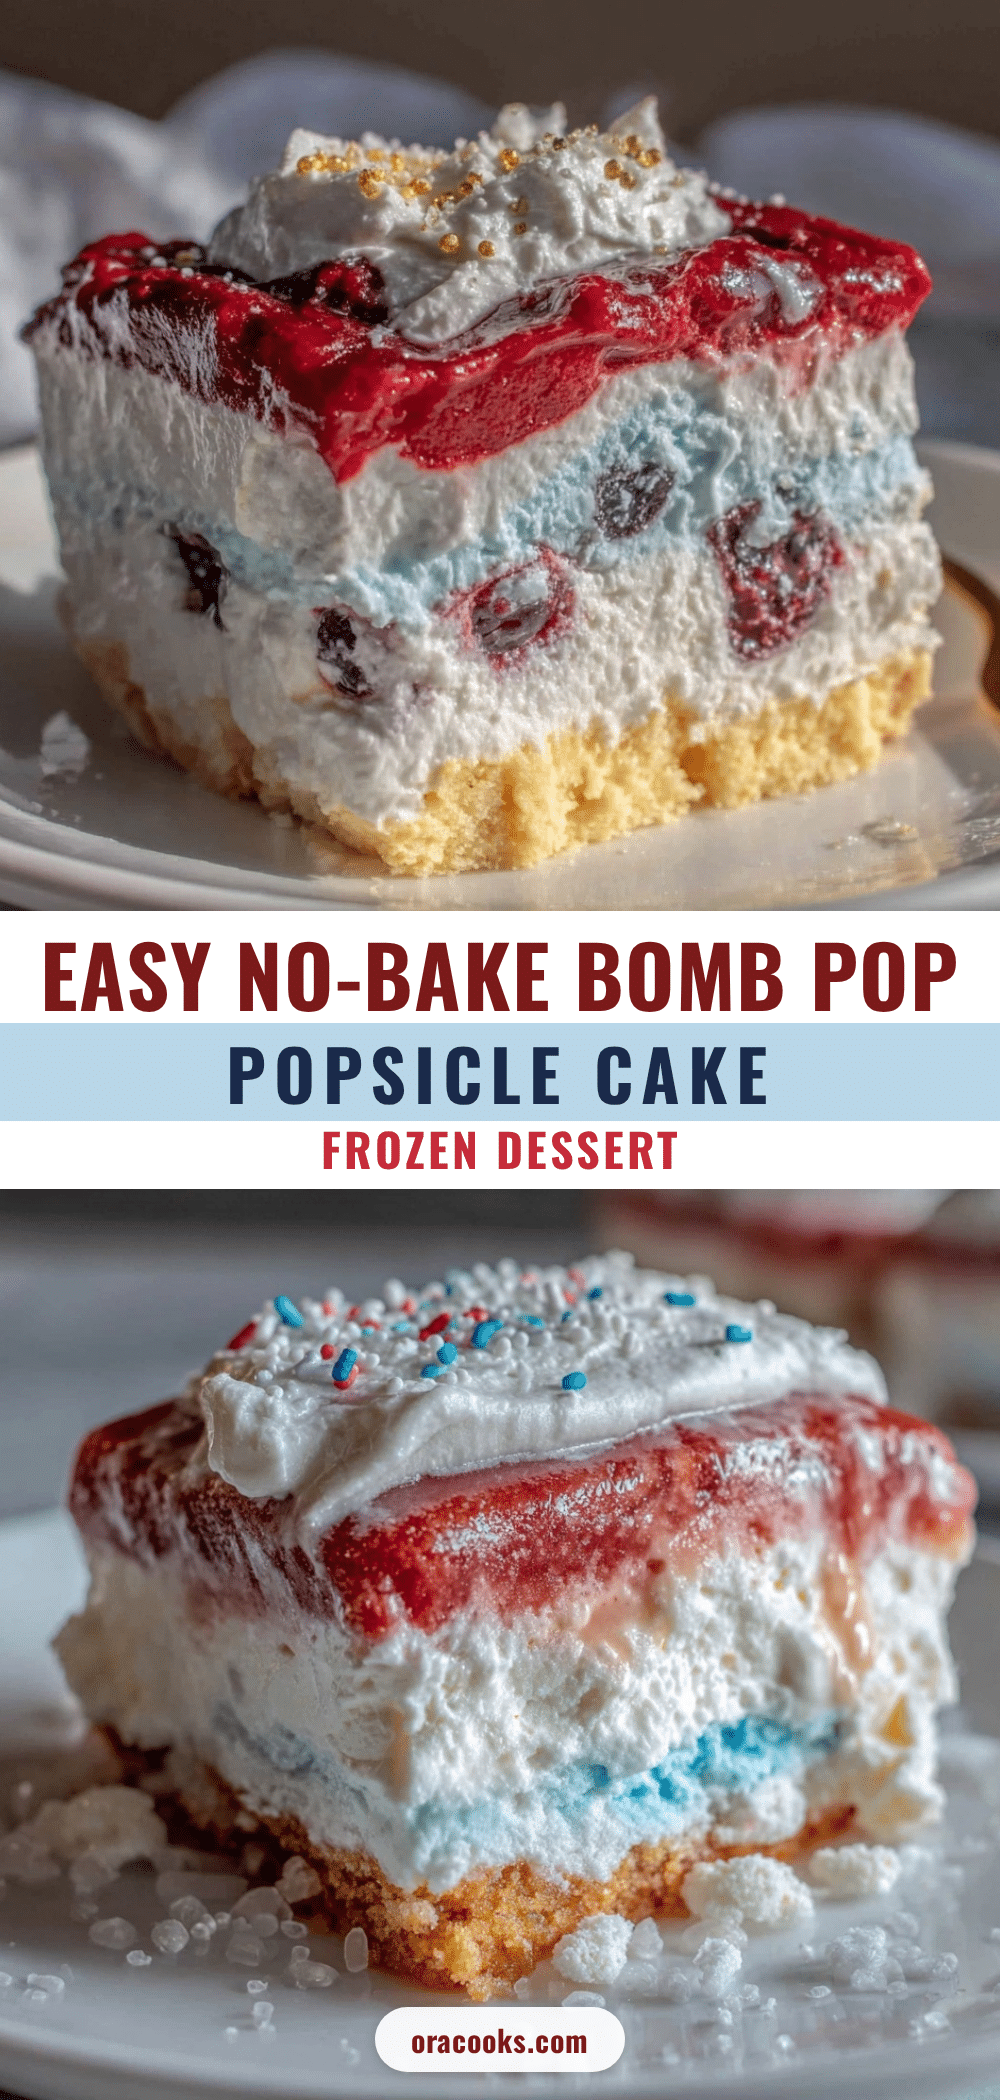
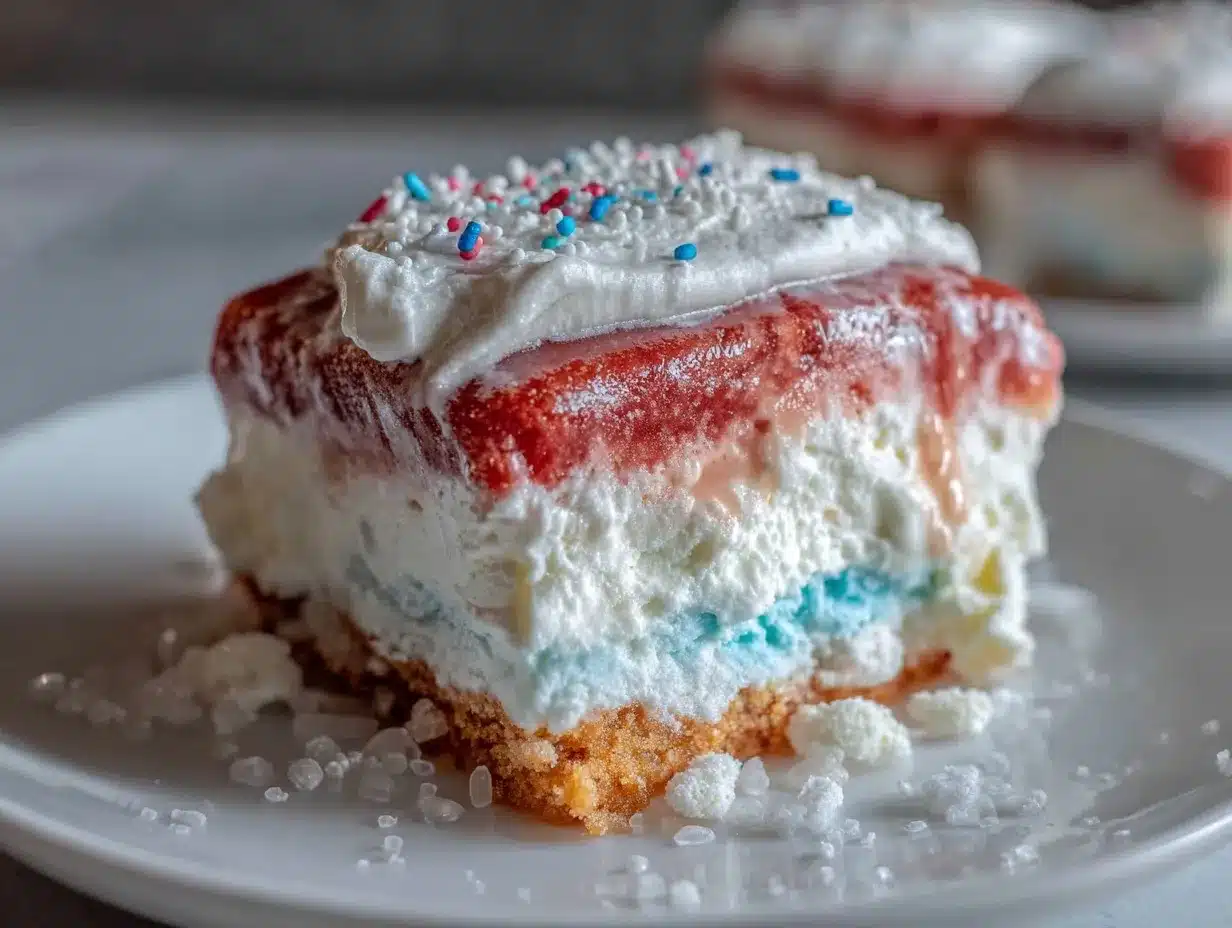
Easy No-Bake Bomb Pop Popsicle Cake
A fun, festive, and easy no-bake summer dessert that layers creamy pudding and whipped topping with colorful bomb pop popsicle slices on a graham cracker crust.
- Prep Time: 20 minutes
- Cook Time: 0 minutes
- Total Time: 4 hours 20 minutes
- Yield: 9 servings 1x
- Category: Dessert
- Cuisine: American
Ingredients
- 8 to 10 Bomb Pop Popsicles (red, white, and blue layers), slightly softened for layering
- 2 cups (16 fl oz) whipped topping (like Cool Whip)
- 1 package (3.4 oz) instant vanilla pudding mix
- 2 cups (16 fl oz) milk (whole or 2%, skim works too)
- 1 ½ cups (5.3 oz) graham cracker crumbs
- 6 tablespoons (0.4 cup) melted butter
- Fresh strawberries (optional, sliced for garnish or extra fruity layers)
Instructions
- Prepare the crust: In a medium bowl, combine graham cracker crumbs with melted butter until mixture resembles wet sand. Press evenly into bottom of a 9×9 inch square baking dish. Chill in fridge for 10 minutes.
- Make the pudding layer: In a large bowl, whisk together vanilla pudding mix and milk. Use electric mixer on medium speed for about 2 minutes until thickened. Let sit for 5 minutes to set.
- Fold in whipped topping: Gently fold whipped topping into pudding until fully combined and smooth, being careful not to overmix.
- Layer the popsicles: Remove bomb pop popsicles from sticks and slice into thin discs (about 1/4 inch thick). Arrange a layer of slices over chilled graham cracker crust.
- Add pudding cream layer: Spoon half of the pudding and whipped topping mixture over popsicle layer. Spread gently and evenly.
- Repeat layering: Add another layer of sliced popsicles, then top with remaining pudding mixture. Smooth top layer.
- Freeze: Cover dish with plastic wrap and freeze for at least 4 hours or overnight.
- Serve: Remove from freezer about 10 minutes before serving to soften slightly. Garnish with fresh strawberries or extra whipped topping if desired.
Notes
Let popsicles soften slightly before slicing to avoid cracking. Use a warm knife dipped in hot water and dried between cuts for clean slices. Freeze overnight for best texture. Can substitute dairy-free ingredients for a dairy-free version. Graham cracker crust can be swapped for gluten-free crumbs for gluten-free option.
Nutrition
- Serving Size: 1 slice (1/9th of ca
- Calories: 235
- Sugar: 18
- Sodium: 150
- Fat: 12
- Saturated Fat: 7
- Carbohydrates: 28
- Fiber: 1
- Protein: 3
Keywords: no-bake cake, bomb pop cake, summer dessert, popsicle cake, easy dessert, patriotic dessert, no oven dessert