Love this? Save it for later!
Share the inspiration with your friends
I was standing in line at the hardware store—of all places—when the plumber ahead of me turned around and started talking about Rice Krispie treats. Not just any Rice Krispie treats, mind you. He was describing a version he made every Halloween that sounded, honestly, too good to be true. Candy corn mixed into the marshmallow mixture, layered on top, pressed in until the whole thing looked like a stained glass window made of sugar. I remember clutching a bag of garden soil and thinking, “This is the last place I expected to find dessert inspiration.”
The plumber’s name was Dave, and he told me he’d been making these for his daughter’s fall parties for over a decade. He wasn’t a fancy cook—he said so himself. But he knew what got people talking at a gathering. And according to Dave, these candy corn Rice Krispie treats disappeared faster than anything else on the dessert table. I scribbled his instructions on the back of a receipt. Let me tell you, I was skeptical. Candy corn can be polarizing, you know? But something about the way he described the colors, the crunch, the way the candy corn softened just a bit in the warm marshmallow—I had to try it.
That first batch I made was a glorious mess. I forgot to butter the spatula, so everything stuck together like concrete. The candy corn melted a little too much in some spots and stayed rock hard in others. But you know what? The flavor was incredible. The sweet, almost honey-like taste of the candy corn mixed with the buttery marshmallow and crispy cereal was this weirdly perfect combination. I tweaked it a few times—added a pinch of salt, let the marshmallows brown just a touch—and landed on a version that, honestly, makes me look like a genius at every party. Maybe you’ve been there, standing over a pan of something that turned out way better than you expected, feeling like you just discovered a secret. That’s this recipe.
Why You’ll Love These Candy Corn Rice Krispie Treats
Let’s be real for a second. When you’re hosting a gathering—whether it’s a Halloween party, a fall potluck, or just a casual get-together with friends—you need a dessert that delivers without stress. These candy corn Rice Krispie treats are that dessert. They’re the kind of thing that makes people stop mid-conversation and ask, “Wait, what’s in this?”
Here’s why this recipe stands out from every other fall dessert you’ll find:
- Incredibly Easy to Make : We’re talking 15 minutes of active prep time. No oven required. No complicated techniques. If you can melt butter and stir, you can make these.
- Simple, Affordable Ingredients : Butter, marshmallows, Rice Krispies cereal, and candy corn. That’s it. You probably already have three of those things in your pantry right now.
- Perfect for Fall Gatherings : These treats scream autumn without being pumpkin-spice everything. They’re festive, colorful, and instantly recognizable as something special for the season.
- Absolute Crowd-Pleaser : I’ve served these at parties where people swore they hated candy corn. Guess what? They went back for seconds. The texture and flavor balance wins everyone over.
- Unbelievably Delicious : The combination of crispy cereal, gooey marshmallow, and slightly softened candy corn creates this texture that’s crunchy, chewy, and melt-in-your-mouth all at once. It’s next-level comfort food.
What makes this version different from just tossing candy corn into a standard Rice Krispie treat recipe? It’s the technique. I figured out the perfect timing for adding the candy corn so it softens without completely melting. I also use a little trick with the butter that gives the whole thing a richer, almost toasted flavor. This isn’t just another recipe—it’s the best version. Trust me on this.
These treats are perfect for impressing guests without any last-minute panic. You can make them a day ahead, they travel beautifully, and they look stunning on a platter. Plus, they’re the kind of dessert that sparks conversation. People always want to know how you got that perfect swirl of orange and yellow. Let them wonder. You’ll know the secret.
What Ingredients You Will Need
This recipe uses simple, pantry-friendly ingredients to create something that feels surprisingly special. The magic is in how they come together, not in fancy ingredients you’ll never use again.
For the Treats
- 3 tablespoons unsalted butter , plus extra for greasing the pan (I recommend using a good quality butter like Kerrygold for the richest flavor—it really does make a difference)
- 1 package (10 ounces) marshmallows , regular size (Jet-Puffed works great, but any brand will do. Avoid mini marshmallows here—they melt too fast and can make the mixture too sticky)
- 6 cups Rice Krispies cereal (or any crispy rice cereal—just make sure it’s fresh and not stale for the best crunch)
- 1 cup candy corn , plus ¼ cup for topping (use fresh candy corn from a recent bag—stale candy corn gets hard and doesn’t soften properly in the marshmallow mixture)
- ¼ teaspoon salt (flaky sea salt like Maldon is ideal, but regular table salt works too. The salt balances the sweetness beautifully)
Ingredient Selection Tips
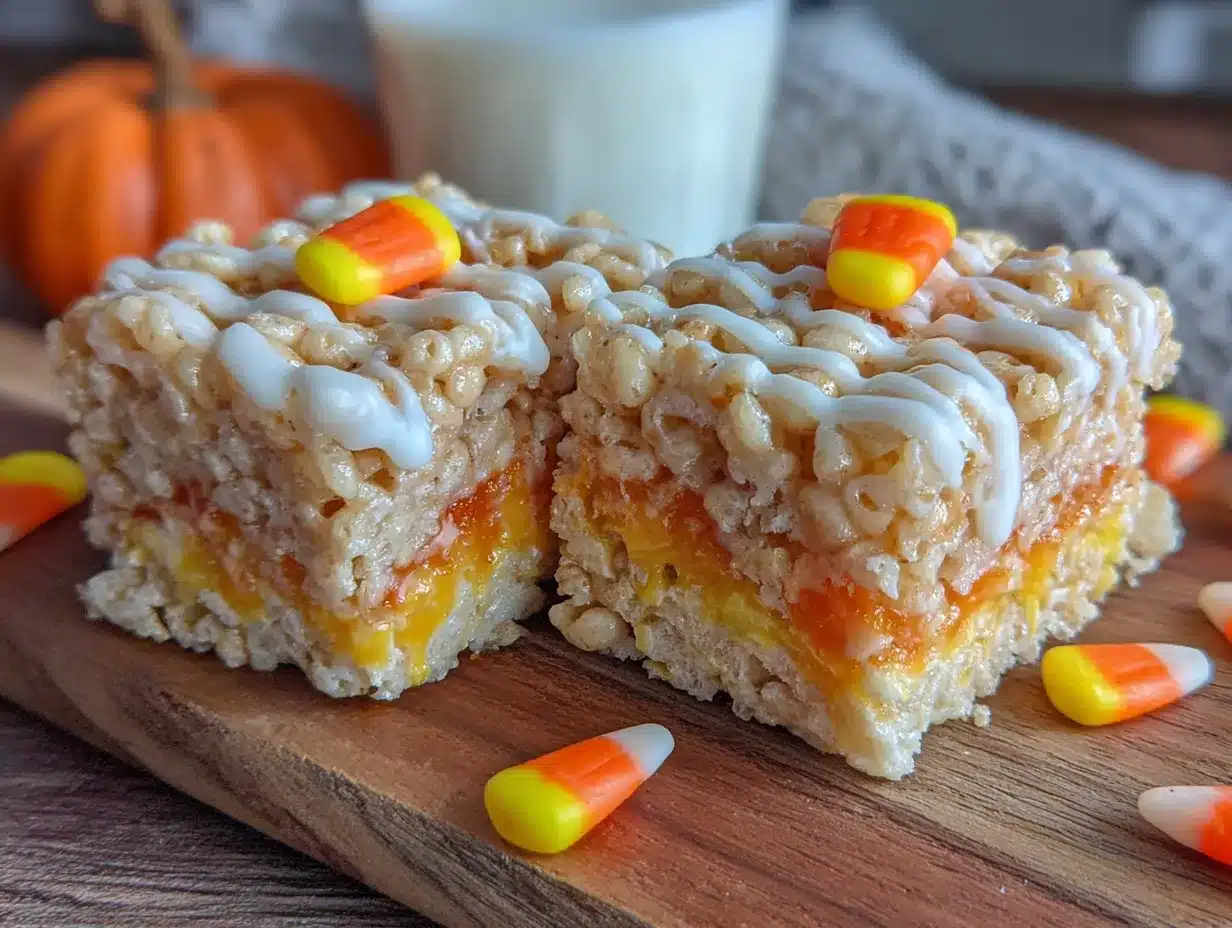
When you’re shopping for candy corn, look for a brand that’s soft and fresh. Brach’s is my go-to because it has that classic creamy texture that works perfectly here. If the candy corn feels rock hard in the bag, it’s probably been sitting on the shelf too long. Give it a gentle squeeze—it should have a little give.
For the marshmallows, I’ve tested this with both name-brand and store-brand versions. The name-brand marshmallows tend to melt more evenly and create a smoother texture. Store-brand ones can sometimes leave little lumps that never fully dissolve. Spend the extra dollar for the good stuff.
The butter is non-negotiable here. Don’t use margarine or a butter substitute. The butter adds richness and helps the marshmallows melt into that silky, glossy texture that makes these treats so addictive. I always use unsalted so I can control the salt level myself.
Substitution Guidance
If you want to make these gluten-free, just use a gluten-free crispy rice cereal. Most standard Rice Krispies are actually not gluten-free in the US, so check the label carefully. There are several good GF options available now.
For a dairy-free version, use a plant-based butter substitute. I’ve had good results with Miyoko’s European Style Cultured Vegan Butter. The texture comes out slightly different—a bit less chewy—but the flavor is still fantastic.
Want to change up the candy corn? Try using the autumn mix that has the little pumpkins and corns together. The pumpkins add a slightly different texture and flavor that’s really fun. Or, for a spooky twist, use the black and orange candy corn that shows up around Halloween.
Equipment Needed
You don’t need a professional kitchen to make these candy corn Rice Krispie treats. In fact, you probably already own everything required. Here’s what you’ll need:
- Large pot or Dutch oven (at least 5-quart capacity—you need room to stir everything without it spilling over the sides)
- 9×13-inch baking pan (a metal pan works best for even cooling, but glass is fine too. Just be careful if you’re using a glass pan—it can shatter if you pour hot marshmallow mixture directly into it. Let it cool slightly first)
- Silicone spatula (this is crucial—a wooden spoon will stick and make a mess. The silicone spatula glides through the marshmallow mixture like a dream)
- Parchment paper (for lining the pan. This makes cleanup so much easier and helps you lift the whole block of treats out for cutting)
- Sharp knife (a chef’s knife or a long serrated knife works best. A dull knife will squish the treats instead of cutting cleanly)
- Measuring cups and spoons (for accuracy—eyeballing it can lead to sticky disasters)
One thing I learned the hard way: always butter your spatula before you start pressing the mixture into the pan. I forgot once and ended up with marshmallow goo welded to my spatula. It was not a fun cleanup. A little butter on the spatula (or a light spritz of cooking spray) makes the pressing step so much easier.
If you don’t have a 9×13 pan, you can use a 9×9 square pan for thicker treats. Just adjust the cooking time slightly—they’ll take a bit longer to cool and set. You can also use a disposable aluminum pan if you’re making these for a party and don’t want to worry about getting your pan back.
Preparation Method
Alright, let’s get to the good part. Here’s exactly how to make these candy corn Rice Krispie treats turn out perfect every single time. Follow these steps, and you’ll be the hero of your next gathering.
- Prep your pan. Line your 9×13-inch baking pan with parchment paper, leaving some overhang on two opposite sides. This creates little handles that let you lift the whole block out later. Lightly butter the parchment paper and the sides of the pan. Set it aside.
- Melt the butter. Place your large pot over medium-low heat. Add the 3 tablespoons of butter and let it melt slowly. Don’t rush this step—medium-low heat is important. If the butter gets too hot, it can brown too quickly and change the flavor. Swirl the pot occasionally as it melts.
- Add the marshmallows. Once the butter is fully melted, pour in the entire bag of marshmallows. Stir constantly with your silicone spatula. The marshmallows will start to puff up and melt. Keep stirring until they’re about 90% melted—you’ll still see some small lumps. This takes about 3-4 minutes. Don’t walk away during this step. Burnt marshmallow is not fixable.
- Remove from heat and add salt. Take the pot off the burner. Stir in the ¼ teaspoon of salt. The residual heat will finish melting the marshmallows completely. Let the mixture sit for about 30 seconds to cool slightly—this is important because if you add the cereal and candy corn right away, the candy corn will melt too much.
- Add the cereal and candy corn. Pour in the 6 cups of Rice Krispies cereal and 1 cup of candy corn. Fold everything together gently but thoroughly. Use a folding motion—lift the mixture from the bottom and bring it over the top. Don’t stir too aggressively or you’ll crush the cereal. You want the candy corn distributed evenly throughout the mixture. It should look like a confetti of orange, yellow, and white.
- Press into the pan. Scrape the mixture into your prepared pan. Now, here’s the trick: lightly butter your spatula (or spray it with cooking spray) and use it to press the mixture into an even layer. Press firmly but don’t compact it too much—you want the treats to hold together without being rock hard. Sprinkle the remaining ¼ cup of candy corn on top and press it in gently so it sticks.
- Let them cool completely. This is the hardest part—waiting. Let the treats cool at room temperature for at least 1 hour. Don’t put them in the refrigerator to speed things up. The rapid cooling can make the treats tough and chewy in a bad way. Patience, my friend.
- Cut and serve. Once the treats are completely cool and firm, use the parchment paper handles to lift the whole block out of the pan. Place it on a cutting board. Use a sharp knife to cut into squares. I like to cut them into 2-inch squares for parties—they’re big enough to feel satisfying but small enough that people can grab one (or three) without feeling guilty.
One more thing: if the knife starts sticking while you’re cutting, wipe it clean with a damp paper towel between cuts. This keeps the edges clean and pretty. You’re going for that perfect Instagram-worthy look, right?
Cooking Tips & Techniques
I’ve made these candy corn Rice Krispie treats more times than I care to count, and let me tell you—I’ve learned some things the hard way. Here’s what I wish someone had told me before my first batch.
Low and slow is the way to go. I know it’s tempting to crank up the heat and melt the marshmallows faster, but don’t do it. High heat makes the marshmallows seize up and turn into a rubbery mess. Keep it on medium-low and be patient. The texture will be so much better. I learned this after a particularly disastrous batch that ended up in the trash. Live and learn, right?
Watch for the “sheen.” When the marshmallow mixture is ready, it will take on a glossy, almost satiny appearance. This is your visual cue that it’s perfectly melted. If it looks dull or matte, you’ve either overcooked it or the heat was too high. Start over if that happens—it’s not worth salvaging.
Don’t overmix. Once you add the cereal and candy corn, work quickly and gently. Overmixing crushes the cereal and makes the treats dense and hard. You want them light and airy with little pockets of candy corn throughout. Fold just until everything is combined, then stop.
Timing is everything for the candy corn. This is the trickiest part. If you add the candy corn while the marshmallow mixture is still screaming hot, it’ll melt into little puddles. If you wait too long, the mixture starts to set and the candy corn won’t incorporate evenly. I’ve found that waiting about 30 seconds after removing the pot from the heat is the sweet spot. The mixture should be warm but not scorching.
Multitasking strategy. Here’s how I organize myself: I measure out the cereal and candy corn into separate bowls before I even start melting the butter. That way, when the marshmallow mixture is ready, I can dump everything in without fumbling. Trust me, you don’t want to be hunting for the measuring cup while your marshmallows are cooling and setting.
Variations & Adaptations
One of the best things about this recipe is how easy it is to customize. Here are some variations I’ve tried and loved.
Chocolate Drizzle Version : After the treats have cooled and set, melt about ½ cup of dark chocolate chips with a teaspoon of coconut oil. Drizzle it over the top in zigzag patterns. Let the chocolate set before cutting. The chocolate adds a rich, slightly bitter contrast to the sweet candy corn. I made this version for a Halloween party last year, and people lost their minds over it.
Peanut Butter Twist : Stir in ¼ cup of creamy peanut butter with the butter at the beginning. It melts right in and adds a nutty depth that pairs beautifully with the candy corn. Just make sure to use a natural peanut butter without added sugar—the sweetness level is already pretty high.
Spiced Autumn Version : Add ½ teaspoon of pumpkin pie spice and ¼ teaspoon of cinnamon to the marshmallow mixture along with the salt. This gives the treats a warm, cozy fall flavor that’s perfect for Thanksgiving or autumn gatherings. The spices don’t overpower the candy corn—they just add a subtle background note that makes people wonder what’s different.
Gluten-Free Adaptation : As I mentioned earlier, use a certified gluten-free crispy rice cereal. I’ve tried several brands, and Nature’s Path Organic Crispy Rice Cereal works beautifully. The texture is almost identical to regular Rice Krispies, so nobody will know the difference.
Vegan Version : Use a vegan marshmallow brand like Dandies (they melt surprisingly well) and a plant-based butter. The candy corn is actually vegan-friendly already—most brands don’t use any animal products. The texture will be slightly different—a bit less stretchy—but the flavor is still spot-on.
Extra Crunch Variation : Replace 1 cup of the Rice Krispies with 1 cup of crushed pretzels. The salty crunch from the pretzels is a fantastic counterpoint to the sweetness. This is my personal favorite variation for adult gatherings where people appreciate that sweet-salty balance.
Serving & Storage Suggestions
These candy corn Rice Krispie treats are incredibly versatile when it comes to serving. Here’s how to make them shine at your next gathering.
Serving Temperature : Serve them at room temperature. Cold treats get hard and lose that wonderful chewy texture. If you’ve stored them in the refrigerator (which I don’t recommend), let them sit out for about 30 minutes before serving. They’re at their absolute best within 24 hours of making them.
Presentation Ideas : Arrange the treats on a large wooden cutting board or a white platter for maximum visual impact. The orange and yellow candy corn pieces will pop against a neutral background. For a Halloween party, I like to scatter a few extra candy corns around the platter and add some small fake spider webs for a spooky touch. For a fall potluck, arrange them on a platter with mini pumpkins and autumn leaves.
What to Serve Alongside : These treats are sweet and rich, so pair them with something to balance that. A warm apple cider or a spiced chai latte is perfect. For a dessert table, they go beautifully with pumpkin bars, caramel apples, or a simple vanilla ice cream. If you’re serving them at a party with other sweets, cut them into smaller pieces so people can sample everything.
Storage Instructions : Store the treats in an airtight container at room temperature. They’ll stay fresh for up to 3 days, though they’re best within the first 48 hours. Layer them with parchment paper between each layer to prevent sticking. Do not store them in the refrigerator—the moisture will make them soggy and ruin the texture.
Freezing Option : You can freeze these treats for up to 2 months. Wrap them individually in plastic wrap, then place them in a freezer-safe bag. To thaw, let them sit at room temperature for about 30 minutes. The texture won’t be quite as perfect as fresh, but they’re still delicious.
Make-Ahead Tip : These are perfect for making the day before your party. In fact, I think they’re even better after sitting overnight—the flavors meld together and the texture becomes perfectly chewy. Just make sure they’re completely cool before storing them in an airtight container.
Nutritional Information & Benefits
Let’s be honest—these candy corn Rice Krispie treats are a treat, not a health food. But that doesn’t mean they can’t fit into a balanced lifestyle. Here’s what you need to know.
Estimated Nutritional Values (per 2-inch square) :
- Calories: 185
- Total Fat: 5g
- Saturated Fat: 3g
- Carbohydrates: 36g
- Sugar: 22g
- Protein: 1g
- Sodium: 135mg
Health Highlights : The Rice Krispies cereal is fortified with iron and B vitamins, so there’s a tiny nutritional silver lining. The butter provides a small amount of vitamin A. And hey, candy corn does have a little bit of honey and sugar—it’s not entirely devoid of redeeming qualities. But let’s be real: you’re eating these for the joy, not the nutrients.
Dietary Considerations : This recipe contains dairy (butter) and gluten (unless you use a GF cereal). The candy corn is typically dairy-free, egg-free, and vegan. If you have allergies, always check the labels on your specific brands. Some candy corn brands may be processed in facilities that handle nuts or other allergens.
My Personal Perspective : I believe in balance. These treats are a celebration food—something you make for special occasions and gatherings. They’re not an everyday snack, and that’s okay. The joy they bring to a party, the smiles on people’s faces when they take that first bite—that’s worth every calorie. Just enjoy them mindfully and savor every bite.
Conclusion: Your New Party Signature
These candy corn Rice Krispie treats have become my go-to dessert for every fall gathering, and I have a feeling they’ll become yours too. They’re easy enough to whip up on a whim, impressive enough to steal the show, and delicious enough to have people asking for the recipe every single time. Honestly, what more could you want from a dessert?
The beauty of this recipe is how adaptable it is. Maybe you’ll stick with the classic version, or maybe you’ll try the chocolate drizzle or the peanut butter twist. Maybe you’ll add a sprinkle of flaky sea salt on top like I sometimes do, or maybe you’ll go wild with the spiced autumn version. The point is, this recipe is a starting point—a canvas for your own creativity. Make it your own, and don’t be afraid to experiment.
I’d love to hear how these turn out for you. Did you try a variation I haven’t thought of? Did your guests go crazy for them? Drop a comment below and let me know. And if you’re feeling generous, share this recipe with a friend who loves hosting as much as you do. After all, the best recipes are the ones we share. Happy cooking, and here’s to many memorable gatherings ahead!
Frequently Asked Questions
Can I use mini marshmallows instead of regular ones?
I don’t recommend it. Mini marshmallows melt much faster and can make the mixture too sticky and dense. Regular marshmallows give you better control over the texture. If you only have minis on hand, reduce the amount to about 7 ounces and watch them carefully as they melt.
Why did my candy corn melt completely?
This usually happens when the marshmallow mixture is too hot when you add the candy corn. Let the mixture cool for about 30 seconds after removing it from the heat. Also, make sure your candy corn is fresh—stale candy corn melts at a lower temperature and can turn into a puddle.
Can I make these treats ahead of time for a party?
Absolutely! In fact, they’re even better the next day. Make them the day before your event, let them cool completely, and store them in an airtight container at room temperature. They’ll stay fresh and delicious for up to 3 days.
How do I cut clean squares without everything sticking?
Use a sharp knife and wipe it clean with a damp paper towel between cuts. You can also lightly spray your knife with cooking spray before cutting. For the cleanest edges, chill the treats in the refrigerator for 15 minutes before cutting—just don’t leave them in there too long or they’ll get hard.
Can I double this recipe for a larger crowd?
Yes, but don’t try to double it in the same pot. The mixture needs room to expand as the marshmallows melt. Use a larger pot (at least 8-quart capacity) and a 12×17-inch sheet pan for the double batch. Increase the cooling time by about 30 minutes since the treats will be thicker.
Pin This Recipe!
Best Candy Corn Rice Krispie Treats: Easy Fall Dessert

These candy corn Rice Krispie treats are an easy, no-bake fall dessert that combines crispy cereal, gooey marshmallow, and slightly softened candy corn for a crowd-pleasing treat perfect for Halloween parties and autumn gatherings.
- Prep Time: 15 minutes
- Cook Time: 5 minutes
- Total Time: 1 hour 20 minutes
- Yield: 12 servings 1x
- Category: Dessert
- Cuisine: American
Ingredients
- 3 tablespoons unsalted butter, plus extra for greasing the pan
- 1 package (10 ounces) marshmallows, regular size
- 6 cups Rice Krispies cereal
- 1 cup candy corn, plus ¼ cup for topping
- ¼ teaspoon salt
Instructions
- Prep your pan. Line your 9×13-inch baking pan with parchment paper, leaving some overhang on two opposite sides. Lightly butter the parchment paper and the sides of the pan. Set it aside.
- Melt the butter. Place your large pot over medium-low heat. Add the 3 tablespoons of butter and let it melt slowly. Swirl the pot occasionally as it melts.
- Add the marshmallows. Once the butter is fully melted, pour in the entire bag of marshmallows. Stir constantly with your silicone spatula until they’re about 90% melted, about 3-4 minutes.
- Remove from heat and add salt. Take the pot off the burner. Stir in the ¼ teaspoon of salt. Let the mixture sit for about 30 seconds to cool slightly.
- Add the cereal and candy corn. Pour in the 6 cups of Rice Krispies cereal and 1 cup of candy corn. Fold everything together gently but thoroughly.
- Press into the pan. Scrape the mixture into your prepared pan. Lightly butter your spatula and use it to press the mixture into an even layer. Sprinkle the remaining ¼ cup of candy corn on top and press it in gently.
- Let them cool completely. Let the treats cool at room temperature for at least 1 hour.
- Cut and serve. Once the treats are completely cool and firm, use the parchment paper handles to lift the whole block out of the pan. Use a sharp knife to cut into squares.
Notes
For best results, use fresh candy corn that is soft and pliable. Let the marshmallow mixture cool for about 30 seconds before adding the candy corn to prevent it from melting completely. Butter the spatula before pressing the mixture into the pan to prevent sticking. Store in an airtight container at room temperature for up to 3 days.
Nutrition
- Serving Size: 1 square (2-inch)
- Calories: 185
- Sugar: 22
- Sodium: 135
- Fat: 5
- Saturated Fat: 3
- Carbohydrates: 36
- Protein: 1
Keywords: candy corn, Rice Krispie treats, fall dessert, Halloween treats, no-bake dessert, easy dessert, party dessert


