Love this? Save it for later!
Share the inspiration with your friends
My buddy Marco asked why I couldn’t just throw everything on a sheet pan and call it a day. I was in the middle of explaining the proper way to caramelize peppers and onions in stages—the patience required, the careful heat management—when I stopped mid-sentence. I mean, honestly, why couldn’t I? I had been overcomplicating this recipe for years, cooking each component separately like some sort of kitchen perfectionist. That Tuesday afternoon, with a cold rain tapping against my apartment windows and the smell of Italian sausage already filling the air, I decided to let Marco’s simple logic win. And let me tell you, it was the best cooking decision I made all year.
The sheet pan method changed everything. The peppers softened in the sausage drippings, the onions turned jammy and sweet, and the whole thing came together with about half the dishes and twice the flavor. I remember standing there watching the cheese bubble over the edges of those slider buns, thinking about how many times I had made this recipe the hard way. The truth is, sometimes the best cooking advice comes from someone who doesn’t overthink things—someone who just asks, “Why not make it easier?”
These Ultimate Cheesy Sausage and Pepper Tailgate Sliders have become my go-to for game days, backyard hangs, and honestly, any Tuesday that needs a little excitement. They’re the kind of sandwich that makes people stop talking mid-conversation and just nod while they chew. Maybe you’ve been there—standing over a hot stove, juggling three pans, wondering why a simple sandwich recipe feels so complicated. I get it. That’s exactly why I’m sharing this version. It’s simpler, cheesier, and somehow even more delicious than the fussy original.
Why You’ll Love This Recipe
Look, I’ve tested this recipe at least a dozen times across four different tailgates and two very competitive game-day parties. I can say with complete confidence that these sliders disappear faster than anything else on the table. Here is why this version stands out from every other sausage and pepper sandwich you have tried:
- Sheet Pan Magic: Everything cooks on one pan. The sausage drippings season the peppers, the peppers soften perfectly, and you barely have any dishes to wash. This is not just convenient—it actually makes the flavors meld together better.
- Simple Ingredients: You likely have most of these items in your kitchen right now. No fancy grocery store trips, no obscure spices that you will use once and forget about. Just good, honest ingredients that work together.
- Perfect for Tailgating: These sliders hold up beautifully in a cooler, reheat like a dream, and feed a crowd without any last-minute fuss. You can assemble them ahead of time and pop them in the oven when guests arrive.
- Crowd-Pleaser Guaranteed: I have served these to picky eaters, spice-avoiders, and serious foodies. Every single person went back for seconds. The combination of melty provolone, savory sausage, and sweet roasted peppers is basically irresistible.
- Unbelievably Cheesy: We are not skimping here. A generous layer of provolone, a sprinkle of parmesan, and a buttery garlic topping that crisps up into pure gold. This is comfort food at its finest.
What makes this recipe different is the technique. Instead of cooking everything separately and assembling cold components, we let the sausage and peppers roast together on one sheet pan. The juices from the sausage baste the vegetables, creating this incredible depth of flavor that you simply cannot get from stovetop cooking. Then we pile everything onto soft slider buns, blanket them with cheese, and bake until bubbly and golden. It is the kind of sandwich that makes you close your eyes after the first bite—the kind that tastes like victory, even if your team is losing.
What Ingredients You Will Need
This recipe relies on simple, high-quality ingredients that deliver bold flavor without any complicated techniques. Most of these are pantry staples or easy to find at any grocery store. Here is everything you need and why each ingredient matters:
For the Sausage and Peppers
- 2 pounds sweet Italian sausage links (I prefer Johnsonville or your local butcher’s house-made sausages—the fat content is key for flavor)
- 3 large bell peppers, sliced into thin strips (use a mix of red, yellow, and orange for sweetness; green peppers work but are slightly more bitter)
- 2 medium yellow onions, thinly sliced (sweet onions like Vidalia are amazing here, but any yellow onion will caramelize beautifully)
- 3 tablespoons olive oil (extra virgin adds nice flavor, but regular works fine too)
- 1 teaspoon salt (kosher salt is best for even seasoning)
- 1/2 teaspoon black pepper, freshly ground
- 1 teaspoon dried oregano (adds that classic Italian-American flavor profile)
- 1/2 teaspoon garlic powder (not fresh garlic here—it burns on the sheet pan)
For the Sliders
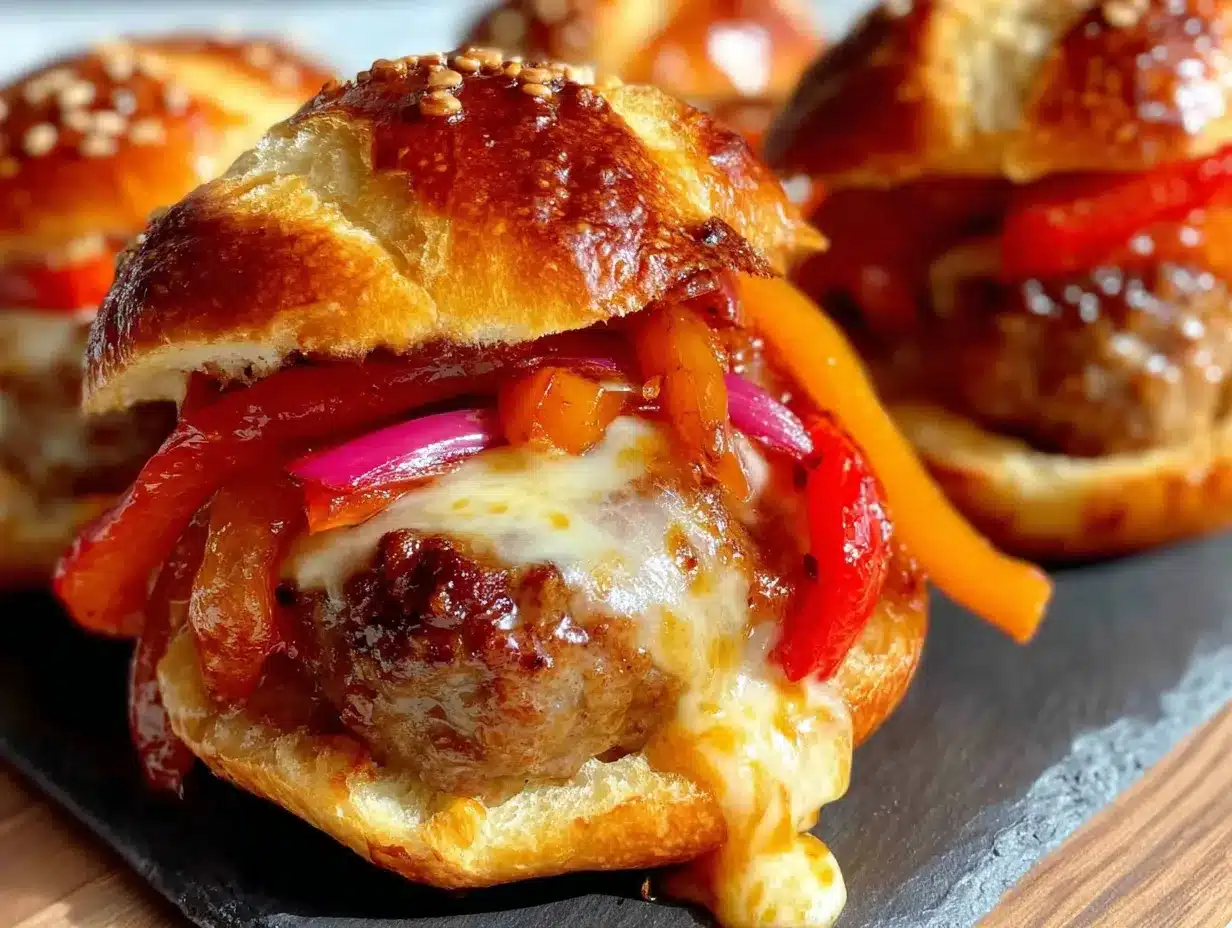
- 12 slider buns (King’s Hawaiian are my absolute favorite—their slight sweetness balances the savory sausage perfectly; look for the package that says “Savory Butter” or “Original”)
- 8 slices provolone cheese (buy the good stuff from the deli counter, not the pre-packaged slices—it melts so much better)
- 1/2 cup grated parmesan cheese (the real thing in a wedge, not the green can—trust me on this one)
- 1/4 cup unsalted butter, melted
- 1 tablespoon Dijon mustard (adds a tangy kick that cuts through the richness)
- 1 tablespoon poppy seeds (optional but traditional for slider toppings)
- 1 teaspoon garlic powder (for the butter topping)
- 1 teaspoon dried parsley (for color and freshness)
Ingredient Selection Tips: Look for sausage links that feel firm but have some give—avoid anything that looks dry or shriveled. For the peppers, choose ones that feel heavy for their size with smooth, glossy skin. If you can find Italian frying peppers (sometimes called cubanelle peppers), mix them in with the bell peppers for an even more authentic flavor. And please, please buy whole milk provolone sliced fresh from the deli. The pre-shredded stuff has anti-caking agents that prevent proper melting, and you deserve better than that.
Substitution Guidance: Use chicken or turkey sausage for a lighter option—just add an extra tablespoon of olive oil since they have less fat. For a gluten-free version, use your favorite GF slider buns and check that your sausages are GF certified. If you cannot find provolone, mozzarella works in a pinch, though it will be less flavorful. Dairy-free cheese lovers can use your favorite plant-based provolone-style slices, but the texture will be slightly different.
Equipment Needed
You do not need a professional kitchen to make these slippers. Here is what you will need and a few tips from my own trial and error:
- Large rimmed baking sheet (half-sheet size, 18×13 inches—the rim is important to catch all those delicious juices)
- Parchment paper or aluminum foil (for easy cleanup; I prefer parchment because it does not stick)
- Sharp chef’s knife (for slicing peppers and onions; a dull knife makes this job miserable)
- Cutting board (preferably large enough to hold all your prepped vegetables)
- Small saucepan or microwave-safe bowl (for melting the butter topping)
- Pastry brush (for brushing the butter mixture onto the buns; a silicone one works great)
- Aluminum foil (for tenting the sliders during the final bake)
Budget-Friendly Tip: If you do not have a rimmed baking sheet, a 9×13 baking dish works in a pinch—just arrange the sausages in a single layer and cook in batches if needed. And honestly, I have used a butter knife to spread the garlic butter topping when I could not find my pastry brush. It is not pretty, but it works. The sliders do not care about your tools, only your effort.
Preparation Method
Let me walk you through this step by step. I have made this recipe enough times to know exactly where things can go wrong and how to fix them. Follow these steps, and you will have the best sliders of your life.
- Preheat your oven to 400°F. Line a large rimmed baking sheet with parchment paper or foil. This is not optional—the cleanup alone makes it worth it. While the oven heats, take your sausages out of the fridge to come to room temperature for about 15 minutes.
- Prep the vegetables. Slice your bell peppers into thin strips, about 1/4 inch wide. Do the same with the onions. I like to cut the onions in half through the root end first, then slice them into half-moons. This gives you even pieces that cook at the same rate. Toss the peppers and onions on the baking sheet with the olive oil, salt, pepper, oregano, and garlic powder. Spread them into an even layer.
- Arrange the sausages. Nestle the sausage links into the pepper and onion mixture, pressing them down slightly so they are surrounded by vegetables. Do not worry if they touch—they will shrink as they cook. Space them evenly so the heat circulates properly.
- Roast for 25 minutes. Place the sheet pan in the oven and roast until the sausages are browned and cooked through (internal temperature of 160°F). The peppers should be soft and starting to caramelize at the edges. Halfway through, use tongs to flip the sausages and stir the vegetables for even cooking.
- Rest and slice. Remove the sheet pan from the oven and transfer the sausages to a cutting board. Let them rest for 5 minutes—this keeps the juices inside. Then slice each link on a diagonal into 3-4 pieces. The diagonal cut gives you more surface area for the cheese to cling to, and honestly, it looks prettier.
- Prepare the buns. While the sausages rest, slice the entire package of slider buns in half horizontally. Keep them connected—you want one giant top and bottom slab. Place the bottom half on a clean baking sheet or in a 9×13 dish.
- Layer the filling. Spread the roasted peppers and onions evenly over the bottom buns. Arrange the sliced sausages on top, distributing them so every slider gets a good amount. Lay the provolone slices over the sausages, overlapping slightly to cover completely.
- Make the garlic butter. In a small bowl, mix the melted butter, Dijon mustard, poppy seeds, garlic powder, and dried parsley. Brush this mixture generously over the cut side of the top buns. Sprinkle the grated parmesan over the butter mixture.
- Bake the sliders. Place the top buns on the sliders (butter side up). Bake at 350°F for 12-15 minutes, until the cheese is melted and bubbly and the tops are golden brown. If the tops brown too quickly, tent loosely with foil for the last 5 minutes.
- Rest and serve. Let the sliders rest for 5 minutes before cutting them apart. This allows the cheese to set slightly so it does not all slide off when you bite into it. Use a sharp knife to cut along the bun seams, then serve warm.
Sensory Cues: When the sausages are done, they should feel firm to the touch but still have a little give. The peppers should be wrinkled at the edges and smell sweet and slightly smoky. When you pull the sliders out of the oven, the cheese should be bubbling around the edges, and the tops should be a deep golden brown with visible specks of parsley and poppy seeds. If you tap the top bun, it should sound slightly hollow—that is how you know it is perfectly toasted.
Cooking Tips & Techniques
I have made every mistake you can imagine with this recipe. Here is what I learned so you do not have to repeat my errors:
Do not overcrowd the pan. If your baking sheet is too small, the vegetables will steam instead of roasting. You want them to caramelize, which requires space between the pieces. If you are doubling the recipe, use two sheet pans and rotate them halfway through.
Watch the sausage fat. Italian sausages release a surprising amount of fat as they cook. This is actually a good thing—it seasons the peppers and onions beautifully. But if you see pools of excess fat after roasting, use a paper towel to blot some of it away before assembling the sliders. Too much grease will make the bottom buns soggy.
Temperature matters. Letting the sausages rest before slicing is not optional. I learned this the hard way when I cut into a hot sausage and watched all the juices run out onto the cutting board. Five minutes of patience saves you from dry, sad meat.
Toast the buns first. Here is a pro tip I discovered by accident: if you have extra time, toast the cut sides of the buns under the broiler for 1-2 minutes before assembling. This creates a barrier that prevents the bottom buns from getting soggy from the roasted vegetables. It is an extra step, but it makes a noticeable difference.
Multitask like a pro. While the sausages and peppers roast, prep your butter topping and grate your parmesan. While the assembled sliders bake, clean up your cutting board and knives. This recipe moves fast, and having everything ready makes the process feel effortless.
Variations & Adaptations
One of the best things about this recipe is how adaptable it is. Here are some variations I have tried and loved:
Spicy Sausage Version: Use hot Italian sausage instead of sweet, and add a pinch of red pepper flakes to the vegetables before roasting. For extra heat, slice a jalapeño or two and scatter the rings over the sliders before adding the cheese. My brother-in-law requests this version every time he visits, and he is not shy about eating four of them in one sitting.
Low-Carb Option: Skip the buns entirely and serve the sausage and pepper mixture over cauliflower rice or a bed of mixed greens. You can also stuff the mixture into hollowed-out bell pepper halves and bake until the peppers are tender. It is not quite the same experience, but the flavors are still incredible.
Vegetarian Adaptation: Replace the sausage with plant-based Italian sausages (I like the Field Roast brand for this) and add a can of drained and rinsed cannellini beans to the sheet pan during the last 10 minutes of roasting. The beans absorb all those roasted pepper flavors and add a creamy texture that mimics the sausage fat.
Cheese Swap: Not a provolone fan? Try smoked gouda for a deeper, smokier flavor, or pepper jack if you want extra heat. I once made these with fontina and fresh mozzarella, and it was like an elevated version of a classic Italian sub. Experiment—cheese is forgiving.
Make It a Meal: Serve these sliders with a simple arugula salad dressed with lemon juice and olive oil. The peppery greens cut through the richness of the cheese and sausage perfectly. Or go full comfort mode with a side of crispy seasoned fries and a cold beer.
Serving & Storage Suggestions
These sliders are best served warm, straight from the oven, when the cheese is still stretchy and the buns are perfectly toasted. I like to arrange them on a large platter with a pile of napkins nearby—trust me, people will need them. For tailgates, keep them warm in a slow cooker set to low, or wrap them in foil and place them in a cooler with a towel on top. They will stay hot for up to an hour this way.
Storage Instructions: Leftover sliders (if you have any) can be stored in an airtight container in the refrigerator for up to 3 days. The buns will soften slightly, but the flavors actually get better as they meld together overnight. To reheat, wrap individual sliders in foil and warm them in a 350°F oven for 10 minutes. The microwave works in a pinch, but the buns will be soft rather than crispy.
Freezer Tips: You can freeze the fully assembled but unbaked sliders for up to 2 months. Assemble them in a disposable aluminum pan, wrap tightly in plastic wrap and then foil, and freeze. When ready to bake, thaw overnight in the refrigerator, then bake as directed, adding 5-10 minutes to the cooking time. This is my secret weapon for unexpected guests.
Flavor Development: Here is something interesting—the sliders actually taste even better the next day. The roasted pepper juices soak into the buns, the cheese sets into a cohesive layer, and all the flavors marry together. If you can resist eating them all at once, pack some for lunch the next day. You will thank me.
Nutritional Information & Benefits
Each slider (based on 12 servings) contains approximately 320 calories, 18g protein, 22g carbohydrates, 19g fat, and 2g fiber. These are estimates and will vary based on the specific brands and ingredients you use.
Beyond the numbers, there is some genuine nutritional value here. Bell peppers are packed with vitamin C—more than an orange, actually. They also contain carotenoids that support eye health and reduce inflammation. Onions provide prebiotic fibers that feed your gut bacteria, and the garlic in the butter topping has compounds that support immune function. The provolone cheese adds calcium and protein, while the sausage provides B vitamins and iron.
Is this health food? No. But it is real food made with whole ingredients, and there is value in that. These sliders are satisfying in a way that processed snacks simply cannot match. One or two of these with a side salad or some fresh fruit makes for a balanced meal that actually fills you up and keeps you satisfied.
Dietary Considerations: This recipe contains gluten (buns), dairy (cheese, butter), and pork (sausage). For gluten-free, use GF buns. For dairy-free, use plant-based cheese and butter alternatives. For pork-free, substitute chicken or turkey sausage. Always check labels if cooking for someone with allergies.
Conclusion
These Ultimate Cheesy Sausage and Pepper Tailgate Sliders are everything I want in a crowd-pleasing recipe: simple enough for a Tuesday, impressive enough for game day, and delicious enough to make everyone ask for the recipe. The sheet pan method changed how I approach this dish entirely, and I hope it does the same for you. There is something deeply satisfying about pulling a single pan out of the oven and knowing you just created magic with minimal effort.
I would love to hear how these turn out for you. Did you try a variation? Use a different cheese? Feed them to a skeptical crowd? Drop a comment below and let me know. And if you are looking for more game-day inspiration, check out my crispy buffalo chicken dip or these loaded nacho bites for another guaranteed hit. Until next time, happy cooking—and may your team win and your sliders stay hot.
Frequently Asked Questions
Can I make these sliders ahead of time?
Absolutely. You can assemble the sliders completely (without baking) up to 24 hours in advance. Cover and refrigerate, then bake just before serving. Add 5-7 minutes to the baking time since everything will be cold from the fridge. This is actually my preferred method for parties—it takes all the stress out of timing.
Can I use ground sausage instead of links?
You can, but the texture will be different. Brown the ground sausage in a skillet, breaking it into crumbles, then mix it with the roasted peppers and onions before layering onto the buns. The flavor will still be great, but you lose that satisfying bite of a whole sausage piece. If you go this route, drain off excess fat before assembling.
How do I keep the bottom buns from getting soggy?
This is the most common question I get. Two tricks: First, let the roasted peppers and onions cool for 5 minutes before piling them onto the buns—excess steam is the enemy of crispy bread. Second, if you have time, toast the cut sides of the bottom buns under the broiler for 1-2 minutes before assembling. This creates a protective barrier.
Can I grill the sausages and peppers instead of roasting?
Yes, and this is fantastic for summer tailgates. Grill the sausages over medium heat until cooked through, about 12-15 minutes, turning occasionally. Meanwhile, grill the peppers and onions in a grill basket or on a sheet of foil with some olive oil. Assemble the sliders as directed and finish them in a 350°F oven or on the grill (indirect heat) until the cheese melts.
What if I cannot find slider buns?
No problem at all. Use dinner rolls, small ciabatta rolls, or even cut hot dog buns into thirds. King’s Hawaiian rolls are the gold standard, but any soft, slightly sweet roll will work. If using larger buns, you might need to adjust the cooking time slightly and add more filling per sandwich. The recipe is flexible—do not let bun availability stop you.
Pin This Recipe!
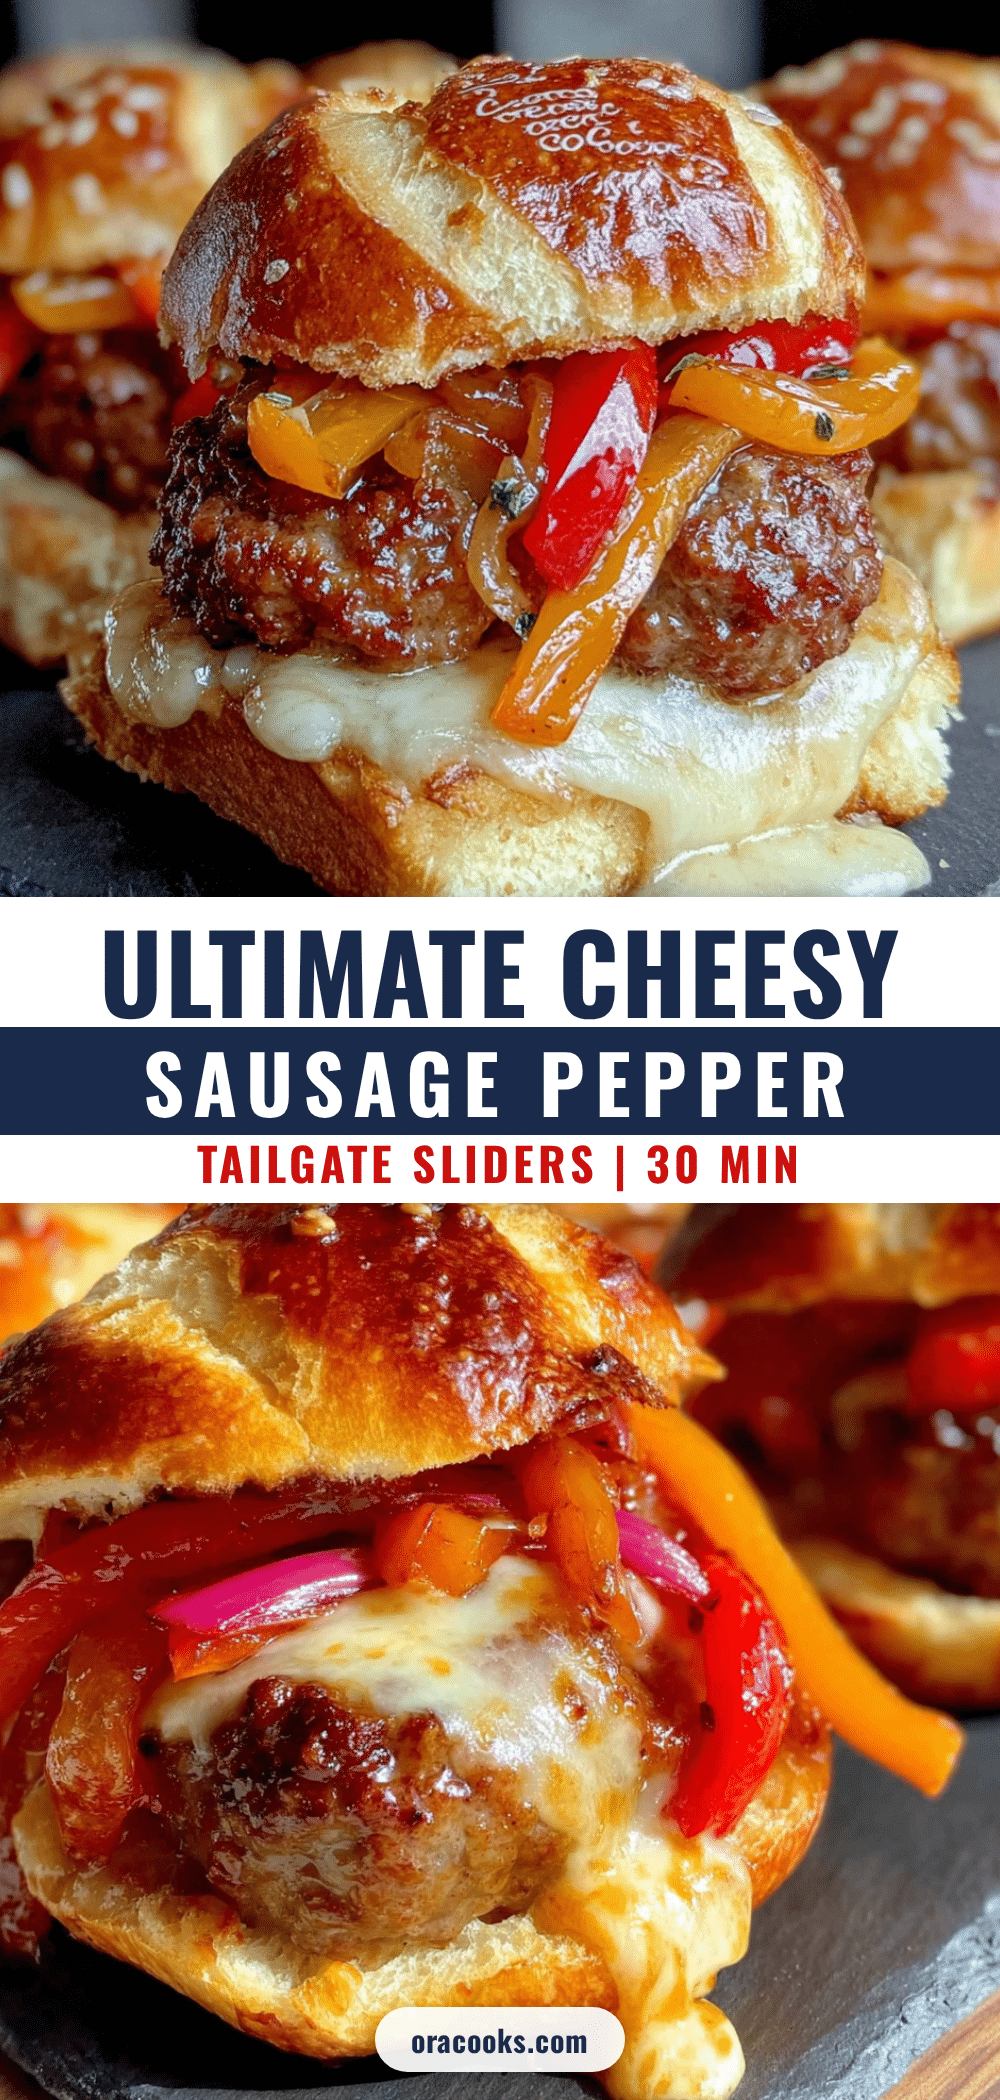
Best Cheesy Sausage and Pepper Sliders Recipe
These Ultimate Cheesy Sausage and Pepper Tailgate Sliders are made with a simple sheet pan method that lets the sausage drippings season the peppers and onions. Piled onto soft slider buns with provolone and a buttery garlic topping, they’re perfect for game days, backyard hangs, or any Tuesday that needs a little excitement.
- Prep Time: 15 minutes
- Cook Time: 40 minutes
- Total Time: 55 minutes
- Yield: 12 servings 1x
- Category: Main Course
- Cuisine: Italian-American
Ingredients
- 2 pounds sweet Italian sausage links
- 3 large bell peppers (mix of red, yellow, orange), sliced into thin strips
- 2 medium yellow onions, thinly sliced
- 3 tablespoons olive oil
- 1 teaspoon kosher salt
- 1/2 teaspoon freshly ground black pepper
- 1 teaspoon dried oregano
- 1/2 teaspoon garlic powder
- 12 slider buns (King’s Hawaiian recommended)
- 8 slices provolone cheese (deli-sliced)
- 1/2 cup grated parmesan cheese
- 1/4 cup unsalted butter, melted
- 1 tablespoon Dijon mustard
- 1 tablespoon poppy seeds (optional)
- 1 teaspoon garlic powder (for butter topping)
- 1 teaspoon dried parsley
Instructions
- Preheat oven to 400°F. Line a large rimmed baking sheet with parchment paper or foil. Take sausages out of fridge to come to room temperature for about 15 minutes.
- Slice bell peppers into thin strips (about 1/4 inch wide) and onions into half-moons. Toss on baking sheet with olive oil, salt, pepper, oregano, and garlic powder. Spread into an even layer.
- Nestle sausage links into the pepper and onion mixture, pressing down slightly. Space evenly.
- Roast for 25 minutes, flipping sausages and stirring vegetables halfway through, until sausages are browned and cooked through (internal temperature 160°F) and peppers are soft and caramelized.
- Remove sheet pan from oven. Transfer sausages to a cutting board and let rest for 5 minutes. Slice each link on a diagonal into 3-4 pieces.
- Slice entire package of slider buns in half horizontally, keeping them connected. Place bottom half on a clean baking sheet or 9×13 dish.
- Spread roasted peppers and onions evenly over bottom buns. Arrange sliced sausages on top. Lay provolone slices over sausages, overlapping slightly.
- In a small bowl, mix melted butter, Dijon mustard, poppy seeds, garlic powder, and dried parsley. Brush generously over cut side of top buns. Sprinkle grated parmesan over butter mixture.
- Place top buns on sliders (butter side up). Bake at 350°F for 12-15 minutes, until cheese is melted and bubbly and tops are golden brown. Tent with foil if browning too quickly.
- Let sliders rest for 5 minutes before cutting along bun seams. Serve warm.
Notes
Let roasted peppers and onions cool for 5 minutes before assembling to prevent soggy buns. For extra crispiness, toast cut sides of buns under broiler for 1-2 minutes before assembling. Sliders taste even better the next day. To freeze, assemble unbaked sliders in a disposable aluminum pan, wrap tightly, and freeze for up to 2 months; thaw overnight and bake as directed, adding 5-10 minutes.
Nutrition
- Serving Size: 1 slider
- Calories: 320
- Sugar: 6
- Sodium: 780
- Fat: 19
- Saturated Fat: 9
- Carbohydrates: 22
- Fiber: 2
- Protein: 18
Keywords: sliders, sausage, peppers, cheese, tailgate, game day, sheet pan, party food


