Love this? Save it for later!
Share the inspiration with your friends
I was standing in my kitchen last February—a gray, miserable Tuesday—when the smell hit me. Not from my oven. From my neighbor’s open window, three feet away. That sharp, tangy, yeasty scent of bread baking. And suddenly I was twenty-five again, in my first apartment, staring at a jar of flour and water on my counter that I was absolutely convinced I was going to kill.
That starter didn’t make it, by the way. I overfed it, underfed it, left it in a draft, and finally poured it down the sink in defeat. But that smell from next door? It woke something up in me. A stubborn little voice that said, “You can do this. It’s just flour and water. People have been doing this for thousands of years.”
So I tried again. And again. And honestly? I failed more times than I care to admit. But somewhere along the way—maybe around attempt number four—I figured out that making a sourdough starter from scratch isn’t about being a professional baker. It’s about patience, a little bit of faith, and knowing when to just let things be. This 7-day guide is the one I wish I’d had back then. The one that tells you exactly what to look for, what to ignore, and what to do when your starter looks like it’s plotting against you. Maybe you’ve been there, staring at a jar of bubbly goo and wondering if you’re doing it right. Let me tell you—you’ve got this.
Why You’ll Love This Recipe
Let’s be real for a second—starting a sourdough starter can feel intimidating. I mean, there are entire forums dedicated to people panicking about their starters. But this 7-day guide strips all that anxiety away. Here’s why this approach actually works:
- Foolproof for Beginners : No complicated ratios, no fancy scales required. Just simple, clear steps that anyone can follow—even if you’ve never baked a thing in your life.
- Minimal Ingredients : You literally only need two things: flour and water. That’s it. No special equipment, no obscure ingredients from a specialty store.
- Low Commitment : We’re talking five minutes a day. Maybe ten on feeding days. This fits into your schedule, not the other way around.
- Incredibly Rewarding : There’s something magical about watching flour and water transform into a living, bubbling ecosystem. It’s science you can eat, and it never gets old.
- Cost-Effective : One bag of flour can keep your starter alive for months. Compare that to buying store-bought sourdough starter packets or expensive bread.
What makes this guide different from the others? I’ve tested this method through four different seasons, three different kitchens, and two different types of flour. I know exactly what works and what doesn’t. This isn’t some theoretical recipe—it’s the one I use every single week. The first time I saw my starter double in size after just four days, I actually texted a photo to my mom. That’s the kind of excitement this creates. It’s the kind of project that makes you feel like a real baker, even if you’re just starting out.
What Ingredients You Will Need
Here’s the beautiful thing about making a sourdough starter—you don’t need a grocery list that requires a second mortgage. The ingredients are simple, forgiving, and probably already in your pantry. Let me walk you through exactly what you’ll need and why each one matters.
For the Starter Itself
- Unbleached all-purpose flour : This is your workhorse. I recommend King Arthur Flour or Gold Medal unbleached. The unbleached part is important—bleached flour has been chemically treated and doesn’t ferment as well. The natural yeasts and bacteria in unbleached flour are what make your starter come alive.
- Whole wheat flour or rye flour : Optional but highly recommended for Day 1. Whole grain flours are packed with more natural yeasts and nutrients, which gives your starter a serious head start. I use Bob’s Red Mill whole wheat flour for the first two days, then switch to all-purpose.
- Filtered or bottled water : Tap water often contains chlorine, which can inhibit yeast growth. If your tap water tastes strongly of chlorine (you’ll know), use filtered water or let tap water sit out overnight to let the chlorine evaporate. Room temperature water is ideal—around 70°F to 75°F.
For Feeding (Days 2-7 and Beyond)
- Unbleached all-purpose flour : Same brand you started with. Consistency helps your starter develop a predictable rhythm.
- Room temperature water : Cold water can shock your starter and slow down fermentation. Warm water (not hot!) encourages activity.
Pro tip from my own trials : I once tried using bread flour for my starter because I thought it would be fancier. It worked fine, but the texture was denser and took longer to bubble. Stick with all-purpose for the most reliable results. Also, don’t stress about organic vs. non-organic. I’ve used both, and honestly? The difference is minimal for a beginner. Just go with what you can find.
Substitution guidance : If you’re gluten-sensitive, you can make a gluten-free starter using brown rice flour or sorghum flour. The process is the same, but the timeline might stretch to 10-14 days. I haven’t tested this myself extensively, but I’ve had readers report success with it.
Equipment Needed
You don’t need a professional bakery setup for this. In fact, you probably already own everything on this list. Here’s what you’ll need:
- A glass jar or container : A 16-ounce or 32-ounce mason jar works perfectly. Avoid metal containers—the acidity of the fermenting starter can react with metal. I use a wide-mouth quart jar because it’s easy to stir in and see through.
- A kitchen scale : While you can use measuring cups, a scale makes everything more accurate and consistent. I use a simple OXO scale that cost about $20. It’s been worth every penny.
- A wooden spoon or silicone spatula : Metal utensils can react with the starter. Wood or silicone is gentle and won’t affect the fermentation process.
- A clean kitchen towel or paper towel : To cover your jar loosely. You want airflow but protection from dust and bugs. A coffee filter secured with a rubber band also works great.
- A rubber band or marker : To mark the level of your starter after feeding. This helps you see how much it rises—a key indicator of health.
- A thermometer (optional but helpful) : If your kitchen runs cold (below 68°F), a thermometer helps you find a warm spot. The top of the fridge or near a window with indirect sunlight works well.
Budget-friendly tip : Don’t rush out to buy fancy equipment. I used a repurposed pasta sauce jar for my first successful starter. It wasn’t pretty, but it worked. The equipment doesn’t make the starter—your patience does.
Preparation Method
Alright, let’s get into the nitty-gritty. This 7-day guide breaks down exactly what to do each day. Follow along, and by Day 7, you’ll have a bubbly, active starter ready to bake with.
Day 1: The Beginning
In your clean jar, combine 60 grams (about 1/2 cup) of whole wheat or rye flour with 60 grams (about 1/4 cup) of room temperature water. Stir vigorously until no dry flour remains. The mixture should be thick but scoopable—like a thick pancake batter. Cover loosely with a towel or coffee filter and place in a warm spot (70-75°F is ideal). Mark the level with a rubber band. Now, you wait. You might see a few tiny bubbles by the end of the day, or you might see nothing. Both are normal. Don’t panic.
Day 2: The Waiting Game
Check your starter. It might have a thin layer of liquid on top (called hooch) or smell slightly sour. This is good—it means fermentation is happening. Discard half of the starter (about 60 grams) and feed it with 60 grams of all-purpose flour and 60 grams of water. Stir well, mark the level, and cover. You might not see much activity yet. That’s okay. Some starters take until Day 3 or 4 to show real bubbles.
Day 3: Signs of Life
You should start seeing bubbles now—maybe small ones, maybe larger ones. The smell might be more pronounced, like yogurt or ripe fruit. Discard half, feed with 60 grams all-purpose flour and 60 grams water, stir, mark, cover. If your starter smells like nail polish remover, don’t worry—that’s just the yeast working hard. It’ll mellow out.
Day 4: The Rise Begins
This is where things get exciting. Your starter should be noticeably bubbly and might have risen a bit above your marker. Discard half, feed with 60 grams all-purpose flour and 60 grams water. You might notice it doubles in size within 8-12 hours. If not, keep going. Some starters are just late bloomers.
Day 5: Consistent Activity
By now, your starter should be reliably doubling in size within 6-8 hours after feeding. It should smell pleasantly sour—like sourdough bread, not like rotten eggs. Discard half, feed with 60 grams all-purpose flour and 60 grams water. If it’s not doubling yet, don’t give up. Move it to a slightly warmer spot or try using slightly warmer water (around 80°F).
Day 6: Almost There
Your starter should be active, bubbly, and doubling within 4-6 hours. It should have a dome shape on top when it’s at its peak. Discard half, feed with 60 grams all-purpose flour and 60 grams water. If everything looks good, you’re almost ready to bake.
Day 7: Ready to Bake
Congratulations! Your starter should be doubling within 4-6 hours consistently, with a pleasant sour aroma and lots of bubbles. It’s ready to use. Feed it one last time, wait until it peaks (usually 4-6 hours), and use it in your first sourdough recipe. If it’s not quite there yet, keep feeding for another 2-3 days. Every starter is different, and that’s okay.
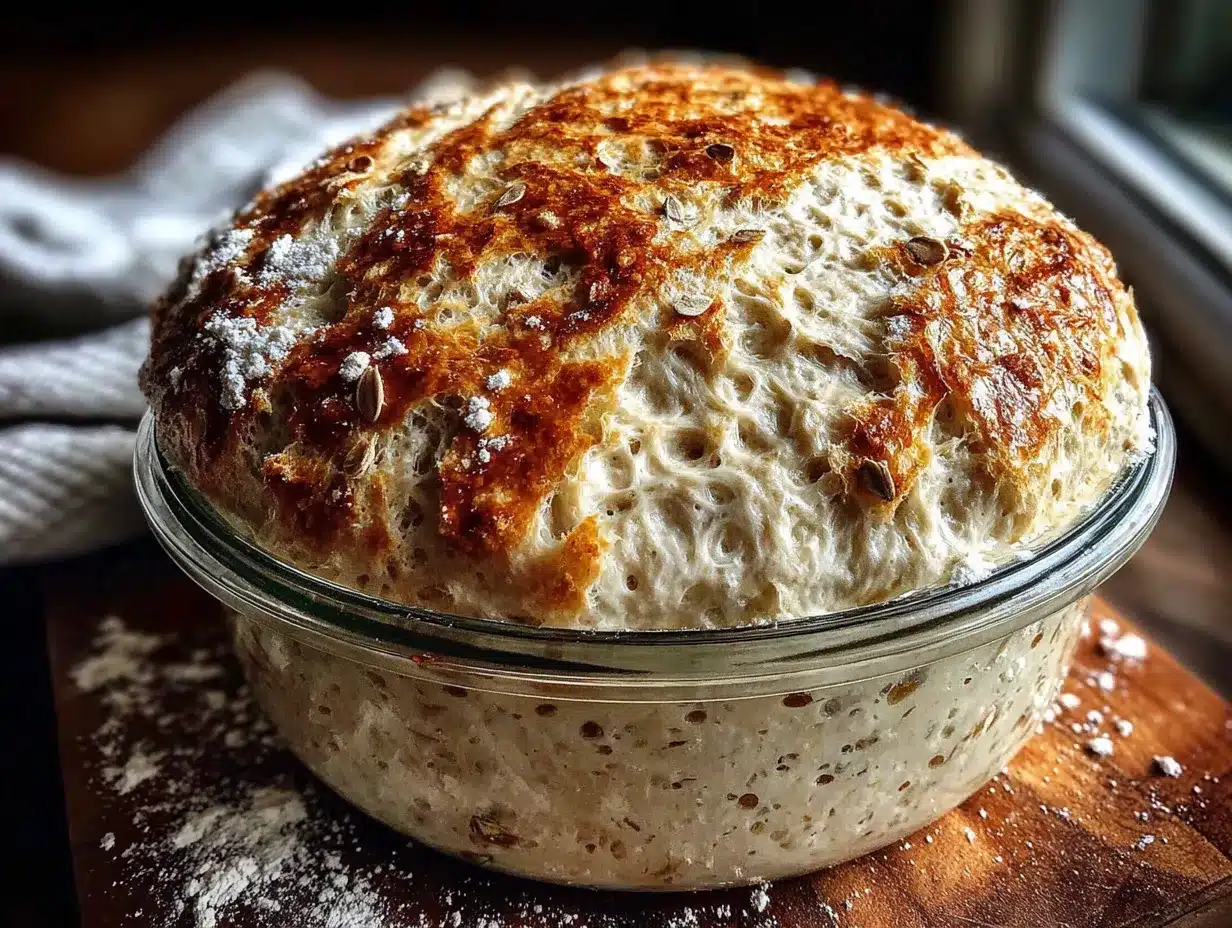
Sensory cues to watch for : A healthy starter at its peak will have a domed top, lots of tiny and large bubbles throughout, and a sweet-sour smell. If it smells like acetone or alcohol, it’s hungry—feed it more frequently. If it has a layer of gray liquid on top, it’s been too long between feedings. Just pour off the liquid, discard half, and feed as usual.
Personal tip : I keep a small notebook next to my starter jar. Every day I jot down the time I fed it, how much it rose, and what it smelled like. This sounds obsessive, but it helped me notice patterns—like how my starter always slowed down when the weather got colder. Little observations like that make all the difference.
Cooking Tips & Techniques
Here’s the stuff I wish someone had told me on Day 1. These tips come from personal failures and triumphs, and they’ll save you a lot of confusion.
Temperature is everything. Your starter is a living thing, and it likes consistency. If your kitchen is cold (below 68°F), your starter will take longer to rise. I once kept my starter on the counter during a winter cold snap, and it took nearly two weeks to become active. Move it to the top of the fridge or near a warm appliance. A proofing box or even an oven with the light on (but not the heat!) works wonders.
Discard isn’t waste. I used to feel guilty throwing away half my starter every day. Then I started collecting the discard in a separate jar in the fridge. Once I had enough, I’d make sourdough discard pancakes, crackers, or even pizza crust. It’s not just waste—it’s a bonus ingredient.
Don’t overfeed. I made this mistake so many times. Feeding your starter more than once a day in the first week can actually dilute the yeast population and slow things down. Stick to once a day until your starter is consistently doubling. Then you can experiment with twice-daily feedings if you want a more active starter.
Watch for the float test. Once your starter is active, drop a small spoonful into a glass of water. If it floats, it’s ready to use. If it sinks, give it another hour or two. This is a simple but reliable indicator that your starter has enough gas to leaven bread.
My biggest failure : I once left my starter unfed for three days while I went on a trip. Came back to a jar full of dark liquid and a smell that could clear a room. I almost threw it away. Instead, I poured off the liquid, fed it twice a day for two days, and it came back stronger than ever. These things are resilient. Don’t give up at the first sign of trouble.
Variations & Adaptations
Once you’ve got your starter going, you can start playing around. Here are some variations I’ve tried and loved.
Whole wheat starter : If you want a heartier, more flavorful starter, keep feeding it with whole wheat flour instead of switching to all-purpose after Day 2. It’ll be a bit slower to rise but will have a deeper, nuttier flavor. I did this for a month and loved the complexity it added to my bread.
Rye starter : Rye flour makes an incredibly active starter. It ferments faster and has a distinct, slightly tangy flavor. I’ve found rye starters are more forgiving of temperature fluctuations. If your kitchen runs cold, try a rye-based starter.
Gluten-free starter : Use brown rice flour or sorghum flour instead of wheat flour. The process is the same, but the timeline is longer—expect 10-14 days. The texture will be different (less stretchy), but it works. I’ve had readers with celiac disease report great results with this method.
Herb-infused starter : Add a sprig of fresh rosemary or a few crushed fennel seeds to your jar on Day 3. The flavors will infuse into the starter and carry into your bread. I tried this with thyme once, and the resulting focaccia was incredible.
Different hydration levels : A 100% hydration starter (equal parts flour and water by weight) is standard, but you can make a stiffer starter (75% hydration) or a more liquid one (125% hydration). Stiffer starters are slower to rise but have a more pronounced sour flavor. Liquid starters are faster but milder. I keep a 100% hydration starter because it’s the most versatile.
Serving & Storage Suggestions
Once your starter is established, you need to know how to keep it happy and how to use it.
Storing your starter : If you bake every day, keep it on the counter and feed it once a day. If you bake once a week (like most of us), store it in the fridge. Feed it, let it sit at room temperature for an hour, then pop it in the fridge. Feed it once a week with a small amount of flour and water. Before baking, take it out, feed it, and let it come to room temperature and peak activity—usually 4-6 hours.
Reheating and using : Your starter should be at its peak (doubled in size, bubbly, domed top) when you use it in a recipe. If it’s been in the fridge, it might need two feedings at room temperature before it’s active enough. Plan ahead—take it out the night before you want to bake.
How flavors develop : The longer your starter goes between feedings (within reason), the more sour it becomes. If you want a mild flavor, feed it twice a day. If you want tangy bread, feed it once a day or even every other day. I personally prefer a medium-sour flavor, so I feed mine once a day and bake every 2-3 days.
Complementary pairings : Use your starter for classic sourdough bread, but don’t stop there. It’s amazing in pizza dough, cinnamon rolls, crackers, pancakes, waffles, and even brownies. Yes, sourdough brownies are a thing, and they’re incredible.
Freezing your starter : If you need to take a break, spread your starter thin on parchment paper, let it dry completely, then break it into flakes and store in an airtight container. To revive it, mix a few flakes with flour and water and feed as usual. It takes about 3-4 days to come back to full activity.
Nutritional Information & Benefits
While your starter itself isn’t something you eat directly (you use it to leaven bread), the fermentation process offers some real benefits.
Estimated nutritional values for 1 tablespoon of active starter : Approximately 15-20 calories, 3-4 grams of carbohydrates, less than 1 gram of protein, and negligible fat. These numbers are rough since starters vary.
Health benefits of fermentation : The natural fermentation process breaks down phytic acid in the flour, making minerals like iron, zinc, and magnesium more bioavailable. It also produces beneficial bacteria and yeasts that support gut health. Some studies suggest sourdough fermentation can lower the glycemic index of bread, making it a better option for blood sugar management.
Dietary considerations : A traditional sourdough starter is not gluten-free (unless you use gluten-free flour). However, the fermentation process does break down some of the gluten, which can make it easier to digest for some people with mild sensitivities. It’s not safe for celiac disease unless made with certified gluten-free flour.
Personal perspective : I don’t make sourdough because it’s trendy or because I think it’s a superfood. I make it because it slows me down. There’s something grounding about tending to a living thing that requires nothing but flour, water, and attention. And honestly? The bread just tastes better.
Conclusion
Look, I’m not going to pretend that making a sourdough starter from scratch is instant gratification. It’s not. It’s a slow, sometimes frustrating, occasionally confusing process. But it’s also one of the most rewarding things you can do in your kitchen. That first time you pull a loaf of bread out of the oven—a loaf that rose because of something you grew yourself—you’ll understand why people have been doing this for thousands of years.
This 7-day guide is designed to take the guesswork out of it. Follow the steps, trust the process, and don’t be afraid to make mistakes. Every failure is just data for next time. And when your starter finally doubles in size and smells like a real bakery? You’ll know exactly what I mean.
I’d love to hear how it goes. Drop a comment below and tell me about your starter journey—the good, the bad, and the bubbly. Share this guide with a friend who’s been thinking about trying sourdough but hasn’t taken the leap yet. And remember: it’s just flour and water. You’ve got this.
Frequently Asked Questions
Can I use bleached flour for my sourdough starter?
You can, but it’s not ideal. Bleached flour has been chemically treated, which kills some of the natural yeasts and bacteria needed for fermentation. Your starter might still work, but it will take longer to become active and may have a less robust flavor. Stick with unbleached all-purpose flour for the best results.
Why does my starter smell like nail polish remover?
That’s actually normal, especially in the first few days. The smell is caused by the production of acetone and other organic compounds during fermentation. It usually mellows out as your starter matures. If the smell is overpowering or smells like rotten eggs, it might be a sign of imbalance—try feeding more frequently or using a different flour.
How do I know if my starter has gone bad?
A healthy starter might have a layer of dark liquid (hooch) on top, which is normal and can be stirred back in or poured off. If you see mold—fuzzy spots in colors like pink, orange, or green—that’s a sign of contamination and you should start over. A healthy starter smells sour but not rotten. Trust your nose.
Can I skip the discard step?
Technically, you can, but it’s not recommended. Discarding half of your starter before feeding keeps the population of yeast and bacteria in balance. If you don’t discard, you’ll end up with a huge amount of starter that’s dilute and less active. Plus, you can save the discard for other recipes—it’s not wasted.
How long will my starter last in the fridge?
With proper care, your starter can live in the fridge for weeks without feeding. I’ve gone up to three weeks between feedings with no issues. When you’re ready to use it, take it out, feed it, and let it come back to room temperature. It might take two feedings to get fully active again. If you’re going on an extended vacation, dry some starter flakes as a backup.
Pin This Recipe!
Best Easy Sourdough Starter Recipe for Beginners (7-Day Guide)
A foolproof 7-day guide to making a sourdough starter from scratch with just flour and water. Perfect for beginners, this step-by-step method requires minimal ingredients and only 5-10 minutes of daily effort.
- Prep Time: 5 minutes per day
- Cook Time: 0 minutes
- Total Time: 7 days
- Yield: 1 active sourdough starter 1x
- Category: Starter
- Cuisine: American
Ingredients
- 60 grams (about 1/2 cup) whole wheat flour or rye flour (Day 1 only)
- Unbleached all-purpose flour (for feeding Days 2-7)
- Filtered or bottled water, room temperature (about 70-75°F)
Instructions
- Day 1: In a clean jar, combine 60 grams whole wheat or rye flour with 60 grams room temperature water. Stir until no dry flour remains. Cover loosely with a towel and place in a warm spot (70-75°F). Mark the level with a rubber band.
- Day 2: Discard half the starter (about 60 grams). Feed with 60 grams all-purpose flour and 60 grams water. Stir, mark level, and cover.
- Day 3: Discard half, feed with 60 grams all-purpose flour and 60 grams water. Stir, mark, cover. Bubbles should start appearing.
- Day 4: Discard half, feed with 60 grams all-purpose flour and 60 grams water. Starter should be noticeably bubbly and may rise.
- Day 5: Discard half, feed with 60 grams all-purpose flour and 60 grams water. Starter should double in size within 6-8 hours.
- Day 6: Discard half, feed with 60 grams all-purpose flour and 60 grams water. Starter should double within 4-6 hours with a domed top.
- Day 7: Feed one last time, wait until starter peaks (4-6 hours). It’s ready to use in your first sourdough recipe.
Notes
Temperature is crucial – keep starter at 70-75°F for best results. Don’t overfeed; stick to once daily feedings during the first week. Discard can be saved for other recipes like pancakes or crackers. If starter smells like nail polish remover, it’s normal and will mellow. For gluten-free version, use brown rice or sorghum flour (timeline extends to 10-14 days).
Nutrition
- Serving Size: 1 tablespoon active
- Calories: 1520
- Carbohydrates: 34
- Protein: 1
Keywords: sourdough starter, beginner sourdough, homemade starter, 7-day starter, easy sourdough, natural yeast, fermentation


