Love this? Save it for later!
Share the inspiration with your friends
My neighbor Jenna wasn’t trying to impress anyone. I’d stopped by to borrow a ladder—ours had mysteriously vanished during a garage clean-out—and the smell hit me before I even got through the screen door. It was rich, savory, and so deeply comforting it almost made me forget why I’d come. She was standing at the stove in sweatpants, stirring a single skillet with a wooden spoon, looking like she’d just rolled out of bed. “Oh, it’s just dinner,” she said when I asked what was in that pan. Just dinner. Let me tell you, that “just dinner” has haunted me in the best way ever since.
I stood there for a solid twenty minutes, watching her throw things into one pan—chicken, rice, some broth, a splash of cream—and somehow, without any fuss or fancy techniques, she created the creamiest, most soul-satisfying meal I’d had in months. Honestly, I was a little jealous. Why did her weeknight dinner look like something I’d stress over for an hour? The answer, I learned, was this one-pot method. It’s the kind of recipe that feels like a secret weapon, the one you pull out on a Tuesday when you’re tired and hungry and need something that actually delivers.
This Creamy One-Pot Chicken and Rice Skillet became a staple in my kitchen the very next week. I’ve tweaked it a bit—added a little garlic, swapped in some fresh thyme—but the heart of it is all Jenna. It’s the recipe I make when I need a guaranteed win, the one that fills the house with that same incredible smell and makes everyone wander into the kitchen asking what’s for dinner. Maybe you’ve been there, standing in front of your pantry at 5:30 PM with zero plan. This is your plan. Trust me on this one.
Why You’ll Love This Recipe
I’ve tested this recipe more times than I can count, and it never fails. It’s the kind of dish that makes you look like a hero without any of the work. Here’s why it works so well:
- One-Pot Wonder: Everything cooks in a single skillet. Less cleanup, more time on the couch. It’s practically a miracle.
- Weeknight Fast: From start to finish, you’re looking at about 40 minutes. That’s faster than takeout in my neighborhood.
- Pantry-Friendly: Chicken, rice, broth, cream, and a few seasonings. Chances are you’ve got most of this already.
- Crowd-Pleasing Comfort: Kids love the creamy texture, adults love the savory depth. It’s a universal win.
- Customizable Base: Throw in some veggies, swap the protein, adjust the spices—it’s forgiving and flexible.
What makes this different from other chicken and rice recipes? It’s the technique. You sear the chicken first for that golden crust, then let the rice slowly absorb all those flavorful juices. The cream goes in at the very end, keeping it silky without making everything heavy. It’s not just another recipe—it’s the version I’ve perfected after dozens of batches, the one that tastes like you spent hours but really took thirty minutes of active cooking.
This is the meal you make when you need a hug in a bowl. It’s warm, it’s satisfying, and it makes your kitchen smell like a cozy restaurant. No stress, no complicated steps—just really, really good food.
What Ingredients You Will Need
This recipe uses simple, wholesome ingredients that come together to create something truly special. Most of these are pantry staples, which makes this dish perfect for those nights when you don’t want to run to the store.
- Chicken Thighs: 1.5 pounds (680g) boneless, skinless chicken thighs. I prefer thighs over breasts here—they stay juicier and add more flavor. If you only have breasts, go for it, but watch the cook time.
- Olive Oil: 2 tablespoons (30ml) for searing. A good quality extra virgin works, but regular olive oil is fine too.
- Yellow Onion: 1 medium, diced. About 1 cup. It forms the flavor base.
- Garlic: 4 cloves, minced. Fresh is best here—don’t skip it. I’ve tried jarred in a pinch, and it’s just not the same.
- Long-Grain White Rice: 1 cup (200g), uncooked. Basmati or jasmine work beautifully. Avoid instant rice—it gets mushy. I like using basmati for its fluffy texture.
- Chicken Broth: 2 cups (480ml). Low-sodium is key so you can control the salt. I recommend Swanson or Kitchen Basics for consistent flavor.
- Heavy Cream: ½ cup (120ml). This is the magic ingredient for that luscious, creamy texture. For a lighter version, you can use half-and-half, but it won’t be as rich.
- Dried Thyme: 1 teaspoon. It adds an earthy, slightly floral note. Fresh thyme works too—use 1 tablespoon of leaves.
- Paprika: 1 teaspoon. Smoked paprika adds a lovely depth, but sweet paprika is great too.
- Salt and Black Pepper: To taste. Start with 1 teaspoon salt and ½ teaspoon pepper, then adjust.
- Parmesan Cheese: ¼ cup (25g), grated. Optional, but highly recommended. It adds a salty, nutty finish that takes this over the top.
- Fresh Parsley: For garnish. A handful, chopped. It brightens everything up.
Substitution Tip: Need a dairy-free option? Use full-fat coconut milk instead of heavy cream. It changes the flavor slightly but keeps it creamy. For a gluten-free version, this recipe is naturally gluten-free as written—just double-check your broth label.
Equipment Needed
You don’t need a fancy kitchen for this recipe. Here’s what you’ll need:
- Large Skillet: A 12-inch (30cm) skillet with a lid is ideal. Cast iron or stainless steel works best for even browning. I use my trusty Lodge cast iron—it’s been with me for years and never lets me down.
- Wooden Spoon or Spatula: For stirring and scraping up those flavorful browned bits.
- Cutting Board and Knife: For prepping the chicken and vegetables. A sharp chef’s knife makes this go faster.
- Measuring Cups and Spoons: Accuracy matters, especially with the rice-to-liquid ratio.
- Lid: Your skillet needs a tight-fitting lid. If yours doesn’t have one, a sheet of aluminum foil works in a pinch.
- Budget-Friendly Tip: No need for a high-end skillet. A good non-stick pan from your local store will work—just be gentle with the metal utensils to avoid scratching.
Preparation Method
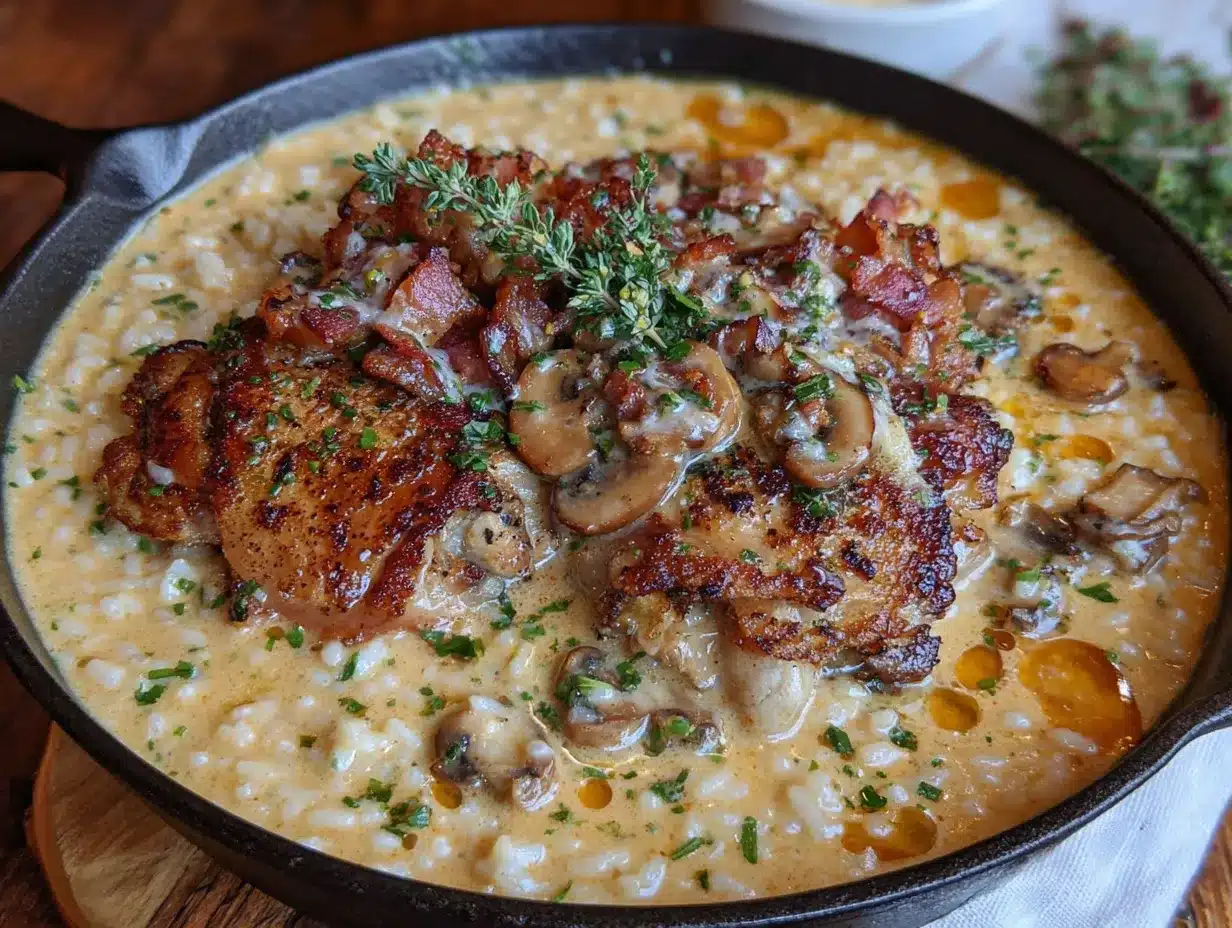
Let’s get cooking. This comes together faster than you think, so have everything prepped and ready to go.
- Prep the Chicken: Pat the chicken thighs dry with paper towels. This is crucial for a good sear—wet chicken steams instead of browning. Season generously on both sides with salt, pepper, and half the paprika. Set aside while you prep the veggies.
- Sear the Chicken: Heat the olive oil in your large skillet over medium-high heat. Once it’s shimmering (a drop of water should sizzle), add the chicken thighs in a single layer. Don’t crowd the pan—work in batches if needed. Cook for 4-5 minutes per side, until golden brown and crispy. The chicken won’t be cooked through yet, and that’s fine. Transfer to a plate and set aside.
- Cook the Aromatics: Reduce the heat to medium. Add the diced onion to the pan with the remaining oil and drippings. Scrape up any browned bits from the bottom—that’s flavor gold. Cook for 3-4 minutes, until the onion is soft and translucent. Add the minced garlic and cook for another 30 seconds, until fragrant. Don’t let it burn, or it’ll turn bitter.
- Toast the Rice: Add the uncooked rice to the pan. Stir it around for 1-2 minutes, letting it coat in the oil and toast slightly. This step adds a nutty flavor and helps the rice stay fluffy. You’ll notice it starts to smell a little toasty—that’s your cue.
- Add the Broth and Seasonings: Pour in the chicken broth, dried thyme, and the remaining paprika. Stir everything together, scraping up any last bits from the bottom. Bring it to a gentle simmer—you should see small bubbles around the edges.
- Return the Chicken: Nestle the seared chicken thighs back into the skillet, pushing them down into the rice and liquid. They should be partially submerged. Cover the skillet with the lid and reduce the heat to low. Let it cook undisturbed for 20 minutes. I know it’s tempting to peek, but keep the lid on—the steam is what cooks the rice perfectly.
- Add the Cream: After 20 minutes, remove the lid. The rice should be tender and most of the liquid absorbed. Pour in the heavy cream and gently stir it through the rice, being careful not to break up the chicken too much. Let it cook uncovered for another 3-4 minutes, until the cream is incorporated and the sauce has thickened slightly.
- Finish and Serve: Turn off the heat. Stir in the grated Parmesan cheese if using. Taste and adjust salt and pepper. Garnish with fresh parsley. Let it rest for 5 minutes before serving—it allows the sauce to set a little and makes serving easier.
Sensory Cue: At step 6, you should smell the thyme and paprika mingling with the savory chicken—it’s a deeply comforting aroma. At step 7, the cream will turn the rice a beautiful pale golden color, and the sauce should coat the back of a spoon.
Cooking Tips & Techniques
I’ve made this recipe enough times to know where things can go wrong. Here’s what I’ve learned:
- Don’t Skip the Sear: I once tried to save time by skipping the browning step. The result was pale, sad chicken and rice that lacked depth. That golden crust is non-negotiable for flavor.
- Resist Peeking: The first time I made this, I lifted the lid three times to “check” on the rice. It turned out gummy and uneven. Trust the process—20 minutes of undisturbed cooking is the magic number.
- Use Low Heat: After adding the broth, keep the heat on low. High heat will evaporate the liquid too quickly and leave you with undercooked rice. Patience is your friend here.
- Toast the Rice Properly: This is a game-changer. Toasting the rice for that extra minute adds a nutty flavor you can’t get any other way. Don’t rush it.
- Adjust Liquid as Needed: Different rice brands absorb liquid differently. If your rice looks dry before the 20 minutes are up, add a splash more broth. If it’s too soupy, cook uncovered for an extra few minutes.
- Multitasking Tip: While the rice cooks, use that time to wash dishes or prep a simple side salad. Makes the whole dinner feel effortless.
Variations & Adaptations
This recipe is a fantastic base for experimentation. Here are a few ways I’ve changed it up:
- Vegetable-Packed Version: Add 1 cup of frozen peas and carrots in step 6, just before covering. They’ll steam perfectly with the rice. I’ve also added chopped spinach at the end—stir it in with the cream for a nutrient boost.
- Spicy Twist: Add ½ teaspoon of red pepper flakes with the garlic, or stir in a chopped jalapeño. The heat cuts through the creaminess beautifully. My husband loves this version—he says it wakes up the dish.
- Herb-Forward Variation: Swap the dried thyme for 1 tablespoon of fresh rosemary and 1 tablespoon of fresh sage. It gives the dish an earthy, almost Thanksgiving-like flavor. I made this for a fall dinner party and got rave reviews.
- Dairy-Free Adaptation: Use full-fat coconut milk instead of heavy cream and skip the Parmesan. The coconut adds a subtle sweetness that works surprisingly well with the savory chicken. My dairy-sensitive friend approved.
- Chicken Breast Option: If you prefer white meat, use boneless, skinless chicken breasts. Reduce the initial sear time to 3-4 minutes per side, and check for doneness after the rice cooks—breasts cook faster and can dry out.
Serving & Storage Suggestions
This dish is best served warm, straight from the skillet. The creamy sauce is at its peak right after cooking. Here’s how to make the most of it:
- Serving: Spoon the rice and chicken into shallow bowls. Garnish with extra parsley and a crack of black pepper. A side of steamed green beans or a simple arugula salad with lemon vinaigrette balances the richness perfectly. For drinks, a crisp white wine like Sauvignon Blanc or a cold beer cuts through the creaminess.
- Storage: Let leftovers cool completely, then transfer to an airtight container. Store in the refrigerator for up to 4 days. The flavors actually meld together overnight, making it even better the next day.
- Reheating: The microwave works in a pinch, but I prefer the stovetop. Add a splash of chicken broth or water to the skillet, reheat over medium-low heat, and stir gently until warmed through. This prevents the rice from drying out. It takes about 5-7 minutes.
- Freezing: This recipe freezes well for up to 3 months. Portion into freezer-safe containers, leaving a little room for expansion. Thaw overnight in the fridge before reheating. Note that the cream sauce may separate slightly after freezing—stir in a splash of cream or broth while reheating to bring it back together.
- Flavor Development: Honestly, I think this dish tastes even better on day two. The rice absorbs more of the sauce, and the flavors deepen. If you can, make it a day ahead—your future self will thank you.
Nutritional Information & Benefits
This recipe is comfort food that also offers some nutritional perks. Here’s an approximate breakdown per serving (based on 4 servings):
- Calories: ~520
- Protein: ~35g
- Fat: ~22g
- Carbohydrates: ~45g
- Fiber: ~2g
- Sugar: ~3g
Health Benefits: Chicken is a great source of lean protein, which supports muscle health and keeps you full. Garlic and onions are packed with antioxidants and have anti-inflammatory properties. Rice provides steady energy, and if you use brown rice, you’ll get extra fiber. The cream adds calcium but also some saturated fat—feel free to use half-and-half for a lighter option.
Dietary Considerations: This recipe is naturally gluten-free. For a lower-carb version, substitute cauliflower rice—just reduce the cooking time to about 10 minutes covered. Always check your broth labels if you have specific dietary needs.
Conclusion
This Creamy One-Pot Chicken and Rice Skillet is the recipe I turn to again and again. It’s the one that delivers every single time—no fuss, no drama, just incredible flavor in under an hour. Whether you’re feeding a hungry family on a busy weeknight or just want something warm and comforting for yourself, this dish delivers.
I love that you can make it your own. Add your favorite veggies, play with the spices, or keep it classic—it’s forgiving and always satisfying. That first bite, with the creamy rice and tender chicken, is pure comfort. It’s the kind of meal that makes you slow down and actually enjoy dinner.
I’d love to hear how it turns out for you! Drop a comment below and let me know what variations you tried. Did you add mushrooms? Swap in coconut milk? Share your version—I’m always looking for new ideas. And if you loved it, don’t forget to pin this recipe for later. Happy cooking, friend!
Frequently Asked Questions
Can I use brown rice instead of white rice?
Yes, but you’ll need to adjust the liquid and cooking time. Use 2 ½ cups of broth instead of 2, and cook covered for 40-45 minutes instead of 20. Brown rice needs more time to absorb liquid and become tender.
Why did my rice turn out mushy?
Mushy rice usually means too much liquid or overcooking. Make sure you’re using long-grain rice and measuring accurately. Also, resist the urge to stir the rice while it’s cooking—stirring releases starch and makes it gummy.
Can I make this in a slow cooker or Instant Pot?
For a slow cooker, sear the chicken first, then add everything except the cream and Parmesan. Cook on low for 4-5 hours. Stir in the cream at the end. For an Instant Pot, use the sauté function for searing, then pressure cook on high for 6 minutes with a natural release. Add cream after cooking.
How do I prevent the chicken from drying out?
Using chicken thighs instead of breasts is your best bet—they’re naturally more forgiving. If you use breasts, don’t overcook them. The 20-minute simmer is usually enough. Always let the chicken rest for a few minutes before serving to retain juices.
Can I add vegetables to this recipe?
Absolutely! Frozen peas and carrots are my go-to—add them with the broth. Mushrooms, bell peppers, or spinach also work well. Just adjust the liquid slightly if adding water-heavy veggies like zucchini. The recipe is very adaptable.
Pin This Recipe!
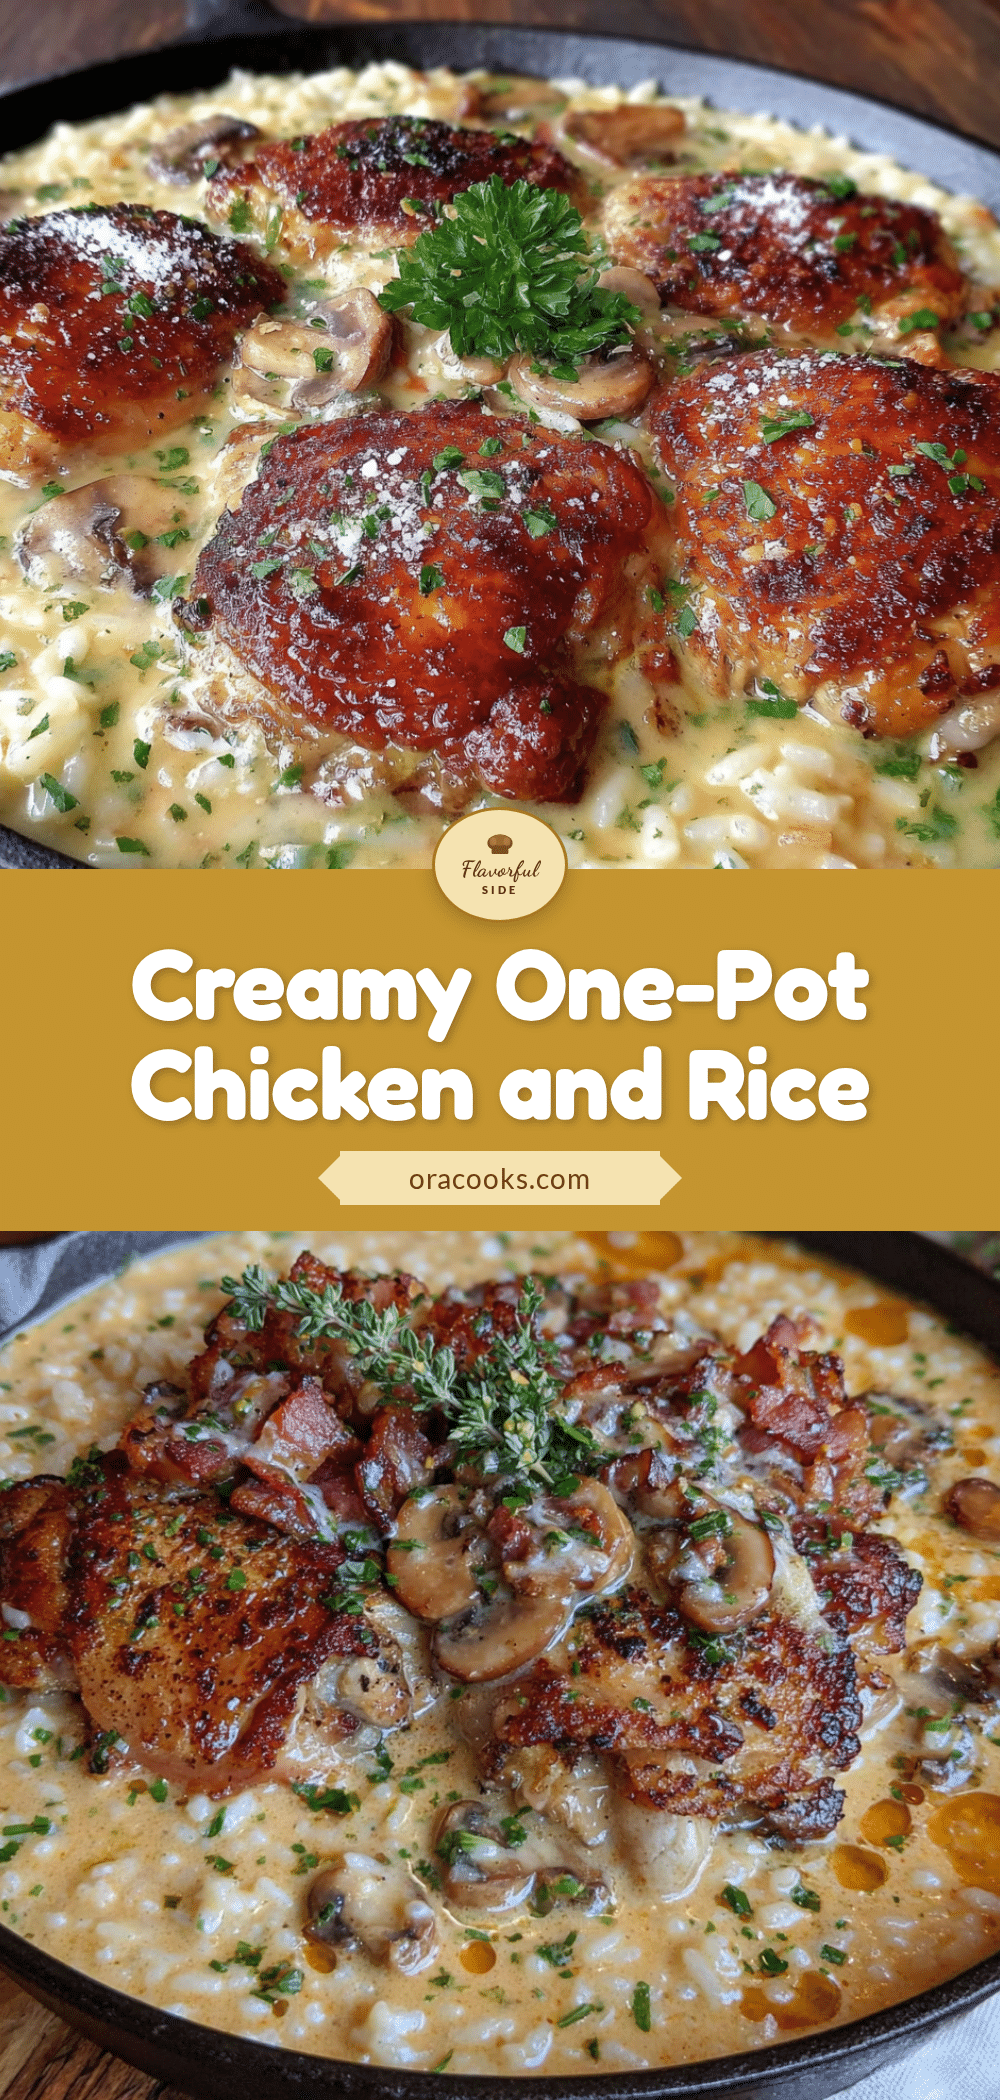
Creamy One-Pot Chicken and Rice Skillet (Easy Best Recipe)

This creamy one-pot chicken and rice skillet is a weeknight wonder that delivers rich, comforting flavor in under an hour. With simple pantry ingredients and minimal cleanup, it’s the perfect meal for busy nights when you need a guaranteed win.
- Prep Time: 10 minutes
- Cook Time: 30 minutes
- Total Time: 40 minutes
- Yield: 4 servings 1x
- Category: Main Course
- Cuisine: American
Ingredients
- 1.5 pounds (680g) boneless, skinless chicken thighs
- 2 tablespoons (30ml) olive oil
- 1 medium yellow onion, diced (about 1 cup)
- 4 cloves garlic, minced
- 1 cup (200g) uncooked long-grain white rice (basmati or jasmine)
- 2 cups (480ml) low-sodium chicken broth
- ½ cup (120ml) heavy cream
- 1 teaspoon dried thyme
- 1 teaspoon paprika (smoked or sweet)
- Salt and black pepper to taste (start with 1 tsp salt and ½ tsp pepper)
- ¼ cup (25g) grated Parmesan cheese (optional)
- Fresh parsley, chopped, for garnish
Instructions
- Prep the Chicken: Pat the chicken thighs dry with paper towels. Season generously on both sides with salt, pepper, and half the paprika. Set aside.
- Sear the Chicken: Heat olive oil in a large 12-inch skillet over medium-high heat. Once shimmering, add chicken thighs in a single layer. Cook for 4-5 minutes per side until golden brown. Transfer to a plate (chicken will not be fully cooked).
- Cook the Aromatics: Reduce heat to medium. Add diced onion to the pan, scraping up browned bits. Cook 3-4 minutes until soft and translucent. Add minced garlic and cook 30 seconds until fragrant.
- Toast the Rice: Add uncooked rice to the pan. Stir for 1-2 minutes until lightly toasted and fragrant.
- Add Broth and Seasonings: Pour in chicken broth, dried thyme, and remaining paprika. Stir, scraping up any bits from the bottom. Bring to a gentle simmer.
- Return the Chicken: Nestle seared chicken thighs back into the skillet, partially submerged. Cover with a tight-fitting lid, reduce heat to low, and cook undisturbed for 20 minutes.
- Add the Cream: Remove lid. Rice should be tender and most liquid absorbed. Pour in heavy cream and gently stir through the rice. Cook uncovered for 3-4 minutes until sauce thickens slightly.
- Finish and Serve: Turn off heat. Stir in Parmesan cheese if using. Adjust salt and pepper to taste. Garnish with fresh parsley. Let rest 5 minutes before serving.
Notes
For best results, don’t skip searing the chicken—it adds essential flavor. Resist the urge to peek while the rice cooks; keeping the lid on ensures perfect texture. Toasting the rice before adding liquid enhances its nutty flavor. If using chicken breasts, reduce sear time to 3-4 minutes per side and check doneness after rice cooks. For a dairy-free version, substitute full-fat coconut milk for heavy cream and omit Parmesan.
Nutrition
- Serving Size: 1 serving (about 1.5
- Calories: 520
- Sugar: 3
- Sodium: 680
- Fat: 22
- Saturated Fat: 9
- Carbohydrates: 45
- Fiber: 2
- Protein: 35
Keywords: one-pot chicken and rice, creamy chicken skillet, easy weeknight dinner, chicken and rice recipe, one pan meal


