Love this? Save it for later!
Share the inspiration with your friends
There used to be a tiny bakery tucked between a vintage shop and a laundromat on the corner of Elm Street that made the most ethereal meringue cookies I have ever tasted. They called them “Little Ghosts” and sold them only in October. When the bakery closed suddenly two years ago—the owner retired to somewhere in Florida, I think—I honestly felt a little panicked. After twelve tries—some that collapsed into sticky puddles, others that turned brown and weepy—I finally got it.
The first successful batch came out of the oven on a rainy Tuesday afternoon. I had forgotten to wipe down the mixing bowl, and there was a tiny smear of grease on the rim that I noticed halfway through whipping the egg whites. I held my breath, expecting disaster. But let me tell you, those little cookies rose perfectly, each one with a tiny peak that looked exactly like a ghost’s head. My kitchen smelled sweet and clean, like vanilla and sugar and maybe a little bit like victory.
These crispy ghost meringue cookies are the Halloween treat you didn’t know you needed. They are crunchy, light as air, and melt on your tongue like a sweet little secret. Honestly, the first time I bit into one that actually worked, I may have let out a tiny squeal. You know that feeling when something just works after you have been chasing it for a while? That is this recipe.
Why You’ll Love This Recipe
Let’s be real for a second. Halloween treats are usually all about sugar overload and messy chocolate. These crispy ghost meringue cookies are something different. They are the elegant, spooky little cousin of all those candy bars, and honestly, they might steal the show at your next Halloween party.
- Only 3 Ingredients: Egg whites, sugar, and vanilla. That is it. No special extracts, no food coloring required unless you want it, no weird stabilizers.
- Naturally Gluten-Free and Low-Fat: Meringues are basically air and sugar with a little egg white protein. Perfect for guests with dietary restrictions.
- Make-Ahead Magic: These cookies last for weeks in an airtight container. You can bake them a full month before Halloween and they will still be perfectly crispy.
- Kid-Friendly Fun: Piping little ghost shapes is genuinely satisfying. Kids love helping with this step, and the mess is minimal.
- Customizable Spookiness: You can pipe them into classic ghost shapes, add tiny chocolate eyes, or dust them with black cocoa for a shadowy effect.
What makes this recipe different from the dozens of meringue recipes floating around the internet? It is the technique. I have tested every variable—room temperature eggs versus cold, cream of tartar versus vinegar, low oven versus barely-warm oven. This version uses a specific low-and-slow drying method that gives you perfectly white, crisp ghosts every single time. No browning, no cracking, no weeping.
This is the kind of recipe that makes you feel like a kitchen wizard. When you pull a tray of perfect little ghost meringues out of the oven, your guests will think you spent hours. And honestly, the active time is only about 15 minutes. The oven does the rest of the work.
What Ingredients You Will Need
This recipe uses three simple ingredients that you probably already have in your kitchen. The magic is in how you treat them, not in fancy additions. Here is what you need and why each one matters.
- 3 large egg whites, room temperature: Room temperature egg whites whip up to a much greater volume than cold ones. Separate your eggs while they are still cold, then let the whites sit on the counter for about 30 minutes. For best results, use fresh eggs—the older ones actually whip better because they are slightly thinner, but I have had great success with both.
- 3/4 cup (150 grams) granulated white sugar: Do not use powdered sugar or brown sugar here. Granulated sugar dissolves into the egg whites and creates that stable, glossy structure. I recommend using a superfine sugar if you can find it—it dissolves faster. Regular granulated works perfectly fine, just be patient with the mixing time.
- 1 teaspoon vanilla extract: Pure vanilla extract gives the best flavor, but imitation vanilla works in a pinch. You can also experiment with other extracts like peppermint or almond for a different twist. I personally use Nielsen-Massey vanilla because the flavor is clean and strong.
- Optional: 1/4 teaspoon cream of tartar: This is not strictly necessary, but it stabilizes the egg whites and helps prevent them from deflating. If you do not have cream of tartar, you can substitute 1/2 teaspoon of lemon juice or white vinegar. I use cream of tartar every time because it gives me the most reliable results.
- Optional: Black gel food coloring or mini chocolate chips: For making ghost faces. Gel coloring works best because it does not add extra liquid. Liquid food coloring can cause your meringues to deflate.
That is genuinely the whole list. No butter, no flour, no complicated ingredients. The beauty of these crispy ghost meringue cookies is in their simplicity. When you have only three ingredients, each one has to do its job perfectly.
Equipment Needed
You do not need a professional bakery setup for these cookies. I have made them in tiny apartment kitchens and big country kitchens, and the equipment list stays the same.
- Electric stand mixer or hand mixer: Whipping egg whites by hand is possible, but it will take you about 20 minutes of continuous whisking. A stand mixer makes this process effortless. I use my KitchenAid for almost every batch.
- Large mixing bowl: Glass or metal is best. Avoid plastic bowls because they can retain grease residue that will prevent your egg whites from whipping properly. I learned this the hard way after two failed batches.
- Clean, grease-free whisk attachment or beaters: Wash them thoroughly with hot soapy water and dry them completely. Any trace of grease will ruin your meringue.
- Piping bag with a round tip: A large piping bag fitted with a 1/2-inch round tip works perfectly for ghost shapes. If you do not have a piping bag, you can use a sturdy zip-top bag with a corner snipped off. It is not as elegant, but it gets the job done.
- Baking sheets lined with parchment paper: Parchment paper is non-negotiable. Do not use wax paper or greased baking sheets. The meringues need a clean, dry surface to release easily.
- Cooling rack: For cooling the cookies completely after baking.
If you are on a budget, skip the fancy piping tips and just use a zip-top bag. I have done it many times, and the ghosts come out looking charmingly imperfect—which honestly fits the Halloween theme better.
Preparation Method
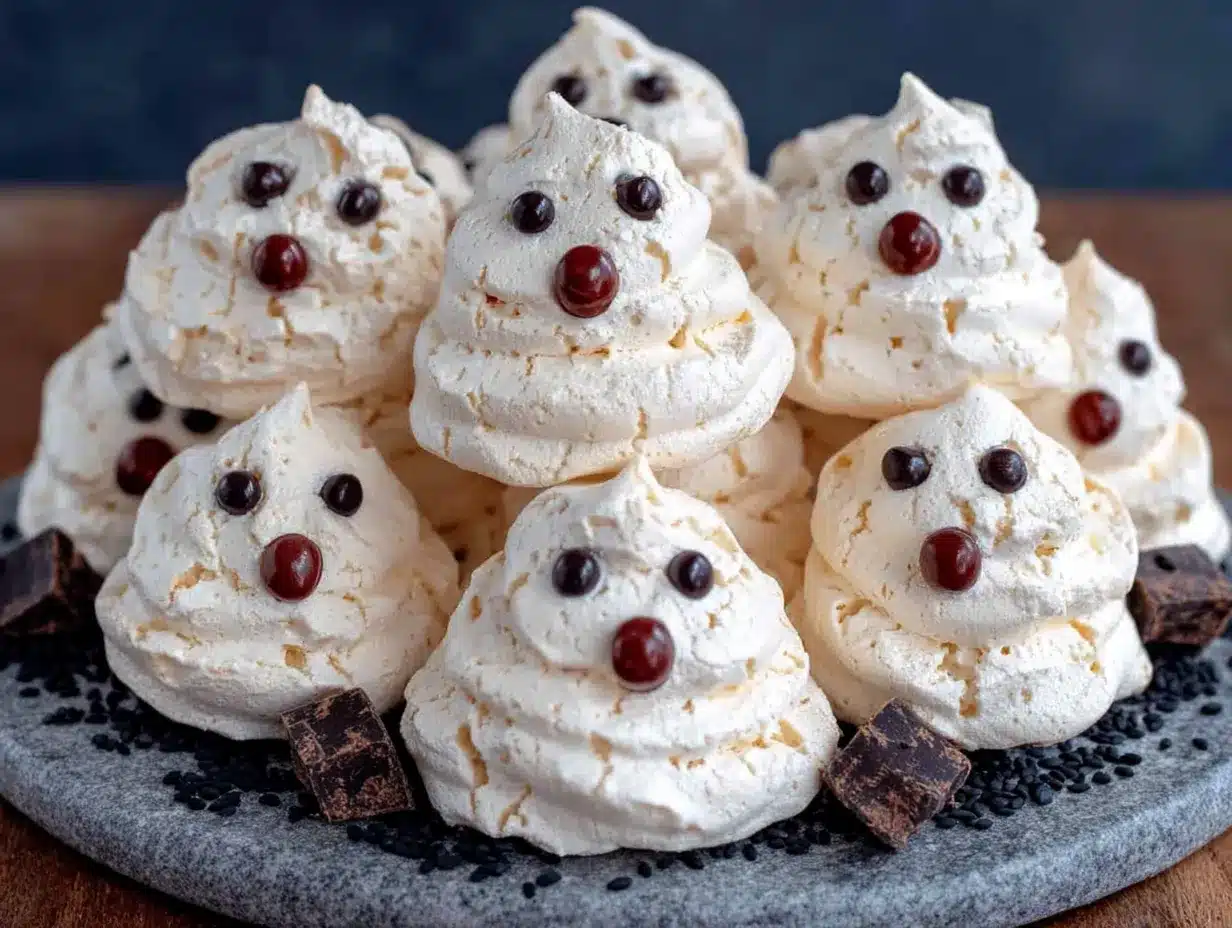
Making these crispy ghost meringue cookies requires a little patience, but the steps are straightforward. Follow them carefully, and you will be rewarded with perfect little ghosts.
Step 1: Prepare your workspace. Preheat your oven to 200°F (93°C). Line two baking sheets with parchment paper. Make sure your mixing bowl and whisk attachment are completely clean and dry. Wipe them with a little lemon juice or vinegar on a paper towel if you are worried about grease.
Step 2: Whip the egg whites. Place the room temperature egg whites in your clean mixing bowl. Add the cream of tartar if you are using it. Begin whipping on medium speed until the egg whites become frothy and start to form soft peaks. This takes about 2-3 minutes. The bubbles should be small and uniform, not large and soapy.
Step 3: Add the sugar gradually. With the mixer running on medium-high speed, add the granulated sugar one tablespoon at a time. This is important—do not dump it all in at once. Each addition should be fully incorporated before you add the next. The mixture will become thicker, glossier, and whiter as you go. This process takes about 5-7 minutes total.
Step 4: Whip to stiff peaks. Continue whipping on high speed until the meringue forms stiff, glossy peaks. You know it is ready when you lift the whisk attachment and the meringue stands up straight without drooping. The mixture should look like marshmallow fluff and feel smooth, not grainy. Rub a tiny bit between your fingers—if it feels gritty, keep whipping until the sugar dissolves completely. This can take up to 10 minutes total.
Step 5: Add vanilla. Add the vanilla extract and whip for another 30 seconds on low speed to incorporate it evenly. Do not overmix at this stage or you risk deflating the meringue.
Step 6: Pipe the ghosts. Transfer the meringue to your piping bag fitted with a round tip. Hold the bag vertically about 1/2 inch above the parchment paper. Pipe a small mound, then pull straight up to create a peak. For a more traditional ghost shape, pipe a round base, then a slightly smaller round on top, then pull up into a pointy head. Leave about 1 inch of space between each ghost because they expand slightly as they dry.
Step 7: Add faces (optional). If you want to give your ghosts eyes and mouths, use a toothpick dipped in black gel food coloring to draw tiny faces. Alternatively, gently press mini chocolate chips into the meringue before baking. Do this immediately after piping while the meringue is still soft.
Step 8: Bake low and slow. Place the baking sheets in the preheated oven. Bake for 60-75 minutes. The meringues are done when they are dry to the touch and easily lift off the parchment paper. They should not be brown at all—if they start to color, your oven is too hot. Turn the temperature down to 180°F (82°C) if needed.
Step 9: Cool completely. Turn off the oven and leave the meringues inside with the door slightly ajar for another 30 minutes. This helps them dry out completely and prevents cracking from sudden temperature changes. Transfer them to a wire rack to cool fully before storing.
Cooking Tips & Techniques
I have made more batches of meringue than I care to count, and I have made every mistake in the book. Here is what I have learned so you do not have to repeat my failures.
Humidity is your enemy. Meringue cookies hate humid days. The sugar absorbs moisture from the air, and your cookies will end up sticky and chewy instead of crisp. If it is raining outside, wait for a dry day. I learned this lesson after a particularly disastrous batch on a July afternoon.
Do not overbake. Meringues should be dry and crisp, not brown. If your oven runs hot, use an oven thermometer to check the actual temperature. I burned an entire batch because my oven was running 25 degrees hotter than the dial said. The ghosts turned tan and tasted slightly caramelized—not the look I was going for.
Separate eggs carefully. Any trace of egg yolk in your whites will prevent them from whipping properly. Separate each egg into a small bowl first, then add the white to your mixing bowl. That way, if one yolk breaks, you only lose that one egg instead of the whole batch. I have saved myself from disaster this way more than once.
Use a timer. Set a timer for 60 minutes, then check your meringues. Every oven is different, and the exact baking time depends on the size of your ghosts and the humidity in your kitchen. Smaller ghosts dry faster, larger ones take longer.
Let them rest in the oven. That extra 30 minutes with the door open is not optional. It prevents the meringues from cracking as they cool. I skipped this step once out of impatience, and half my ghosts developed hairline cracks. They still tasted fine, but they were not as pretty.
Variations & Adaptations
Once you master the basic recipe, you can customize these crispy ghost meringue cookies in so many ways. Here are some of my favorite variations.
Chocolate Ghosts: Replace 2 tablespoons of the granulated sugar with 2 tablespoons of unsweetened cocoa powder. Sift the cocoa powder with the sugar before adding it to the egg whites. The ghosts will be a pale brown color, perfect for spooky chocolate spirits.
Peppermint Ghosts: Substitute the vanilla extract with 1/2 teaspoon of peppermint extract. Crush a few candy canes and sprinkle the pieces over the piped ghosts before baking. The red and white specks look festive and taste amazing.
Vegan Meringue Ghosts: Use aquafaba (the liquid from a can of chickpeas) instead of egg whites. You will need about 1/2 cup of aquafaba for this recipe. Whip it exactly the same way, and add 1/4 teaspoon of cream of tartar for stability. The flavor is slightly different, but the texture is remarkably similar.
Colorful Ghosts: Divide the meringue into separate bowls and add different gel food colors. Pipe purple ghosts, green ghosts, and orange ghosts for a rainbow of Halloween spirits. My niece requested pink ghosts one year, and they turned out adorable.
Spiced Ghosts: Add 1/2 teaspoon of pumpkin pie spice or cinnamon with the sugar. The warm spice flavor pairs beautifully with the sweet meringue and makes these cookies feel extra cozy for fall.
Serving & Storage Suggestions
These crispy ghost meringue cookies are best served at room temperature. They are delicate, so handle them with care when moving them from the baking sheet to a serving platter.
Serving Ideas: Arrange the ghosts on a black platter for maximum spooky effect. You can also pile them in a clear glass jar tied with a ribbon for a cute Halloween gift. They look fantastic on a dessert table alongside other Halloween treats like pumpkin cupcakes or caramel apples.
Storage Instructions: Store the meringues in an airtight container at room temperature. Do not refrigerate them—the moisture in the fridge will make them sticky. They will stay crisp for up to 2 weeks if stored properly. I have kept them for a full month with no loss of quality.
Do Not Freeze: Freezing meringue cookies is not recommended. The ice crystals that form during freezing will ruin their delicate texture. Make them fresh or store them at room temperature.
Transport Tips: If you are taking these cookies to a party, pack them in a single layer in a sturdy container with parchment paper between layers. They are fragile and will crumble if jostled too much. I learned this the hard way when I arrived at a party with a container full of ghost crumbs.
Nutritional Information & Benefits
Per serving (2 cookies): approximately 60 calories, 0g fat, 14g carbohydrates, 1g protein. These are a relatively low-calorie treat compared to most Halloween desserts.
Meringue cookies are naturally fat-free and cholesterol-free if you use only the egg whites. They are also gluten-free, making them a safe option for guests with celiac disease or gluten sensitivity. The main ingredient is sugar, so they are not exactly health food, but they are a lighter alternative to butter-laden cookies.
Egg whites are a good source of protein and contain no fat. They also provide small amounts of potassium and magnesium. Of course, the sugar content means these should be enjoyed in moderation, but as far as Halloween treats go, these are one of the better options.
If you are watching your sugar intake, you can try using a sugar substitute like Swerve or monk fruit sweetener. The texture will be slightly different, and the meringues may not be quite as crisp, but it is a viable option for low-sugar diets.
Conclusion
These crispy ghost meringue cookies have become a Halloween tradition in my house. Every October, I pull out my piping bag and whip up a batch while listening to spooky music. The process is meditative in a way—the whirring of the mixer, the glossy white peaks, the careful piping of each little ghost.
I hope you give this recipe a try. It is simple enough for beginners but impressive enough to wow your Halloween guests. Feel free to experiment with flavors and decorations—that is half the fun. And if your first batch does not turn out perfectly, do not give up. My first batch was a flat, sticky mess, and now I can make these ghosts in my sleep.
I would love to hear how your ghosts turn out. Leave a comment below and tell me about your experience. Did you add faces? Try a different flavor? Make them with your kids? Share your stories and photos—I read every single comment and I answer questions too. Happy Halloween, and happy baking!
Frequently Asked Questions
Why did my meringue cookies turn brown?
Your oven temperature is too high. Meringues should be baked at a low temperature—200°F (93°C) or lower. Check your oven with an oven thermometer to make sure it is accurate. If the cookies are browning, reduce the temperature by 10-15 degrees.
Can I make these cookies in humid weather?
It is not ideal, but you can try. Add an extra 15 minutes to the baking time and let the cookies cool completely in the turned-off oven with the door ajar. Store them immediately in an airtight container with a silica gel packet if you have one.
How do I know when the meringue is whipped enough?
Lift the whisk attachment straight up. The meringue should form stiff peaks that hold their shape without drooping. The mixture should be glossy and smooth, not grainy. Rub a tiny bit between your fingers—it should feel silky, not gritty.
Can I use liquid food coloring?
I do not recommend it. Liquid food coloring adds moisture that can cause your meringues to deflate or become sticky. Use gel or powder food coloring instead. A tiny dab of gel color goes a long way.
Why are my meringues sticky?
They are not fully baked or dried out. Return them to the oven at 200°F (93°C) for another 15-20 minutes. Humidity can also cause stickiness after baking—store them in an airtight container immediately once they are cool.
Pin This Recipe!
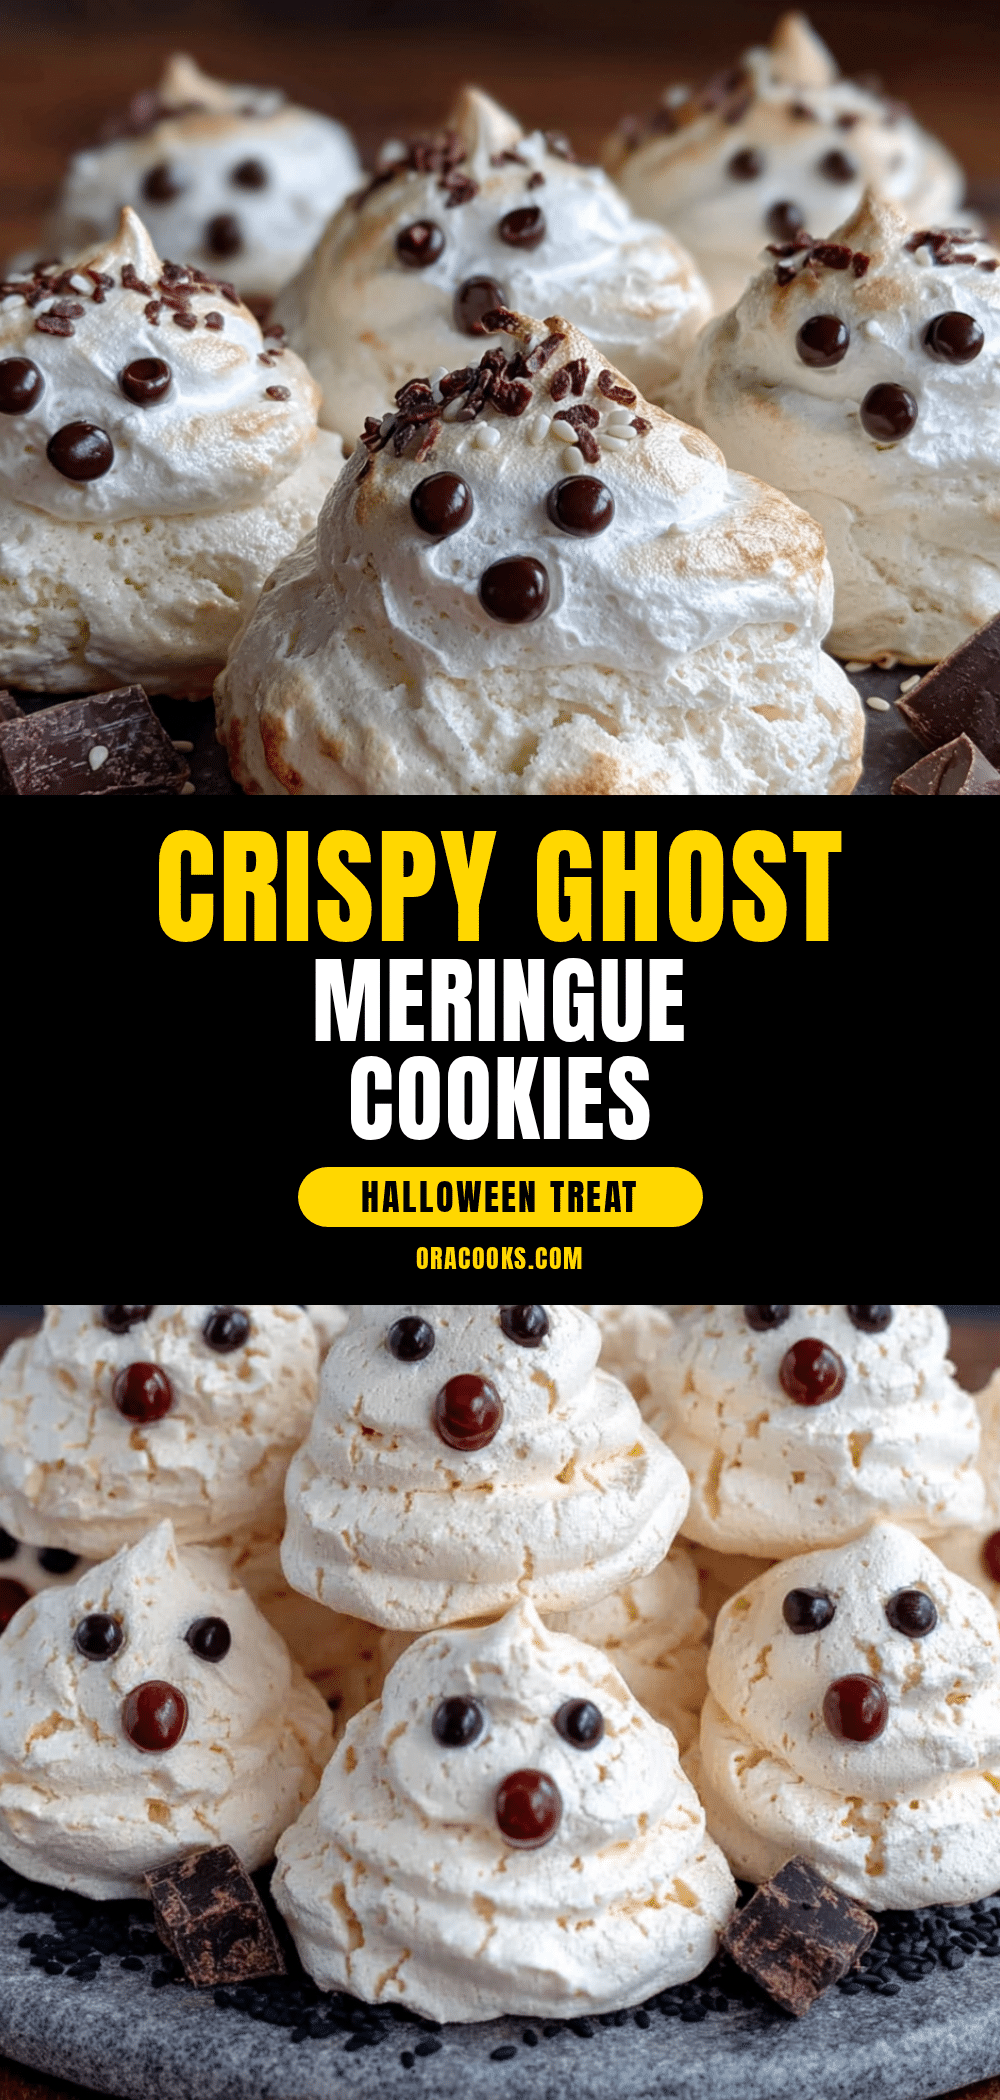
Crispy Ghost Meringue Cookies: Easy 3-Ingredient Recipe
These crispy ghost meringue cookies are the Halloween treat you didn’t know you needed. They are crunchy, light as air, and melt on your tongue like a sweet little secret.
- Prep Time: 15 minutes
- Cook Time: 60-75 minutes
- Total Time: 1 hour 45 minutes to 2 hours
- Yield: 24 cookies 1x
- Category: Dessert
- Cuisine: American
Ingredients
- 3 large egg whites, room temperature
- 3/4 cup (150 grams) granulated white sugar
- 1 teaspoon vanilla extract
- Optional: 1/4 teaspoon cream of tartar
- Optional: Black gel food coloring or mini chocolate chips
Instructions
- Preheat your oven to 200°F (93°C). Line two baking sheets with parchment paper. Make sure your mixing bowl and whisk attachment are completely clean and dry.
- Place the room temperature egg whites in your clean mixing bowl. Add the cream of tartar if using. Begin whipping on medium speed until frothy and soft peaks form, about 2-3 minutes.
- With the mixer running on medium-high speed, add the granulated sugar one tablespoon at a time, fully incorporating each addition before adding the next. This takes about 5-7 minutes.
- Continue whipping on high speed until stiff, glossy peaks form. The meringue should stand up straight without drooping and feel smooth, not grainy. This can take up to 10 minutes total.
- Add the vanilla extract and whip for another 30 seconds on low speed to incorporate.
- Transfer the meringue to a piping bag fitted with a round tip. Pipe small mounds onto the prepared baking sheets, pulling straight up to create a peak. Leave about 1 inch of space between each ghost.
- Optional: Use a toothpick dipped in black gel food coloring to draw faces, or gently press mini chocolate chips into the meringue immediately after piping.
- Bake for 60-75 minutes, until the meringues are dry to the touch and easily lift off the parchment paper. They should not be brown.
- Turn off the oven and leave the meringues inside with the door slightly ajar for another 30 minutes. Transfer to a wire rack to cool completely before storing.
Notes
Humidity is your enemy; avoid making meringues on rainy days. Separate eggs carefully to avoid any yolk. Use an oven thermometer to ensure accurate temperature. Let meringues rest in the turned-off oven with the door ajar for 30 minutes to prevent cracking. Store in an airtight container at room temperature for up to 2 weeks; do not refrigerate or freeze.
Nutrition
- Serving Size: 2 cookies
- Calories: 60
- Sugar: 14
- Sodium: 20
- Carbohydrates: 14
- Protein: 1
Keywords: Halloween cookies, meringue cookies, ghost cookies, 3-ingredient recipe, gluten-free, low-fat, egg white cookies, spooky treats


