Love this? Save it for later!
Share the inspiration with your friends
I was standing in the checkout line at Target last October when I saw them. A giant plastic tub of candy corn sitting on an endcap, glowing like some kind of amber treasure. And just like that, I was seven years old again, sitting cross-legged on my aunt Carol’s linoleum kitchen floor, carefully separating the orange, yellow, and white layers of candy corn into three neat piles on a paper towel. She’d always laugh at me for doing that—”You’re the only kid I know who eats candy corn in the wrong order,” she’d say. She passed away a few years back, and honestly, I haven’t thought about that ritual in ages. But standing there in the checkout line, I could feel that cold linoleum under my legs and hear the hum of her old refrigerator.
I bought the candy corn, of course. And then I stood in my own kitchen wondering what in the world I was going to do with it. I mean, you can only eat so many straight out of the bag before your teeth hurt, right? That’s when it hit me—why not bake with it? Why not turn that nostalgic little candy into something you could actually serve at a fall gathering without feeling like you’re raiding a Halloween bucket?
These Easy Candy Corn Sugar Cookie Bars are the result of that weird, wonderful moment. They take everything you love about soft, buttery sugar cookies and pack them with pockets of melted candy corn that get all chewy and caramel-like. Maybe you’ve been there too—buying a bag of candy corn because it looks pretty on the counter, then realizing you have no real plan for it. Well, now you do.
Why You’ll Love This Recipe
Let me tell you, I tested this recipe four times before I got it right. The first batch came out too dry. The second? The candy corn sank to the bottom like little sugary anchors. The third was somehow both overbaked and underdone in the middle—don’t ask. But this version? This is the one. I’ve got over a decade of recipe development under my belt, and I’m telling you, these bars hit every single note.
- Quick & Easy: From start to finish, these come together in about 35 minutes. No chilling dough, no rolling pins, no fussy layering. Just mix, press, bake, and slice.
- Simple Ingredients: You probably have most of this stuff in your pantry right now. Butter, sugar, flour, eggs, vanilla—the usual suspects. The only “special” ingredient is the candy corn itself.
- Perfect for Fall Gatherings: Harvest parties, Halloween potlucks, Thanksgiving dessert tables—these bars fit right in. They look festive without screaming “I spent three hours on this.”
- Crowd-Pleaser: I brought a batch to my neighbor’s bonfire night, and they were gone in twenty minutes. Even the people who swore they “don’t like candy corn” came back for seconds.
- Unbelievably Delicious: Here’s the thing—when candy corn bakes, it transforms. It gets soft and almost fudge-like, with a subtle honey-vanilla sweetness that’s way more sophisticated than eating it raw. The cookie base stays thick, tender, and perfectly golden.
What makes these different from every other cookie bar recipe out there? It’s the texture. I use a higher ratio of butter to shortening, which gives you that soft, almost cake-like crumb without being greasy. And I fold the candy corn into the dough rather than pressing it on top, so every single bite has those little pockets of melted sweetness. This isn’t just another fall dessert—it’s the one you’ll make every single year.
What Ingredients You Will Need
This recipe uses simple, pantry-friendly ingredients to create something that tastes way more complicated than it actually is. Here’s what you’ll need and why each one matters.
- Unsalted butter, softened (1 cup, or 2 sticks) — I always use unsalted so I can control the salt level. Let it sit out for about 30 minutes before you start. Cold butter won’t cream properly, and you’ll end up with dense bars instead of tender ones.
- Granulated sugar (1 ½ cups) — White sugar gives these bars that classic sugar cookie sweetness and helps with browning. Don’t substitute brown sugar here—it changes the texture too much.
- Large eggs (2, room temperature) — Room temperature eggs incorporate into the butter-sugar mixture much more smoothly than cold ones. If you forgot to take them out ahead of time, place them in a bowl of warm water for 5 minutes.
- Vanilla extract (2 teaspoons) — Pure vanilla makes a real difference here. I’m partial to Nielsen-Massey, but any good-quality brand works. The vanilla complements the candy corn’s honey flavor beautifully.
- All-purpose flour (2 ½ cups) — Spoon and level your flour. Scooping directly from the bag can pack in up to 25% more flour, which leads to dry, crumbly bars.
- Baking powder (1 teaspoon) — This gives the bars just enough lift without making them cakey. We want dense but tender.
- Salt (½ teaspoon) — Don’t skip this. Salt balances the sweetness and makes the candy corn flavor pop.
- Candy corn (1 ½ cups, plus ¼ cup for topping) — The star of the show! I recommend Brach’s for consistent melting. Avoid store-brand candy corn if possible—it tends to be harder and doesn’t soften as nicely during baking. If you’re feeling fancy, try the autumn mix with the little pumpkins and harvest shapes.
For a gluten-free version, swap the all-purpose flour with a 1:1 gluten-free baking blend. I’ve tested this with King Arthur’s Measure for Measure, and it works beautifully. Just don’t use almond flour or coconut flour—the texture won’t hold up. If you want to cut down on sugar, you can reduce the granulated sugar to 1 ¼ cups, but keep the candy corn as-is since it’s really the signature element.
Equipment Needed
You don’t need a fancy kitchen to pull these off. Here’s what you’ll actually use:
- 9×13-inch baking pan — This is your best friend for bar recipes. If you only have an 8×8, the bars will be much thicker and need an extra 8-10 minutes of baking time. A 9×13 gives you that perfect 1-inch thickness.
- Electric hand mixer or stand mixer — You can cream the butter and sugar by hand if you’ve got strong arms, but a mixer makes it way easier. I’ve done both, and honestly, the mixer gives you a fluffier result because you can cream longer without getting tired.
- Parchment paper — Line your pan with this, leaving some overhang on the sides. It creates “handles” that let you lift the entire slab of bars out cleanly for easy slicing. Worth every penny.
- Large mixing bowl — Any big bowl works. I use my grandmother’s old Pyrex mixing bowl, which has a chip in the rim, but it still gets the job done.
- Rubber spatula — For folding in the candy corn without crushing it. A wooden spoon works too, but you’ll have more control with a spatula.
- Cooling rack — Letting the bars cool in the pan for 10 minutes, then transferring them to a rack, prevents the bottoms from getting soggy. If you don’t have a rack, just let them cool completely in the pan—it’ll be fine, just slightly less crisp on the bottom.
Budget-friendly tip: If you don’t have a 9×13 pan, a disposable aluminum one from the grocery store works perfectly. Just be careful not to scratch the bottom when you’re cutting.
Preparation Method
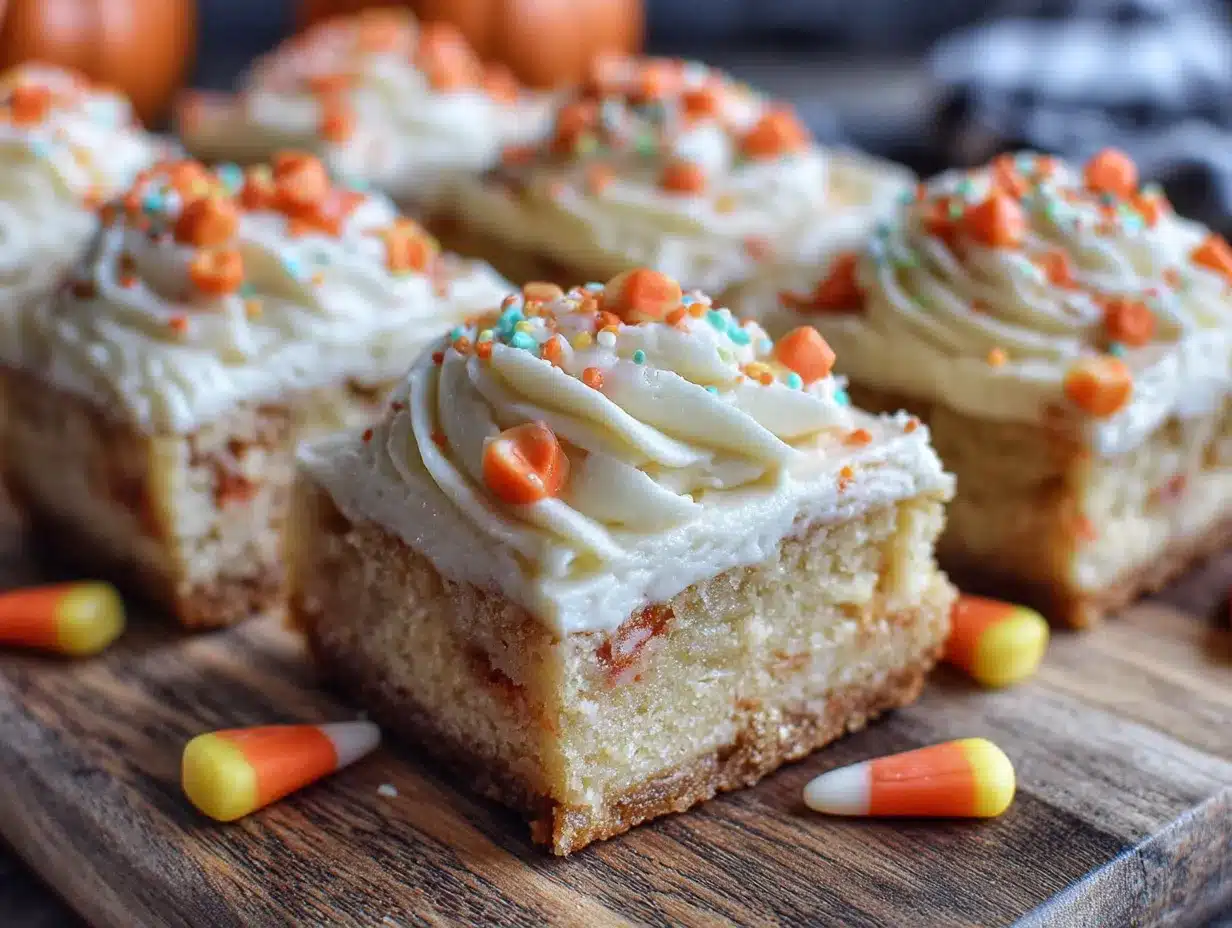
Alright, let’s get baking. I’ve numbered everything clearly so you can follow along without getting lost.
- Preheat your oven to 350°F (175°C). Line your 9×13 baking pan with parchment paper, leaving about 2 inches of overhang on the long sides. Lightly spray the parchment with nonstick cooking spray—just a quick spritz so nothing sticks.
- Cream the butter and sugar. In a large mixing bowl, beat the softened butter and granulated sugar together on medium speed until light and fluffy. This takes about 3-4 minutes with an electric mixer. You’re looking for a pale, airy texture—almost like wet sand. Scrape down the sides of the bowl halfway through. I once skipped this step because I was in a hurry, and the bars came out dense and greasy. Don’t be like me.
- Add the eggs and vanilla. Crack in the eggs one at a time, beating well after each addition. The mixture might look slightly curdled after the first egg—that’s normal, don’t panic. Add the vanilla and beat for another 30 seconds until everything is smooth and glossy.
- Whisk the dry ingredients separately. In a separate medium bowl, whisk together the flour, baking powder, and salt. This ensures the baking powder is evenly distributed. If you skip this and just dump it all in, you might end up with one bar that’s flat and another that puffs up like a biscuit.
- Combine wet and dry ingredients. Gradually add the flour mixture to the butter mixture, mixing on low speed. Stop as soon as the flour disappears—overmixing develops gluten and makes the bars tough. The dough will be thick and slightly sticky, like a soft play-dough.
- Fold in the candy corn. Using a rubber spatula, gently fold in 1 ½ cups of candy corn. Don’t overwork it—just fold until the candy corn is evenly distributed. You want those little pieces scattered throughout, not all clumped together.
- Press the dough into the pan. Transfer the dough to your prepared pan. It’s going to be thick and a little stubborn. Use your hands or the back of a spatula to press it evenly into the corners. Wet your fingers slightly if the dough sticks to you. The layer should be about ¾-inch thick.
- Sprinkle the remaining candy corn on top. Take that extra ¼ cup of candy corn and scatter it over the surface, pressing it in gently. This gives you those beautiful little pops of color on top.
- Bake for 20-25 minutes. The edges should be lightly golden and the center should look set but still soft. A toothpick inserted in the center should come out with a few moist crumbs—not wet batter. My oven runs hot, so I check at 18 minutes just to be safe. Yours might be different, so start checking early.
- Cool completely before slicing. Let the bars cool in the pan on a wire rack for 10 minutes. Then lift them out using the parchment handles and transfer to the rack to cool completely. This is crucial—if you cut them while they’re warm, they’ll fall apart. I learned this the hard way with my second batch. Patience, friend.
- Slice into squares. Once completely cool, use a sharp knife to cut into 24 even bars (6 rows by 4 rows). Wipe the knife clean between cuts for neat edges.
Cooking Tips & Techniques
After four batches and more than a few mistakes, here’s what I’ve learned so you don’t have to repeat my errors.
Don’t overmix the dough. This is probably the most common mistake. Once you add the flour, mix just until it comes together. Overmixing develops gluten, and you’ll end up with bars that are tough and bread-like instead of tender and soft. I’m talking from experience—batch one was basically hockey pucks.
Watch your oven temperature. Ovens lie. They really do. My oven runs about 25 degrees hot, so I always use an oven thermometer. If your bars are browning too fast on the edges but the center is still raw, tent the pan loosely with aluminum foil for the last 5 minutes of baking.
Let them cool completely. I know, I know—you want to eat them right away. But cutting into warm bars is a recipe for disaster. The candy corn is still molten at that point, and the bars will crumble into a sugary mess. Give them at least 45 minutes to cool on the rack. The texture firms up beautifully, and the flavors meld together.
Use room temperature ingredients. Cold eggs and cold butter don’t cream well. You’ll end up with a lumpy dough that bakes unevenly. Set your butter and eggs out 30 minutes before you start. If you forgot, place the eggs in warm water for 5 minutes and microwave the butter in 5-second bursts until it’s soft but not melted.
Line your pan properly. The parchment overhang trick is non-negotiable. It lets you lift the entire slab of bars out in one piece, which makes slicing so much easier. I once forgot to do this and spent 15 minutes digging broken bars out of the pan with a spatula. Never again.
Variations & Adaptations
One of the best things about this recipe is how easy it is to tweak. Here are some variations I’ve tried and loved.
- Chocolate Drizzle: After the bars have cooled, melt ½ cup of semi-sweet chocolate chips with 1 teaspoon of coconut oil and drizzle it over the top. The chocolate-candy corn combo is surprisingly amazing—like a grown-up version of those Halloween chocolate candies.
- Pumpkin Spice Twist: Add 1 teaspoon of pumpkin pie spice to the flour mixture and swap ¼ cup of the granulated sugar for brown sugar. This gives the bars a warm, autumnal flavor that pairs beautifully with the candy corn. I made this version for a Friendsgiving and got asked for the recipe three times.
- Nutty Crunch: Fold in ½ cup of chopped pecans or walnuts along with the candy corn. The nuts add a lovely crunch that contrasts with the soft cookie base. Toast them first for extra flavor—just 5 minutes in a dry pan over medium heat.
- Gluten-Free Option: As I mentioned earlier, use a 1:1 gluten-free baking blend. I’ve tested this with King Arthur’s Measure for Measure and Bob’s Red Mill, and both worked perfectly. The texture is slightly more crumbly, but still delicious.
- Vegan Adaptation: Substitute the butter with vegan butter (I like Miyoko’s), use flax eggs (1 tablespoon ground flaxseed + 3 tablespoons water per egg), and make sure your candy corn is vegan-friendly. Most major brands are, but double-check the label.
My personal favorite variation? The chocolate drizzle version. I made it for a Halloween party last year, and people literally stood around the platter eating them like they were the main event. There’s something about that combination of soft, buttery cookie, sweet candy corn, and rich chocolate that just works.
Serving & Storage Suggestions
These bars are incredibly versatile when it comes to serving. Here’s how to make the most of them.
Serving Temperature: Room temperature is best. The cookie stays soft and tender, and the candy corn has that perfect chewy texture. If you’ve stored them in the fridge, let them sit out for about 15 minutes before serving. You can also warm them in the microwave for 10 seconds if you want that just-baked feel.
Presentation Ideas: Arrange the bars on a wooden cutting board or a white platter for a beautiful fall display. Sprinkle a few extra candy corn pieces around the edges for color. For Halloween parties, serve them on a black or orange platter. For Thanksgiving, add a few mini pumpkins or fall leaves as decoration.
Complementary Dishes: These bars pair beautifully with a hot cup of apple cider or a pumpkin spice latte. For a dessert spread, serve them alongside classic pumpkin pie or apple crisp with oat topping. They also go surprisingly well with vanilla ice cream—the cold creaminess balances the sweetness perfectly.
Storage Instructions: Store the bars in an airtight container at room temperature for up to 5 days. Layer them between sheets of parchment paper to prevent sticking. If you live in a humid climate, add a piece of bread to the container—it absorbs excess moisture and keeps the bars soft. I learned this trick from my aunt, and it works like magic.
Freezer Instructions: These bars freeze beautifully. Wrap individual bars in plastic wrap, then place them in a freezer-safe bag or container. They’ll keep for up to 3 months. To thaw, let them sit at room temperature for about 30 minutes. You can also pop them in the microwave for 15-20 seconds if you’re impatient (I won’t judge).
Flavor Development: Here’s a little secret—these bars actually taste better the next day. The candy corn continues to soften and meld with the cookie base, creating an even more cohesive texture. So if you’re making them for a party, bake them a day ahead. Your future self will thank you.
Nutritional Information & Benefits
Let’s be real—these are a treat, not a health food. But that doesn’t mean they can’t fit into a balanced lifestyle.
Per bar (based on 24 servings): Approximately 210 calories, 9g fat, 31g carbohydrates, 2g protein, 1g fiber, 18g sugar. These values will vary slightly based on the specific brands you use and any variations you make.
Health Highlights: The butter provides a small amount of vitamin A, and the eggs contribute protein and choline. If you use the gluten-free version, you’re accommodating dietary needs without sacrificing flavor. And honestly? Sometimes the biggest benefit is the joy of sharing something homemade with people you love. That counts for something, right?
Dietary Considerations: This recipe contains dairy, eggs, and gluten. For dairy-free, use vegan butter. For egg-free, use flax eggs. For gluten-free, use a 1:1 gluten-free flour blend. The candy corn itself is typically free of common allergens, but always check the label if you’re serving someone with allergies.
My Wellness Perspective: I’m a big believer in the 80/20 rule—eat well most of the time, and enjoy treats without guilt the rest of the time. These bars fall firmly in the “enjoy” category. They’re perfect for celebrations, holidays, or just a Tuesday that needs a little sweetness. Life’s too short to skip dessert, you know?
Conclusion
These Easy Candy Corn Sugar Cookie Bars are everything I hoped they’d be when I stood in that Target checkout line. They’re nostalgic without being cloying, festive without being fussy, and delicious in a way that makes you close your eyes after the first bite. The candy corn transforms into something almost magical—soft, chewy, and caramel-like—while the cookie base stays perfectly tender and buttery.
I love that this recipe lets me honor my aunt Carol’s memory in my own way. She’d probably laugh at me for baking with candy corn instead of eating it in the “right” order, but I think she’d also sneak a second bar when she thought no one was looking. That’s the kind of recipe this is—one that brings people together, sparks conversation, and makes ordinary moments feel special.
Now I want to hear from you! Have you ever baked with candy corn before? What’s your favorite fall dessert? Drop a comment below and let me know. And if you make these bars, tag me in your photos—I absolutely love seeing your creations. Happy baking, friends!
Frequently Asked Questions
Can I use leftover Halloween candy corn?
Absolutely! In fact, that’s one of the best things about this recipe. Stale candy corn works just fine—it softens up during baking. Just make sure it’s not rock hard or discolored.
Why did my candy corn sink to the bottom?
This usually happens if the dough is too thin or warm. Make sure your butter is softened, not melted, and chill the dough for 15 minutes if your kitchen is particularly warm. Also, fold the candy corn in gently instead of stirring vigorously.
Can I make these ahead of time?
Yes! These bars actually taste better the next day. Bake them up to 2 days in advance and store in an airtight container at room temperature. You can also freeze them for up to 3 months.
How do I get clean slices?
Use a sharp knife and wipe it clean between each cut. For the neatest edges, chill the bars in the refrigerator for 30 minutes before slicing. This firms up the candy corn and makes it easier to cut through.
Can I use other candies instead of candy corn?
Sure! Try autumn mix, candy pumpkins, or even chopped caramel candies. Just keep in mind that different candies melt at different rates, so you may need to adjust baking time slightly. Avoid anything with a hard shell, like M&Ms, unless you want crunchy bits.
Pin This Recipe!

Easy Candy Corn Sugar Cookie Bars: Best Fall Dessert

These Easy Candy Corn Sugar Cookie Bars are soft, buttery sugar cookies packed with pockets of melted candy corn that become chewy and caramel-like. Perfect for fall gatherings, they come together in about 35 minutes with simple pantry ingredients.
- Prep Time: 10 minutes
- Cook Time: 25 minutes
- Total Time: 35 minutes
- Yield: 24 bars 1x
- Category: Dessert
- Cuisine: American
Ingredients
- 1 cup (2 sticks) unsalted butter, softened
- 1 ½ cups granulated sugar
- 2 large eggs, room temperature
- 2 teaspoons vanilla extract
- 2 ½ cups all-purpose flour
- 1 teaspoon baking powder
- ½ teaspoon salt
- 1 ½ cups candy corn (plus ¼ cup for topping)
Instructions
- Preheat your oven to 350°F (175°C). Line a 9×13-inch baking pan with parchment paper, leaving about 2 inches of overhang on the long sides. Lightly spray the parchment with nonstick cooking spray.
- In a large mixing bowl, beat the softened butter and granulated sugar together on medium speed until light and fluffy, about 3-4 minutes. Scrape down the sides of the bowl halfway through.
- Add the eggs one at a time, beating well after each addition. Add the vanilla and beat for another 30 seconds until smooth and glossy.
- In a separate medium bowl, whisk together the flour, baking powder, and salt.
- Gradually add the flour mixture to the butter mixture, mixing on low speed until just combined. The dough will be thick and slightly sticky.
- Using a rubber spatula, gently fold in 1 ½ cups of candy corn until evenly distributed.
- Transfer the dough to the prepared pan and press it evenly into the corners. The layer should be about ¾-inch thick.
- Sprinkle the remaining ¼ cup of candy corn over the surface, pressing it in gently.
- Bake for 20-25 minutes, until the edges are lightly golden and the center is set but still soft. A toothpick inserted in the center should come out with a few moist crumbs.
- Let the bars cool in the pan on a wire rack for 10 minutes. Then lift them out using the parchment handles and transfer to the rack to cool completely.
- Once completely cool, use a sharp knife to cut into 24 even bars (6 rows by 4 rows). Wipe the knife clean between cuts for neat edges.
Notes
For gluten-free, use a 1:1 gluten-free baking blend. For vegan, use vegan butter and flax eggs. Bars taste even better the next day. Store in an airtight container at room temperature for up to 5 days, or freeze for up to 3 months.
Nutrition
- Serving Size: 1 bar
- Calories: 210
- Sugar: 18
- Sodium: 95
- Fat: 9
- Saturated Fat: 5
- Carbohydrates: 31
- Fiber: 1
- Protein: 2
Keywords: candy corn, sugar cookie bars, fall dessert, Halloween dessert, easy cookie bars, candy corn recipe


