Love this? Save it for later!
Share the inspiration with your friends
The office potluck was in four hours and I’d completely forgotten. Not just forgotten—I’d actively ignored the email chain for two weeks, assuming someone else would handle it. By 10 AM, my desk phone buzzed with a reminder from Karen in accounting. Everyone else would be bringing their signature dishes: layered enchilada casseroles that took all weekend, handmade pasta salads with heirloom tomatoes, that one woman’s famous chocolate torte that requires a kitchen torch. I had a pound of ground beef thawing on the counter and a half-empty box of long-grain rice in the pantry. Honestly? I almost stopped for takeout on the way home. But then I remembered this cheesy beef and rice skillet recipe I’d thrown together during a camping trip last summer—one pot, one burner, zero stress. I figured it would be decent enough to not embarrass myself. What I didn’t expect was for it to disappear first, with people actually asking for the recipe. Let me tell you, there’s something deeply satisfying about winning a potluck with the dish you almost didn’t bring. Maybe you’ve been there—scrambling at the last minute, convinced everyone else has it together. This one’s for you.
Why You’ll Love This Recipe
This cheesy beef and rice skillet isn’t just another weeknight dinner—it’s the kind of recipe that makes you look like a kitchen wizard when you barely broke a sweat. I’ve tested this more times than I care to admit (my family has been very patient), and every single batch comes out creamy, cheesy, and deeply satisfying. Here’s why you’ll keep coming back to it:
- Ready in 20 Minutes Flat: From fridge to table in less time than it takes to order takeout. Perfect for those nights when you’re staring into the pantry wondering what’s for dinner.
- One Skillet, Zero Drama: You don’t need a dozen pots and pans. Just a single skillet—less cleanup, more time on the couch.
- Pantry-Friendly Ingredients: Ground beef, rice, cheese, a few seasonings. Chances are you already have most of this in your kitchen right now.
- Kid-Approved (and Adult-Approved): My nephew calls it “the cheesy meat rice” and requests it every time he visits. Adults love it because it actually tastes like comfort food, not a sad weeknight compromise.
- Endlessly Customizable: Swap the beef for ground turkey, add bell peppers, throw in some black beans—it’s forgiving enough to work with whatever you’ve got.
What makes this version different from all the other cheesy rice skillets out there? It’s the technique. Instead of boiling the rice separately, you cook it right in the skillet with the beef juices and broth. That means every grain absorbs all that savory flavor—no bland, watery rice here. And the cheese? You stir it in at the very end, off the heat, so it melts into a creamy blanket without getting greasy. It’s simple cooking that tastes like you tried way harder than you actually did.
What Ingredients You Will Need
This recipe uses simple, wholesome ingredients to deliver bold flavor and satisfying texture without the fuss. Most of these are probably already in your kitchen—if not, they’re easy to find at any grocery store. Let’s break down what you’ll need and why each ingredient matters.
For the Beef and Rice Base
- 1 pound ground beef (80/20 works best—the fat adds flavor; drain excess if needed)
- 1 tablespoon olive oil (for browning; use avocado oil if that’s what you have)
- 1 medium yellow onion, diced (about 1 cup; adds sweetness and depth)
- 3 cloves garlic, minced (fresh is best, but jarred minced garlic works in a pinch)
- 1 cup long-grain white rice (uncooked; basmati or jasmine also work great—avoid instant rice here)
- 2 cups beef broth (low-sodium recommended so you control the salt; chicken broth works too)
- 1 can (14.5 oz) diced tomatoes, undrained (fire-roasted adds a lovely smoky note)
- 1 teaspoon smoked paprika (adds warmth and color; regular paprika is fine)
- 1/2 teaspoon cumin (gives it that subtle Tex-Mex vibe)
- 1/2 teaspoon salt (adjust to taste)
- 1/4 teaspoon black pepper
- 1/2 teaspoon dried oregano (optional, but I love the herbal note)
For the Cheesy Finish
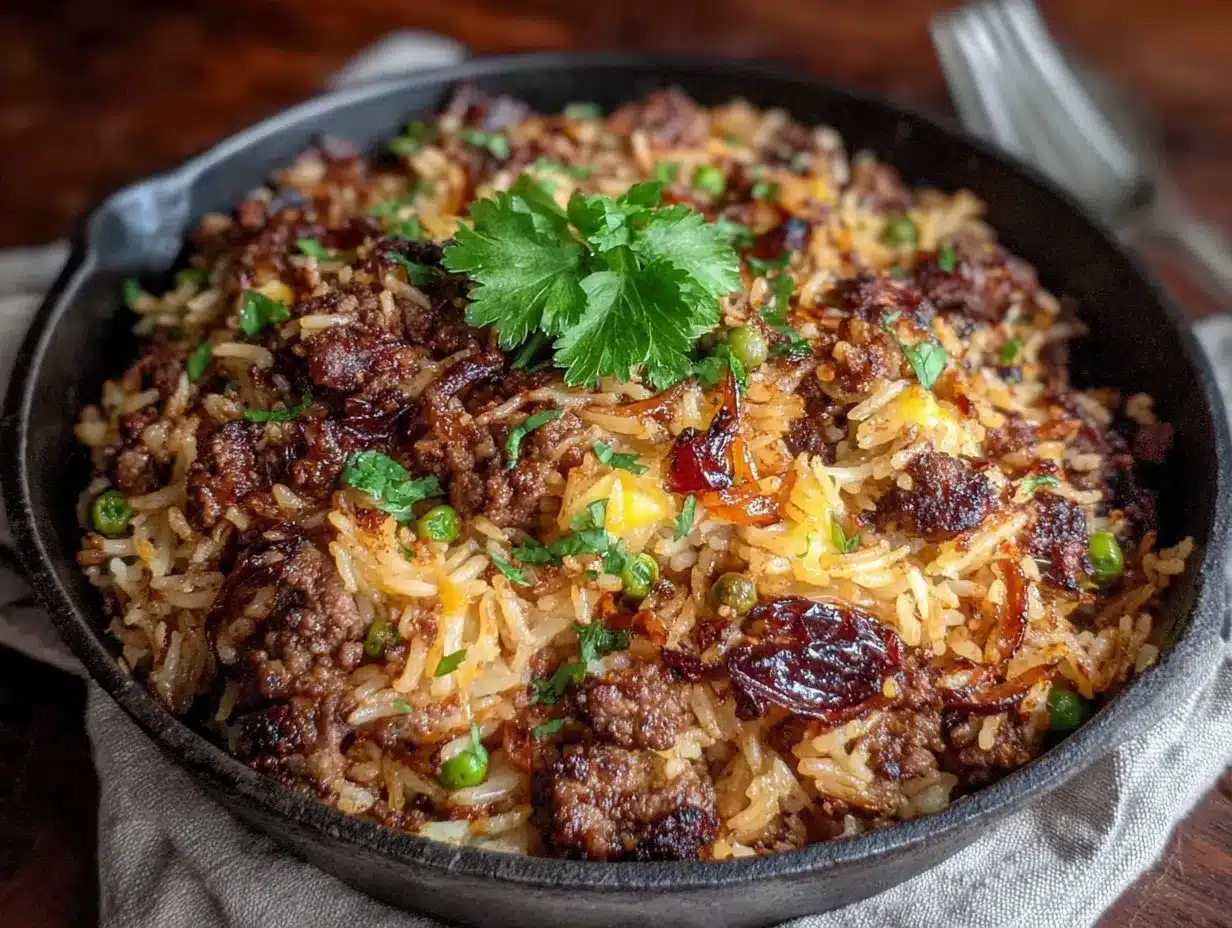
- 1 1/2 cups shredded cheddar cheese (sharp cheddar gives the most flavor; mild works if you prefer)
- 1/2 cup shredded mozzarella (for that stretchy, gooey texture)
- 2 tablespoons cream cheese, softened (this is my secret ingredient—adds creaminess without making it heavy)
Optional Toppings
- Fresh parsley or cilantro, chopped
- Green onions, sliced
- A dollop of sour cream
- Hot sauce (I’m partial to Cholula)
Ingredient Tips: For the best texture, I recommend using a good-quality cheddar—Tillamook or Kerrygold are my go-to brands. If you’re watching sodium, definitely use low-sodium broth and adjust the salt at the end. And here’s a little trick: if you only have minute rice, this recipe won’t work the same way. You need a rice that absorbs liquid and holds its shape, so stick with long-grain or medium-grain white rice.
Equipment Needed
One of the best things about this cheesy beef and rice skillet is how little equipment it requires. You probably already own everything on this list.
- A large skillet or sauté pan (12-inch with a lid is ideal; a Dutch oven works too)
- A wooden spoon or spatula (for breaking up the beef and stirring)
- A sharp knife (for dicing the onion and mincing garlic)
- A cutting board
- Measuring cups and spoons
- A cheese grater (pre-shredded cheese works, but freshly grated melts much smoother)
Budget-Friendly Tip: If you don’t have a lid that fits your skillet, use a baking sheet or aluminum foil to cover it. I’ve done this more times than I’d like to admit, and it works perfectly. Also, if your skillet isn’t nonstick, just make sure to stir more frequently to prevent sticking—especially when the rice is absorbing the liquid.
Preparation Method
Let’s get cooking! This cheesy beef and rice skillet comes together in about 20 minutes, but I’ll walk you through each step so you get perfect results every time. Trust me on the order of operations—it matters.
- Heat the skillet over medium-high heat. Add the olive oil and let it shimmer for about 30 seconds. You want it hot but not smoking—if it starts smoking, turn the heat down a notch.
- Add the ground beef. Break it apart with your wooden spoon as it cooks. Let it brown for about 3-4 minutes without stirring too much—you want those lovely brown bits (fond) to develop on the bottom of the pan. That’s flavor gold right there.
- Add the diced onion and cook for 2 minutes, stirring occasionally. The onion should soften and become translucent. If the pan looks dry, don’t worry—the beef fat will keep things moving.
- Stir in the minced garlic and cook for 30 seconds until fragrant. Garlic burns fast, so keep stirring. You’ll know it’s ready when your kitchen smells amazing.
- Drain excess fat if needed. If you used 80/20 beef, you might have a lot of rendered fat. Tilt the skillet and spoon out the excess, leaving about a tablespoon for flavor. If you used leaner beef, skip this step.
- Add the rice, smoked paprika, cumin, salt, pepper, and oregano. Stir everything together for about 1 minute, letting the rice toast slightly in the beef fat. This step is crucial—toasting the rice gives it a nutty flavor and helps it stay separate instead of turning mushy.
- Pour in the beef broth and diced tomatoes (with their juices). Stir to combine, scraping up any browned bits from the bottom of the pan. Bring the mixture to a boil—you should see bubbles breaking the surface.
- Reduce heat to low, cover the skillet, and let it simmer. Set a timer for 15 minutes. Do NOT lift the lid during this time! I know it’s tempting, but every time you lift the lid, you release steam that the rice needs to cook properly. Trust the process.
- After 15 minutes, remove the lid and check the rice. It should be tender and most of the liquid should be absorbed. If the rice is still a bit crunchy, add 2-3 tablespoons of water, cover, and cook for 2 more minutes.
- Remove the skillet from the heat. This is important—you’re going to add the cheese off the heat so it melts slowly and evenly without separating.
- Add the cream cheese first, stirring until it’s fully incorporated into the rice and beef mixture. The heat from the pan will soften it quickly.
- Add the shredded cheddar and mozzarella. Stir gently until the cheese is fully melted and everything looks gloriously creamy. This should take about 1-2 minutes.
- Taste and adjust seasoning. Add more salt or pepper if needed. Remember that the cheese adds saltiness too, so go easy at first.
- Serve immediately while it’s hot and cheesy. Top with fresh parsley, green onions, or a drizzle of hot sauce if you’re feeling fancy.
Sensory Cue: When the rice is perfectly cooked, the mixture should look moist but not soupy—like a thick, hearty risotto. The cheese should pull into soft, stretchy ribbons when you lift the spoon. And the smell? Smoky, savory, with that unmistakable melted cheese aroma that makes everyone wander into the kitchen asking what’s for dinner.
Cooking Tips & Techniques
After making this cheesy beef and rice skillet more times than I can count (and messing it up plenty along the way), I’ve learned a few things that make a real difference. Here are my best tips:
Don’t skip toasting the rice. I learned this the hard way. The first time I made this, I just dumped everything in and let it cook. The rice turned out mushy and bland. Taking that extra minute to stir the rice in the beef fat before adding liquid changes everything—it gives each grain a slight crunch and a deeper flavor that carries through the whole dish.
Use freshly shredded cheese. I know, I know—pre-shredded cheese is convenient. But it’s coated in anti-caking agents (usually potato starch or cellulose) that prevent it from melting smoothly. Your cheese sauce will be creamier and less grainy if you shred it yourself. It takes two extra minutes and it’s absolutely worth it.
Watch your heat. This recipe cooks quickly, and the rice can go from perfectly tender to scorched in about 30 seconds. Once you cover the skillet and reduce the heat to low, resist the urge to crank it up. Low and slow is the way to go here. If your stovetop runs hot, use the lowest setting possible.
Let it rest (briefly). After you stir in the cheese and remove the pan from the heat, let it sit for about 2 minutes before serving. This allows the flavors to meld and the cheese to set slightly—the texture becomes creamier rather than immediately greasy. I know you’re hungry, but patience pays off here.
Double the recipe if you’re smart. This dish reheats beautifully (more on that below), so I always make a double batch. It saves me on busy nights when I don’t have 20 minutes to spare. Just use a larger skillet or Dutch oven and add 5 minutes to the cooking time.
One mistake I made: I once used extra-lean ground beef (93/7) because I was trying to be healthy. The rice turned out dry and the whole dish lacked richness. You need at least 80/20 beef for the fat to flavor the rice properly. If you’re set on lean beef, add an extra tablespoon of olive oil when cooking the rice.
Variations & Adaptations
This cheesy beef and rice skillet is incredibly flexible—I’ve tried it half a dozen ways and loved every version. Here are some of my favorites:
Tex-Mex Style: Add 1 can of drained black beans and 1 cup of frozen corn along with the broth. Swap the oregano for chili powder and top with pickled jalapeños. This version is heartier and has a nice spicy kick.
Vegetarian Version: Skip the beef entirely and use 2 cans of black beans or 1 package of crumbled plant-based meat. Use vegetable broth instead of beef broth. The cheese adds enough richness that you won’t miss the meat—honestly, I’ve served this to friends who didn’t even notice.
Spicy Buffalo Style: Stir in 3 tablespoons of buffalo sauce along with the broth. Use pepper jack cheese instead of cheddar. Top with crumbled blue cheese and sliced celery. This one’s a game-day favorite in my house.
Low-Carb Adaptation: Swap the rice for 2 cups of cauliflower rice (frozen or fresh). Skip the broth and just use the diced tomatoes—cauliflower releases water as it cooks. Reduce the cooking time to 8-10 minutes. It’s not quite the same texture, but the cheesy goodness still delivers.
Add Some Veggies: Throw in 1 cup of diced bell peppers (any color) along with the onion. Or stir in 2 cups of fresh spinach right before adding the cheese—it wilts down to almost nothing and adds color without changing the flavor. My kids don’t even notice the spinach.
Personal Variation: My favorite twist came from a happy accident. I was out of diced tomatoes, so I used a can of Rotel (diced tomatoes with green chiles) instead. The subtle heat and tangy flavor were incredible. Now I make it that way on purpose.
Serving & Storage Suggestions
This cheesy beef and rice skillet is perfect straight from the pan, but here’s how to make the most of it:
Serving Temperature: Serve it hot—right after you stir in the cheese. The cheese will be at its creamiest and the rice will have the best texture. If it cools down too much, the cheese starts to firm up and the rice gets sticky.
Presentation Ideas: Spoon it into shallow bowls and top with fresh parsley or cilantro for color. A dollop of sour cream adds a nice cool contrast. If you’re feeling fancy, serve it in individual cast iron skillets for that rustic, cozy vibe. A side of warm tortillas or crusty bread is perfect for sopping up any cheesy bits left in the bowl.
What to Serve With It: A simple green salad with a tangy vinaigrette balances the richness. Roasted broccoli or steamed green beans work well too. If you’re feeding a crowd, this skillet pairs beautifully with a side of refried beans or a simple corn salad. For drinks, a cold beer or a glass of iced tea is all you need.
Storage Instructions: Let any leftovers cool completely, then transfer to an airtight container. Store in the refrigerator for up to 4 days. The flavors actually meld together overnight—I think it tastes even better the next day.
Reheating Tips: The microwave works fine (cover with a damp paper towel to add moisture), but I prefer reheating in a skillet. Add a splash of beef broth or water, cover, and warm over medium-low heat for 5-7 minutes, stirring occasionally. This restores the creamy texture better than the microwave. If the rice seems dry, just add a little more liquid.
Freezer Instructions: This freezes surprisingly well. Portion into freezer-safe containers and freeze for up to 3 months. Thaw overnight in the refrigerator and reheat in a skillet as described above. I often freeze individual portions for easy lunches—just grab and go.
Nutritional Information & Benefits
This cheesy beef and rice skillet is comfort food, but it also has some surprising nutritional perks. Here’s the breakdown:
Estimated Nutritional Values (per serving, based on 6 servings):
| Nutrient | Amount |
|---|---|
| Calories | 485 |
| Protein | 28g |
| Carbohydrates | 38g |
| Fat | 24g |
| Saturated Fat | 12g |
| Fiber | 2g |
| Sodium | 680mg |
| Calcium | 320mg |
| Iron | 3.5mg |
Health Benefits: The ground beef provides high-quality protein and iron—essential for energy and healthy blood cells. The cheese adds calcium for strong bones, and the tomatoes contribute lycopene, an antioxidant linked to heart health. The onions and garlic offer anti-inflammatory compounds. It’s not a health food, but it’s a balanced meal that satisfies without leaving you feeling heavy.
Dietary Considerations: This recipe is naturally gluten-free (just double-check your broth and seasonings). For a lower-carb option, use cauliflower rice. For a lower-fat version, use lean ground beef and reduced-fat cheese—though I find the texture suffers a bit. It’s not suitable for dairy-free or vegan diets as written, but you could experiment with plant-based cheese alternatives.
Potential Allergens: Dairy (cheese, cream cheese). Always check labels if cooking for someone with allergies.
Conclusion
This cheesy beef and rice skillet has become my weeknight hero—the recipe I turn to when I’m tired, busy, or just need something that’s guaranteed to make everyone happy. It’s proof that you don’t need fancy ingredients or hours in the kitchen to create a meal that feels special. The creamy, cheesy texture, the savory beef, the perfectly cooked rice—it all comes together in one pan, in 20 minutes, with zero stress.
I love this recipe because it’s forgiving. You can swap ingredients, adjust the seasoning, add whatever vegetables are languishing in your fridge—and it still turns out delicious. It’s the kind of dish that makes you feel like a competent, put-together adult even on days when you’re barely holding it together. And honestly? That’s the best kind of recipe to have in your back pocket.
So go ahead—give it a try. Make it your own. Add extra cheese, throw in some jalapeños, serve it with a side of tortilla chips. I’d love to hear how it turns out for you. Leave a comment below and tell me about your version—did you add something unexpected? Did your kids go back for seconds? Did you win your own office potluck? Let me know!
Happy cooking, friends. You’ve got this.
Frequently Asked Questions
Can I use brown rice instead of white rice?
You can, but you’ll need to adjust the cooking time and liquid. Brown rice takes about 35-40 minutes to cook and needs more broth—about 2 1/2 cups instead of 2. You’ll also want to add an extra 1/2 cup of broth and cook covered for 35 minutes before checking. The texture won’t be quite as creamy, but it works in a pinch.
Can I make this in an Instant Pot or slow cooker?
For the Instant Pot, brown the beef on sauté mode, then add the remaining ingredients (except cheese). Pressure cook on high for 5 minutes with a natural release. Stir in the cheese at the end. For a slow cooker, brown the beef first, then add everything except the cheese and cook on low for 3-4 hours or high for 1-2 hours. Stir in cheese before serving. The slow cooker version will be softer and less distinct in texture, but still tasty.
How do I prevent the rice from getting mushy?
The biggest culprit is too much liquid or overcooking. Stick to the 2 cups of broth plus the can of tomatoes (with their juices). Don’t lift the lid while the rice is cooking—every time you do, you release steam and disrupt the cooking process. Also, make sure your heat is low enough that the liquid simmers gently, not boils vigorously.
Can I use ground turkey or chicken instead of beef?
Absolutely. Ground turkey or chicken work well, but they’re leaner, so you’ll need to add a little extra olive oil (about 1 tablespoon) when cooking the rice. The flavor will be milder, so consider adding an extra pinch of smoked paprika or a dash of Worcestershire sauce for depth. I’ve made it with ground turkey several times and it’s always been a hit.
What’s the best cheese combination for this recipe?
My go-to is sharp cheddar and mozzarella—the cheddar brings bold flavor and the mozzarella adds that stretchy, gooey texture. But feel free to experiment. Monterey Jack melts beautifully and is mild enough for picky eaters. Pepper jack adds heat. Gouda gives a smoky, rich flavor. Even a handful of Parmesan stirred in at the end adds a nice salty kick. Just avoid pre-shredded cheese blends for the smoothest melt.
Pin This Recipe!
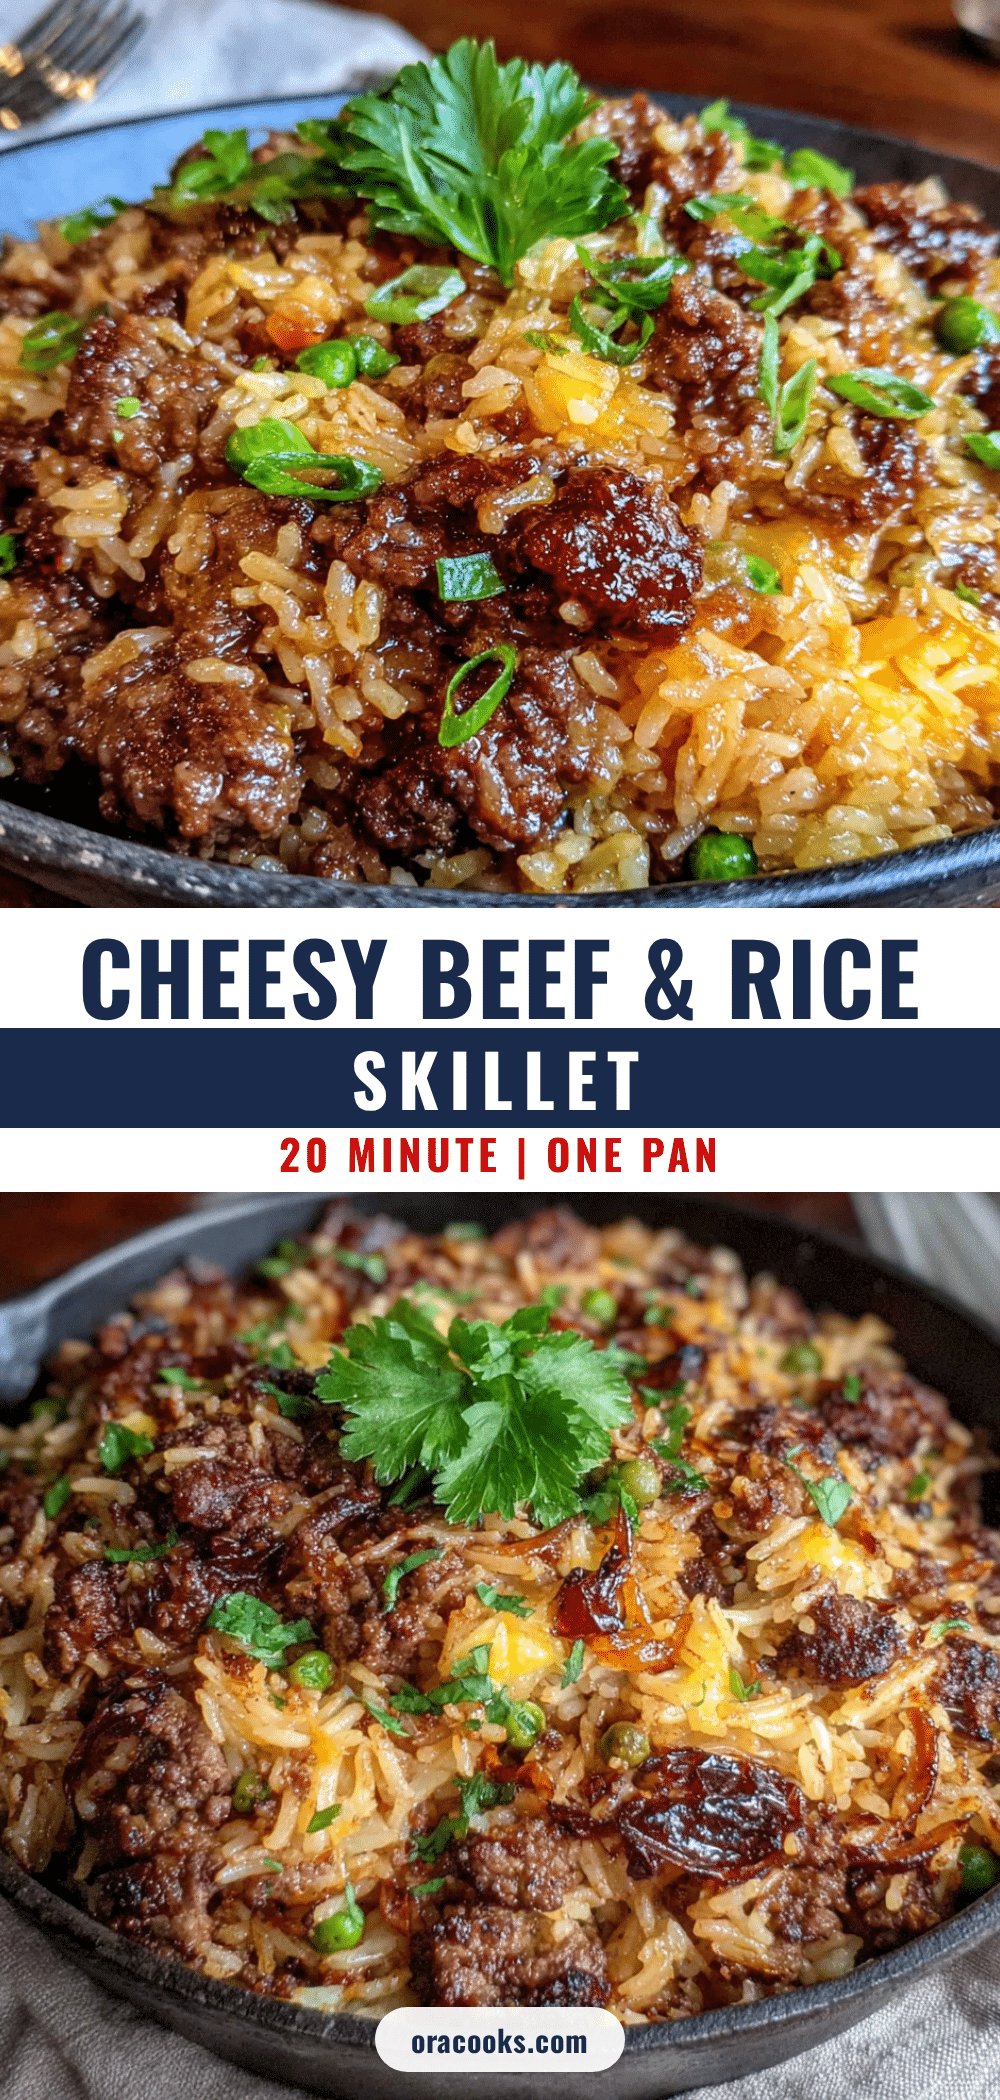
Easy Cheesy Beef & Rice Skillet: Ready in 20 Minutes

A quick and easy one-skillet dinner with ground beef, rice, and melted cheese, ready in just 20 minutes. Perfect for busy weeknights or last-minute potlucks.
- Prep Time: 5 minutes
- Cook Time: 15 minutes
- Total Time: 20 minutes
- Yield: 6 servings 1x
- Category: Main Course
- Cuisine: American
Ingredients
- 1 pound ground beef (80/20 works best)
- 1 tablespoon olive oil
- 1 medium yellow onion, diced (about 1 cup)
- 3 cloves garlic, minced
- 1 cup long-grain white rice (uncooked; basmati or jasmine also work)
- 2 cups beef broth (low-sodium recommended)
- 1 can (14.5 oz) diced tomatoes, undrained (fire-roasted preferred)
- 1 teaspoon smoked paprika
- 1/2 teaspoon cumin
- 1/2 teaspoon salt
- 1/4 teaspoon black pepper
- 1/2 teaspoon dried oregano (optional)
- 1 1/2 cups shredded cheddar cheese (sharp cheddar recommended)
- 1/2 cup shredded mozzarella
- 2 tablespoons cream cheese, softened
- Fresh parsley or cilantro, chopped (optional topping)
- Green onions, sliced (optional topping)
- Sour cream (optional topping)
- Hot sauce (optional topping)
Instructions
- Heat the skillet over medium-high heat. Add the olive oil and let it shimmer for about 30 seconds.
- Add the ground beef. Break it apart with a wooden spoon and let it brown for 3-4 minutes without stirring too much.
- Add the diced onion and cook for 2 minutes, stirring occasionally, until softened and translucent.
- Stir in the minced garlic and cook for 30 seconds until fragrant.
- Drain excess fat if needed, leaving about a tablespoon for flavor.
- Add the rice, smoked paprika, cumin, salt, pepper, and oregano. Stir for 1 minute to toast the rice slightly.
- Pour in the beef broth and diced tomatoes (with their juices). Stir to combine, scraping up any browned bits from the bottom. Bring to a boil.
- Reduce heat to low, cover the skillet, and let it simmer for 15 minutes. Do not lift the lid during this time.
- After 15 minutes, remove the lid and check the rice. It should be tender and most liquid absorbed. If still crunchy, add 2-3 tablespoons water, cover, and cook 2 more minutes.
- Remove the skillet from the heat.
- Add the cream cheese first, stirring until fully incorporated.
- Add the shredded cheddar and mozzarella. Stir gently until fully melted and creamy, about 1-2 minutes.
- Taste and adjust seasoning with more salt or pepper if needed.
- Serve immediately while hot and cheesy. Top with fresh parsley, green onions, or hot sauce if desired.
Notes
For best results, use freshly shredded cheese instead of pre-shredded to avoid anti-caking agents. Do not lift the lid while rice is cooking to ensure proper steam absorption. If using lean ground beef, add an extra tablespoon of olive oil when cooking the rice. Leftovers can be stored in an airtight container in the refrigerator for up to 4 days or frozen for up to 3 months.
Nutrition
- Serving Size: 1 serving (about 1.5
- Calories: 485
- Sugar: 4
- Sodium: 680
- Fat: 24
- Saturated Fat: 12
- Carbohydrates: 38
- Fiber: 2
- Protein: 28
Keywords: cheesy beef and rice skillet, one skillet dinner, quick weeknight meal, ground beef recipe, easy dinner, 20 minute meal, comfort food


