Love this? Save it for later!
Share the inspiration with your friends
This was supposed to be a different kind of Halloween snack entirely. I had grand plans for those little puff pastry pizzas shaped like bats — you know, the ones that look amazing on Pinterest but take about forty-five minutes of careful cutting and egg washing? Yeah, I was aiming for that. But then my nephew called asking if we could make something “spooky but not scary” for his class party, and I realized I had completely forgotten to thaw the puff pastry. It was sitting in the freezer like a brick of butter and regret. I stared at a can of crescent rolls in my fridge, a pack of hot dogs, and honestly, I almost just gave up and ordered pizza. But something made me grab that can and give it a whirl. What came out was nothing like the plan — and better.
The first few mummies were, let’s be honest, a total mess. The dough ripped, the hot dogs poked through, and I had about three that looked more like sad bandaged caterpillars than mummies. I almost tossed the whole tray. But I kept going, wrapping a little tighter, leaving a tiny gap for the eyes, and suddenly they started looking… cute? Eerily cute, if that’s a thing. My nephew walked in, took one look, and declared them “awesome.” That was the moment I knew we had something special.
Maybe you’ve been there — a recipe that starts with a plan, hits a wall, and then surprises you in the best way. That’s exactly what happened here. These mummy hot dogs are now our go-to for Halloween parties, movie nights, and even lazy Sunday afternoons when we want a little fun. They’re simple, they’re silly, and they make everyone smile. Honestly, I don’t think I’ll ever go back to the puff pastry bats.
Why You’ll Love This Recipe
Let me tell you why this recipe has become a staple in my kitchen. It’s not just because they’re cute — though they absolutely are. It’s because they solve the eternal Halloween party problem: something that looks impressive but takes almost no effort. I’ve tested these with kids, picky eaters, and even my neighbor who claims she “doesn’t do themed food.” She ate four.
- Quick & Easy: From fridge to table in under 20 minutes. No fancy techniques, no complicated steps. Perfect for that last-minute school party or a spontaneous spooky snack.
- Simple Ingredients: You only need three things — hot dogs, crescent dough, and mustard (for the eyes). Chances are, you already have them in your kitchen. No special trips to a craft store or gourmet market.
- Perfect for Halloween: These are the ultimate Halloween party food. They’re fun, festive, and totally kid-approved. Plus, they double as a great activity — let the kids help wrap the dough!
- Crowd-Pleaser: I’ve yet to meet a person who doesn’t smile when they see these little guys. They disappear fast at parties, and adults love them just as much as kids do.
- Unbelievably Delicious: The flaky, buttery crescent dough wrapped around a juicy hot dog is a match made in comfort food heaven. The little mustard eyes add a tangy kick that cuts through the richness.
What makes this recipe different from every other mummy dog out there? It’s the technique. I learned the hard way that wrapping too tightly makes the dough tear. Too loose, and your mummy looks like it’s falling apart. I’ve perfected the sweet spot — a snug but gentle wrap that leaves a tiny window for the eyes. It’s a small detail, but it makes all the difference between a mummy that looks cute and one that looks like a hot dog in a blanket that got attacked by a spider.
This recipe isn’t just good — it is the kind that makes you close your eyes after the first bite. The warm, flaky dough, the salty snap of the hot dog, the little burst of mustard… it’s comfort food reimagined for the spookiest season. Perfect for impressing guests without stress, or turning a simple snack into something memorable.
What Ingredients You Will Need
This recipe uses simple, pantry-friendly ingredients to create something that feels way more special than it actually is. Here’s everything you’ll need:
For the Mummies
- 1 can (8 oz) refrigerated crescent roll dough — I prefer Pillsbury for its consistent flakiness, but any brand works. Look for the sheet-style crescent dough if you can find it — it saves you from having to pinch the perforations together.
- 8 hot dogs — Use your favorite brand. I’ve tested these with beef, turkey, and even plant-based hot dogs, and they all work great. For a fun twist, try mini hot dogs or cocktail sausages for bite-sized mummies.
- Mustard for the eyes — Yellow mustard is classic for that bright, spooky look. You can also use ketchup, sriracha, or even small dots of cream cheese for a milder flavor.
Optional Add-Ons
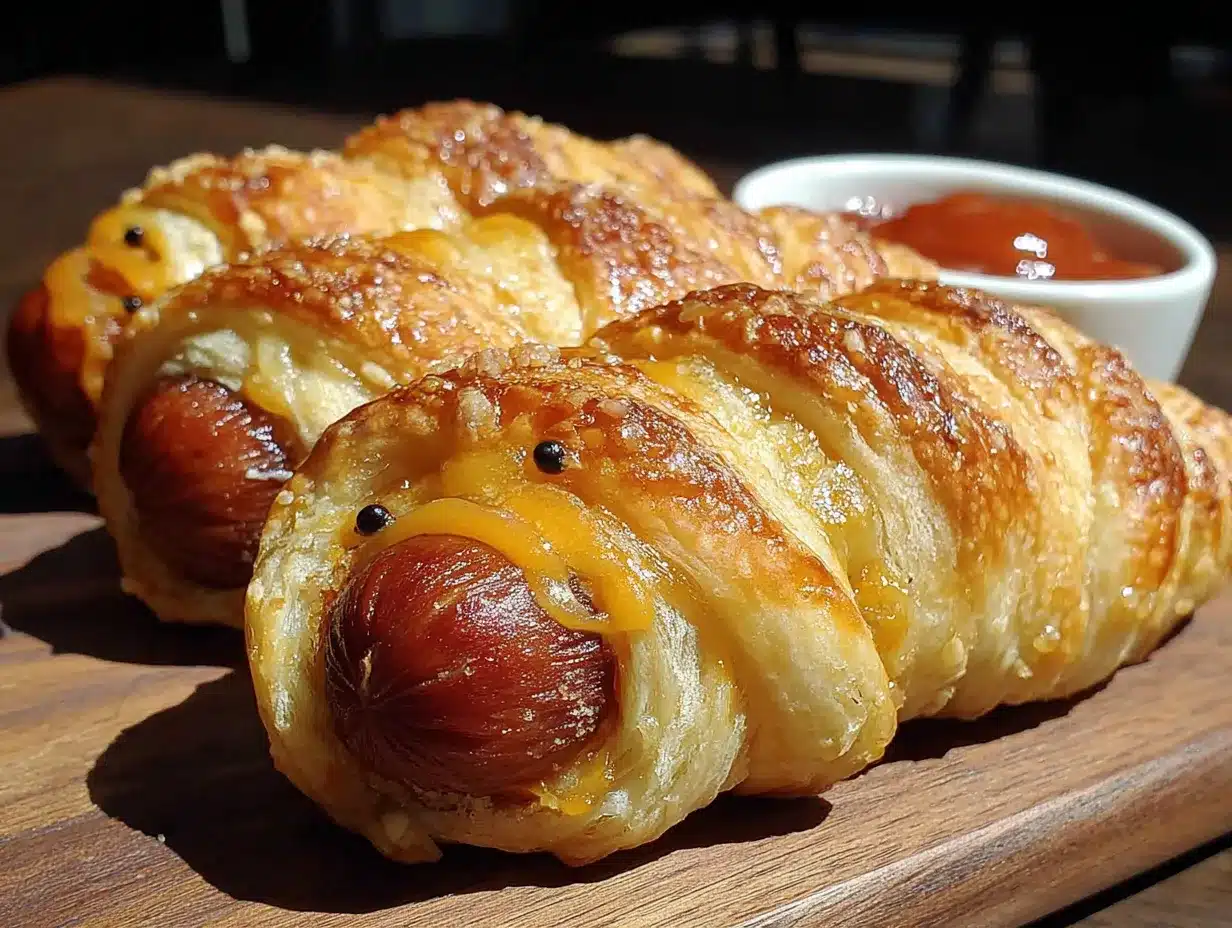
- Everything bagel seasoning — A light sprinkle after baking adds a salty, savory crunch that’s surprisingly good.
- Grated Parmesan cheese — For a cheesy, golden crust. Sprinkle it on before baking.
- Garlic powder or onion powder — A pinch mixed into the dough adds a subtle savory note.
I want to emphasize that the quality of your hot dogs really matters here. I’ve tried this with cheap, bargain-bin hot dogs, and they were… fine. But when I splurge on a good all-beef brand like Hebrew National or Nathan’s, the difference is night and day. The hot dog has a better snap, more flavor, and it holds up better to the baking process. If you’re using plant-based hot dogs, look for ones that are firm and not too soft — they tend to get mushy in the oven.
For the crescent dough, I’ve found that the “sheet” style (where the dough comes in one solid rectangle instead of pre-perforated triangles) is a game-changer. It eliminates the need to pinch the seams together, which can sometimes make the dough lumpy. But honestly, the regular triangle style works just fine — just press the perforations together firmly with your fingers.
Substitution guidance: If you’re gluten-free, look for gluten-free crescent dough (it exists, and it works!). For a dairy-free option, most crescent doughs are dairy-free, but double-check the label. And if you’re watching your sodium, low-sodium hot dogs are a great swap.
Equipment Needed
You don’t need a fancy kitchen to make these mummies. Here’s what you’ll need:
- Baking sheet — A standard half-sheet pan works perfectly. Line it with parchment paper for easy cleanup.
- Parchment paper — Trust me on this one. The dough can stick, and parchment saves you from scrubbing. Silicone baking mats also work great.
- Sharp knife or pizza cutter — For cutting the crescent dough into strips. A pizza cutter makes quick work of it.
- Small bowl — For holding the mustard or other “eye” ingredients.
- Toothpick or small brush — For applying the mustard eyes. A toothpick gives you more control than a brush.
I’ve made these with a dull knife before, and let me tell you, it’s a mess. The dough gets squished and torn, and the strips end up uneven. A sharp knife or a pizza cutter makes all the difference. If you don’t have either, kitchen shears work in a pinch — just make sure they’re clean and sharp.
One more tip: if you’re making a big batch for a party, use two baking sheets so the mummies have room to spread. Crowding them leads to uneven baking and sad, pale mummies.
Preparation Method
Let’s get to the fun part. Here’s how to make these mummies step by step.
- Preheat your oven to 375°F (190°C). Line a baking sheet with parchment paper. This is a small step, but it saves you from a sticky cleanup later.
- Prepare the crescent dough. Unroll the crescent dough onto a clean cutting board. If you’re using the triangle style, press the perforations together firmly with your fingers to create a solid sheet. If you’re using the sheet style, you’re already good to go.
- Cut the dough into strips. Using a sharp knife or pizza cutter, cut the dough lengthwise into thin strips — about 1/4 to 1/2 inch wide. You should get around 8 to 10 strips per sheet. Don’t worry if they’re not perfectly even; a little imperfection adds character.
- Wrap the hot dogs. Take one hot dog and start wrapping a strip of dough around it, leaving a small gap near the top for the eyes. Overlap the dough slightly as you go, but don’t pull it too tight — the dough will expand as it bakes, and tight wrapping can cause it to tear. Tuck the end of the strip under the hot dog to secure it.
- Repeat with the remaining hot dogs. Place the wrapped hot dogs on the prepared baking sheet, leaving about an inch of space between each one. They’ll puff up a bit as they bake.
- Bake for 10-12 minutes. Bake until the dough is golden brown and flaky, and the hot dogs are heated through. Keep an eye on them — ovens vary, and you don’t want them to burn. The dough should be a light, golden brown.
- Add the eyes. Let the mummies cool for a minute or two (they’re hot!). Then, using a toothpick or a small brush, add two small dots of mustard to the exposed hot dog area for the eyes. Don’t be shy — the eyes are what make them cute!
- Serve immediately. These are best enjoyed warm, right out of the oven. The dough is flakiest when it’s fresh.
A few troubleshooting tips: If your dough is tearing as you wrap, it might be too cold. Let it sit at room temperature for a couple of minutes to soften slightly. If your hot dogs are too long for the dough strips, cut them in half to make mini mummies. And if the mustard eyes are sliding off, try dabbing the hot dog dry with a paper towel first — moisture is the enemy of mustard adhesion.
I remember the first time I made these, I wrapped the dough so tightly that the hot dogs looked like they were in a straitjacket. They came out of the oven with the dough split open like a busted seam. Lesson learned: a gentle hand is the key to a happy mummy.
Cooking Tips & Techniques
Here are some hard-won tips from my many batches of mummy dogs. I’ve made every mistake in the book so you don’t have to.
- Don’t overwork the dough. Crescent dough is delicate. Handle it as little as possible to keep it light and flaky. If the dough gets too warm and sticky, pop it in the fridge for 5 minutes.
- Leave a gap for the eyes. This is the most important visual tip. If you wrap the dough all the way to the top, you lose the mummy’s face. Leave about half an inch of the hot dog exposed at one end.
- Use a light hand with the mustard. A little goes a long way. Too much mustard and it will run down the hot dog and make a mess. Two small dots are perfect.
- Experiment with eye placement. You can make your mummies look surprised, sleepy, or even a little creepy by changing the angle or size of the eyes. I once made one with one eye bigger than the other, and it looked like it was winking. It was my favorite.
- Make ahead tip. You can assemble the mummies up to a day in advance. Just wrap them, place them on the baking sheet, cover with plastic wrap, and refrigerate. Bake them right before serving for the best texture.
One mistake I made early on was using too much dough per hot dog. I thought thicker strips would look better, but they just ended up doughy and undercooked in the middle. Thin strips — about 1/4 inch wide — are the sweet spot. They bake through perfectly and give you that nice, crispy exterior.
Variations & Adaptations
These mummy dogs are incredibly versatile. Here are some of my favorite variations.
- Cheesy Mummies: Before wrapping, cut a slit lengthwise in the hot dog and stuff it with a strip of cheddar or mozzarella cheese. The cheese oozes out as it bakes, adding a gooey, delicious surprise.
- Spicy Mummies: Use spicy Italian sausage or chorizo instead of hot dogs. Add a dash of cayenne pepper to the dough for an extra kick. These are great for adults who want a little heat.
- Veggie Mummies: Swap the hot dogs for vegetarian sausages or even carrot sticks (blanched first for tenderness). I’ve also used cooked, seasoned tofu strips — they’re surprisingly good.
- Breakfast Mummies: Use breakfast sausage links instead of hot dogs. Serve them with a side of maple syrup for dipping. Sweet and savory — yes, please!
- Mini Mummies: Cut the hot dogs into thirds and use smaller strips of dough. These are perfect for appetizers or kids’ lunchboxes. They bake in about 8-10 minutes.
I tried a batch with pepper jack cheese stuffed inside, and honestly, it was life-changing. The cheese gets all melty and spicy, and it pairs perfectly with the flaky dough. My husband now requests those for every party.
Serving & Storage Suggestions
These mummy dogs are best served warm, straight from the oven. The dough is at its flakiest and the hot dogs are perfectly juicy. But they’re still good at room temperature, which makes them great for parties.
For dipping, I love serving them with ketchup, mustard, or even a little ranch dressing. The tangy flavors contrast beautifully with the buttery dough. If you’re feeling fancy, a side of warm marinara sauce is also delicious.
To store leftovers (if you have any!), let them cool completely, then place them in an airtight container in the refrigerator. They’ll keep for up to 3 days. To reheat, pop them in a 350°F oven for 5-7 minutes, or until warmed through. The microwave works in a pinch, but the dough will be soft, not crispy.
I don’t recommend freezing these after baking — the dough can get soggy when thawed. But you can freeze them before baking! Assemble the mummies, place them on a baking sheet, and freeze until solid. Then transfer them to a freezer bag. Bake from frozen, adding 2-3 minutes to the baking time.
One thing I’ve noticed: these mummies actually taste better the next day, cold, straight from the fridge. I know that sounds strange, but the flavors meld together, and the dough takes on a slightly chewy texture that I find addictive. Don’t judge me — try it.
Nutritional Information & Benefits
Let’s be real: these are a treat, not a health food. But here’s the estimated nutritional info for one mummy dog (using standard hot dogs and crescent dough):
- Calories: 220-250
- Protein: 8-10g
- Fat: 14-16g
- Carbohydrates: 16-18g
- Sodium: 600-700mg
If you’re looking to lighten them up, use turkey or chicken hot dogs — they cut the fat and calories by about a third. Low-fat crescent dough is also available, though the texture is slightly less flaky.
On the plus side, hot dogs do provide a decent amount of protein, and the crescent dough offers some carbohydrates for energy. For a more balanced snack, serve these with a side of veggies or a simple salad. I like pairing them with carrot sticks and cucumber slices — the crunch contrasts nicely with the soft dough.
Allergen alert: Crescent dough typically contains wheat and dairy. Hot dogs may contain soy or other allergens. Check labels if you have sensitivities.
Conclusion
These mummy hot dogs have become a Halloween tradition in my house, and I don’t see that changing anytime soon. They’re the perfect blend of fun and delicious — the kind of recipe that makes everyone smile, from the youngest kid to the grumpiest adult. And honestly, they’re so easy that you can whip them up on a whim, even on a busy weeknight.
I love that they’re customizable. You can make them cheesy, spicy, or even breakfast-style. You can use different sausages, add different seasonings, or change up the eyes. The possibilities are endless, and that’s what makes this recipe so special. It’s a canvas for your creativity.
So go ahead — give them a try. And when you do, I’d love to hear about it. Leave a comment below and tell me how your mummies turned out. Did your kids love them? Did you try a fun variation? Share your photos and stories — I read every single one. And if you’re looking for more Halloween inspiration, check out our spooky Halloween snacks and easy finger food appetizers for more party-perfect ideas.
Happy Halloween, and happy snacking!
Frequently Asked Questions
Can I make these mummy dogs ahead of time?
Yes! You can assemble them up to a day in advance. Just wrap the hot dogs, place them on a baking sheet, cover with plastic wrap, and refrigerate. Bake them right before serving for the best texture.
Can I use puff pastry instead of crescent dough?
Absolutely. Puff pastry will give you a flakier, more buttery result. Just cut it into strips and wrap the same way. The baking time might be slightly longer — about 12-15 minutes at 400°F.
How do I keep the mustard eyes from sliding off?
Pat the hot dog dry with a paper towel before adding the mustard. Moisture on the surface can cause the mustard to slide. You can also use a tiny dab of mustard as “glue” and let it set for a minute before adding more.
Can I make these in an air fryer?
Yes! Air fry at 350°F for 6-8 minutes, or until the dough is golden and crispy. No need to flip them. The air fryer gives them an extra-crispy exterior.
What other sauces can I use for the eyes?
Ketchup, sriracha, barbecue sauce, or even small dots of cream cheese all work great. For a sweeter version, try melted chocolate or Nutella — perfect for a dessert mummy!
Pin This Recipe!
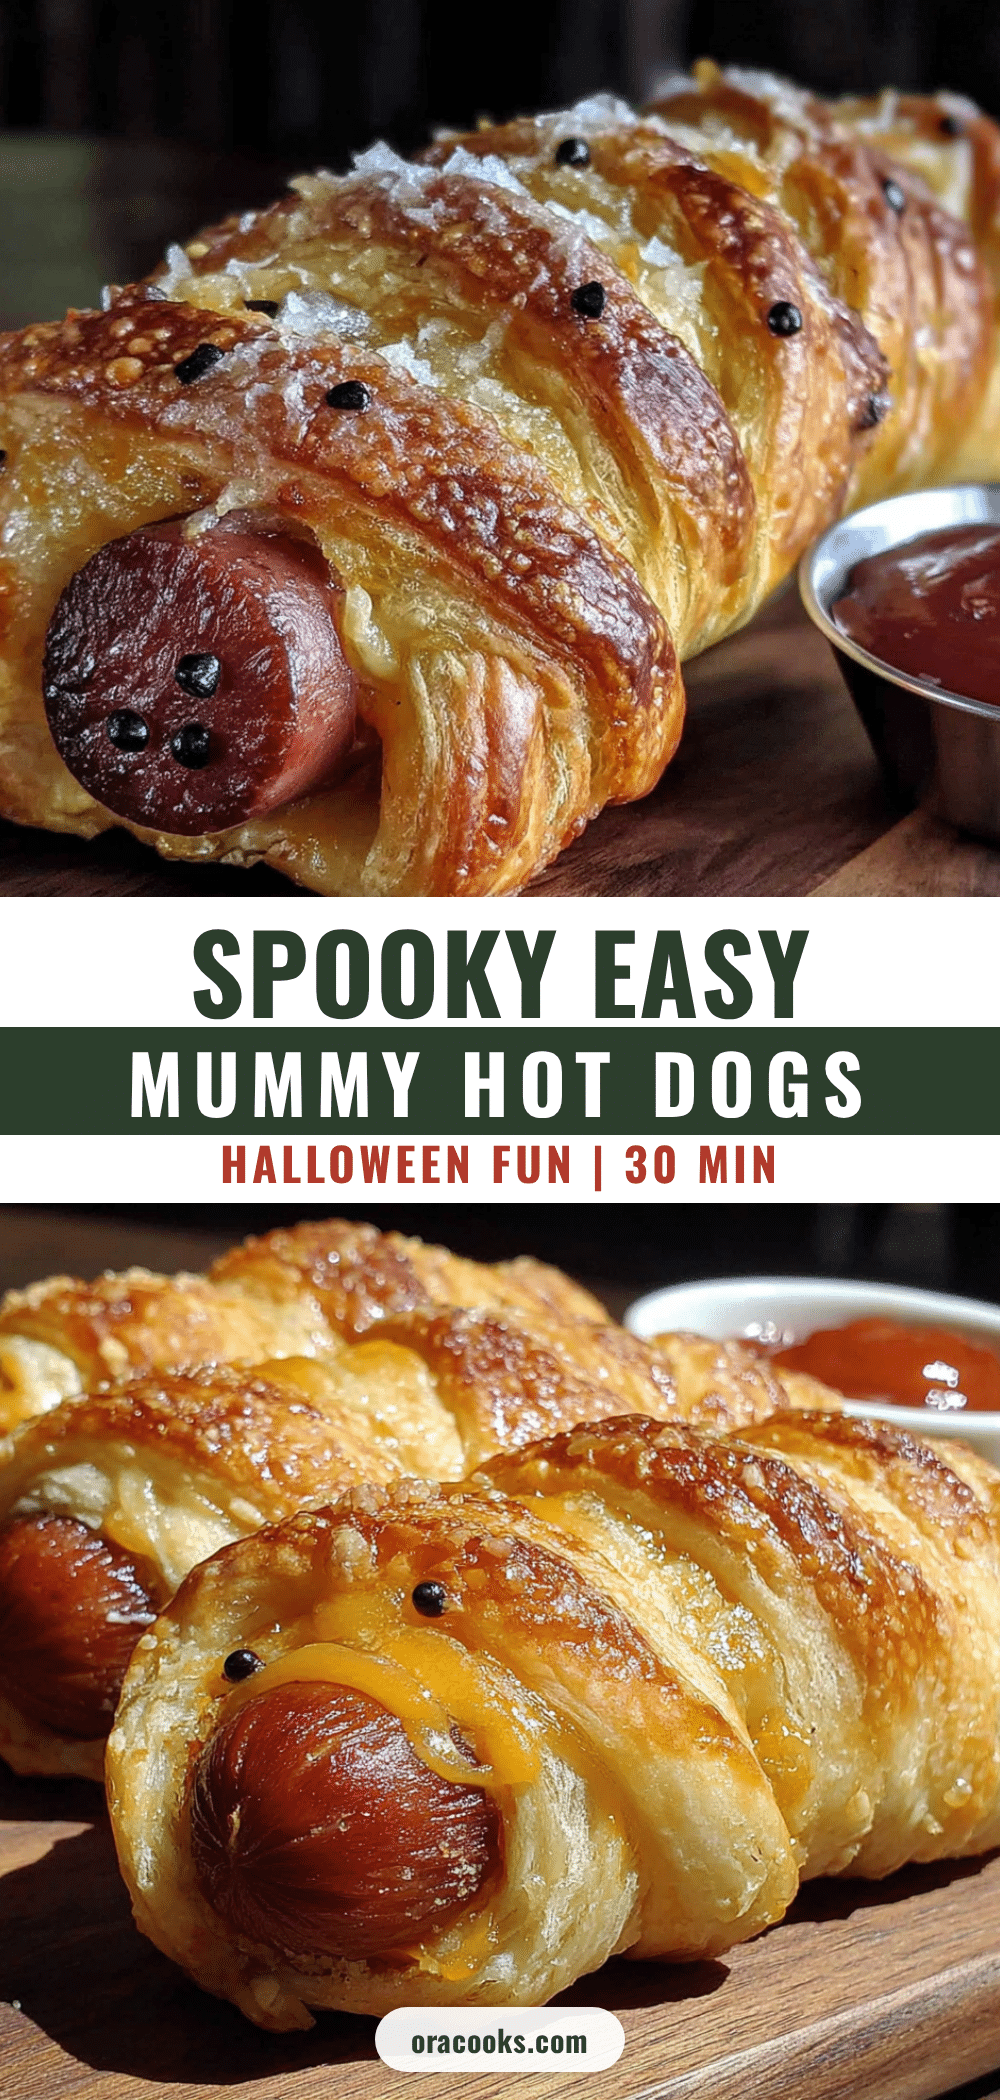
Easy Halloween Mummy Hot Dogs with Crescent Dough

These mummy hot dogs are a fun, easy Halloween snack made with crescent dough and hot dogs. They’re perfect for parties, movie nights, or a quick spooky treat that everyone will love.
- Prep Time: 10 minutes
- Cook Time: 12 minutes
- Total Time: 22 minutes
- Yield: 8 servings 1x
- Category: Appetizer
- Cuisine: American
Ingredients
- 1 can (8 oz) refrigerated crescent roll dough
- 8 hot dogs
- Mustard for the eyes
- Everything bagel seasoning (optional)
- Grated Parmesan cheese (optional)
- Garlic powder or onion powder (optional)
Instructions
- Preheat your oven to 375°F (190°C). Line a baking sheet with parchment paper.
- Unroll the crescent dough onto a clean cutting board. If using triangle style, press the perforations together firmly to create a solid sheet.
- Using a sharp knife or pizza cutter, cut the dough lengthwise into thin strips, about 1/4 to 1/2 inch wide. You should get around 8 to 10 strips per sheet.
- Take one hot dog and start wrapping a strip of dough around it, leaving a small gap near the top for the eyes. Overlap the dough slightly as you go, but don’t pull it too tight. Tuck the end of the strip under the hot dog to secure it.
- Repeat with the remaining hot dogs. Place the wrapped hot dogs on the prepared baking sheet, leaving about an inch of space between each one.
- Bake for 10-12 minutes, until the dough is golden brown and flaky, and the hot dogs are heated through.
- Let the mummies cool for a minute or two. Then, using a toothpick or small brush, add two small dots of mustard to the exposed hot dog area for the eyes.
- Serve immediately.
Notes
For best results, use a gentle hand when wrapping the dough to avoid tearing. Leave a small gap for the eyes to make the mummies look cute. You can assemble the mummies up to a day in advance and refrigerate until ready to bake.
Nutrition
- Serving Size: 1 mummy hot dog
- Calories: 235
- Sugar: 3
- Sodium: 650
- Fat: 15
- Saturated Fat: 5
- Carbohydrates: 17
- Protein: 9
Keywords: Halloween, mummy hot dogs, crescent dough, easy snack, party food, kid-friendly


