Love this? Save it for later!
Share the inspiration with your friends
My neighbor wasn’t trying to impress anyone. I’d stopped by to borrow a drill on a random Tuesday afternoon, and the sight of her three kids happily munching on these little compartmentalized snack boxes hit me before I even made it past the front door. There was no fancy charcuterie board in sight—just crackers, cheese cubes, salami rounds, and a few grapes, all neatly arranged in a bento-style container. She shrugged when I asked about it, like it was no big deal. “Oh, I just got tired of buying those overpriced plastic trays at the grocery store,” she said, wiping a smear of mustard off the counter. “Takes like five minutes.”
Let me tell you, I stood there in her kitchen, drill forgotten, watching her assemble a second batch for school lunches the next day. She wasn’t measuring anything. She wasn’t stressing about presentation. She just grabbed stuff from the fridge and tossed it together with this casual confidence that honestly made me a little envious. I’d been spending way too much money on those store-bought lunchable kits for years, thinking they were some kind of culinary convenience I couldn’t replicate at home. Turns out, I was totally wrong. Maybe you’ve been there too—standing in the grocery aisle, tossing another box of processed crackers and mystery meat into your cart because it feels easier than making something from scratch.
That afternoon changed my whole approach to snack prep. These easy copycat lunchable snack boxes are my go-to now, and honestly, they’re better than anything you’ll find in a plastic tray. The cheese tastes fresher. The crackers stay crunchier. And the best part? You control exactly what goes in there—no weird preservatives, no tiny portions that leave kids hungry twenty minutes later. I’ve been making these for months now, and they’ve saved me a ridiculous amount of money and mental energy. This recipe stayed with me because it proved that sometimes the best kitchen hacks come from watching someone who doesn’t even realize they’re being clever.
Why You’ll Love This Recipe
Let’s be real for a second. Store-bought lunchables have their moment, but they’re expensive, portion-controlled to the point of frustration, and packed with ingredients I can’t pronounce. These homemade versions solve all of that. I’ve tested countless combinations over the past few months, tweaking and adjusting until I found the perfect balance of convenience, taste, and kid-approved satisfaction.
- Quick & Easy : These come together in under 5 minutes per box. Seriously. I timed myself last week while half-asleep and still managed to assemble three boxes before my coffee finished brewing.
- Simple Ingredients : No fancy grocery trips needed. You likely already have crackers, cheese, and some sort of protein in your fridge right now. I’m looking at you, leftover rotisserie chicken.
- Perfect for Busy Days : Great for school lunches, road trips, afternoon snacks, or even a lazy dinner when you don’t feel like cooking. My kids eat these on the way to soccer practice more often than I’d like to admit.
- Crowd-Pleaser : Always gets rave reviews from kids and adults alike. I’ve brought these to playdates and watched parents sneak extra ones when they thought no one was looking.
- Unbelievably Delicious : The texture and flavor combo is next-level comfort food. Fresh cheese, crunchy crackers, and whatever protein you choose—it’s simple but somehow more satisfying than the processed version.
What makes this recipe different from the rest? It’s the flexibility. Most copycat recipes lock you into one specific combination, but these snack boxes are designed to adapt to whatever you have on hand. I’ve made them with cheddar, pepper jack, and even brie when I was feeling fancy. The technique is simple: compartmentalize your ingredients to keep crackers from getting soggy, and you’re golden. This isn’t just another version—it’s your best version, customized to your family’s taste buds.
Honestly, this recipe is the kind that makes you close your eyes after the first bite. It’s comfort food reimagined—healthier, faster, but with the same soul-soothing satisfaction. Perfect for impressing your kids without stress, or turning a chaotic weekday lunch into something memorable.
What Ingredients You Will Need
This recipe uses simple, wholesome ingredients to deliver bold flavor and satisfying texture without the fuss. Most of these are pantry staples or fridge basics, so you can whip these up anytime without a special shopping trip.
- Crackers : 8-10 crackers per box. I prefer buttery Ritz-style crackers or whole wheat saltines for extra crunch. (Pro tip: keep crackers separate from moist ingredients until serving to maintain crispness.)
- Cheese : 2-3 ounces per box. Cheddar, Colby Jack, or mozzarella work beautifully. I recommend Tillamook or Cabot for best texture and flavor. Cut into cubes or use a crinkle cutter for fun shapes.
- Protein : 2-3 ounces per box. Salami, pepperoni, ham, turkey, or even leftover grilled chicken. I personally love Genoa salami from the deli counter—it’s flavorful without being greasy.
- Fruit or Vegetable : 1/4 cup per box. Grapes (halved for little ones), apple slices, baby carrots, cucumber rounds, or cherry tomatoes. Seasonal options work great—try strawberries in summer or apple slices in fall.
- Dipping Sauce (Optional) : 2 tablespoons per box. Ranch dressing, honey mustard, hummus, or Greek yogurt. I keep a little container of ranch in mine because my kids won’t eat vegetables without it.
- Sweet Treat (Optional) : 1-2 tablespoons per box. Dark chocolate chips, a few mini marshmallows, or a small cookie. This turns lunch into a special event without going overboard.
- Nuts or Seeds (Optional) : 1 tablespoon per box. Almonds, walnuts, or pumpkin seeds for extra crunch and healthy fats. Skip if your school has nut restrictions.
For ingredient selection tips, look for firm, block-style cheese rather than pre-shredded bags—it stays fresh longer and cubes more neatly. If you’re using deli meat, ask for thicker slices and cut them yourself; pre-packaged slices tend to be paper-thin and fall apart in the box. For seasonal variations, swap in fresh berries instead of grapes in summer, or use roasted sweet potato cubes in fall. Substitution guidance: use dairy-free cheese and vegan crackers for a plant-based option, or swap turkey for salami if you’re watching sodium intake.
Equipment Needed
You don’t need much to pull these together, which is honestly my favorite part. Here’s what I use:
- Bento Boxes or Divided Containers : These are the star of the show. I use a set of three-compartment plastic containers I found at Target for under ten bucks. Glass versions work too, but they’re heavier for lunchboxes. If you don’t have divided containers, use small silicone muffin cups inside a regular container to keep ingredients separate.
- Cheese Knife or Crinkle Cutter : A sharp knife works fine, but a crinkle cutter makes cheese cubes look more fun. My kids actually eat more cheese when it has wavy edges—I’m not kidding.
- Cutting Board : Any board will do. I prefer a medium-sized wooden board because it doesn’t slide around on the counter.
- Small Bowls or Ramekins : For portioning out dipping sauces and smaller items like nuts or chocolate chips. I use these little glass prep bowls from IKEA.
- Measuring Cups or a Food Scale : Not strictly necessary, but helpful if you’re meal prepping for a whole week. I use a digital scale to keep portions consistent.
For budget-friendly options, reusable plastic containers from the dollar store work perfectly. I’ve been using the same set for over a year, and they’re still going strong. Just hand-wash them to avoid warping in the dishwasher.
Preparation Method
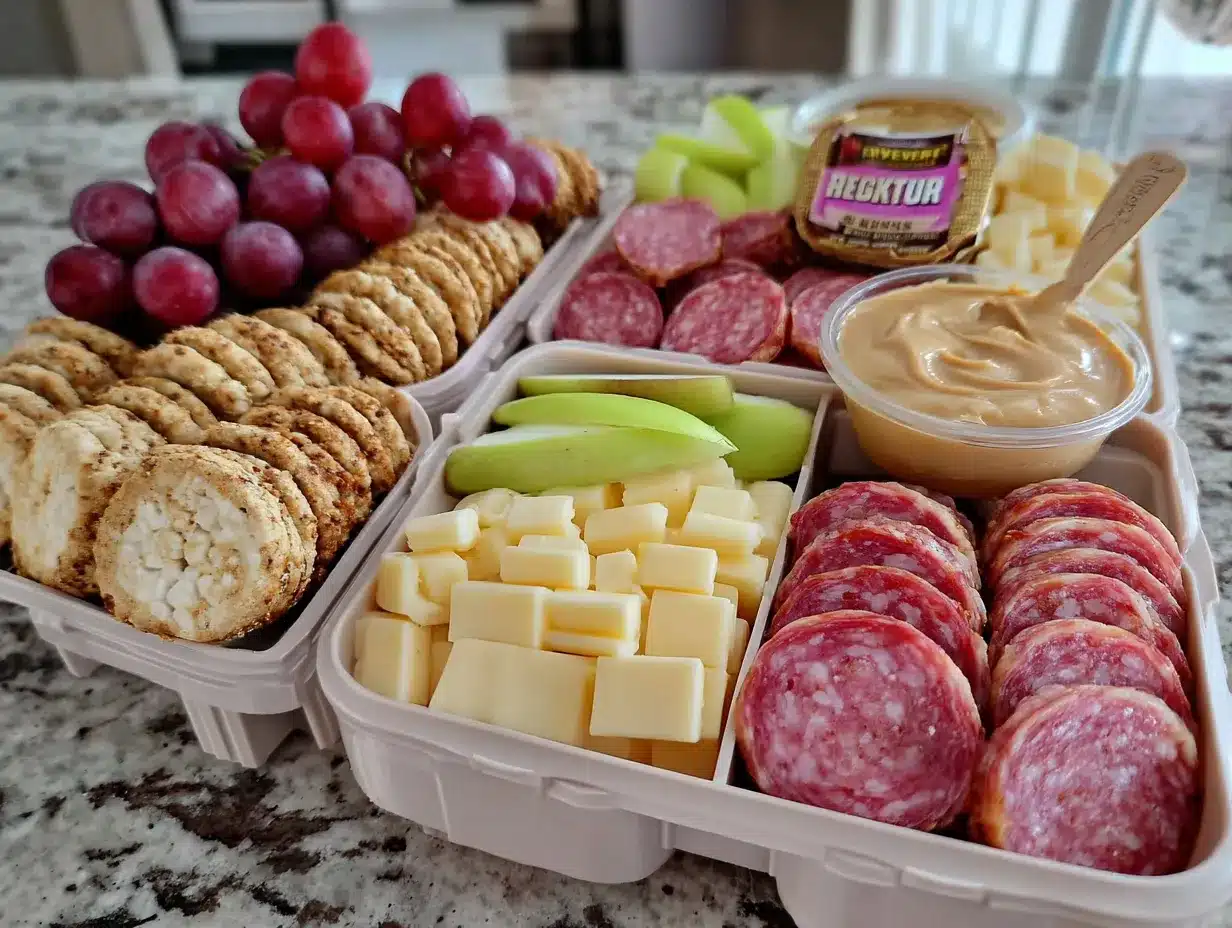
Alright, let’s get to the fun part. I’ve broken this down into simple steps so you can whip these up without overthinking it.
- Prep your containers : Grab your bento boxes or divided containers and give them a quick wipe if they’ve been sitting in the cupboard. Place them on your counter in a row if you’re making multiple boxes. This assembly-line approach saves a ton of time.
- Cut the cheese : Take your block of cheese and slice it into 1/2-inch thick slabs, then cut those into cubes. Aim for bite-sized pieces—about the size of a dice. If you’re using a crinkle cutter, run it along the edges for that wavy look. (My kids call them “fancy cheese” and it cracks me up every time.) For one box, you’ll need about 6-8 cubes.
- Slice the protein : If you’re using salami or pepperoni, cut the slices into quarters or leave them whole if they’re small. For deli meat, roll each slice into a tight log and slice it into pinwheels—this makes them easier to grab and looks prettier in the box. Aim for 4-6 pieces per box.
- Wash and prep produce : Rinse your fruit or vegetable of choice. Grapes should be halved lengthwise for kids under 4 to prevent choking. Apple slices get a quick spritz of lemon juice to prevent browning. Baby carrots can go in whole, or cut them into sticks for easier dipping.
- Portion the extras : If you’re including dipping sauce, spoon it into a small container or silicone cup. Same goes for nuts, seeds, or a sweet treat. Keep these in their own compartment so nothing gets soggy or mixed together.
- Assemble the boxes : Place crackers in the largest compartment. Add cheese cubes to one smaller section and protein to another. If you have a third compartment, use it for fruit or veggies. Tuck the sauce container into any remaining space. This is where the magic happens—everything looks so neat and intentional.
- Add the finishing touch : If you’re including a sweet treat, place it in a separate small container or wrap it in a bit of parchment paper. I like to add a tiny note or sticker to my kids’ boxes sometimes. It takes two seconds and makes them feel special.
- Seal and store : Snap the lids on tight and refrigerate if you’re not serving immediately. These keep well for up to 3 days in the fridge, though crackers may soften slightly after day two. I usually assemble them the night before and grab them on my way out the door.
One thing I learned the hard way: don’t put moist ingredients like grapes or sauce directly next to crackers. The moisture migrates and turns everything sad and limp within a few hours. Keep them separated by compartments or use those little silicone cups as barriers. Also, if you’re packing these for school, consider adding an ice pack to keep cheese and meat fresh until lunchtime.
Cooking Tips & Techniques
After months of making these, I’ve picked up a few tricks that make the whole process smoother. Let me share what I’ve learned—including some epic failures so you don’t repeat them.
- The cracker placement rule : Always put crackers in their own compartment, away from anything moist. I once tucked a few crackers next to some grape halves, and by lunchtime they were basically croutons. Not in a good way. Keep them isolated, and they’ll stay perfectly crunchy.
- Cheese variety matters : Harder cheeses like cheddar and gouda hold up better than soft cheeses like brie or fresh mozzarella. Soft cheeses release moisture and can make the whole box feel damp. Save the brie for a fancy adult version and stick with firm cheeses for kid-friendly boxes.
- Meat rolling technique : Rolling deli slices into pinwheels isn’t just for looks. It creates little pockets that hold together better than flat slices, and kids find them more fun to eat. Plus, they take up less space in the container, leaving room for extra grapes or crackers.
- Batch prep is your friend : I spend 20 minutes on Sunday afternoon prepping ingredients for the week. I cube all the cheese, slice all the meat, and portion out crackers into little bags. Then assembly takes about 60 seconds per box each morning. This changed my life, honestly.
- Temperature control : If you’re packing these for later, keep everything cold until the last minute. I store assembled boxes in the fridge and only add crackers right before serving if I’m being extra careful. For school lunches, an ice pack is non-negotiable for food safety.
One mistake I made early on: I tried to cram too many different items into one box. Less is more here. Stick to 4-5 components max, and make sure each one has enough room to breathe. Overstuffed boxes look messy and ingredients end up mingling in ways you don’t want.
Variations & Adaptations
The beauty of this recipe is how endlessly customizable it is. Here are some variations I’ve tried and loved:
- Vegetarian Version : Skip the meat and double up on cheese and veggies. Add hard-boiled eggs, hummus, or edamame for protein. I made this for my vegetarian neighbor, and she asked for the recipe three times.
- Low-Carb/Keto Version : Replace crackers with cucumber rounds, bell pepper strips, or pork rinds. Use full-fat cheese and pepperoni or salami. Add a few almonds or macadamia nuts for healthy fats. My husband does keto, and this version keeps him happy all afternoon.
- Gluten-Free Version : Use gluten-free crackers or rice cakes. Most cheese and meat are naturally gluten-free, but double-check labels on processed meats. I’ve used Schär brand crackers with great results.
- Seasonal Fruit Swap : In summer, use sliced peaches, nectarines, or cherries. Fall calls for apple slices and pear chunks. Winter brings clementine segments and pomegranate arils. Spring is perfect for strawberries and blueberries. I love matching the fruit to what’s in season at the farmer’s market.
- Breakfast Box Version : Replace crackers with mini pancakes or waffle pieces. Use cheese cubes and turkey sausage links. Add a small container of maple syrup for dipping. My kids go crazy for these on weekend mornings when we’re running late.
I once tried a Mediterranean-inspired version with feta cheese, olives, cucumber slices, and pita chips. It was fantastic, though my kids were suspicious of the olives at first. Now they ask for it regularly. Don’t be afraid to experiment—the worst that happens is you eat the evidence yourself.
Serving & Storage Suggestions
These snack boxes are best served cold or at room temperature. If you’re packing them for later, keep everything refrigerated until you’re ready to go. For school lunches, I add a small ice pack to the lunchbox to keep cheese and meat fresh until noon.
Presentation-wise, I like to arrange ingredients by color—red grapes next to orange cheddar, green cucumber next to brown crackers. It sounds silly, but visually appealing boxes get eaten faster. My kids actually fight over the ones with the best color arrangement.
For storage, assembled boxes keep in the refrigerator for up to 3 days. After that, crackers start to soften and cheese can dry out. If you’re prepping for the week, I recommend storing components separately and assembling each morning. Crackers stay fresh in an airtight container at room temperature, cheese lasts longer in the original packaging, and meat keeps best in the deli drawer.
Reheating isn’t really a thing here—these are meant to be eaten cold. But if you’re using leftover cooked chicken or hard-boiled eggs, make sure they’re fully chilled before assembling. Warm ingredients will steam everything else and create a soggy mess.
Flavors actually develop nicely over time. The cheese and meat mingle slightly in the container, creating a more cohesive taste by lunchtime. I’ve noticed that boxes made the night before taste even better than freshly assembled ones. Something about the ingredients settling together just works.
Nutritional Information & Benefits
Here’s an estimated breakdown for one snack box (varies based on your specific ingredients):
- Calories : 350-450 per box
- Protein : 15-20 grams
- Carbohydrates : 25-35 grams
- Fat : 20-25 grams
- Fiber : 2-4 grams
- Sugar : 8-12 grams (mostly from fruit)
The health benefits here are solid. Cheese provides calcium and protein for strong bones and sustained energy. Crackers offer quick carbs for a midday energy boost. Fruit or veggies add vitamins, fiber, and antioxidants. If you include nuts, you’re getting healthy fats that support brain function—especially important for growing kids.
This recipe is naturally gluten-free if you choose the right crackers. It’s also easy to make low-carb, vegetarian, or dairy-free with simple swaps. Potential allergens include dairy (cheese), gluten (crackers), and nuts (if added). Always check labels if you’re serving someone with food allergies.
From a wellness perspective, I love that these boxes help with portion control without feeling restrictive. My kids get a balanced mix of nutrients in one container, and I don’t have to fight them about eating their vegetables. It’s a win-win.
Conclusion
These easy copycat lunchable snack boxes have genuinely simplified my life. They’re faster than a trip to the store, cheaper than the pre-packaged versions, and way more customizable than anything you’ll find in the grocery aisle. Whether you’re packing school lunches, prepping for a road trip, or just want a satisfying snack without the processed junk, this recipe delivers every time.
I’d love to hear how you customize yours. Do you add something unexpected? Have you tried a flavor combination your kids went crazy for? Drop your variations in the comments below—I’m always looking for new ideas to try. And if you found this helpful, share it with a friend who’s still buying those overpriced plastic trays. Trust me, they’ll thank you later.
Happy snacking, friends. You’ve got this.
Frequently Asked Questions
How long do homemade lunchable boxes stay fresh in the fridge?
Assembled boxes stay fresh for up to 3 days in the refrigerator. After that, crackers may soften and cheese can dry out. For best results, store components separately and assemble each morning.
Can I freeze these snack boxes?
I don’t recommend freezing assembled boxes. Cheese and crackers don’t thaw well, and the texture suffers. However, you can freeze cheese cubes and meat separately for up to 2 months, then thaw overnight in the fridge before assembling.
What are the best containers for homemade lunchables?
Three-compartment bento boxes work best. Look for BPA-free plastic or glass versions with tight-sealing lids. Silicone muffin cups inside a regular container are a great budget-friendly alternative.
How can I keep crackers from getting soggy?
Keep crackers in their own compartment away from moist ingredients like fruit, sauce, or juicy vegetables. Add them to the box right before serving if possible. If prepping ahead, store crackers separately and add them at lunchtime.
Are these cheaper than store-bought lunchables?
Absolutely. Homemade versions cost about $1-2 per box compared to $3-4 for store-bought. Buying ingredients in bulk and using leftovers reduces the cost even further. Plus, you get better quality ingredients and less packaging waste.
Pin This Recipe!
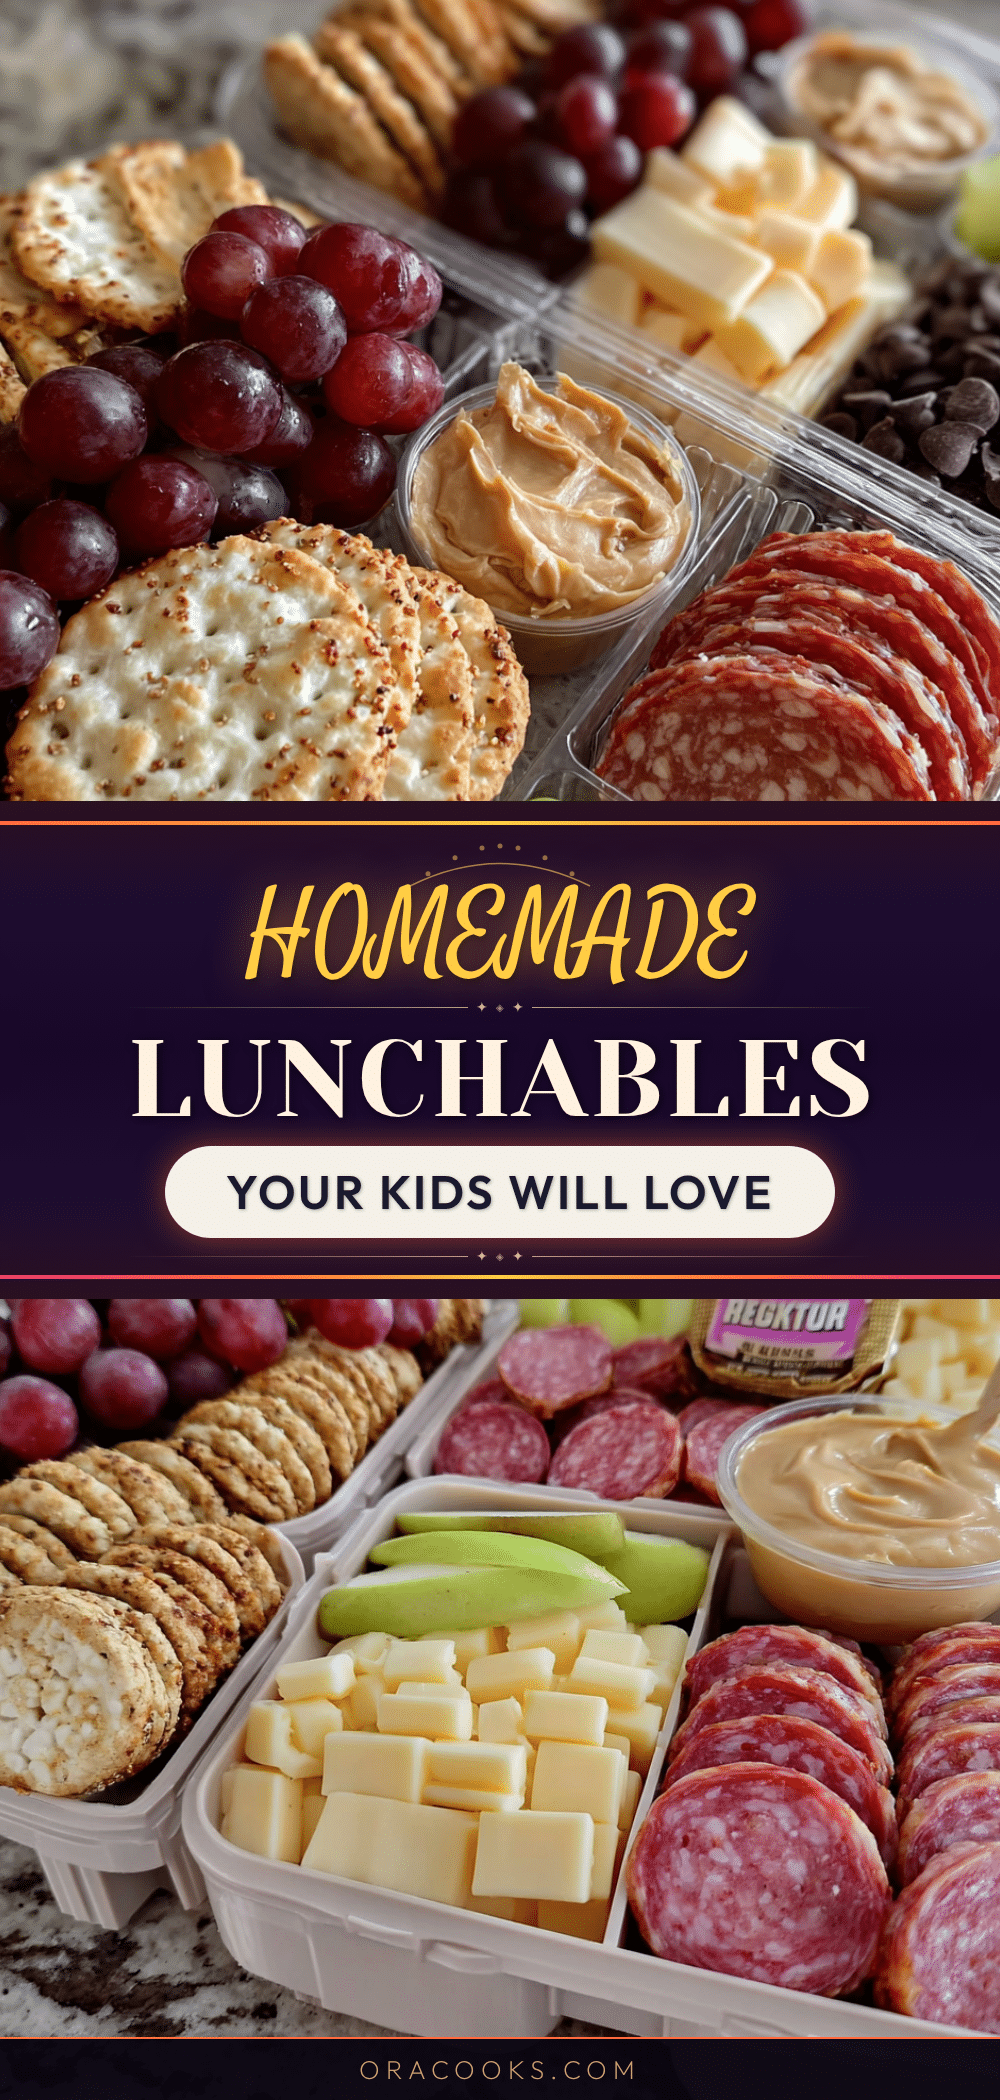
Easy Homemade Lunchable Snack Boxes: 5-Minute Copycat
These easy copycat lunchable snack boxes are better than anything you’ll find in a plastic tray. They come together in under 5 minutes per box, use simple ingredients, and are perfect for school lunches, road trips, or afternoon snacks.
- Prep Time: 5 minutes
- Cook Time: 0 minutes
- Total Time: 5 minutes
- Yield: 1 serving (adjustable) 1x
- Category: Snack
- Cuisine: American
Ingredients
- 8–10 crackers per box (Ritz-style or whole wheat saltines)
- 2–3 ounces cheese per box (cheddar, Colby Jack, or mozzarella)
- 2–3 ounces protein per box (salami, pepperoni, ham, turkey, or leftover grilled chicken)
- 1/4 cup fruit or vegetable per box (grapes, apple slices, baby carrots, cucumber rounds, or cherry tomatoes)
- 2 tablespoons dipping sauce (optional; ranch dressing, honey mustard, hummus, or Greek yogurt)
- 1–2 tablespoons sweet treat (optional; dark chocolate chips, mini marshmallows, or a small cookie)
- 1 tablespoon nuts or seeds (optional; almonds, walnuts, or pumpkin seeds)
Instructions
- Prep your containers: Grab your bento boxes or divided containers and place them on your counter in a row if making multiple boxes.
- Cut the cheese: Slice block cheese into 1/2-inch thick slabs, then cut into bite-sized cubes (about 6-8 cubes per box). Use a crinkle cutter for fun shapes if desired.
- Slice the protein: Cut salami or pepperoni into quarters, or roll deli meat slices into tight logs and slice into pinwheels. Aim for 4-6 pieces per box.
- Wash and prep produce: Rinse fruit or vegetables. Halve grapes lengthwise for young children. Spritz apple slices with lemon juice to prevent browning.
- Portion the extras: Spoon dipping sauce into a small container or silicone cup. Portion nuts, seeds, or sweet treats into separate compartments.
- Assemble the boxes: Place crackers in the largest compartment. Add cheese cubes to one smaller section and protein to another. Place fruit or veggies in the remaining compartment. Tuck sauce container into any available space.
- Add the finishing touch: If including a sweet treat, place it in a separate small container or wrap in parchment paper. Optionally add a note or sticker.
- Seal and store: Snap lids on tight and refrigerate if not serving immediately. These keep well for up to 3 days in the fridge.
Notes
Keep crackers in their own compartment away from moist ingredients to maintain crispness. For school lunches, add an ice pack to keep cheese and meat fresh. Batch prep ingredients on Sunday for quick assembly during the week. Store assembled boxes in the refrigerator for up to 3 days; crackers may soften after day two.
Nutrition
- Serving Size: 1 snack box
- Calories: 350450
- Sugar: 812
- Sodium: 500800
- Fat: 2025
- Saturated Fat: 812
- Carbohydrates: 2535
- Fiber: 24
- Protein: 1520
Keywords: homemade lunchable, snack boxes, copycat lunchable, easy snack, school lunch, bento box, kid-friendly snack, 5-minute recipe


