Love this? Save it for later!
Share the inspiration with your friends
There used to be a tiny, family-run panadería tucked away on a side street in Puebla, the one with the faded yellow awning and the bell that jingled too loudly every time you walked in. They made a Pan de Muerto that was nothing short of a revelation—soft as a cloud, perfumed with orange and the faintest whisper of anise, and dusted with sugar that sparkled like morning frost. When the family retired and the bakery closed its doors three years ago, I honestly felt a little lost. I mean, I’d drive by that spot for months, half-expecting to see the lights on and smell that sweet, yeasty warmth spilling out onto the sidewalk.
After twelve tries—twelve!—including one batch that was so dense I could have used it as a doorstop and another where I accidentally doubled the anise and it tasted like black licorice candy, I finally got it. This recipe is the one. It’s the bread I remember: tender, fragrant, and deeply comforting, with that signature orange-anise flavor that makes it feel like a hug wrapped in a memory. Maybe you’ve been there—chasing a taste from a trip or a childhood kitchen, and you just can’t let it go. Let me tell you, the wait is worth it.
This isn’t just a recipe for Dia de Muertos, though it’s perfect for that. It’s the kind of bread you bake on a quiet Sunday, when you want to fill your home with something that smells like love and patience. The dough is forgiving, the process is meditative, and the result? Honestly, it’s the best version of Pan de Muerto I’ve ever made. And I’m pretty sure that little panadería in Puebla would approve.
Why You’ll Love This Recipe
I’ve tested this recipe more times than I care to admit, and here’s the thing—it works every single time. The dough is soft, the flavor is perfectly balanced, and it’s designed for real home cooks who don’t have a pastry chef hiding in their kitchen. You’ll love it because it’s approachable, affordable, and absolutely delicious.
- Budget-Friendly Ingredients: No fancy extracts or imported flours here. Just pantry staples—flour, sugar, butter, eggs, and a couple of oranges. This bread is made for families feeding a family, and it won’t break the bank.
- Perfect for Dia de Muertos and Beyond: While it’s traditional for the holiday, this bread is wonderful for any fall gathering, a cozy weekend baking project, or even as a special breakfast treat. It’s versatile like that.
- Crowd-Pleasing Flavor: The combo of orange zest and anise is subtle but unforgettable. It’s not too sweet, not too spicy—just right for kids and adults alike. My own picky eater, who usually turns up her nose at anything with “spices,” asked for seconds.
- Soft, Tender Texture: This bread stays soft for days, which is a small miracle for homemade yeast bread. The secret is in the butter and the technique—I’ll show you exactly how to get that pillowy crumb.
- Family-Approved and Chef-Tested: I’ve made this with my neighbor, a former baker, and she gave it her seal of approval. It’s also been taste-tested by a group of hungry kids at a playdate, and it disappeared in minutes. That’s the kind of trust you can bake with.
This recipe isn’t just good—it’s the one that makes you close your eyes after the first bite. It’s comfort food reimagined: simpler, faster than you think, but with the same soul-soothing satisfaction. Perfect for impressing guests without stress, or turning a simple meal into something memorable.
What Ingredients You Will Need
This recipe uses simple, wholesome ingredients to deliver bold flavor and satisfying texture without the fuss. Most of these are pantry staples, so you likely have them on hand. The key players are the orange zest and anise seed, which give the bread its signature aroma and taste.
- All-purpose flour – 4 cups (500g). I recommend Gold Medal or King Arthur for consistent results. No need for bread flour here; AP flour gives the perfect tender crumb.
- Active dry yeast – 2 ¼ teaspoons (one packet). Make sure it’s fresh! If you use instant yeast, you can skip the proofing step and mix it directly with the flour.
- Warm milk – ½ cup (120ml), heated to about 110°F. Whole milk adds richness, but 2% works too. If you’re dairy-free, you can use oat milk—just avoid almond milk, which can be too thin.
- Granulated sugar – ¾ cup (150g). This is for the dough and the topping. You’ll also need a bit extra for sprinkling on top.
- Unsalted butter – ½ cup (113g), softened. I prefer Kerrygold for its creaminess, but any good butter works. Let it come to room temperature before using.
- Large eggs – 3, at room temperature. Cold eggs can shock the yeast, so let them sit out for 30 minutes before starting.
- Orange zest – 2 tablespoons (from about 2 large oranges). Use a microplane for the best texture. Avoid the white pith—it’s bitter.
- Fresh orange juice – ¼ cup (60ml). Squeeze it yourself! Bottled juice just doesn’t have the same bright flavor.
- Anise seeds – 1 teaspoon, lightly crushed. You can crush them with a mortar and pestle or the back of a spoon. This releases their oils and makes the flavor more fragrant.
- Salt – 1 teaspoon. Fine sea salt is best; it dissolves more evenly.
- Vanilla extract – 1 teaspoon. Pure vanilla is ideal, but imitation works in a pinch.
- For the topping: – ¼ cup (50g) granulated sugar mixed with the zest of 1 orange. You’ll brush the baked bread with melted butter and roll it in this orange sugar. It’s heavenly.
Ingredient Selection Tip: Look for oranges that feel heavy for their size—that means they’re juicier. For the anise, make sure it’s anise seed, not star anise. They’re different! Anise seed has a milder, sweeter licorice flavor that’s perfect for this bread.
Substitution Guidance: If you’re gluten-free, I haven’t tested this with gluten-free flour, so I can’t vouch for results. For a dairy-free version, use vegan butter and oat milk. The texture will be slightly less rich, but still delicious.
Equipment Needed
You don’t need a fancy kitchen to make this bread. Here’s what you’ll need:
- Stand mixer with dough hook – This makes kneading a breeze, but you can absolutely knead by hand. It’ll take about 10-12 minutes of arm work.
- Large mixing bowl – For proofing the dough. Glass or stainless steel works best.
- Baking sheet – A standard half-sheet pan lined with parchment paper. I’ve used a well-seasoned baking stone too, which gives a crisper bottom.
- Microplane or zester – For zesting the oranges. A box grater works in a pinch, but the zest won’t be as fine.
- Pastry brush – For brushing the melted butter on the baked bread. A silicone brush is easy to clean.
- Kitchen scale – Not strictly necessary, but it makes measuring flour so much more accurate. I use a simple OXO scale.
- Plastic wrap or a clean kitchen towel – For covering the dough while it rises.
Budget-Friendly Options: If you don’t have a stand mixer, a sturdy wooden spoon and a strong arm will do the job. I’ve made this bread in a tiny apartment kitchen with nothing but a bowl and my hands, and it turned out beautifully. Don’t let a lack of equipment stop you.
Preparation Method
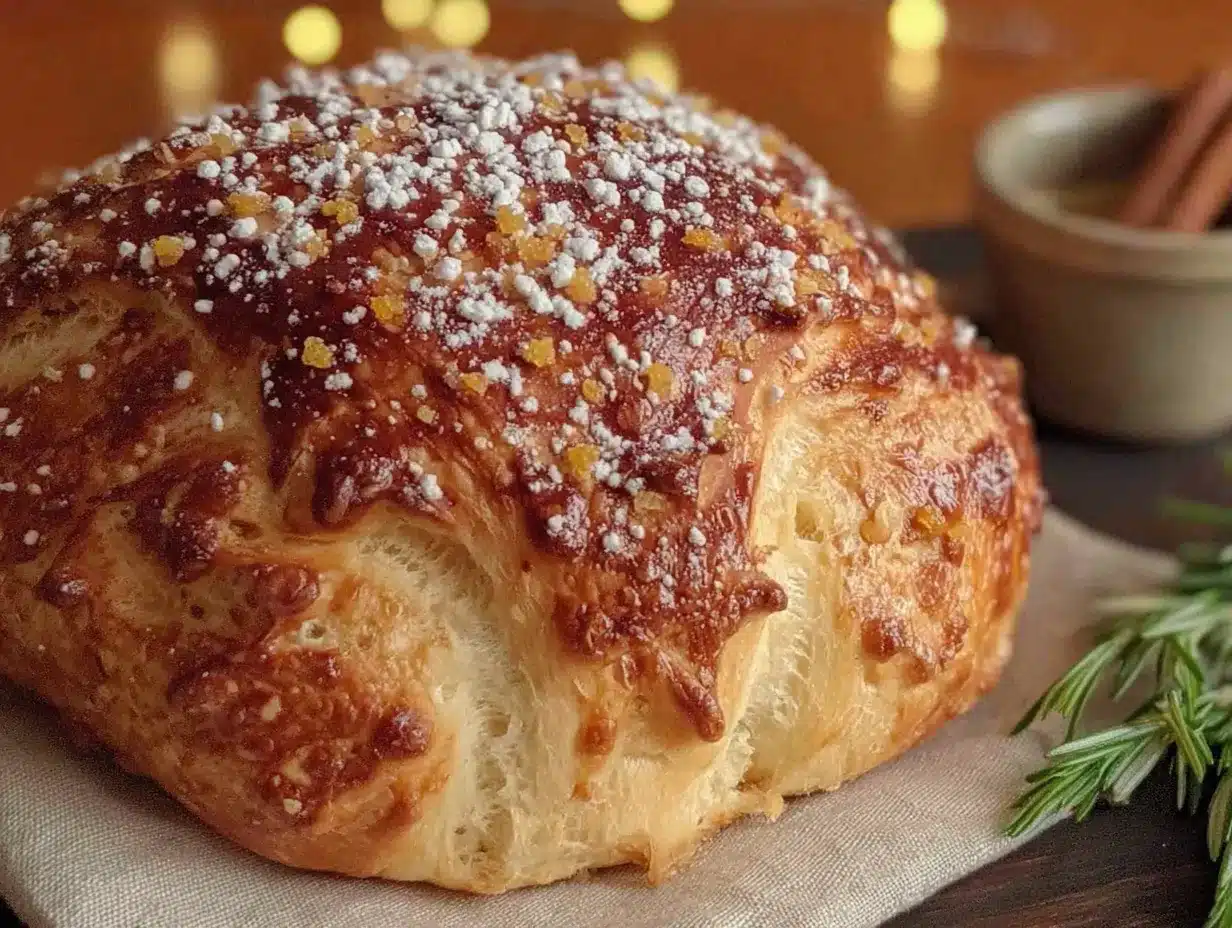
This recipe takes about 3 hours total, including rising time. Most of that is hands-off, so you can get other things done. Let’s break it down step by step.
- Proof the yeast. In a small bowl, combine the warm milk (110°F), 1 tablespoon of the sugar, and the yeast. Stir gently and let it sit for 5-10 minutes, until it’s foamy and smells yeasty. If it doesn’t foam, your yeast is dead—start over with fresh yeast. I’ve learned this the hard way, and it’s a bummer.
- Mix the dry ingredients. In the bowl of your stand mixer, whisk together the flour, remaining sugar, salt, and crushed anise seeds. This distributes the anise evenly so you don’t get a clump of licorice flavor in one bite.
- Add the wet ingredients. Make a well in the center of the flour mixture. Add the proofed yeast mixture, beaten eggs, orange zest, orange juice, and vanilla extract. Mix on low speed with the dough hook until a shaggy dough forms, about 2 minutes.
- Knead the dough. Add the softened butter, one tablespoon at a time, while the mixer runs on low. It might look messy at first—don’t panic. Keep kneading for 8-10 minutes, until the dough is smooth, elastic, and pulls away from the sides of the bowl. It should be soft and slightly tacky, but not sticky. If it’s too sticky, add a tablespoon of flour at a time. Too dry? Add a splash of milk.
- First rise. Shape the dough into a ball and place it in a lightly greased bowl. Cover with plastic wrap or a damp towel and let it rise in a warm spot (like an oven with the light on) for 1.5 to 2 hours, until doubled in size. It should feel puffy and spring back when poked gently.
- Shape the bread. Punch down the dough to release the air. Turn it out onto a lightly floured surface. Divide the dough into two pieces: one large piece (about two-thirds) for the main loaf, and a smaller piece for the “bones” and top decoration. Shape the large piece into a round loaf and place it on your prepared baking sheet. From the smaller piece, roll out ropes about ½-inch thick. Cut them into short lengths to form the “bones” (traditional Pan de Muerto shape) and a round disc for the top. Attach them to the loaf with a dab of water. It doesn’t have to be perfect—rustic is beautiful.
- Second rise. Cover the shaped loaf loosely with plastic wrap and let it rise for another 45 minutes to 1 hour, until it’s puffy and nearly doubled. Don’t skip this—it’s what gives the bread its light texture.
- Bake. Preheat your oven to 350°F (175°C). Bake the bread for 25-30 minutes, until the top is deep golden brown and the loaf sounds hollow when tapped on the bottom. If the top is browning too fast, tent it with foil halfway through.
- Finish with sugar. While the bread is still warm, brush it generously with melted butter. Then roll it in the orange-zest sugar mixture until it’s completely coated. The butter helps the sugar stick, and the zest adds a fresh pop of flavor. Let it cool on a wire rack for at least 20 minutes before slicing—I know it’s hard to wait, but the texture sets as it cools.
Sensory Cue: When the dough is properly kneaded, it should feel like a baby’s bottom—smooth, soft, and slightly springy. And when it’s baked, your kitchen will smell like a bakery in Mexico City. Trust your nose.
Cooking Tips & Techniques
I’ve made every mistake in the book with this bread, so let me save you some trouble. Here are my top tips for success:
- Don’t overheat the milk. Yeast is a living thing, and it dies at temperatures above 130°F. If you don’t have a thermometer, the milk should feel like warm bath water—comfortable on your wrist, not hot.
- Crush the anise seeds gently. You want to release the oils, not turn them into powder. A quick press with the bottom of a glass works perfectly. Too much powder can make the bread taste dusty.
- Use room-temperature eggs. Cold eggs can seize the butter and slow down the rise. If you forgot to take them out, place them in a bowl of warm water for 5 minutes. Problem solved.
- Be patient with the first rise. If your kitchen is cold, it might take longer. I once had a batch take 3 hours because it was a chilly day. Just wait until it’s doubled—don’t rush it.
- Brush with butter while warm. This is non-negotiable. The butter soaks into the crust and keeps the bread soft for days. Plus, it makes the sugar coating stick beautifully.
- Multitask wisely. While the dough is rising, you can prep the orange sugar, clean up your kitchen, or start on dinner. I like to set a timer so I don’t forget about it.
My Biggest Failure: The time I forgot to add the salt. The bread rose like crazy, but it tasted flat and sad. Salt isn’t just for flavor—it controls yeast activity and strengthens the gluten. Don’t skip it!
Variations & Adaptations
This recipe is wonderfully flexible. Here are a few ways to make it your own:
- Chocolate Pan de Muerto: Add ¼ cup of unsweetened cocoa powder to the flour mixture and reduce the flour by ¼ cup. The chocolate pairs beautifully with the orange and anise. I tried this for a friend’s birthday, and it was a hit.
- Gluten-Free Version: I haven’t tested this personally, but a reader shared that she used a 1:1 gluten-free flour blend (like Bob’s Red Mill) and added an extra tablespoon of milk. The texture was a bit denser but still delicious.
- Spiced Variation: Add ½ teaspoon of ground cinnamon and a pinch of ground cloves to the dough. It gives the bread a warmer, more autumnal flavor—perfect for Thanksgiving.
- Dairy-Free Adaptation: Use vegan butter and oat milk. The dough will be slightly less rich, but the flavor is still wonderful. I’ve made it for dairy-free friends, and they couldn’t tell the difference.
- Mini Loaves: Divide the dough into 8 small rounds and shape them into mini Pan de Muerto. Bake for 15-18 minutes instead of 25-30. These are great for gifting or for portion control!
Personal Favorite: I love adding a teaspoon of orange blossom water to the dough. It’s subtle, but it makes the bread taste even more floral and elegant. Find it at Middle Eastern grocery stores or online.
Serving & Storage Suggestions
This bread is best served warm, the same day you bake it. But let’s be real—it’s also amazing the next day, toasted and slathered with butter. Here’s how to get the most out of it:
- Serving Temperature: Serve at room temperature or slightly warm. If you’re reheating, pop slices in a 300°F oven for 5 minutes, or toast them lightly. The sugar coating gets a little caramelized—heavenly.
- Presentation: Place the whole loaf on a wooden board or a colorful platter. Dust with a little extra orange sugar right before serving. It’s stunning for Dia de Muertos altars or fall brunches.
- Complementary Dishes: This bread pairs beautifully with a cup of Mexican hot chocolate, café de olla, or a simple cup of coffee. For a savory contrast, serve it alongside a bowl of black bean soup or a cheese plate.
- Storage: Store the bread in an airtight container at room temperature for up to 3 days. The sugar coating might get a little sticky, but the bread stays soft. Do not refrigerate—it dries out the bread.
- Freezer Instructions: Wrap the cooled, unsugared loaf tightly in plastic wrap, then foil, and freeze for up to 2 months. When ready to serve, thaw at room temperature, then warm in the oven and coat with the butter and sugar. The flavor actually gets better after freezing!
Flavor Development Note: The anise and orange flavors meld and deepen overnight. Honestly, I think this bread tastes even better on day two. Don’t be afraid to make it a day ahead.
Nutritional Information & Benefits
Here’s the honest truth: this is a treat, not a health food. But it’s made with real ingredients, and that counts for something. One slice (based on 12 servings) contains approximately:
- Calories: 280
- Fat: 10g
- Carbohydrates: 42g
- Protein: 6g
- Fiber: 1g
- Sugar: 18g
Health Benefits: Oranges are packed with vitamin C, which supports your immune system. Anise seeds have been used traditionally to aid digestion—so this bread might actually help your stomach feel good after a big meal. Plus, the butter and eggs provide protein and healthy fats, which make this bread more satisfying than your average pastry.
Dietary Considerations: This recipe contains gluten, dairy, and eggs. It is not suitable for vegans or those with celiac disease without modifications. However, it’s nut-free and soy-free, so it works for many common allergies.
My Wellness Perspective: I believe in balance. This bread is a celebration food, meant to be enjoyed with loved ones. One slice won’t derail your health goals—it’ll nourish your soul. And that’s important too.
Conclusion
This Homemade Pan de Muerto with Orange and Anise is more than just a recipe—it’s a little piece of tradition you can bring into your own kitchen. With its soft, tender crumb, bright citrus flavor, and subtle warmth from the anise, it’s the kind of bread that makes you slow down and savor the moment. Whether you’re baking it for Dia de Muertos, a fall gathering, or just because you want your house to smell amazing, I promise it’s worth every minute.
I’d love to hear how yours turns out! Did you add a twist? Did your family gobble it up? Drop a comment below and share your experience—or tag me on Pinterest so I can see your beautiful loaves. Baking is better when we do it together, and your adaptations might inspire someone else.
So go ahead, preheat that oven, and get your hands in some dough. This bread is waiting to be made, and I know you’re going to love it. Happy baking, friend!
Frequently Asked Questions
Can I make this Pan de Muerto without a stand mixer?
Absolutely! You can knead the dough by hand on a lightly floured surface. It’ll take about 10-12 minutes of steady work, but the result is just as good. Think of it as a little arm workout.
Why didn’t my dough rise?
This usually happens if the yeast is old or the milk was too hot. Always check the expiration date on your yeast, and make sure the milk is warm (110°F), not hot. If your kitchen is cold, find a warmer spot—like near a sunny window or on top of the fridge.
Can I use star anise instead of anise seeds?
I don’t recommend it. Star anise has a much stronger, more pungent flavor that can overpower the bread. Stick with anise seeds for that subtle, sweet licorice note. If you’re in a pinch, you can leave the anise out entirely—the orange flavor will still shine.
How do I shape the traditional “bones” on top?
It’s easier than it looks! Roll the reserved dough into thin ropes, cut them into 2-inch pieces, and place them across the top of the loaf in a cross pattern. Then add a small round disc in the center. The “bones” represent the deceased, and the disc is a tear. It’s a beautiful tradition.
Can I freeze the dough instead of the baked bread?
Yes! After the first rise, punch down the dough, wrap it tightly in plastic, and freeze for up to 1 month. Thaw it in the fridge overnight, then shape and let it rise before baking. It’s a great time-saver for busy weeks.
Pin This Recipe!

Easy Homemade Pan de Muerto with Orange & Anise

This soft, fragrant bread is perfumed with orange and anise, dusted with sugar, and perfect for Dia de Muertos or any cozy fall gathering. It’s a comforting, family-approved recipe that brings a taste of tradition into your kitchen.
- Prep Time: 20 minutes
- Cook Time: 30 minutes
- Total Time: 3 hours (including rising time)
- Yield: 12 servings 1x
- Category: Bread
- Cuisine: Mexican
Ingredients
- 4 cups (500g) all-purpose flour
- 2 ¼ teaspoons active dry yeast (one packet)
- ½ cup (120ml) warm milk (about 110°F)
- ¾ cup (150g) granulated sugar
- ½ cup (113g) unsalted butter, softened
- 3 large eggs, at room temperature
- 2 tablespoons orange zest (from about 2 large oranges)
- ¼ cup (60ml) fresh orange juice
- 1 teaspoon anise seeds, lightly crushed
- 1 teaspoon fine sea salt
- 1 teaspoon vanilla extract
- For the topping: ¼ cup (50g) granulated sugar mixed with zest of 1 orange, plus 2 tablespoons melted butter for brushing
Instructions
- Proof the yeast: In a small bowl, combine warm milk (110°F), 1 tablespoon of the sugar, and the yeast. Stir gently and let sit for 5-10 minutes until foamy.
- Mix dry ingredients: In the bowl of a stand mixer, whisk together flour, remaining sugar, salt, and crushed anise seeds.
- Add wet ingredients: Make a well in the center. Add proofed yeast mixture, beaten eggs, orange zest, orange juice, and vanilla extract. Mix on low speed with dough hook until a shaggy dough forms, about 2 minutes.
- Knead the dough: Add softened butter, one tablespoon at a time, while mixing on low. Knead for 8-10 minutes until smooth, elastic, and pulls away from the bowl. Dough should be soft and slightly tacky.
- First rise: Shape dough into a ball and place in a lightly greased bowl. Cover with plastic wrap or a damp towel and let rise in a warm spot for 1.5 to 2 hours, until doubled in size.
- Shape the bread: Punch down dough. Turn out onto a lightly floured surface. Divide into two pieces: two-thirds for the main loaf, one-third for decoration. Shape large piece into a round loaf and place on a parchment-lined baking sheet. From the smaller piece, roll ropes about ½-inch thick, cut into short lengths for ‘bones,’ and shape a round disc for the top. Attach to the loaf with a dab of water.
- Second rise: Cover shaped loaf loosely with plastic wrap and let rise for 45 minutes to 1 hour, until puffy and nearly doubled.
- Bake: Preheat oven to 350°F (175°C). Bake for 25-30 minutes, until deep golden brown and loaf sounds hollow when tapped on the bottom. Tent with foil if browning too fast.
- Finish with sugar: While still warm, brush generously with melted butter. Roll in orange-zest sugar mixture until completely coated. Let cool on a wire rack for at least 20 minutes before slicing.
Notes
Don’t overheat the milk—yeast dies above 130°F. Crush anise seeds gently to release oils. Use room-temperature eggs. Be patient with the first rise; it may take longer in a cold kitchen. Brush with butter while warm for a soft crust. The bread stays soft for days stored in an airtight container at room temperature. For freezing, wrap unsugared loaf tightly and freeze for up to 2 months; thaw, warm, and coat with butter and sugar before serving.
Nutrition
- Serving Size: 1 slice
- Calories: 280
- Sugar: 18
- Sodium: 200
- Fat: 10
- Saturated Fat: 6
- Carbohydrates: 42
- Fiber: 1
- Protein: 6
Keywords: Pan de Muerto, Day of the Dead bread, orange anise bread, Mexican sweet bread, homemade bread, Dia de Muertos recipe


