Love this? Save it for later!
Share the inspiration with your friends
“Why can’t we just mix the peanut butter and chocolate and skip the oven?” my friend asked one afternoon while I was fussing over baking granola bars. I started to explain why that wouldn’t work—then stopped. Honestly, it made me pause. Sometimes, you overthink things in the kitchen, right? So, I said, “Okay, let’s try it your way.”
That day, armed with nothing but peanut butter, chocolate, oats, and a bit of honey, we whipped up what turned out to be the easiest and most satisfying granola bars I’d ever made. No baking, no timer watching, no mess of burnt edges. Just a simple, sticky, chocolate-peanut buttery delight that set perfectly in the fridge. I mean, who knew that skipping the oven could yield such a winner?
Maybe you’ve been there—wanting a quick snack that’s sweet but not overly sugary, something wholesome yet indulgent. This recipe stuck with me because it’s exactly that. It’s the kind of treat you can pull together in minutes and feel good about eating. Plus, it saved me from ruining another batch of baked bars (I’m still haunted by one that turned into a hockey puck).
So here’s the thing: sometimes, the best lessons come from being proven wrong. And in this case, that “wrong” led to these easy no-bake chocolate peanut butter granola bars becoming a staple in my snack rotation. Honestly, I keep coming back to them, and I think you’ll see why soon enough.
Why You’ll Love This Recipe
After quite a few trials, tweaks, and “oops” moments, this recipe is a dependable winner. I’ve made it for quick breakfasts, post-workout boosts, and even last-minute picnic snacks. Here’s why it’s worth your time:
- Quick & Easy: Ready in under 20 minutes, no baking required—ideal for busy days or when you just want a sweet fix without fuss.
- Simple Ingredients: Uses pantry staples like rolled oats, peanut butter, and cocoa powder. No exotic stuff needed, so you won’t be running to specialty stores.
- Perfect for On-the-Go: Compact and portable, these bars are perfect for lunchboxes, hiking trips, or office snacks.
- Crowd-Pleaser: Kids, adults, and even the picky eaters I know always ask for seconds. The chocolate-peanut butter combo is just timeless.
- Unbelievably Delicious: The balance of creamy peanut butter and rich chocolate with a touch of honey makes these bars feel indulgent but still wholesome.
- Unique No-Bake Twist: Unlike traditional granola bars that need baking, this recipe relies on chilling and setting, which keeps the oats chewy and the bars tender.
Honestly, this isn’t just another snack bar recipe. It’s the kind that makes you pause mid-bite and think, “Yeah, this is good.” Whether you’re after a healthier treat or just want something homemade without the hassle, these bars fit the bill perfectly.
What Ingredients You Will Need
This recipe uses simple, wholesome ingredients to deliver bold flavor and satisfying texture without the fuss. Most are pantry staples, which means you can usually whip these bars up on a whim.
- Rolled oats (1 ½ cups / 135g) – The hearty base that adds chew and fiber. Quick oats can work but may make the bars mushier.
- Natural peanut butter (½ cup / 125g) – I prefer creamy for easier mixing, but chunky works if you like some crunch. Look for brands without added sugar or oils.
- Honey (½ cup / 170g) – Acts as the sweetener and binder. Maple syrup is a good vegan substitute.
- Cocoa powder (¼ cup / 25g) – Unsweetened for that rich chocolate flavor. I recommend a Dutch-processed variety for smoother taste.
- Vanilla extract (1 teaspoon) – Just a touch to round out the flavors.
- Salt (¼ teaspoon) – Balances sweetness and enhances the peanut butter’s nuttiness.
- Mini chocolate chips (½ cup / 90g) – Optional, but adds little bursts of melted chocolate. Enjoy the melty surprise!
- Chopped nuts or seeds (optional, ¼ cup / 30g) – Like almonds or sunflower seeds for extra texture and nutrition.
If you’re looking to make these gluten-free, double-check your oats are certified gluten-free. For a dairy-free option, use plant-based chocolate chips or leave them out altogether.
Equipment Needed
- Mixing bowl: A medium to large bowl to combine ingredients comfortably. Glass or stainless steel work best.
- Measuring cups and spoons: Precision matters here for that perfect balance of sweetness and texture.
- Spatula or wooden spoon: For mixing sticky ingredients without scraping your knuckles.
- 8×8-inch (20×20 cm) baking pan or dish: To press and set the bars. Line it with parchment paper for easy removal.
- Plastic wrap or foil: To cover the bars while chilling.
If you don’t have a baking pan, a shallow glass dish or even a loaf pan can work fine. Just adjust thickness accordingly. I once used a square Tupperware when in a pinch—it’s not fancy, but it did the job.
Preparation Method
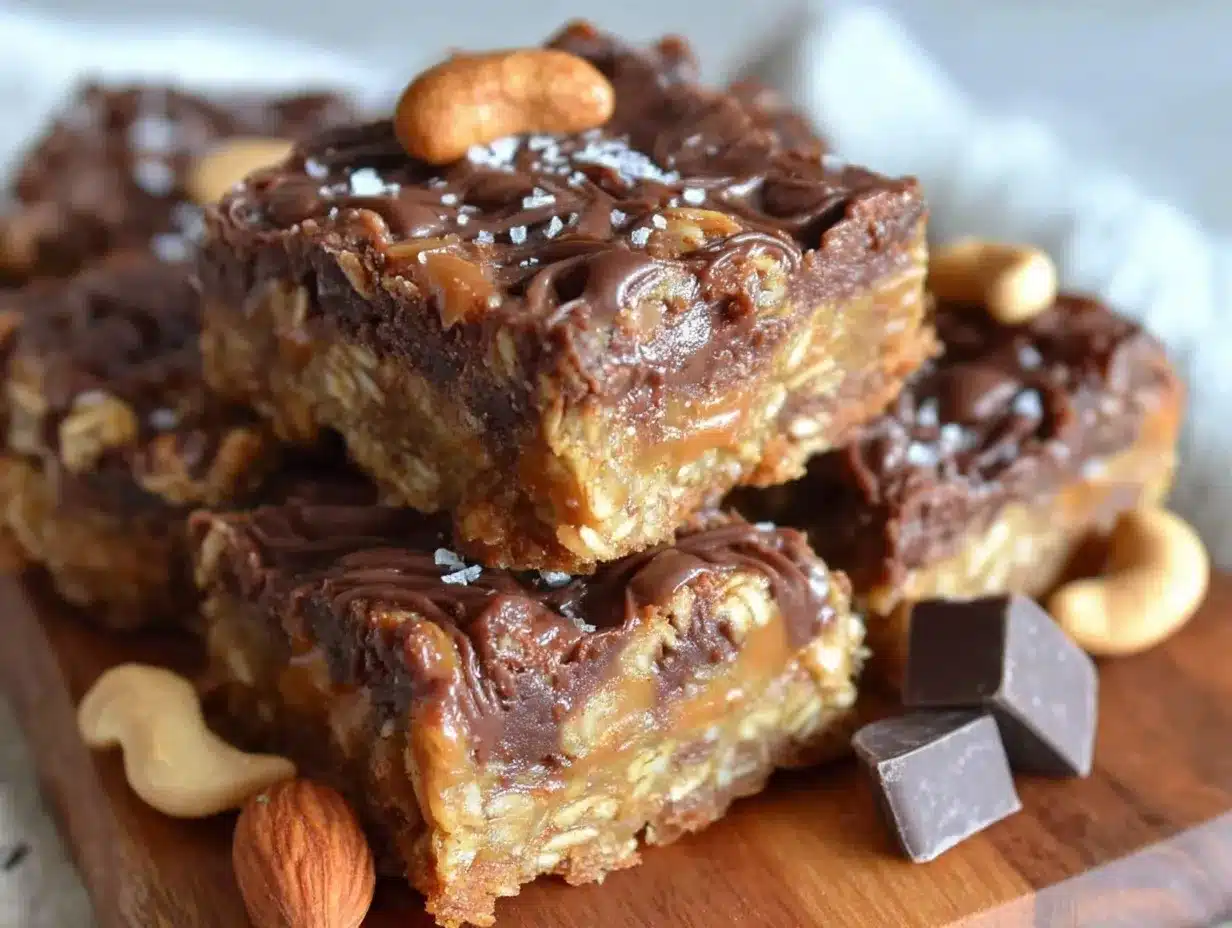
- Line your pan: Start by lining an 8×8-inch (20×20 cm) pan with parchment paper, leaving extra hanging over the edges for easy lifting later. This step saves a lot of headache when removing the bars.
- Mix wet ingredients: In your mixing bowl, combine ½ cup (125g) peanut butter and ½ cup (170g) honey. Stir them together until smooth and combined—this usually takes about 2-3 minutes. The mixture should be glossy and pourable, not stiff.
- Add vanilla and salt: Mix in 1 teaspoon vanilla extract and ¼ teaspoon salt. These small additions really boost flavor, trust me.
- Incorporate dry ingredients: Add 1 ½ cups (135g) rolled oats and ¼ cup (25g) cocoa powder to the wet mix. Stir gently but thoroughly until the oats are evenly coated. The mixture will start looking chocolatey and thick.
- Fold in extras: If using, add ½ cup (90g) mini chocolate chips and/or ¼ cup (30g) chopped nuts or seeds. These add texture and extra chocolatey goodness.
- Press into pan: Transfer the mixture into your prepared pan. Using a spatula or clean hands, press it down firmly and evenly to about 1-inch (2.5 cm) thickness. This ensures the bars hold together when set.
- Chill to set: Cover the pan with plastic wrap or foil and place it in the refrigerator for at least 2 hours. This step is crucial; it allows the honey and peanut butter to harden, binding everything into bars.
- Cut and serve: Once chilled, lift the slab out using the parchment paper edges. Place it on a cutting board and slice into 10–12 bars depending on size preference.
If the bars seem too soft, pop them back in the fridge for another 30 minutes. They should feel firm but still chewy—no brittle crunch here. I learned the hard way that rushing the chilling step results in crumbly bars that just fall apart.
Cooking Tips & Techniques
Honestly, the biggest trick with this recipe is patience when chilling. Let the bars fully set to avoid crumbling messes. Here are a few other nuggets I picked up over time:
- Use natural peanut butter: It has less added sugar and oils, so the bars set better. If you only have the sweetened stuff, reduce honey a bit.
- Measure oats carefully: Too many oats make the bars dry, too few make them sticky and hard to cut.
- Press firmly: Don’t be shy about pressing the mixture down hard into the pan—it helps the bars hold their shape.
- Mix gently but thoroughly: Overmixing can crush the oats too much, leading to a mushy texture.
- Try chilling overnight: For best results, let the bars chill overnight. The flavors meld, and the texture firms up perfectly.
- Room temperature peanut butter: If your peanut butter is too cold or hard, warm it slightly to make mixing easier.
- Optional add-ins: Dried fruit, shredded coconut, or chia seeds can elevate texture and flavor but keep portions balanced so bars still hold together.
I once tried swapping peanut butter for almond butter, and while tasty, the bars were a bit softer. So I recommend sticking with peanut butter if you want that classic firmness. Also, don’t rush the refrigeration step; I’ve seen bars fall apart when cut too soon.
Variations & Adaptations
This recipe is a great base for creativity. Here are some ways I’ve adapted it or that you can try:
- Chocolate-Free Version: Leave out cocoa powder and chocolate chips. Add cinnamon or vanilla for flavor, and maybe toss in some dried cranberries.
- Gluten-Free: Use certified gluten-free oats to keep it safe for those with sensitivities.
- Nut-Free: Swap peanut butter for sunflower seed butter. Be aware it may affect texture slightly.
- Protein Boost: Stir in a scoop of your favorite protein powder (vanilla or chocolate) to make them more filling.
- Seasonal Twist: Mix in pumpkin pie spices or chopped dried apples for a fall-inspired snack.
One variation I love is adding a handful of shredded coconut and chopped dark chocolate chunks. It gives the bars a tropical note and a bit of extra chew. Another time, I tried swapping honey for maple syrup to make it vegan, which worked well but made the bars just a bit softer.
Serving & Storage Suggestions
These easy no-bake chocolate peanut butter granola bars taste best chilled or at room temperature. They’re perfect as a grab-and-go snack or paired with a glass of cold milk or a hot cup of coffee.
For a quick breakfast, serve with fresh fruit or yogurt on the side. They also hold up well in lunchboxes and make excellent post-exercise fuel.
Store bars in an airtight container in the refrigerator for up to one week. They keep well in the freezer too—just wrap individually and freeze for up to 3 months. To enjoy, thaw at room temperature or briefly microwave for 10–15 seconds.
Over time, the flavors soften and meld, making the bars taste even better after a day or two. Just be sure to keep them covered to prevent drying out.
Nutritional Information & Benefits
Each bar (assuming 12 bars per batch) contains approximately:
| Calories | Fat | Carbohydrates | Protein | Fiber |
|---|---|---|---|---|
| 180 kcal | 9g | 20g | 5g | 3g |
Thanks to the oats and peanut butter, these bars provide a good mix of complex carbs, healthy fats, and protein that keep you satisfied. Cocoa powder adds antioxidants, while the honey offers natural sweetness without refined sugars.
They’re naturally gluten-free when made with certified oats and can be tailored to vegan or nut-free diets with simple swaps. Just watch for added sugars in store-bought peanut butter if you want to keep it healthier.
Personally, I appreciate having a snack that feels indulgent but supports my energy needs—these bars hit that sweet spot every time.
Conclusion
Making these easy no-bake chocolate peanut butter granola bars was a happy accident that turned into a snack staple in my kitchen. They’re quick, simple, and downright delicious. Whether you want something wholesome for your kids’ lunchboxes, a no-fuss snack for yourself, or a treat to bring along on an adventure, these bars fit the bill.
Feel free to tweak the recipe to your liking—more nuts, less chocolate, or a dash of your favorite spice. I love how forgiving and adaptable this recipe is, making it approachable for all skill levels.
Give it a go, and let me know how you make it your own. I’d love to hear your twists or any questions you have. Here’s to snack time made simple and satisfying!
FAQs
Can I substitute almond butter for peanut butter in this recipe?
Yes, you can swap almond butter for peanut butter, but keep in mind the texture may be a bit softer, so chilling time might need adjusting.
How long do these granola bars last in the fridge?
They stay fresh for up to one week when stored in an airtight container in the refrigerator.
Can I freeze these no-bake granola bars?
Absolutely! Wrap them individually and freeze for up to 3 months. Thaw at room temperature or microwave briefly before eating.
What’s the best way to get the bars to hold together?
Press the mixture firmly into the pan and chill for at least 2 hours, preferably overnight. This helps the peanut butter and honey bind the oats well.
Are these granola bars gluten-free?
They can be if you use certified gluten-free rolled oats. Regular oats might be cross-contaminated with gluten.
For a snack that’s just as comforting as it is convenient, these easy no-bake chocolate peanut butter granola bars won’t disappoint. Happy snacking!
Pin This Recipe!
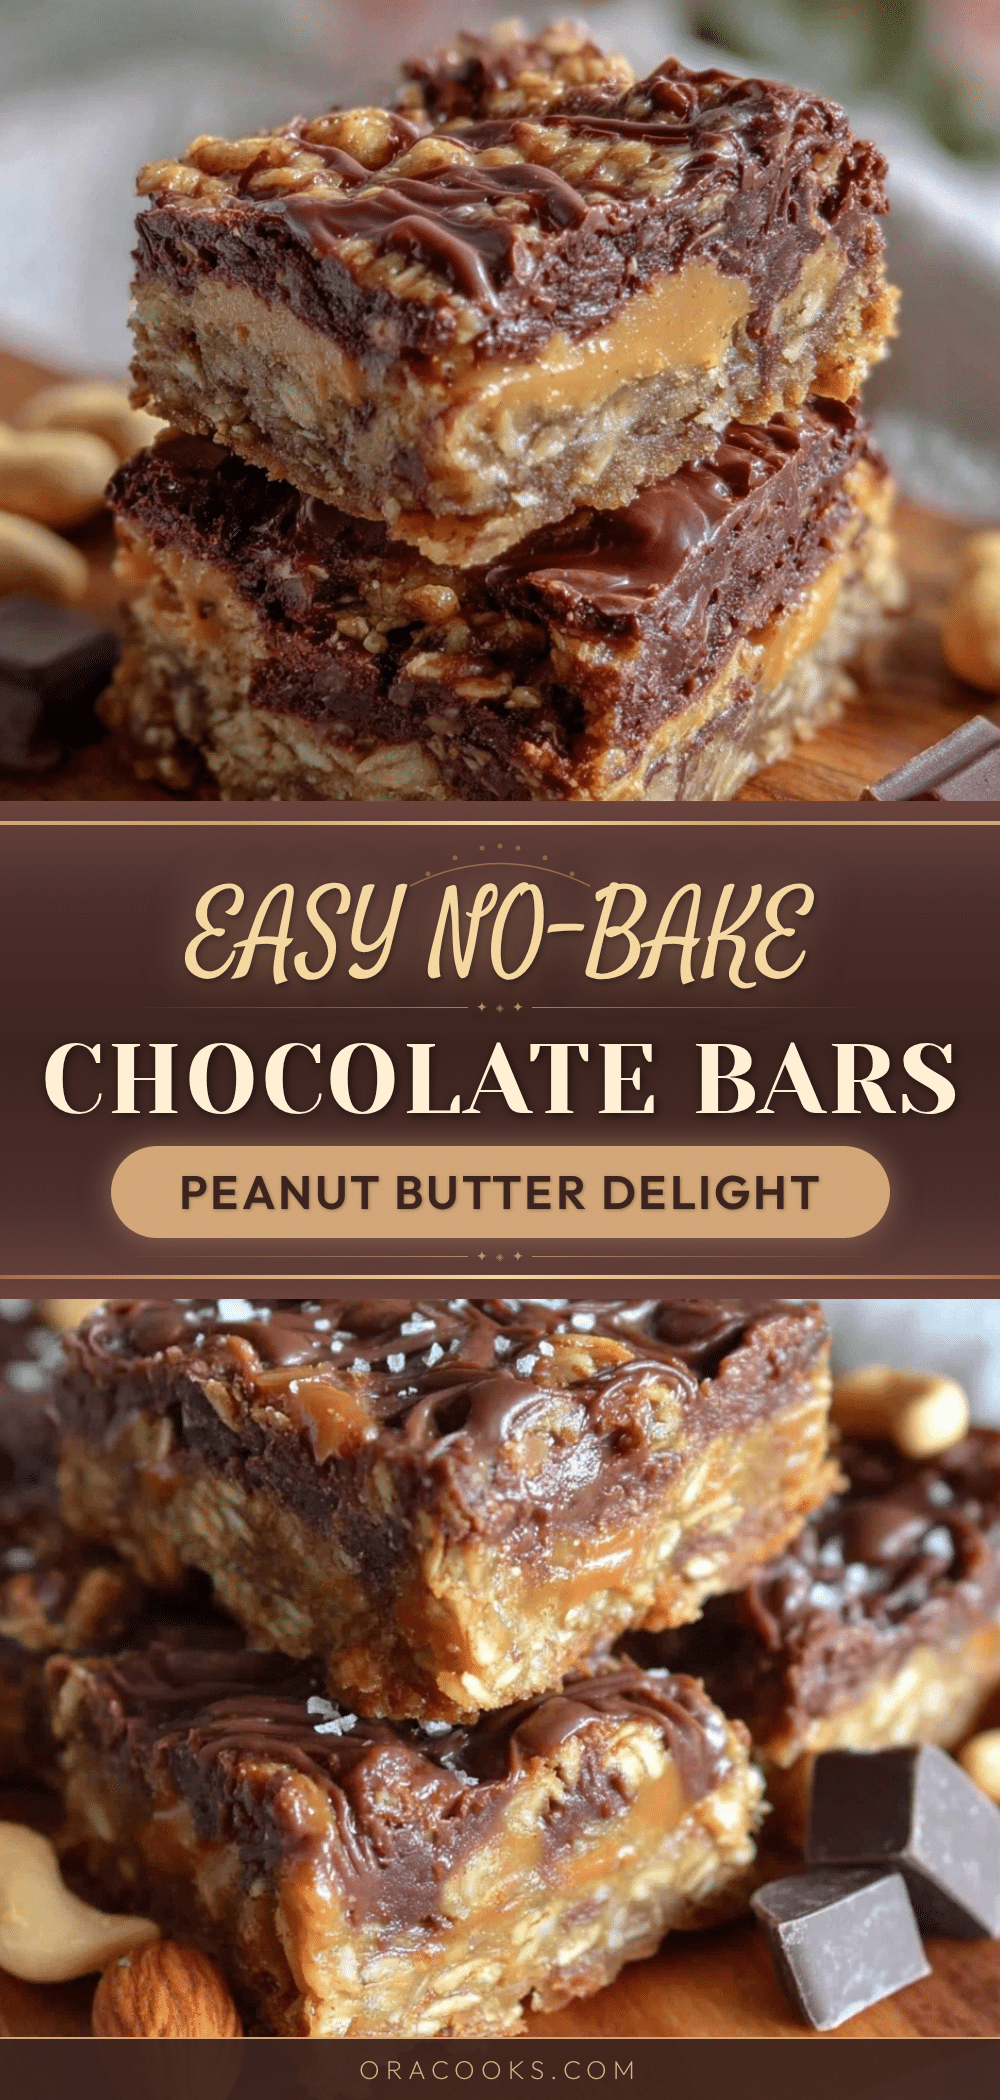
Easy No-Bake Chocolate Peanut Butter Granola Bars
These no-bake granola bars combine creamy peanut butter and rich chocolate with oats and honey for a quick, wholesome, and delicious snack that sets perfectly in the fridge.
- Prep Time: 10 minutes
- Cook Time: 0 minutes
- Total Time: 2 hours 10 minutes
- Yield: 10-12 bars 1x
- Category: Snack
- Cuisine: American
Ingredients
- 1 ½ cups (135g) rolled oats
- ½ cup (125g) natural peanut butter
- ½ cup (170g) honey
- ¼ cup (25g) unsweetened cocoa powder
- 1 teaspoon vanilla extract
- ¼ teaspoon salt
- ½ cup (90g) mini chocolate chips (optional)
- ¼ cup (30g) chopped nuts or seeds (optional)
Instructions
- Line an 8×8-inch (20×20 cm) pan with parchment paper, leaving extra hanging over the edges for easy lifting.
- In a mixing bowl, combine ½ cup (125g) peanut butter and ½ cup (170g) honey. Stir until smooth and combined, about 2-3 minutes.
- Mix in 1 teaspoon vanilla extract and ¼ teaspoon salt.
- Add 1 ½ cups (135g) rolled oats and ¼ cup (25g) cocoa powder to the wet mixture. Stir gently until oats are evenly coated.
- Fold in ½ cup (90g) mini chocolate chips and/or ¼ cup (30g) chopped nuts or seeds if using.
- Transfer the mixture into the prepared pan and press down firmly and evenly to about 1-inch (2.5 cm) thickness.
- Cover the pan with plastic wrap or foil and refrigerate for at least 2 hours to set.
- Lift the set slab using parchment paper edges and cut into 10–12 bars.
Notes
Use natural peanut butter without added sugar or oils for best results. Press the mixture firmly into the pan to help bars hold together. Chill overnight for best texture. For gluten-free, use certified gluten-free oats. For dairy-free, use plant-based chocolate chips or omit them.
Nutrition
- Serving Size: 1 bar (assuming 12 b
- Calories: 180
- Fat: 9
- Carbohydrates: 20
- Fiber: 3
- Protein: 5
Keywords: no-bake granola bars, chocolate peanut butter bars, healthy snacks, easy granola bars, no oven snack, quick snack bars


