Love this? Save it for later!
Share the inspiration with your friends
This was supposed to be a pumpkin cheesecake. The kind with the crackly top, the water bath, the whole nine yards. I had the cream cheese sitting out to soften, the graham crackers ready to be crushed, and a plan to impress my book club. But then my toddler decided 3 PM was the perfect time to “help” me bake, and somewhere between the flour cloud and the spilled vanilla, I realized my springform pan was still in the dishwasher from last Thanksgiving. I stood there, staring at the mixer, the pumpkin puree, and a kid who was now wearing more cream cheese than the bowl contained. Honestly, I almost just ordered pizza.
But I had all those ingredients, you know? And I was stubborn. So I grabbed four little glass cups from the cabinet, threw the graham crackers into a bag, and just started layering. No oven. No water bath. No fancy pan. I figured it would be a mess. Maybe a deconstructed disaster. But what came out of the fridge two hours later was nothing like the plan—and better. These little cups had that perfect creamy, tangy pumpkin flavor, a buttery crunch, and none of the stress. I sat there eating one with a tiny spoon, feeling quietly vindicated while my daughter licked the mixing bowl clean.
Maybe you’ve been there—staring at a dessert you wanted to make but realizing you don’t have the time, the right pan, or the patience for a complicated bake. That’s exactly why these easy no-bake pumpkin cheesecake cups exist. They’re the happy accident that became my go-to fall dessert. No oven required, no stress allowed, and honestly? I might never go back to the big cheesecake again.
Why You’ll Love This Recipe
Let me tell you why these little cups have taken over my fall dessert rotation. First off, they are quick and easy. We’re talking 15 minutes of active prep time, and then the fridge does the rest. No standing over a hot oven, no worrying about cracks, no complicated water baths. It’s the kind of recipe you can throw together after dinner and have ready for the next day.
The simple ingredients list is another huge win. You probably have most of this in your kitchen right now. Cream cheese, pumpkin puree, some spices, and graham crackers. No fancy grocery store trips or obscure ingredients. I tested this with both full-fat and reduced-fat cream cheese, and honestly, both work beautifully.
These cups are the perfect for fall gatherings. Thanksgiving, Friendsgiving, a cozy dinner party, or just a Tuesday night when you need a little pumpkin spice in your life. They look impressive in those little glass cups, but nobody has to know how easy they were. I brought them to a potluck last month, and three people asked for the recipe before I even sat down.
And here’s the thing that makes them different from other no-bake cheesecake recipes I’ve tried—the texture. A lot of no-bake cheesecakes can be a little too soft or almost mousse-like. But this one? It sets up firm and creamy, with that perfect sliceable-but-scoopable consistency. The secret is letting the cream cheese soften fully and whipping it until it’s truly smooth. No shortcuts there, I promise.
This recipe is the kind that makes you close your eyes after the first bite. It’s comfort food reimagined—faster, easier, but with the same soul-soothing satisfaction of a classic pumpkin cheesecake. Perfect for impressing guests without stress, or turning a simple fall evening into something memorable.
What Ingredients You Will Need
This recipe uses simple, wholesome ingredients to deliver that rich, creamy pumpkin flavor without any complicated steps. Most of these are pantry staples or easy fall favorites.
- Graham crackers – About 8 full sheets, crushed into fine crumbs. You can use a food processor or just put them in a ziplock bag and go to town with a rolling pin. I prefer the classic honey grahams, but cinnamon grahams add an extra layer of warmth.
- Unsalted butter, melted – 4 tablespoons (56g). This binds the crust together. If you only have salted butter, just skip adding any extra salt to the crust mixture.
- Granulated sugar – 1 tablespoon for the crust, plus 1/2 cup (100g) for the filling. Regular white sugar works best here for that clean sweetness.
- Cream cheese – 8 ounces (226g), softened to room temperature. This is non-negotiable for a smooth filling. I recommend Philadelphia brand for the creamiest result. Let it sit on the counter for at least 30 minutes before you start.
- Pumpkin puree – 1 cup (245g). Make sure you grab pure pumpkin puree, not pumpkin pie filling. They look similar but are very different. Libby’s is my go-to brand for consistent texture.
- Powdered sugar – 1/2 cup (60g). This helps stabilize the filling and keeps it silky smooth. No graininess here.
- Heavy cream – 1/2 cup (120ml). This gets whipped and folded in, giving the cheesecake that light, airy texture. Make sure it’s cold straight from the fridge.
- Pumpkin pie spice – 1 teaspoon. Or make your own blend: 1/2 teaspoon cinnamon, 1/4 teaspoon ginger, 1/8 teaspoon nutmeg, and a pinch of cloves.
- Vanilla extract – 1 teaspoon. Pure vanilla makes a difference here, but imitation works in a pinch.
- Optional toppings – Whipped cream, a sprinkle of cinnamon, crushed pecans, or a drizzle of caramel sauce. These are purely for fun, but they do make the cups look extra special.
For substitutions, you can use dairy-free cream cheese and coconut cream for a dairy-free version. Gluten-free graham crackers work perfectly too. Just keep in mind the texture might be slightly different, but the flavor will still be amazing.
Equipment Needed
The equipment list for this recipe is refreshingly short. You’ll need:
- 4 to 6 small glass cups or jars – I use 8-ounce mason jars, but any small glass or even ramekins work. Clear glass lets you see those beautiful layers.
- Mixing bowls – One medium bowl for the crust, one large bowl for the filling. Nothing fancy needed.
- Electric hand mixer or stand mixer – You can technically do this by hand with a whisk and some serious arm muscle, but a mixer makes it so much easier and gives you that perfectly smooth texture.
- Rolling pin or food processor – For crushing the graham crackers. A ziplock bag and a rolling pin is my go-to when I don’t want to wash extra dishes.
- Measuring cups and spoons – Standard set for accuracy.
- Spatula – For scraping every last bit of that creamy filling into the cups.
If you don’t have a mixer, you can whisk the cream cheese by hand if it’s very soft, but honestly, a hand mixer is a worthwhile investment for recipes like this. I’ve used the same $20 hand mixer for years, and it works perfectly.
Preparation Method
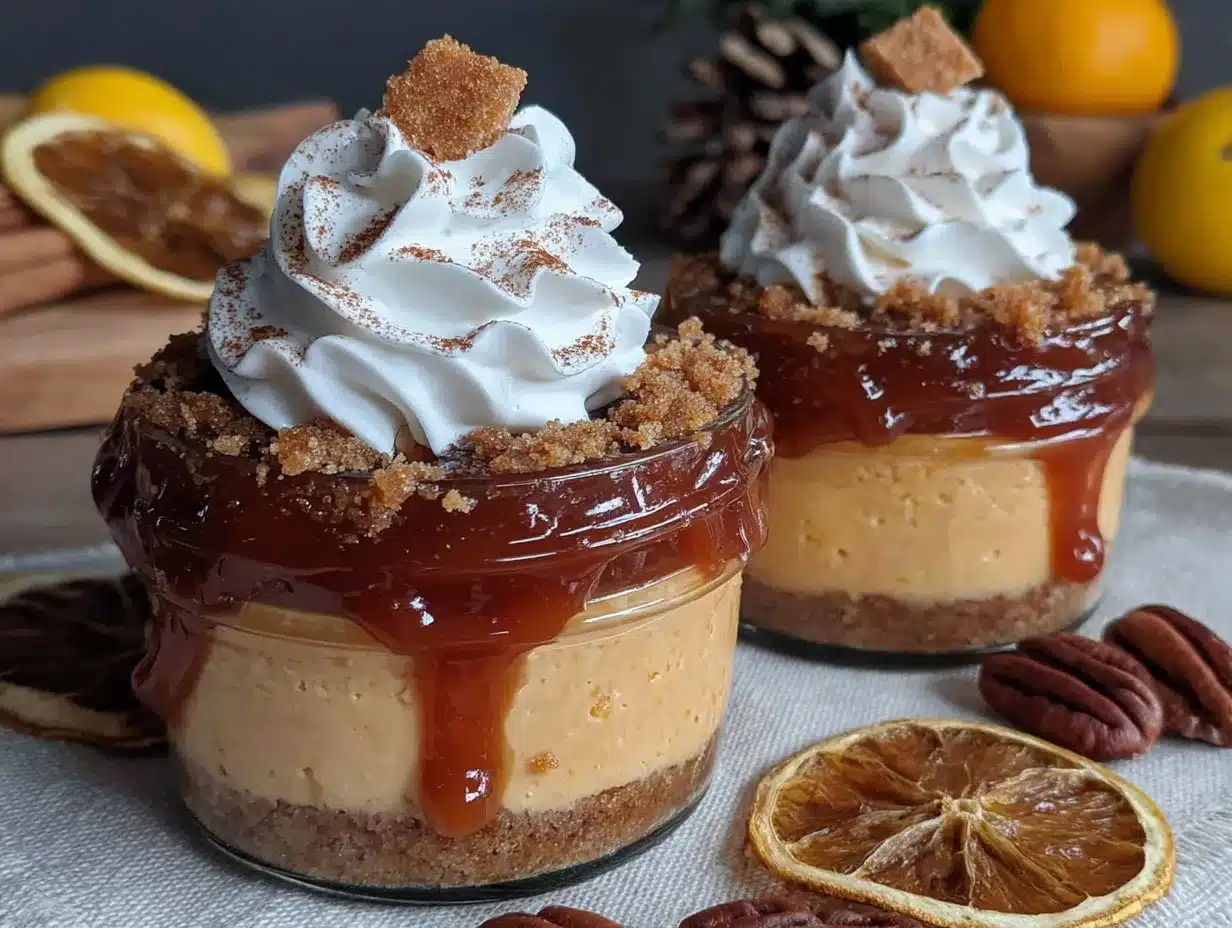
- Make the crust. Crush your graham crackers into fine crumbs. You want about 1 cup of crumbs. In a medium bowl, combine the crumbs, 1 tablespoon of granulated sugar, and the melted butter. Stir until every crumb is coated and the mixture looks like wet sand. Divide this evenly among your cups—about 2 to 3 tablespoons per cup. Press it down firmly with the back of a spoon or the bottom of a small glass. Pop these in the fridge while you make the filling.
- Whip the cream. In a separate bowl, pour in the cold heavy cream. Using your hand mixer, whip it on medium-high speed until stiff peaks form. This takes about 2 to 3 minutes. You’ll know it’s ready when you lift the beaters and the cream holds its shape. Set this aside in the fridge for now.
- Soften the cream cheese. This step is crucial. Your cream cheese needs to be at room temperature. If you forgot to take it out, you can microwave it in 10-second bursts, but be careful not to melt it. You just want it soft enough that a finger pressed into it leaves an indentation.
- Make the filling. In a large bowl, beat the softened cream cheese with the hand mixer on medium speed until it’s completely smooth and fluffy—about 2 minutes. Scrape down the sides of the bowl. Add the pumpkin puree, powdered sugar, granulated sugar, pumpkin pie spice, and vanilla extract. Beat again until everything is combined and silky. Taste it here. Yes, it’s safe to eat raw. Adjust the spices if you want more warmth.
- Fold in the whipped cream. Take your whipped cream out of the fridge. Add about half of it to the pumpkin mixture and gently fold it in with a spatula. Don’t stir vigorously—you want to keep that airy texture. Once it’s mostly combined, add the rest of the whipped cream and fold until no white streaks remain. The filling should be light, fluffy, and a beautiful pale orange.
- Assemble the cups. Take the crust cups out of the fridge. Spoon or pipe the filling over the crust. I like to use a piping bag for clean layers, but a spoon works just fine. Divide the filling evenly—about 1/3 to 1/2 cup per cup depending on the size. Smooth the tops with the back of a spoon.
- Chill. This is the hardest part—waiting. Cover each cup with plastic wrap or a lid and refrigerate for at least 4 hours, but overnight is best. The filling needs time to set up and become firm. I know it’s tempting, but don’t rush this step. The texture really changes after a full night in the fridge.
- Serve. When you’re ready to eat, take the cups out of the fridge. Add a dollop of whipped cream on top, a sprinkle of cinnamon, and maybe some crushed pecans. Serve cold and enjoy every spoonful.
One thing I learned the hard way—don’t skip pressing the crust firmly. A loose crust will just crumble into the filling when you try to eat it. Really pack it down. Your future self will thank you.
Cooking Tips & Techniques
Let me share some things I learned through trial and error. First, temperature matters. I once tried to rush this recipe with cold cream cheese, and the filling came out lumpy. It still tasted fine, but the texture was off. Room temperature cream cheese is your best friend here. Set it out an hour before you start, or at least 30 minutes.
Don’t overwhip the cream. I’ve made butter by accident before. It’s a sad moment. Whip the cream just until stiff peaks form, then stop. If you go too far, it will separate and turn grainy. If that happens, just start over with fresh cream—it’s cheaper than ruining the whole dessert.
Patience with chilling is the real secret. I know 4 hours feels like forever, but the first time I made these, I tried one after only 2 hours. It was still delicious, but it was more like a mousse than a cheesecake. After a full 8 hours in the fridge, the texture was firm, creamy, and perfect. The flavors also meld together beautifully overnight.
Another tip—use a piping bag for the filling if you want those Instagram-worthy layers. A zip-top bag with the corner snipped off works just as well. It keeps the filling clean and prevents it from mixing with the crust.
And here’s a mistake I made more than once—overfilling the cups. Leave a little room at the top for toppings. Trust me, you want space for that whipped cream and caramel drizzle.
Variations & Adaptations
This recipe is incredibly flexible. Here are some variations I’ve tried and loved:
Gluten-free version – Use gluten-free graham crackers or crushed gluten-free cookies. I’ve used gluten-free shortbread cookies, and they were amazing. The texture is slightly different, but the flavor is just as good.
Dairy-free version – Swap the cream cheese for a high-quality dairy-free cream cheese (I like Kite Hill or Miyoko’s). Use coconut cream instead of heavy cream. The texture will be a bit softer, but it’s still delicious. Let it chill for a full 12 hours for best results.
Maple pecan twist – Add 2 tablespoons of maple syrup to the filling and top with toasted pecans. The maple and pumpkin combo is absolutely heavenly. I made this for a fall brunch, and it disappeared in minutes.
Chocolate lovers version – Use chocolate graham crackers for the crust and add a layer of melted dark chocolate between the crust and filling. The chocolate and pumpkin pairing is surprisingly perfect.
Spiced up version – Add a pinch of cayenne pepper or black pepper to the filling. It sounds weird, but that little kick of heat really brings out the pumpkin flavor. I learned this trick from a pumpkin pie recipe my grandmother used.
You can also make these as a single dessert in a small dish instead of individual cups. Just press the crust into a small baking dish, spread the filling, and chill. It works perfectly for a family-style dessert.
Serving & Storage Suggestions
These cups are best served cold, straight from the fridge. The texture is firm and creamy, and the flavors are most vibrant when they’re chilled. I like to take them out about 5 minutes before serving, just to take the edge off the chill.
For toppings, I keep it simple: a generous dollop of whipped cream, a light dusting of cinnamon, and maybe a few toasted pecans or a drizzle of caramel sauce. It adds a nice crunch and makes them look extra special. If you’re serving these at a party, set out a little topping bar so guests can customize their own.
These pair beautifully with a hot cup of coffee, spiced apple cider, or even a glass of dessert wine. They’re also wonderful alongside a slice of apple pie or a warm pumpkin muffin for a full fall dessert spread.
Storage instructions: Cover each cup with plastic wrap or a tight-fitting lid and store in the refrigerator for up to 5 days. The flavor actually gets better on day two as the spices meld together. I do not recommend freezing these—the texture becomes watery and grainy when thawed. Trust me, I tried it once.
If you’re making these ahead for a party, they’re actually perfect for that. Make them up to two days in advance, keep them covered in the fridge, and add the toppings just before serving. The crust stays crunchy, and the filling stays perfectly creamy.
Nutritional Information & Benefits
Here’s an approximate nutritional breakdown per serving (based on 4 servings, without optional toppings):
| Nutrient | Amount |
|---|---|
| Calories | 380 |
| Total Fat | 26g |
| Saturated Fat | 15g |
| Cholesterol | 80mg |
| Sodium | 290mg |
| Total Carbohydrates | 34g |
| Dietary Fiber | 2g |
| Sugars | 22g |
| Protein | 5g |
| Vitamin A | 180% DV |
| Calcium | 6% DV |
| Iron | 6% DV |
Pumpkin is packed with Vitamin A, which is great for eye health and immune function. It’s also a good source of fiber and antioxidants. The cream cheese adds calcium and protein, making this a more balanced dessert than you might expect. Of course, it’s still a treat, but you can feel a little better about that second cup knowing there’s actual pumpkin in there.
For a lighter version, use reduced-fat cream cheese and skip the whipped cream topping. It cuts the calories and fat without sacrificing too much flavor.
Conclusion
These easy no-bake pumpkin cheesecake cups are proof that sometimes the best recipes come from the most chaotic moments. They’re simple enough for a weeknight, impressive enough for a holiday table, and forgiving enough for even the most distracted cook. No oven, no stress, no fancy equipment—just creamy, spiced, pumpkin perfection in a cup.
I hope you give these a try and make them your own. Maybe add extra cinnamon, swap in your favorite cookie for the crust, or top them with something unexpected. That’s the beauty of this recipe—it’s a starting point, not a strict rulebook. I’d love to hear how yours turn out. Drop a comment below and let me know what variations you tried, or tag me in your photos. There’s nothing better than seeing these little cups bring a smile to someone else’s face.
Happy no-baking, friends. Your stress-free fall dessert is waiting.
Frequently Asked Questions
Can I use pumpkin pie filling instead of pumpkin puree?
I wouldn’t recommend it. Pumpkin pie filling already has sugar and spices added, so it will throw off the sweetness and texture of the filling. Stick with pure pumpkin puree for the best results. If you only have pie filling, reduce the sugar in the recipe by half.
How long do these need to chill?
At least 4 hours, but overnight is ideal. The filling needs time to firm up and become sliceable. If you’re in a rush, you can try 2 hours, but the texture will be much softer—more like a mousse than a cheesecake.
Can I make these without a mixer?
Yes, but you’ll need some arm strength. Make sure your cream cheese is very soft, and use a whisk to beat it until smooth. For the whipped cream, you can whip it by hand with a whisk, but it will take about 5 to 8 minutes of steady whisking. A hand mixer makes it much easier.
Can I freeze these cups?
I don’t recommend freezing them. The texture becomes watery and grainy when thawed because of the cream cheese and whipped cream. They’re best made fresh and stored in the fridge for up to 5 days.
What can I use instead of graham crackers for the crust?
So many options! Crushed vanilla wafers, shortbread cookies, ginger snaps, or even crushed pretzels work beautifully. Ginger snaps are especially good with the pumpkin flavor. Just adjust the butter amount slightly—drier cookies may need a little more butter to hold together.
Pin This Recipe!
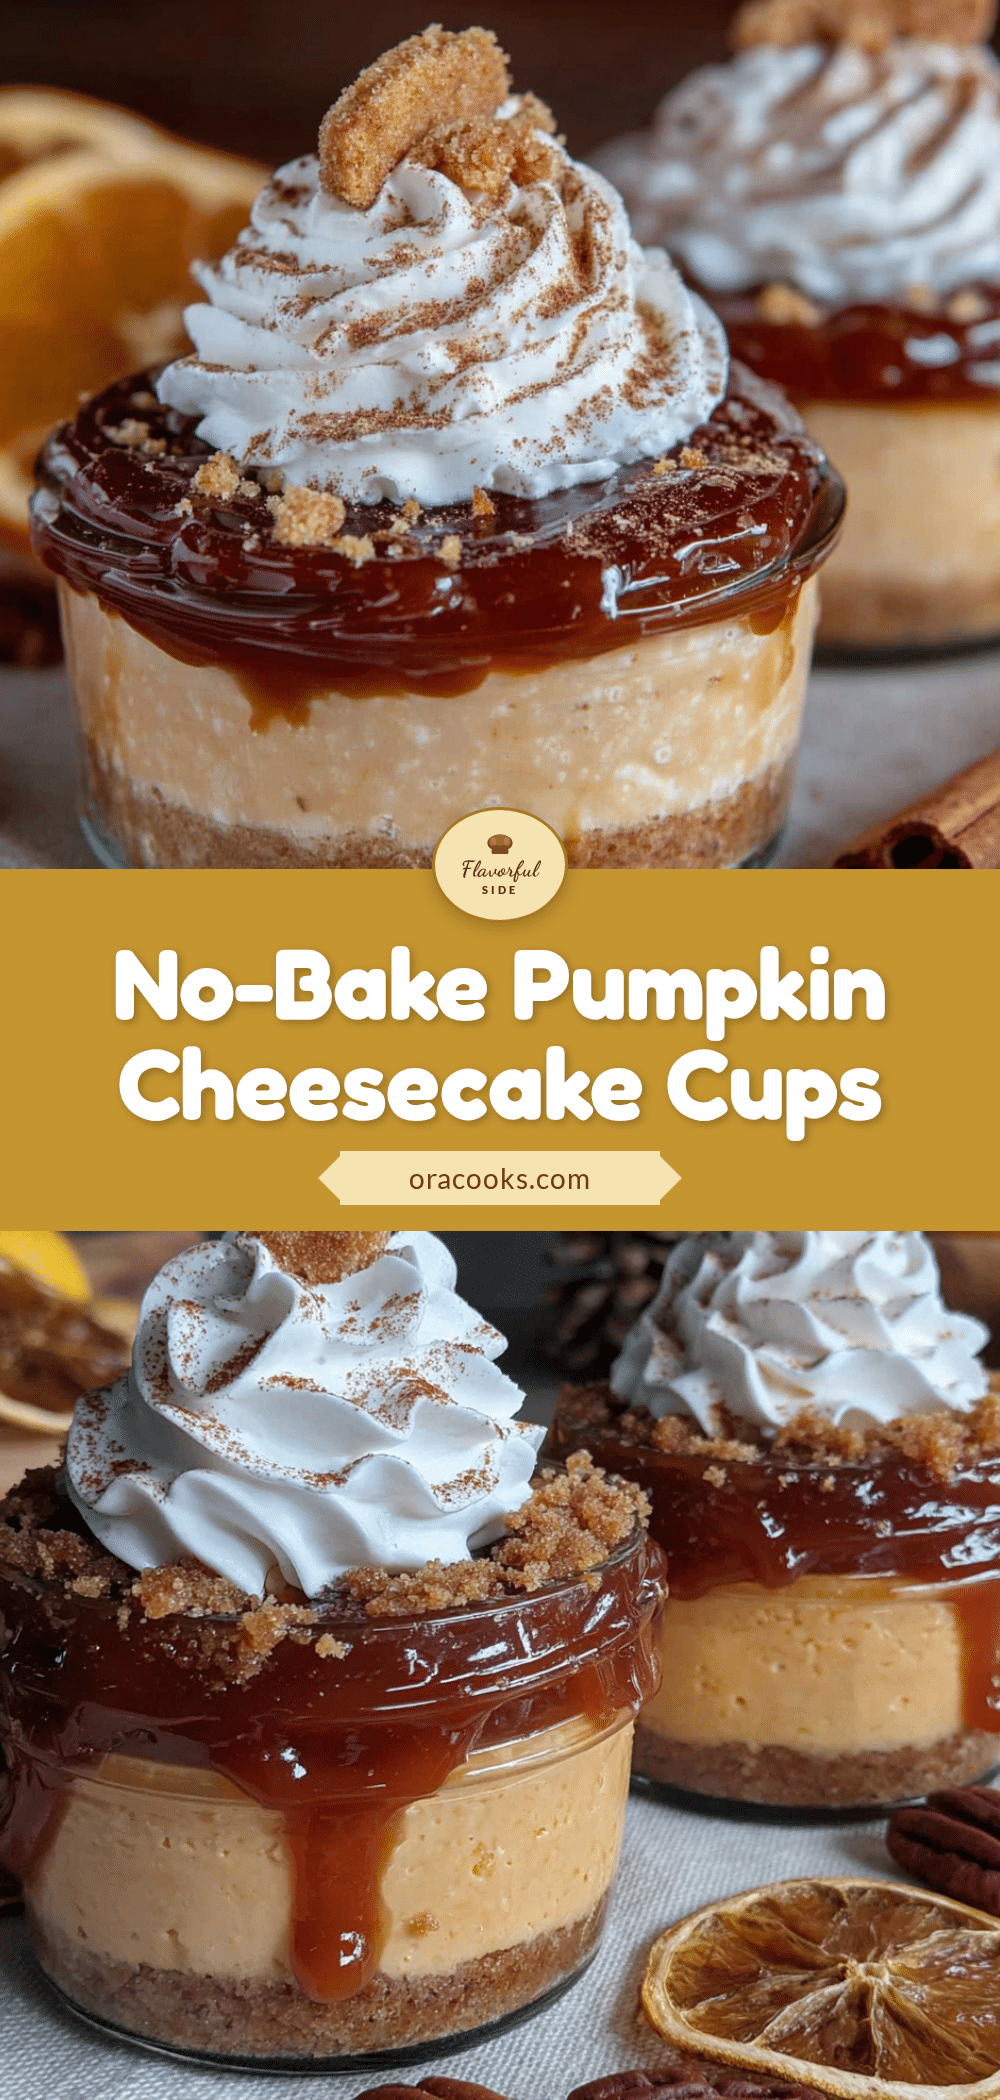
Easy No-Bake Pumpkin Cheesecake Cups
These easy no-bake pumpkin cheesecake cups are the perfect fall dessert with a creamy, tangy pumpkin filling and a buttery graham cracker crust. No oven required, no stress allowed—just a simple, delicious treat that comes together in 15 minutes.
- Prep Time: 15 minutes
- Cook Time: 0 minutes
- Total Time: 4 hours 15 minutes (includes chilling)
- Yield: 4-6 servings 1x
- Category: Dessert
- Cuisine: American
Ingredients
- 8 full sheets graham crackers (about 1 cup crumbs)
- 4 tablespoons (56g) unsalted butter, melted
- 1 tablespoon granulated sugar (for crust)
- 8 ounces (226g) cream cheese, softened to room temperature
- 1 cup (245g) pumpkin puree (not pumpkin pie filling)
- 1/2 cup (60g) powdered sugar
- 1/2 cup (100g) granulated sugar (for filling)
- 1/2 cup (120ml) heavy cream, cold
- 1 teaspoon pumpkin pie spice (or 1/2 tsp cinnamon, 1/4 tsp ginger, 1/8 tsp nutmeg, pinch cloves)
- 1 teaspoon vanilla extract
- Optional toppings: whipped cream, cinnamon, crushed pecans, caramel sauce
Instructions
- Make the crust: Crush graham crackers into fine crumbs (about 1 cup). In a medium bowl, combine crumbs, 1 tablespoon granulated sugar, and melted butter. Stir until every crumb is coated and mixture looks like wet sand. Divide evenly among 4-6 cups (about 2-3 tablespoons per cup). Press down firmly with the back of a spoon or bottom of a small glass. Refrigerate while making filling.
- Whip the cream: In a separate bowl, pour cold heavy cream. Using a hand mixer, whip on medium-high speed until stiff peaks form (about 2-3 minutes). Set aside in the fridge.
- Soften the cream cheese: Ensure cream cheese is at room temperature. If forgotten, microwave in 10-second bursts until soft but not melted.
- Make the filling: In a large bowl, beat softened cream cheese with hand mixer on medium speed until smooth and fluffy (about 2 minutes). Scrape down sides. Add pumpkin puree, powdered sugar, granulated sugar, pumpkin pie spice, and vanilla extract. Beat until combined and silky. Taste and adjust spices if desired.
- Fold in whipped cream: Add half the whipped cream to pumpkin mixture and gently fold with a spatula. Add remaining whipped cream and fold until no white streaks remain. Filling should be light, fluffy, and pale orange.
- Assemble the cups: Remove crust cups from fridge. Spoon or pipe filling over crust (about 1/3 to 1/2 cup per cup). Smooth tops with back of a spoon.
- Chill: Cover each cup with plastic wrap or lid and refrigerate for at least 4 hours, but overnight is best for firm texture.
- Serve: Take cups out of fridge. Add whipped cream, cinnamon, and/or crushed pecans on top. Serve cold.
Notes
Don’t skip pressing the crust firmly. Use room temperature cream cheese for smooth filling. Don’t overwhip the cream. Chill for at least 4 hours, preferably overnight. For dairy-free, use dairy-free cream cheese and coconut cream. For gluten-free, use gluten-free graham crackers. Can be made up to 2 days in advance. Do not freeze.
Nutrition
- Serving Size: 1 cup (without optio
- Calories: 380
- Sugar: 22
- Sodium: 290
- Fat: 26
- Saturated Fat: 15
- Carbohydrates: 34
- Fiber: 2
- Protein: 5
Keywords: no-bake pumpkin cheesecake, pumpkin cheesecake cups, easy fall dessert, no-bake dessert, pumpkin dessert, individual cheesecake


