Love this? Save it for later!
Share the inspiration with your friends
My older brother, Mark, claimed to hate birthday cake for fifteen years. Fifteen years. Every single party, every single celebration, he’d wave it away with this little smirk, saying he’d rather have pie or ice cream or honestly, nothing at all. We all just accepted it. That was Mark being Mark — the family contrarian who took quiet pleasure in being different. Then last summer, at my niece’s fifth birthday party, I caught him. He was standing by the kitchen counter, fork in hand, scraping the last bits of vanilla buttercream off a sheet cake pan I’d left there. He froze when he saw me, fork halfway to his mouth, and I just stood there grinning. “I thought you hated birthday cake,” I said. He shrugged, took another bite, and muttered something about this one being different.
And honestly? He was right. This one is different.
This homemade birthday sheet cake with vanilla buttercream isn’t trying to be fancy. There are no fondant flowers, no elaborate piping, no three-tiered tower situation. It’s just a perfectly moist, buttery sheet cake with a thick, creamy, melt-in-your-mouth vanilla buttercream that somehow tastes like every good birthday you’ve ever had. You know that feeling when you take a bite and you’re instantly transported back to being seven years old, sitting on a folding chair in someone’s backyard, wearing a paper crown? That’s what this cake does.
The first time I made it, I was just trying to throw something together for a last-minute work celebration. I used a random recipe I found online, and it turned out dry and kind of flavorless. I was so embarrassed. But I’m stubborn, so I kept testing. I tried different ratios of butter to sugar, different flours, different mixing methods. I burned a batch so badly the smoke alarm went off. I made a buttercream that was so runny it slid right off the cake and puddled on the plate. But eventually, after maybe six or seven tries, I got it. The cake was tender and rich, the buttercream was silky and sweet, and everyone at the table went quiet for a second after that first bite. That’s when I knew I had something worth keeping.
Maybe you’ve been there — searching for that one reliable sheet cake recipe that actually delivers on flavor and texture. Or maybe you just need something simple and foolproof for an upcoming birthday. Either way, this one’s for you. It’s the cake that converted my brother, and honestly, if it can do that, it can do anything.
Why You’ll Love This Recipe
Let me tell you why this homemade birthday sheet cake with vanilla buttercream has become my go-to for every celebration. I’ve tested this recipe more times than I care to admit, and it’s earned a permanent spot in my baking rotation for good reason.
- Quick & Easy: From start to finish, this cake comes together in under an hour. The batter takes about 10 minutes to mix, bakes for 25-30 minutes, and the buttercream whips up while the cake cools. Perfect for those moments when you realize a birthday is tomorrow and you have nothing planned.
- Simple Ingredients: You likely have most of these in your kitchen right now. Butter, sugar, eggs, flour, vanilla — nothing weird or hard to find. No specialty flours, no obscure extracts, no trips to three different stores.
- Perfect for Celebrations: This is the ultimate crowd-pleaser for birthdays, potlucks, office parties, or just a Tuesday that needs a little extra joy. Sheet cakes are easy to transport, easy to slice, and everyone gets a corner piece if they want one.
- Crowd-Pleaser: Kids love it, adults love it, even my brother who “doesn’t like birthday cake” loves it. The texture is soft and tender, the buttercream is rich without being cloying, and it somehow feels both nostalgic and fresh at the same time.
- Unbelievably Delicious: The secret here is in the technique — creaming the butter and sugar until it’s truly light and fluffy, using room-temperature eggs, and not overmixing the flour. It makes a noticeable difference in the crumb.
What sets this recipe apart from the countless others out there is the balance. So many sheet cakes are either too dry or too dense. The buttercream is either too sweet or too greasy. This version hits that sweet spot where everything just works together. The cake is moist but sturdy enough to hold the frosting, and the buttercream is smooth and spreadable with just the right amount of vanilla flavor.
This isn’t just another birthday cake recipe. This is the one that makes people close their eyes after the first bite. It’s comfort food in cake form — familiar, reliable, and deeply satisfying. Whether you’re making it for a five-year-old’s party or a fiftieth birthday bash, it delivers every single time.
What Ingredients You Will Need
This recipe uses simple, wholesome ingredients that work together to create a tender, flavorful cake and a silky, dreamy buttercream. Most of these are pantry staples, which makes this the perfect last-minute celebration cake.
For the Cake
- All-purpose flour, 2 ½ cups (315 grams) — I use King Arthur Flour for consistent results. Spoon and level it into your measuring cup; don’t scoop directly or you’ll pack in too much flour.
- Granulated sugar, 2 cups (400 grams) — Regular white sugar works perfectly here. It adds sweetness and helps create that tender crumb.
- Unsalted butter, 1 cup (2 sticks or 226 grams), softened — Make sure it’s truly at room temperature. If you press your finger into it, it should leave an indent without sliding around. I prefer Land O’Lakes or Kerrygold for baking.
- Large eggs, 4, room temperature — Room-temperature eggs emulsify better into the batter, creating a more even texture. If you forgot to take them out ahead of time, place them in a bowl of warm water for 5 minutes.
- Whole milk, 1 cup (240 ml), room temperature — Whole milk adds richness, but 2% works in a pinch. Avoid skim milk — the cake will be less tender.
- Vanilla extract, 2 teaspoons — Pure vanilla extract, not imitation. I’m partial to Nielsen-Massey, but any good quality brand works. This is where the flavor really shines.
- Baking powder, 2 ½ teaspoons — Make sure it’s fresh. If your baking powder is more than 6 months old, it might not give the cake enough lift.
- Salt, ½ teaspoon — Just regular table salt. It balances the sweetness and enhances the vanilla flavor.
For the Vanilla Buttercream
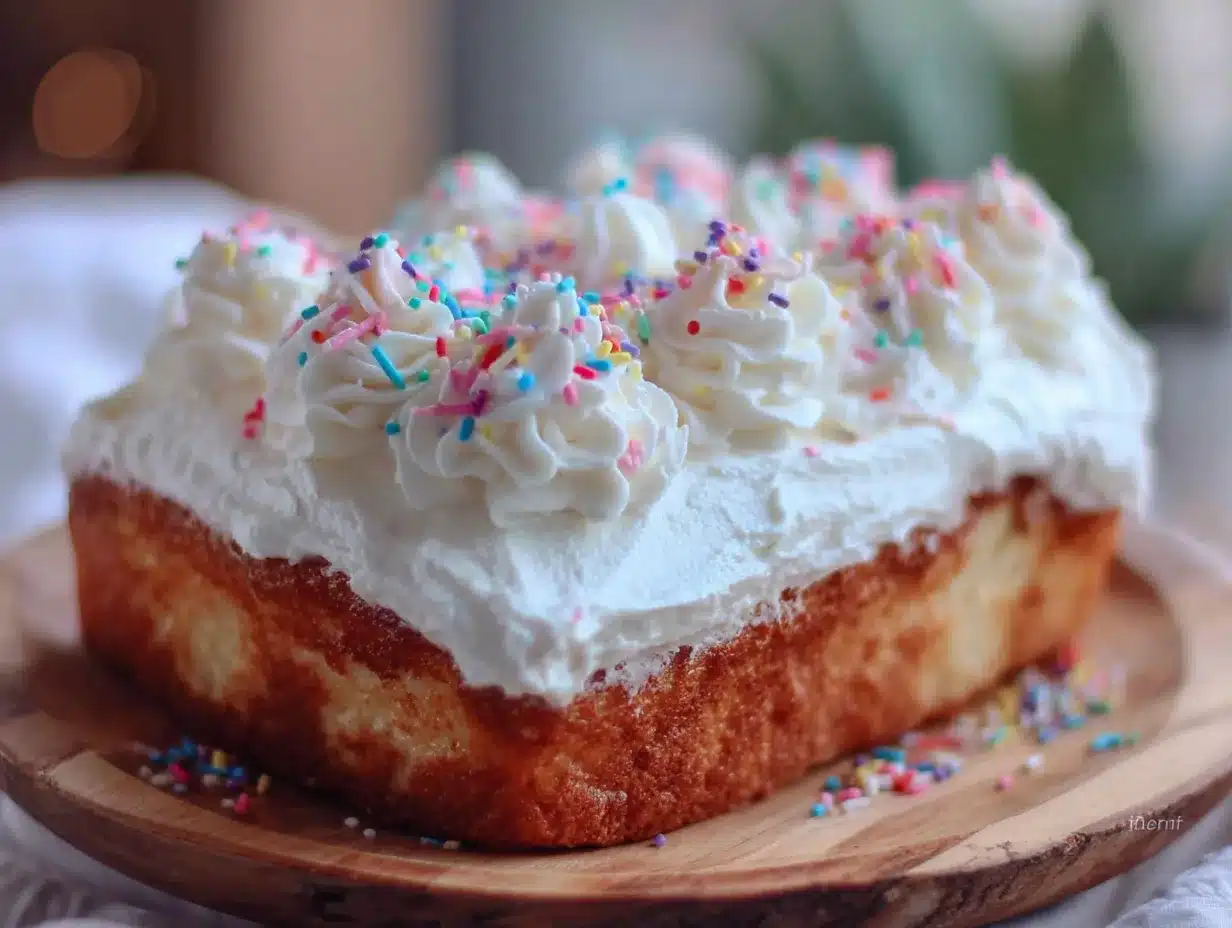
- Unsalted butter, 1 ½ cups (3 sticks or 340 grams), softened — Again, room temperature is key. If the butter is too cold, your frosting will be lumpy. Too warm, and it will be runny.
- Powdered sugar, 4 cups (480 grams), sifted — Sifting removes lumps and gives you a silky-smooth frosting. I know it’s an extra step, but trust me on this one.
- Vanilla extract, 2 teaspoons — Pure vanilla again. You can also use vanilla bean paste for those little specks of vanilla if you’re feeling fancy.
- Heavy cream, 3-4 tablespoons (45-60 ml) — Heavy cream makes the buttercream light and fluffy. Whole milk works in a pinch, but the texture won’t be quite as luxurious.
- Salt, a pinch — Just a tiny pinch to cut the sweetness and bring out the vanilla flavor.
Ingredient Tips and Substitutions
If you’re dairy-free, you can substitute the butter with a good quality plant-based butter like Miyoko’s or Country Crock Plant Butter. Use oat milk or almond milk in place of the whole milk, and use a dairy-free heavy cream alternative. The texture will be slightly different, but still delicious.
For a gluten-free version, swap the all-purpose flour with a 1:1 gluten-free baking flour blend. I’ve had good results with Bob’s Red Mill Gluten-Free 1-to-1 Baking Flour. Just be careful not to overmix the batter, as gluten-free flours can get gummy.
If you want to add a little something extra, you can fold in ½ cup of rainbow sprinkles into the batter for a funfetti effect. Just toss them in a tablespoon of flour first to prevent them from sinking to the bottom.
Equipment Needed
You don’t need a fancy kitchen to make this homemade birthday sheet cake with vanilla buttercream. Here’s what you’ll need:
- 13×9-inch baking pan — This is the standard sheet cake size. A metal pan works best for even baking. Glass or ceramic pans can work, but they tend to bake a little slower and the edges might brown more.
- Electric hand mixer or stand mixer — You can technically make this by hand with a whisk and some elbow grease, but a mixer makes the creaming process much easier and gives you a lighter texture. I use my KitchenAid stand mixer for the cake batter and my hand mixer for the buttercream.
- Large mixing bowls — You’ll need at least two: one for the dry ingredients and one for the wet ingredients.
- Whisk — For mixing the dry ingredients together.
- Rubber spatula — For scraping down the bowl and folding in the final ingredients.
- Measuring cups and spoons — For accurate measuring. I prefer using a kitchen scale for the flour and sugar, but measuring cups work just fine if you use the right technique.
- Cooling rack — Essential for cooling the cake evenly. If you don’t have one, you can carefully invert the cake onto a clean towel, but a rack is better.
- Offset spatula — For spreading the buttercream smoothly. A butter knife works in a pinch, but an offset spatula makes it so much easier.
- Parchment paper — Lining the pan makes removal a breeze. You can also grease and flour the pan, but parchment is foolproof.
If you’re on a budget, don’t worry about having the fanciest tools. I made this cake for years with a hand mixer I got for fifteen dollars at a garage sale. It’s more about technique than equipment.
Preparation Method
Let’s get baking! I’ll walk you through each step so you get a perfect cake every time.
Step 1: Preheat and Prep
Preheat your oven to 350°F (175°C). Grease your 13×9-inch baking pan with butter or non-stick spray, then line it with a sheet of parchment paper. Leave a little overhang on the long sides — this will act as handles to lift the cake out later. Grease the parchment too, just to be safe.
Step 2: Mix the Dry Ingredients
In a medium bowl, whisk together the 2 ½ cups all-purpose flour, 2 ½ teaspoons baking powder, and ½ teaspoon salt. Whisk for about 20 seconds to make sure everything is evenly distributed. Set this aside for now.
Step 3: Cream the Butter and Sugar
In a large mixing bowl, beat the 1 cup of softened unsalted butter with the 2 cups of granulated sugar. Use your mixer on medium speed and beat for 3-4 minutes, until the mixture is light, fluffy, and pale in color. You’ll notice it starts to look almost like whipped butter. Scrape down the sides of the bowl halfway through. This step is crucial — don’t rush it. Proper creaming incorporates air into the batter, which gives the cake its tender texture.
Step 4: Add the Eggs and Vanilla
Add the 4 room-temperature eggs one at a time, beating well after each addition. The batter might look a little curdled at this point — that’s totally normal, especially if your eggs were slightly cooler than your butter. Add the 2 teaspoons of vanilla extract and beat until combined.
Step 5: Alternate Dry Ingredients and Milk
With the mixer on low speed, add about one-third of the dry ingredients to the butter mixture. Mix until just combined. Then add half of the room-temperature milk. Mix again. Repeat with another third of the dry ingredients, then the remaining milk, then the final third of the dry ingredients. Mix until just combined after each addition. Overmixing at this stage can develop the gluten too much and make the cake tough. You want to stop as soon as the flour disappears into the batter.
Step 6: Finish the Batter
Use your rubber spatula to give the batter a few final folds from the bottom up. This ensures everything is evenly mixed without overworking it. The batter should be thick, smooth, and slightly glossy.
Step 7: Bake
Pour the batter into your prepared pan and spread it evenly with the spatula. Give the pan a couple of gentle taps on the counter to release any air bubbles. Bake for 25-30 minutes, or until a toothpick inserted into the center comes out clean or with just a few moist crumbs. The edges should be lightly golden and starting to pull away from the sides of the pan. Every oven runs a little differently, so start checking at 25 minutes.
Step 8: Cool
Place the pan on a cooling rack and let the cake cool completely in the pan. This usually takes about 1-2 hours. Don’t try to frost it while it’s still warm, or the buttercream will melt into a sad, greasy mess. I speak from experience on that one.
Step 9: Make the Buttercream
While the cake cools, make the frosting. In a large bowl, beat the 1 ½ cups of softened unsalted butter on medium speed for 2-3 minutes until it’s smooth and creamy. It should look pale and fluffy. Gradually add the sifted powdered sugar, about 1 cup at a time, beating on low speed until incorporated. Add the 2 teaspoons of vanilla extract and the pinch of salt. Then add 3 tablespoons of heavy cream and beat on medium-high speed for 3-4 minutes until the frosting is light, fluffy, and spreadable. If it’s too stiff, add the remaining tablespoon of cream. If it’s too soft, refrigerate it for 10-15 minutes.
Step 10: Frost and Decorate
Once the cake is completely cool, spread the buttercream evenly over the top using your offset spatula. You can leave it rustic with swoops and swirls, or smooth it out for a cleaner look. Add sprinkles if you’re feeling festive. Slice, serve, and watch everyone go back for seconds.
Cooking Tips & Techniques
After making this homemade birthday sheet cake with vanilla buttercream more times than I can count, I’ve learned a few things the hard way. Here are my best tips to help you avoid my mistakes.
Room temperature ingredients really matter. I know it’s tempting to use cold eggs and cold milk straight from the fridge, but trust me, it makes a difference. Cold ingredients don’t emulsify properly into the batter, which can lead to a denser, less tender cake. Take everything out of the fridge about 30-60 minutes before you start baking. If you forgot, place the eggs in a bowl of warm water for 5 minutes and warm the milk in the microwave for 15-20 seconds.
Don’t overmix the batter. This is probably the most common mistake I see. Once you add the flour, mix only until it’s just combined. A few streaks of flour are okay — they’ll disappear when you fold the batter with the spatula. Overmixing develops gluten, which makes the cake tough and chewy instead of tender and soft.
Use an oven thermometer. I learned this lesson after baking a cake that came out dry on the edges and raw in the middle. Turns out my oven was running 25 degrees hotter than it said. An inexpensive oven thermometer will save you a lot of heartache.
Sift your powdered sugar. I know, I know — it’s an extra step and it’s messy. But lumps in your buttercream are no fun. If you don’t have a sifter, you can whisk the powdered sugar vigorously before adding it, or push it through a fine-mesh strainer. Your future self will thank you.
Let the cake cool completely. I once frosted a slightly warm cake because I was impatient, and the buttercream turned into a slippery, melty disaster. It still tasted good, but it looked terrible. Patience is a virtue, especially in baking.
For clean slices, use a sharp knife and wipe it clean between cuts. Run the knife under hot water, dry it, then slice. Repeat for each cut. This gives you those beautiful, bakery-style slices with clean edges.
Variations & Adaptations
One of the best things about this homemade birthday sheet cake with vanilla buttercream is how versatile it is. Here are some ways to make it your own.
Funfetti Version: Fold ½ cup of rainbow sprinkles into the batter just before pouring it into the pan. Toss them in a tablespoon of flour first to prevent them from sinking to the bottom. The kids (and honestly, the adults) go crazy for this version.
Chocolate Cake: Replace ½ cup of the all-purpose flour with ½ cup of unsweetened cocoa powder. Increase the milk to 1 ¼ cups to compensate for the cocoa’s absorbency. You’ll get a rich, chocolatey sheet cake that pairs beautifully with the vanilla buttercream.
Lemon Version: Add the zest of 2 lemons to the sugar and rub it in with your fingers before creaming with the butter. Replace 2 tablespoons of the milk with fresh lemon juice. For the buttercream, add 1 tablespoon of lemon zest and 1 tablespoon of lemon juice. It’s bright, fresh, and perfect for spring.
Gluten-Free Option: Substitute the all-purpose flour with a 1:1 gluten-free baking flour blend. I’ve tested this with Bob’s Red Mill and it works beautifully. Just be careful not to overmix, as gluten-free batters can become gummy if overworked.
Dairy-Free Version: Use plant-based butter (I like Miyoko’s) and oat milk or almond milk. For the buttercream, use a dairy-free butter alternative and a dairy-free heavy cream. The texture will be slightly different, but still delicious.
Spice Cake: Add 1 teaspoon of cinnamon, ½ teaspoon of nutmeg, and ¼ teaspoon of ground cloves to the dry ingredients. This turns it into a cozy, fall-inspired cake that’s perfect with a cup of coffee.
Serving & Storage Suggestions
This cake is best served at room temperature, which lets the buttercream soften to that perfect, creamy consistency. If you’ve refrigerated it, let it sit out for about 30 minutes before serving.
For presentation, I love adding a generous handful of rainbow sprinkles on top. It’s simple, festive, and instantly makes the cake feel like a celebration. You can also add fresh berries, edible flowers, or even a drizzle of chocolate sauce if you’re feeling extra fancy.
This cake pairs beautifully with a cold glass of milk, a hot cup of coffee, or a scoop of vanilla ice cream. For a birthday party, serve it alongside a fruit salad or some chocolate-dipped strawberries for a complete dessert spread.
Storage: Cover the cake tightly with plastic wrap or aluminum foil and store it at room temperature for up to 3 days. If your kitchen is warm, you can refrigerate it, but let it come to room temperature before serving. The cake actually gets even more moist on the second day as the flavors meld together.
Freezing: This cake freezes beautifully. If you’re freezing the whole cake, place it in the freezer uncovered for about an hour until the buttercream is firm, then wrap it tightly in plastic wrap and foil. It will keep for up to 3 months. To thaw, transfer it to the refrigerator overnight, then bring it to room temperature before serving. You can also freeze individual slices for a quick treat later.
Reheating: If you want that just-baked warmth, pop a slice in the microwave for about 10-15 seconds. The buttercream will soften and the cake will taste like it just came out of the oven.
Nutritional Information & Benefits
Let’s be real — this is a celebration cake, not a health food. But here’s the estimated nutritional breakdown per serving (based on 18 servings):
- Calories: 420
- Fat: 22g
- Carbohydrates: 55g
- Protein: 4g
- Sugar: 40g
That said, there are a few redeeming qualities. The butter provides a small amount of vitamin A and healthy fats. The eggs add protein and essential nutrients like choline and vitamin D. And honestly, there’s something to be said for the mental health benefits of a slice of birthday cake shared with people you love.
If you’re watching your sugar intake, you can reduce the sugar in the cake to 1 ½ cups and use a sugar substitute in the buttercream. I’ve tried it with Swerve powdered sugar substitute, and while the texture isn’t quite the same, it’s still pretty good.
For those with dietary restrictions, this recipe contains gluten, dairy, and eggs. The variations section above has options for gluten-free and dairy-free adaptations.
My personal philosophy is that food is about more than just nutrients. It’s about connection, celebration, and joy. A slice of this cake on a birthday is good for the soul, and that counts for something.
Conclusion
This homemade birthday sheet cake with vanilla buttercream is more than just a recipe — it’s the cake that converted my brother, the one that saves me every time I need a last-minute celebration dessert, and the one that consistently gets requests for “that cake you made that one time.” It’s simple, reliable, and absolutely delicious.
I hope you’ll give it a try, whether it’s for a birthday, a holiday, or just a Tuesday that needs a little extra sweetness. Don’t be afraid to make it your own — add sprinkles, swap in lemon, or go full chocolate. The beauty of this recipe is that it’s a perfect base for whatever you’re craving.
I’d love to hear how it turns out for you. Did you make any variations? Did it convert a birthday cake skeptic in your life? Drop a comment below and let me know. And if you share it on social media, tag me — I love seeing your creations.
Here’s to the simple joy of a really good piece of cake. Happy baking, friends.
Frequently Asked Questions
Can I make this cake ahead of time?
Absolutely. You can bake the cake a day ahead, wrap it tightly in plastic wrap once it’s completely cool, and store it at room temperature. Make the buttercream the day you plan to serve it, or make it ahead and refrigerate it — just let it come to room temperature and re-whip it before frosting.
Why did my cake turn out dry?
The most common reasons are overbaking or using too much flour. Make sure you’re measuring your flour correctly (spoon and level, don’t scoop), and start checking for doneness at 25 minutes. Every oven is different, and even an extra 2-3 minutes can dry out a cake.
Can I use salted butter instead of unsalted?
You can, but reduce the added salt in the recipe to ¼ teaspoon. Salted butter has varying amounts of salt depending on the brand, so it’s harder to control the final flavor. I prefer unsalted for baking because it gives you more control.
How do I get my buttercream smooth and lump-free?
Sift your powdered sugar — this is the most important step. Also, make sure your butter is truly softened to room temperature. If your buttercream still has lumps, try beating it on medium-high speed for an extra 2-3 minutes. If that doesn’t work, your butter might have been too cold when you started.
Can I double this recipe for a larger crowd?
Yes, this recipe doubles beautifully. Use a half-sheet pan (18×13 inches) and increase the baking time to 35-40 minutes. Make sure your mixer can handle the larger volume, or mix the batter in batches. You’ll need to double the buttercream recipe as well.
Pin This Recipe!
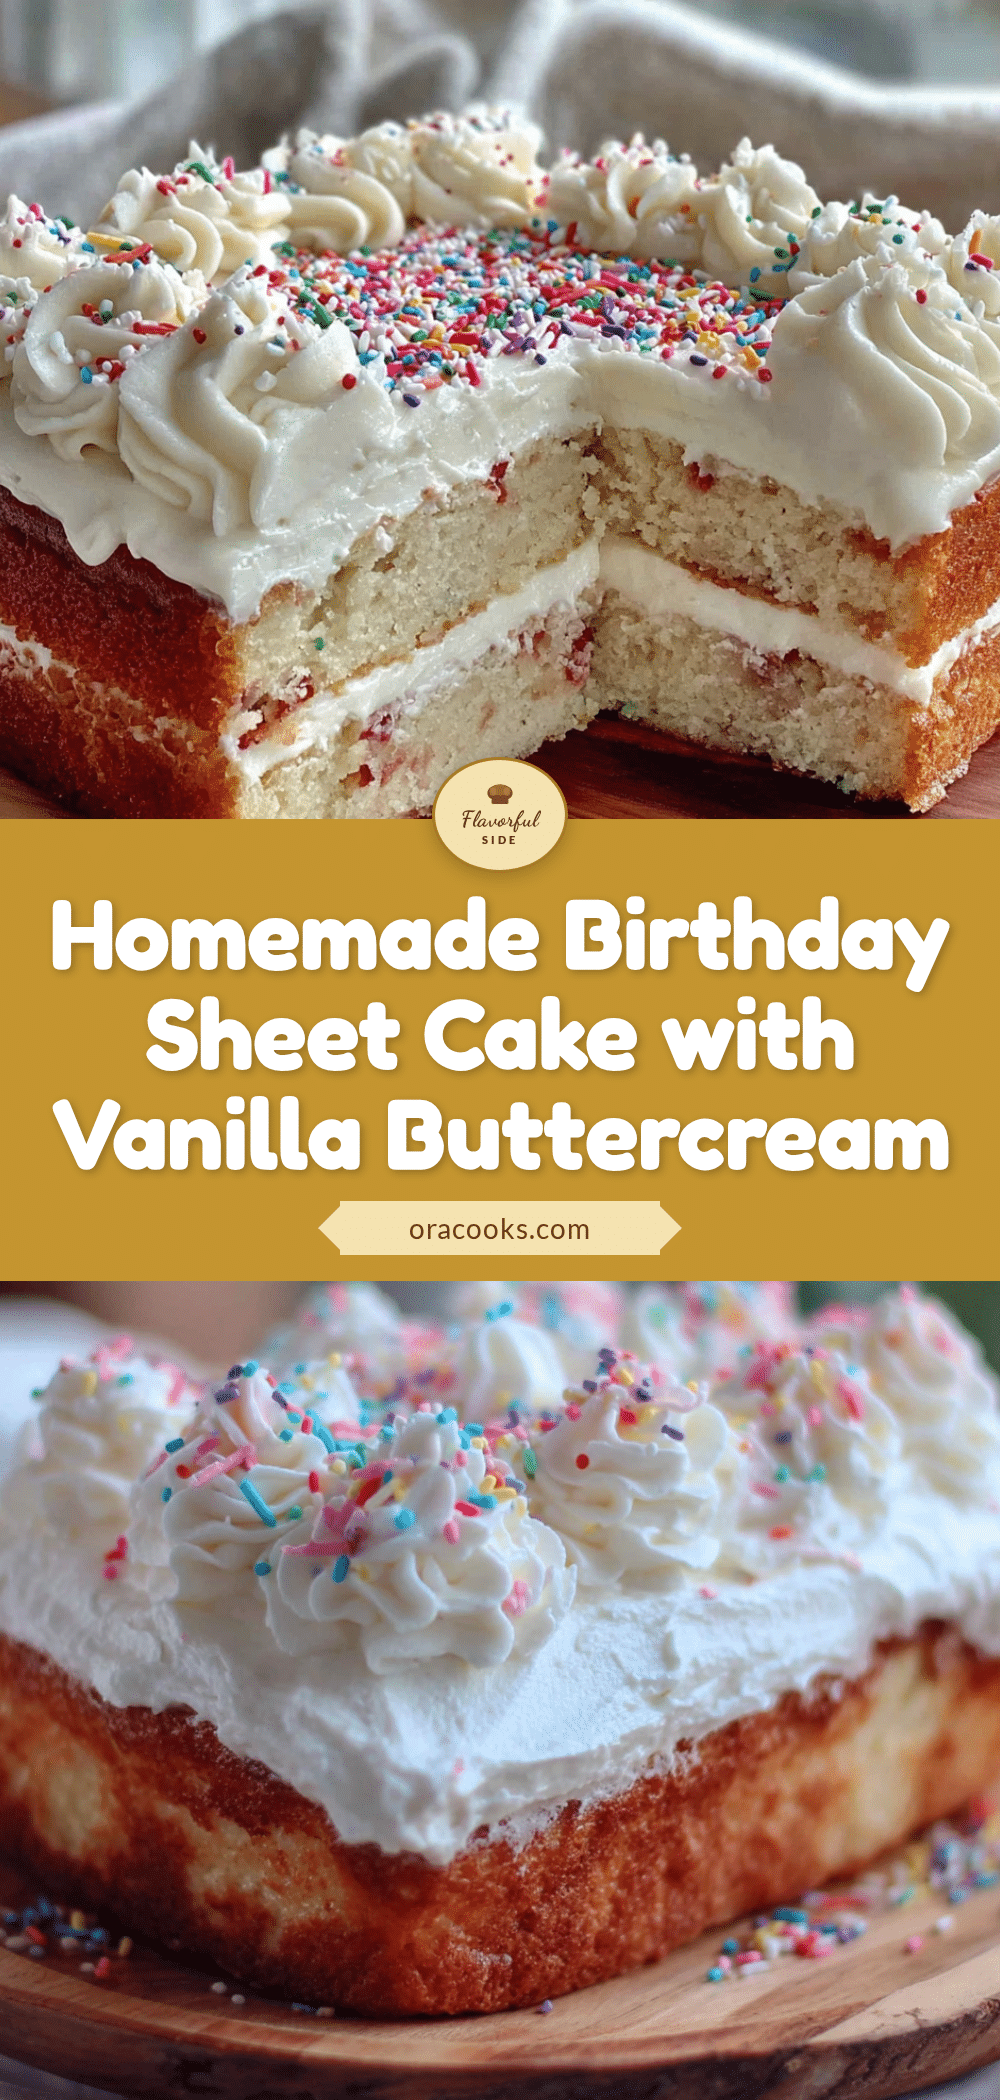
Homemade Birthday Sheet Cake with Easy Vanilla Buttercream
A perfectly moist, buttery sheet cake with a thick, creamy, melt-in-your-mouth vanilla buttercream that tastes like every good birthday you’ve ever had. This crowd-pleasing recipe is quick, easy, and made with simple ingredients.
- Prep Time: 15 minutes
- Cook Time: 30 minutes
- Total Time: 45 minutes
- Yield: 18 servings 1x
- Category: Dessert
- Cuisine: American
Ingredients
- 2 ½ cups (315 grams) all-purpose flour
- 2 cups (400 grams) granulated sugar
- 1 cup (2 sticks or 226 grams) unsalted butter, softened
- 4 large eggs, room temperature
- 1 cup (240 ml) whole milk, room temperature
- 2 teaspoons vanilla extract
- 2 ½ teaspoons baking powder
- ½ teaspoon salt
- 1 ½ cups (3 sticks or 340 grams) unsalted butter, softened (for buttercream)
- 4 cups (480 grams) powdered sugar, sifted (for buttercream)
- 2 teaspoons vanilla extract (for buttercream)
- 3–4 tablespoons (45–60 ml) heavy cream (for buttercream)
- a pinch of salt (for buttercream)
Instructions
- Preheat your oven to 350°F (175°C). Grease a 13×9-inch baking pan with butter or non-stick spray, then line it with parchment paper, leaving overhang on the long sides. Grease the parchment as well.
- In a medium bowl, whisk together the flour, baking powder, and salt for about 20 seconds. Set aside.
- In a large mixing bowl, beat the softened butter and granulated sugar on medium speed for 3-4 minutes until light, fluffy, and pale. Scrape down the sides halfway through.
- Add the eggs one at a time, beating well after each addition. Add the vanilla extract and beat until combined.
- With the mixer on low speed, add one-third of the dry ingredients, mixing until just combined. Add half of the milk, mixing until just combined. Repeat with another third of the dry ingredients, the remaining milk, and the final third of the dry ingredients. Mix until just combined after each addition.
- Use a rubber spatula to give the batter a few final folds from the bottom up. The batter should be thick, smooth, and slightly glossy.
- Pour the batter into the prepared pan and spread evenly. Tap the pan gently on the counter to release air bubbles. Bake for 25-30 minutes, or until a toothpick inserted into the center comes out clean or with a few moist crumbs. Cool completely in the pan on a cooling rack.
- While the cake cools, make the buttercream: In a large bowl, beat the softened butter on medium speed for 2-3 minutes until smooth and creamy. Gradually add the sifted powdered sugar, 1 cup at a time, beating on low speed. Add the vanilla extract and salt. Add 3 tablespoons of heavy cream and beat on medium-high speed for 3-4 minutes until light, fluffy, and spreadable. Add the remaining tablespoon of cream if needed.
- Once the cake is completely cool, spread the buttercream evenly over the top using an offset spatula. Add sprinkles if desired. Slice and serve.
Notes
Room temperature ingredients are crucial for best texture. Don’t overmix the batter once flour is added. Let the cake cool completely before frosting to prevent the buttercream from melting. For clean slices, use a sharp knife wiped clean between cuts.
Nutrition
- Serving Size: 1 slice (1/18 of cak
- Calories: 420
- Sugar: 40
- Sodium: 200
- Fat: 22
- Saturated Fat: 13
- Carbohydrates: 55
- Fiber: 1
- Protein: 4
Keywords: birthday cake, sheet cake, vanilla buttercream, homemade cake, easy cake recipe, celebration cake


