Love this? Save it for later!
Share the inspiration with your friends
I was folding laundry last Tuesday—a truly thrilling pile of unmatched socks and tiny t-shirts—when the smell hit me. It wasn’t from my house. It was a crisp, sweet, almost smoky scent drifting in from the open window, someone nearby burning apple wood in a fire pit. And just like that, I was seven years old, standing on a step stool in my Aunt Clara’s tiny kitchen. Her hands, dusted with flour, were peeling apples for a cake that took all afternoon. She’d let me lick the caramel spoon, that sticky, buttery sweetness clinging to my tongue. I haven’t thought about that cake in years. Aunt Clara moved to Arizona a while back, and her old kitchen feels like a dream I half-remember. But that smell—that specific mix of apple and warm caramel—pulled me right back. I dropped the sock I was holding and knew I had to try to make it myself.
Honestly, my first few attempts were a mess. The cake was dry, the caramel seized, and my kids looked at me like I’d lost my mind. But I kept at it, tweaking and testing until I landed on this version. It’s not Aunt Clara’s cake—it’s better, if I’m being honest. It’s moister, simpler, and built for the chaos of a real family kitchen. Maybe you’ve been there, chasing a flavor from your past, only to realize you need to create something new. This is that cake for me. It’s the one I make for no reason at all, just because a Tuesday afternoon demanded it.
Why You’ll Love This Recipe
This isn’t just another layer cake. It’s the one that disappears before you’ve even frosted the top, the one your kids will ask for by name. Here’s why it works for our kind of family cooking:
- Made with Real Ingredients: No cake mixes or artificial flavors here. You’ll use fresh apples, real butter, and honest-to-goodness apple cider. Your kitchen will smell like a fall festival, minus the hayride.
- Actually Kid-Approved: I tested this on my own three picky eaters. The youngest licked the plate clean. The oldest asked for seconds before I’d even cut the first slice. It’s sweet without being cloying, with a texture that just works.
- Budget-Friendly for a Crowd: This cake uses pantry staples and a couple of apples. It feeds a crowd without breaking the bank, and the leftovers (if there are any) reheat beautifully for breakfast the next day. No judgment here.
- Foolproof Caramel: I’ve burned more caramel than I care to admit. This method is forgiving, uses simple steps, and doesn’t require a candy thermometer. You can do this, I promise.
- Perfect for Any Occasion: Birthday parties, school bake sales, or a random Tuesday? This cake fits. It’s dressed-up enough for a party but simple enough for a weeknight treat.
What makes this recipe different? It’s the apple cider reduction. Instead of just adding liquid to the batter, you simmer the cider down until it’s a concentrated, tangy syrup. That little step gives the cake a deep, authentic apple flavor without making it soggy. It’s a chef’s trick that feels fancy but takes ten minutes. The result is a cake that’s tender, flavorful, and completely unforgettable. It’s the kind of dessert that makes you close your eyes after the first bite—and then reach for another slice.
What Ingredients You Will Need
This recipe uses simple, wholesome ingredients to deliver big flavor. Most of these are probably in your kitchen right now, which is exactly how I like it. Let’s break them down so you know what to grab and why it matters.
- For the Apple Cider Reduction:
- 2 cups (480 ml) apple cider (unfiltered is best for flavor)
- 1 cinnamon stick (optional, but adds warmth)
- For the Cake Layers:
- 2 ½ cups (315 g) all-purpose flour (spooned and leveled)
- 2 teaspoons baking powder
- 1 teaspoon baking soda
- 1 teaspoon ground cinnamon
- ½ teaspoon ground nutmeg (freshly grated if you have it)
- ½ teaspoon salt
- ¾ cup (1 ½ sticks or 170 g) unsalted butter, softened
- 1 ½ cups (300 g) granulated sugar
- ½ cup (100 g) packed light brown sugar
- 3 large eggs, room temperature
- 1 teaspoon vanilla extract
- 1 cup (240 ml) buttermilk (or make your own with 1 cup milk + 1 tablespoon lemon juice)
- 1 cup (about 1 medium apple) peeled and finely grated apple (Honeycrisp or Granny Smith work great)
- For the Caramel Sauce:
- 1 cup (200 g) granulated sugar
- 6 tablespoons (85 g) unsalted butter, cut into pieces
- ½ cup (120 ml) heavy cream, room temperature
- 1 teaspoon vanilla extract
- ¼ teaspoon salt (flaky sea salt is lovely)
- For the Cream Cheese Frosting:
- 8 oz (226 g) cream cheese, softened
- ½ cup (1 stick or 113 g) unsalted butter, softened
- 3 cups (360 g) powdered sugar, sifted
- 1 teaspoon vanilla extract
- 2-3 tablespoons reserved apple cider reduction (cooled)
I recommend using a good-quality apple cider for the reduction—it’s the backbone of the flavor. For the apples, I love Honeycrisp for their sweetness, but Granny Smith adds a nice tartness that balances the caramel. If you don’t have buttermilk, just add a tablespoon of lemon juice or white vinegar to a cup of regular milk and let it sit for 5 minutes. It works like a charm. For the caramel, use a heavy-bottomed pan to prevent scorching. I’ve used a cheap saucepan before and ended up with a grainy mess. Trust me on this one.
Equipment Needed
You don’t need a fancy kitchen to pull this off. Here’s what you’ll actually use:
- Two 9-inch round cake pans (8-inch will work too, just bake a few minutes longer)
- Parchment paper (for lining the pans—non-stick spray isn’t enough)
- Stand mixer or hand mixer (a whisk and some elbow grease works too, but your arm will thank you for the mixer)
- Medium saucepan (for the caramel and the cider reduction)
- Wire cooling racks (essential for even cooling)
- Box grater (for grating the apple)
- Offset spatula (makes frosting easier, but a butter knife works)
- Measuring cups and spoons
If you don’t have a stand mixer, a hand mixer is perfectly fine. I’ve even made the frosting by hand with a wooden spoon when my mixer broke—it’s a good arm workout! For the cake pans, I prefer light-colored metal pans for even browning. Dark pans can cause the edges to brown too quickly. And please, buy a roll of parchment paper. It’s cheap and saves you from the heartbreak of a stuck cake layer.
Preparation Method
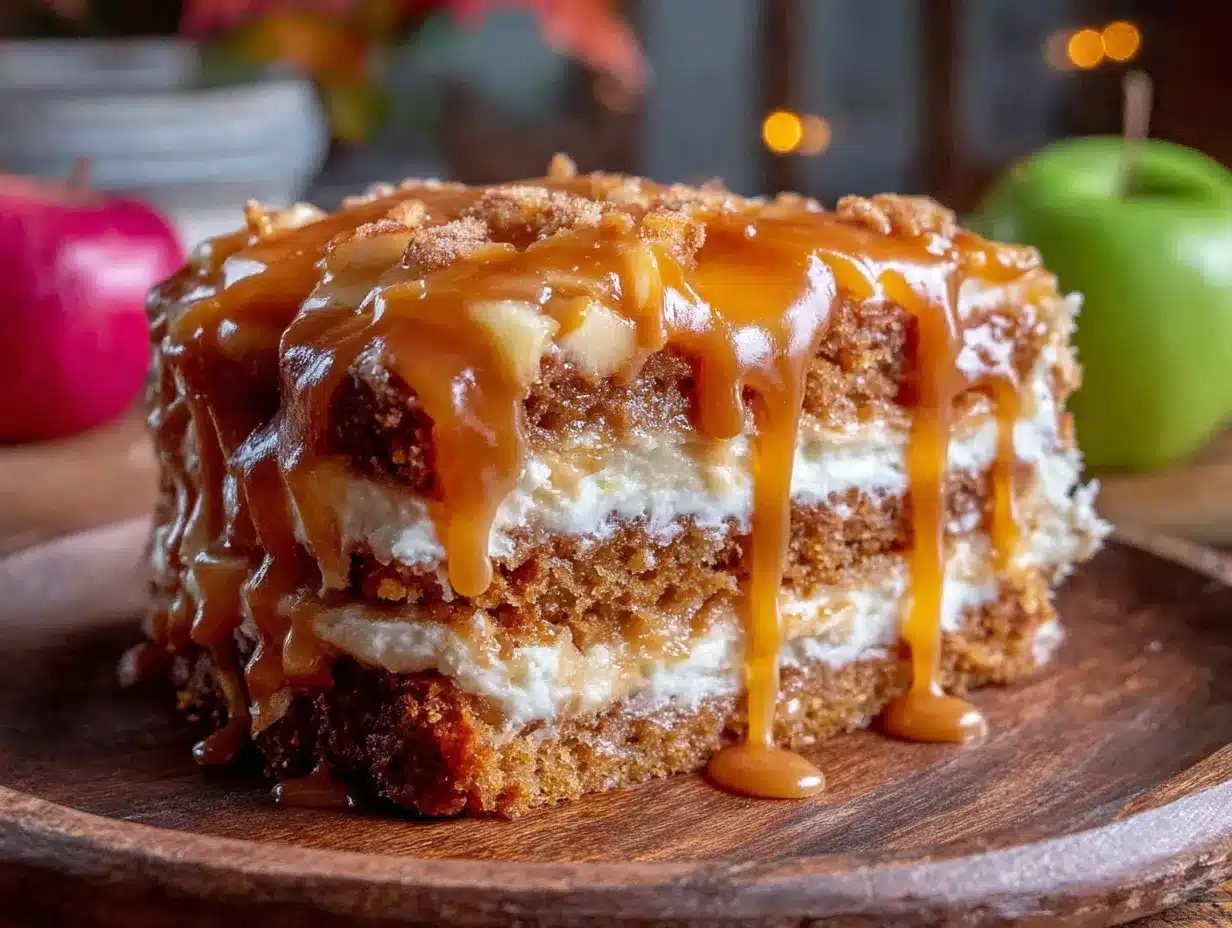
Let’s bake this cake. Take your time, read through the steps once, and then dive in. I’ll be right here with you.
- Make the Apple Cider Reduction: Pour the apple cider into a small saucepan. Add the cinnamon stick if using. Bring to a boil over medium-high heat, then reduce to a simmer. Let it bubble away for 15-20 minutes, until it’s reduced to about ¼ cup. It should be syrupy and smell intensely of apples. Remove the cinnamon stick and set aside to cool completely. You’ll use some in the cake and some in the frosting.
- Preheat and Prep: Preheat your oven to 350°F (175°C). Grease two 9-inch round cake pans, line the bottoms with parchment paper, and grease the paper too. Dust with a little flour and tap out the excess. This extra step guarantees your cakes will release cleanly.
- Mix the Dry Ingredients: In a medium bowl, whisk together the flour, baking powder, baking soda, cinnamon, nutmeg, and salt. Set aside.
- Cream the Butter and Sugars: In a large bowl (or the bowl of your stand mixer), beat the softened butter, granulated sugar, and brown sugar together on medium speed until light and fluffy, about 3-4 minutes. Scrape down the sides of the bowl. It should look pale and airy.
- Add the Eggs and Vanilla: Add the eggs one at a time, beating well after each addition. Stir in the vanilla extract. The mixture might look a little curdled at this point—that’s okay.
- Alternate Dry and Wet Ingredients: With the mixer on low speed, add about one-third of the flour mixture. Then add half of the buttermilk. Repeat, ending with the flour mixture. Mix just until combined. Overmixing will make the cake tough.
- Fold in the Apple and Cider: Gently fold in the grated apple and 2 tablespoons of the cooled apple cider reduction. The batter will be thick and smell amazing.
- Bake the Cakes: Divide the batter evenly between the prepared pans. Smooth the tops with a spatula. Bake for 25-30 minutes, or until a toothpick inserted into the center comes out clean or with a few moist crumbs. The tops should be golden and spring back when lightly touched.
- Cool the Cakes: Let the cakes cool in the pans for 10 minutes. Then run a knife around the edges, invert onto a wire rack, and peel off the parchment paper. Let them cool completely before frosting. Don’t rush this—warm cake will melt your frosting into a sad puddle.
- Make the Caramel Sauce: While the cakes cool, make the caramel. In a clean, heavy-bottomed saucepan, spread the sugar in an even layer. Cook over medium heat, without stirring, until the edges start to melt. Swirl the pan gently (don’t stir) until the sugar is completely melted and a deep amber color. This takes about 5-7 minutes. Watch it closely—it goes from perfect to burnt in seconds.
- Finish the Caramel: Remove the pan from the heat. Carefully add the butter pieces and whisk until melted. The mixture will bubble up. Slowly pour in the heavy cream while whisking constantly. It will steam and bubble again. Whisk until smooth. Stir in the vanilla and salt. Let it cool to room temperature. It will thicken as it cools.
- Make the Cream Cheese Frosting: In a large bowl, beat the softened cream cheese and butter together until smooth and creamy. Gradually add the powdered sugar, beating on low speed until incorporated. Add the vanilla and 2 tablespoons of the reserved apple cider reduction. Beat on medium speed until light and fluffy. If it’s too thick, add another tablespoon of the cider reduction.
- Assemble the Cake: Place one cake layer on your serving plate. Spread a generous layer of frosting on top. Drizzle some of the cooled caramel sauce over the frosting (save most for the top). Place the second cake layer on top. Frost the top and sides of the cake with the remaining cream cheese frosting. Don’t worry about perfection—a rustic look is charming.
- Finish and Serve: Drizzle the remaining caramel sauce over the top of the cake. Let it drip down the sides. You can also add a sprinkle of flaky sea salt for a sweet-salty finish. Slice and serve!
Cooking Tips & Techniques
I’ve made this cake more times than I can count, and I’ve learned a few things the hard way. Here’s what I wish someone had told me:
Don’t skip the parchment paper. I know it feels like an extra step, but I once had a cake layer stick so badly I ended up with apple-flavored crumbs. Lining the pans with parchment guarantees clean release every time. Cut circles that fit snugly in the bottom of the pans.
Room temperature ingredients matter. Cold eggs and butter don’t cream properly, leading to a dense cake. Take them out of the fridge 30 minutes before you start. If you’re in a hurry, place the eggs in a bowl of warm water for 5 minutes and microwave the butter for 5-10 seconds (don’t melt it).
The caramel will scare you the first time. It’s hot, it bubbles, and it feels like it’s about to seize. Stay calm. If you see lumps, keep whisking gently over low heat. They’ll melt. If it seizes (turns into a hard, grainy mess), add a splash of warm water and whisk until smooth. It happens to the best of us.
Grate the apple, don’t chop it. Grated apple melts into the batter, adding moisture without chunks. I once tried dicing the apple, and my kids picked the pieces out. Grating is the way to go.
Let the cake cool completely. This is non-negotiable. I’ve frosted a slightly warm cake and watched the frosting slide off like a mudslide. If you’re in a rush, pop the cake layers in the freezer for 15 minutes to speed things up.
Variations & Adaptations
This cake is a great base for experimenting. Here are a few ways to make it your own:
- Gluten-Free Version: Swap the all-purpose flour with a 1:1 gluten-free baking blend. I’ve used Cup4Cup with great results. Add an extra tablespoon of buttermilk to keep it moist.
- Dairy-Free Option: Use a plant-based butter (like Miyoko’s) and a dairy-free cream cheese (like Kite Hill). For the buttermilk, add a tablespoon of lemon juice to unsweetened oat milk. The caramel can be made with coconut cream instead of heavy cream—it’s still delicious.
- Spice It Up: Add a pinch of ground cloves or allspice to the dry ingredients for a warmer flavor profile. A teaspoon of fresh ginger zest also works beautifully.
- Apple Cider Donut Cake: Skip the caramel and toss the cake layers in cinnamon sugar after baking, like a giant donut. Serve with a simple vanilla glaze.
- Kid-Friendly Decoration: Let the kids help! Top the frosted cake with candy corn, apple-shaped gummies, or a sprinkle of cinnamon sugar. They’ll be so proud of their creation.
I once made this as a sheet cake for a school bake sale—just baked the batter in a 9×13 pan for 35 minutes and frosted it directly in the pan. It was a hit and saved me time on layering.
Serving & Storage Suggestions
This cake is best served at room temperature. The flavors are more pronounced, and the frosting is perfectly soft. If you’ve refrigerated it, let it sit on the counter for 30 minutes before slicing.
Presentation: For a pretty look, wipe the plate clean after drizzling the caramel. Add a few thin apple slices or a sprinkle of chopped pecans for crunch. A dusting of cinnamon on top is lovely too.
What to Serve With It: A scoop of vanilla ice cream is classic, but a dollop of whipped cream works too. For a cozy fall drink, pair it with a mug of hot apple cider or a spiced chai latte.
Storage: Store leftover cake in an airtight container in the refrigerator for up to 4 days. The flavors actually deepen overnight. To freeze, wrap unfrosted cake layers tightly in plastic wrap and then foil. Freeze for up to 3 months. Thaw in the fridge overnight before frosting. Frosted cake can also be frozen—just place it in the freezer until the frosting is firm, then wrap well. Thaw in the fridge.
Reheating: If you want a warm slice, microwave it for 10-15 seconds. The caramel will get a little gooey again. Don’t overheat, or the frosting will melt.
Leftover Caramel: You’ll probably have extra caramel sauce. Store it in a jar in the fridge for up to 2 weeks. Use it on pancakes, oatmeal, or ice cream. It’s a gift that keeps on giving.
Nutritional Information & Benefits
Let’s be real—this is a celebration cake. It’s not health food, and that’s okay. But here’s the good news: it’s made with real ingredients, and you can feel good about what you’re serving your family. One slice (1/12 of the cake) contains approximately:
- Calories: 520
- Fat: 28g
- Carbohydrates: 68g
- Protein: 6g
- Fiber: 1g
- Sugar: 48g
The apples provide a small amount of fiber and vitamin C. The cinnamon has antioxidant properties, and the buttermilk adds a touch of calcium. The cream cheese frosting is lower in sugar than a traditional buttercream, thanks to the tanginess balancing the sweetness. If you’re watching portions, cut smaller slices—the flavor is so rich that a thin piece is plenty satisfying. This cake is a treat, meant to be enjoyed in the company of people you love. That’s a kind of nourishment too.
Conclusion
This Kid-Approved Apple Cider Caramel Layer Cake is more than a recipe—it’s a memory in the making. It’s the cake I bake when I want to slow down, when I want my kitchen to smell like autumn, and when I want to see my kids’ faces light up. It’s forgiving enough for a beginner baker but impressive enough for a holiday table. I hope you’ll try it and make it your own. Maybe you’ll add an extra pinch of cinnamon, or skip the caramel altogether, or serve it for breakfast with a cup of coffee (I won’t tell).
I’d love to hear how it turns out for you. Leave a comment below and tell me about your version—did your kids help decorate? Did you use a different apple? Your stories make this community what it is. And if you take a photo, tag me on Pinterest so I can see your beautiful creation. Until next time, happy baking, and remember: the best cakes are the ones shared with the people you love.
Frequently Asked Questions
Can I use apple juice instead of apple cider?
You can, but the flavor will be milder. Apple cider has a deeper, more complex taste due to the unfiltered pulp. If you use juice, consider adding a pinch of apple pie spice to the reduction to boost the flavor.
My caramel turned out grainy. What went wrong?
This usually happens if sugar crystals get on the sides of the pan or if you stir the sugar while it’s melting. To fix it, add a tablespoon of water and warm the caramel gently while whisking. If that doesn’t work, start over—it’s a cheap ingredient, and practice makes perfect.
Can I make this cake ahead of time?
Absolutely! Bake the cake layers up to 2 days in advance. Wrap them tightly in plastic wrap and store at room temperature. Make the caramel and frosting up to 3 days ahead and refrigerate. Assemble the cake the day you plan to serve it for the best texture.
How do I get clean slices?
Use a long, sharp knife and run it under hot water before each cut. Wipe the blade clean between slices. This works like magic for a neat presentation.
Can I skip the apple cider reduction?
You can, but it’s worth the extra step. The reduction concentrates the apple flavor without adding extra liquid to the batter. If you skip it, add an extra ¼ cup of apple cider to the batter, but expect a slightly less intense apple taste.
Pin This Recipe!
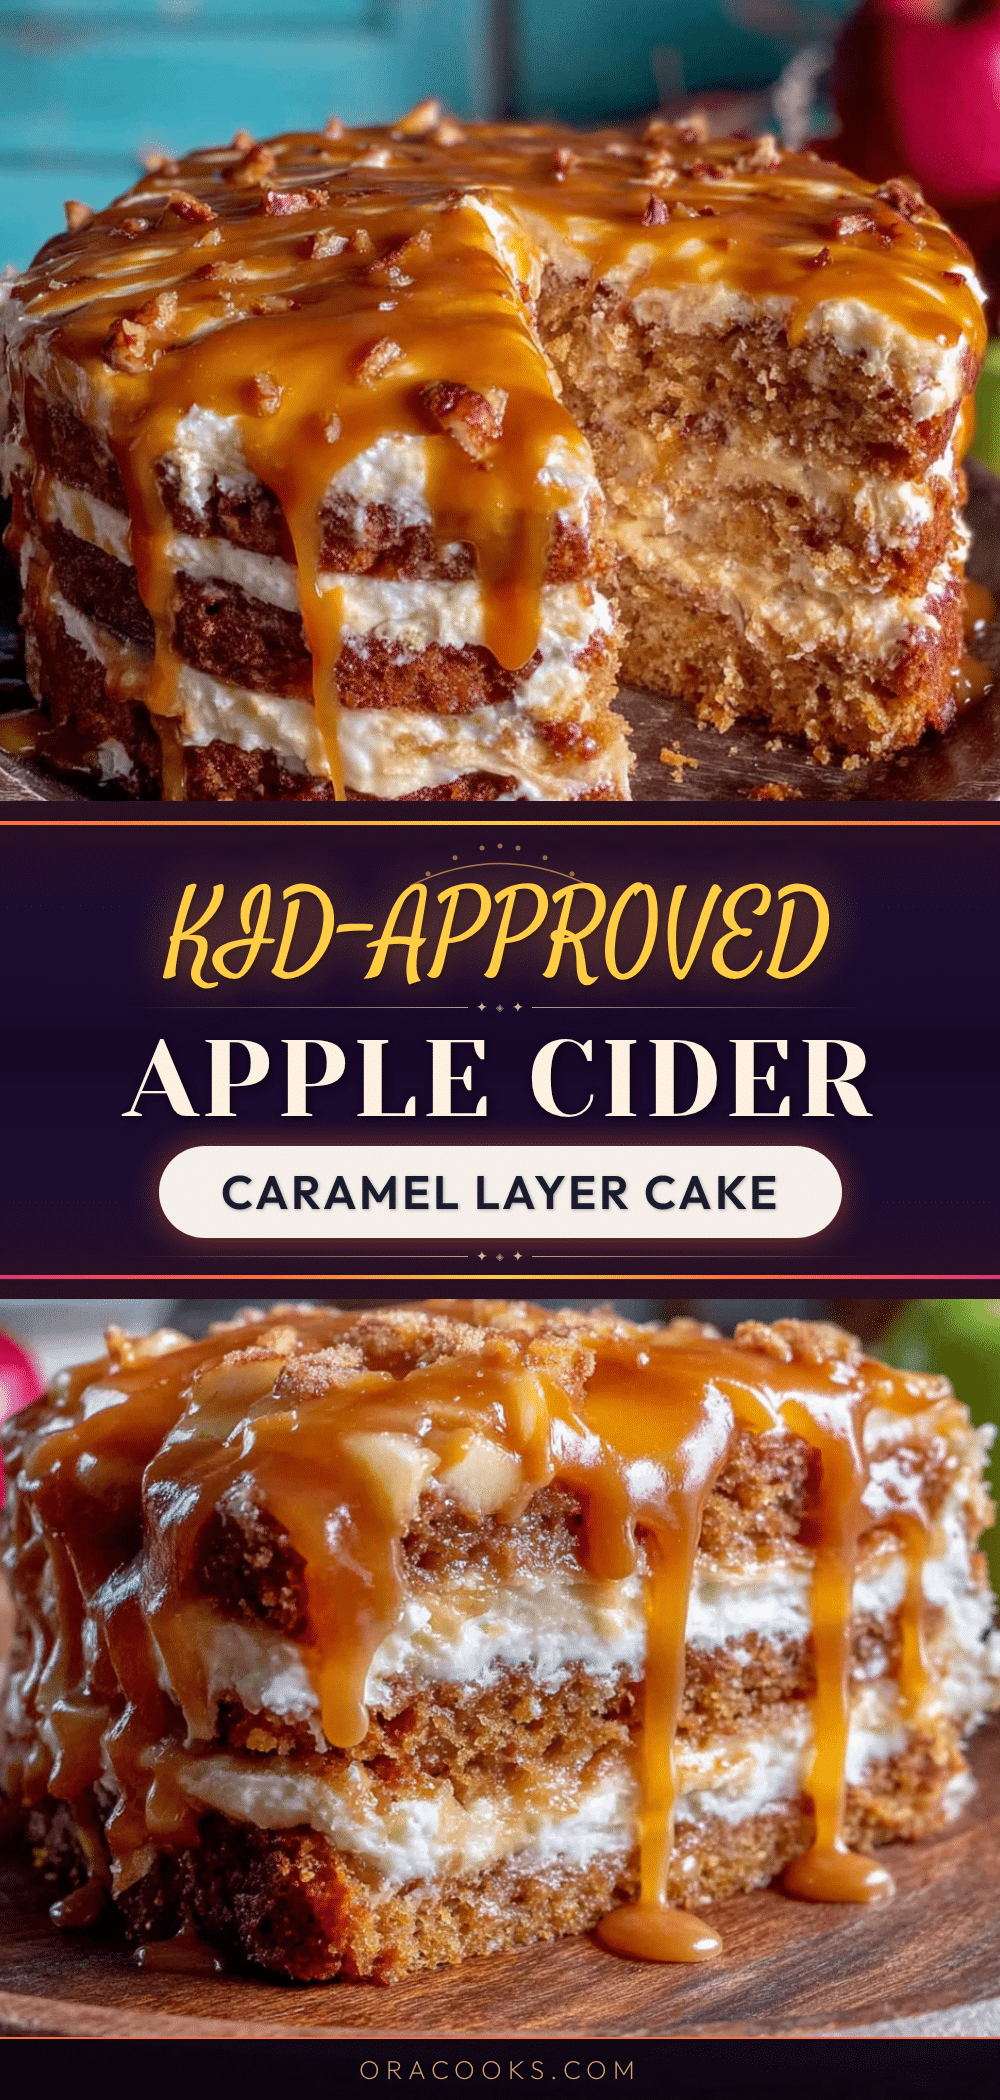
Kid-Approved Apple Cider Caramel Layer Cake
A moist, tender layer cake infused with concentrated apple cider flavor, topped with a creamy apple cider cream cheese frosting and a luscious homemade caramel sauce. This foolproof recipe is made with real ingredients and is perfect for fall gatherings or any occasion.
- Prep Time: 30 minutes
- Cook Time: 30 minutes
- Total Time: 1 hour 30 minutes
- Yield: 12 servings 1x
- Category: Dessert
- Cuisine: American
Ingredients
- For the Apple Cider Reduction:
- 2 cups (480 ml) apple cider (unfiltered is best)
- 1 cinnamon stick (optional)
- For the Cake Layers:
- 2 ½ cups (315 g) all-purpose flour (spooned and leveled)
- 2 teaspoons baking powder
- 1 teaspoon baking soda
- 1 teaspoon ground cinnamon
- ½ teaspoon ground nutmeg (freshly grated if you have it)
- ½ teaspoon salt
- ¾ cup (1 ½ sticks or 170 g) unsalted butter, softened
- 1 ½ cups (300 g) granulated sugar
- ½ cup (100 g) packed light brown sugar
- 3 large eggs, room temperature
- 1 teaspoon vanilla extract
- 1 cup (240 ml) buttermilk (or make your own with 1 cup milk + 1 tablespoon lemon juice)
- 1 cup (about 1 medium apple) peeled and finely grated apple (Honeycrisp or Granny Smith work great)
- For the Caramel Sauce:
- 1 cup (200 g) granulated sugar
- 6 tablespoons (85 g) unsalted butter, cut into pieces
- ½ cup (120 ml) heavy cream, room temperature
- 1 teaspoon vanilla extract
- ¼ teaspoon salt (flaky sea salt is lovely)
- For the Cream Cheese Frosting:
- 8 oz (226 g) cream cheese, softened
- ½ cup (1 stick or 113 g) unsalted butter, softened
- 3 cups (360 g) powdered sugar, sifted
- 1 teaspoon vanilla extract
- 2–3 tablespoons reserved apple cider reduction (cooled)
Instructions
- Make the Apple Cider Reduction: Pour the apple cider into a small saucepan. Add the cinnamon stick if using. Bring to a boil over medium-high heat, then reduce to a simmer. Let it bubble away for 15-20 minutes, until it’s reduced to about ¼ cup. It should be syrupy and smell intensely of apples. Remove the cinnamon stick and set aside to cool completely. You’ll use some in the cake and some in the frosting.
- Preheat and Prep: Preheat your oven to 350°F (175°C). Grease two 9-inch round cake pans, line the bottoms with parchment paper, and grease the paper too. Dust with a little flour and tap out the excess.
- Mix the Dry Ingredients: In a medium bowl, whisk together the flour, baking powder, baking soda, cinnamon, nutmeg, and salt. Set aside.
- Cream the Butter and Sugars: In a large bowl (or the bowl of your stand mixer), beat the softened butter, granulated sugar, and brown sugar together on medium speed until light and fluffy, about 3-4 minutes. Scrape down the sides of the bowl.
- Add the Eggs and Vanilla: Add the eggs one at a time, beating well after each addition. Stir in the vanilla extract.
- Alternate Dry and Wet Ingredients: With the mixer on low speed, add about one-third of the flour mixture. Then add half of the buttermilk. Repeat, ending with the flour mixture. Mix just until combined.
- Fold in the Apple and Cider: Gently fold in the grated apple and 2 tablespoons of the cooled apple cider reduction.
- Bake the Cakes: Divide the batter evenly between the prepared pans. Smooth the tops with a spatula. Bake for 25-30 minutes, or until a toothpick inserted into the center comes out clean or with a few moist crumbs.
- Cool the Cakes: Let the cakes cool in the pans for 10 minutes. Then run a knife around the edges, invert onto a wire rack, and peel off the parchment paper. Let them cool completely before frosting.
- Make the Caramel Sauce: While the cakes cool, make the caramel. In a clean, heavy-bottomed saucepan, spread the sugar in an even layer. Cook over medium heat, without stirring, until the edges start to melt. Swirl the pan gently (don’t stir) until the sugar is completely melted and a deep amber color. This takes about 5-7 minutes.
- Finish the Caramel: Remove the pan from the heat. Carefully add the butter pieces and whisk until melted. The mixture will bubble up. Slowly pour in the heavy cream while whisking constantly. Whisk until smooth. Stir in the vanilla and salt. Let it cool to room temperature.
- Make the Cream Cheese Frosting: In a large bowl, beat the softened cream cheese and butter together until smooth and creamy. Gradually add the powdered sugar, beating on low speed until incorporated. Add the vanilla and 2 tablespoons of the reserved apple cider reduction. Beat on medium speed until light and fluffy. If it’s too thick, add another tablespoon of the cider reduction.
- Assemble the Cake: Place one cake layer on your serving plate. Spread a generous layer of frosting on top. Drizzle some of the cooled caramel sauce over the frosting (save most for the top). Place the second cake layer on top. Frost the top and sides of the cake with the remaining cream cheese frosting.
- Finish and Serve: Drizzle the remaining caramel sauce over the top of the cake. Let it drip down the sides. You can also add a sprinkle of flaky sea salt for a sweet-salty finish. Slice and serve!
Notes
Don’t skip the parchment paper for clean release. Room temperature ingredients are crucial for proper creaming. The caramel may seem intimidating but is forgiving; if it seizes, add a splash of warm water and whisk. Grate the apple, don’t chop it, for best texture. Let the cake cool completely before frosting to prevent melting.
Nutrition
- Serving Size: 1 slice (1/12 of cak
- Calories: 520
- Sugar: 48
- Sodium: 320
- Fat: 28
- Saturated Fat: 17
- Carbohydrates: 68
- Fiber: 1
- Protein: 6
Keywords: apple cider cake, caramel layer cake, fall dessert, apple cake, cream cheese frosting, homemade caramel, kid-friendly cake


