Love this? Save it for later!
Share the inspiration with your friends
I swore I would never be that parent. The one who spends hours on complicated Halloween treats that get picked apart and left on the plate. Three years ago, I stood in the baking aisle, staring at black food coloring and edible glitter, feeling that familiar pressure to create something Instagram-worthy for my daughter’s classroom party. I almost gave up and bought a bag of pre-packaged cookies. Then my five-year-old tugged my sleeve and pointed at a box of plain white cupcake liners. “Those look like ghosts,” she said. And honestly, that was the moment everything clicked.
I went home and threw together a simple vanilla cupcake batter—nothing fancy, just the recipe my grandmother used to make on rainy afternoons. I baked them plain, whipped up a basic buttercream, and let my daughter go to town with a piping bag. She made blobs and squiggles and one ghost that looked suspiciously like a potato. But you know what? She was so proud. She took those lopsided little ghosts to school, and her teacher told me later that every single kid asked for the recipe. That’s when I realized something important: Halloween treats don’t need to be complicated to be special. They just need to be made with a little love and a lot of butter.
These Kid-Approved Ghost Vanilla Cupcakes with Buttercream Faces have become our family’s go-to Halloween tradition. They’re simple enough for a Tuesday afternoon and cute enough for any costume party. Maybe you’ve been there—stressed about Pinterest-perfect treats that take three hours and leave your kitchen looking like a disaster zone. Let me tell you, these cupcakes are the opposite of that. They’re forgiving, they’re fun, and they let the kids actually help without you losing your mind. That first bite of soft vanilla cake with creamy buttercream? Pure magic. And the best part? You probably already have everything you need in your pantry right now.
Why You’ll Love This Recipe
Let me be real with you for a second. I’ve tested this recipe about seven times over the past three years, tweaking the flour ratio and the butter temperature until it was absolutely foolproof. My sister-in-law, who is a professional pastry chef, actually tried them at our Halloween block party last year and asked for the recipe. That’s when I knew I had something special. These Kid-Approved Ghost Vanilla Cupcakes with Buttercream Faces aren’t just another Halloween dessert—they’re the result of real kitchen trial and error.
- Quick & Easy: From start to finish, these cupcakes take about 45 minutes. That includes cooling time. I’ve made them on a school night while helping with homework, and they still turned out perfect.
- Simple Ingredients: Flour, sugar, butter, eggs, vanilla, and powdered sugar. That’s it. No weird extracts, no specialty flours, no hunting down obscure decorating supplies. You probably have everything already.
- Perfect for Halloween: Whether it’s a classroom party, a trunk-or-treat event, or just a cozy night at home watching spooky movies, these cupcakes fit the occasion without being too scary for little ones.
- Crowd-Pleaser: I’ve served these at three different Halloween gatherings now, and they disappear every single time. Adults love them because the vanilla flavor is classic and comforting. Kids love them because, well, they look like ghosts.
- Unbelievably Delicious: The secret is in the buttercream. I use a slightly higher butter-to-sugar ratio than most recipes, which gives it a silky texture that isn’t cloyingly sweet. One mom at my daughter’s party actually asked if she could take the leftover frosting home.
What makes these different from every other vanilla cupcake recipe out there? It’s the technique. I cream the butter and sugar for a full three minutes—not just until combined—which creates a lighter, fluffier crumb. And I add a pinch of salt to the frosting, which might sound weird, but trust me, it balances the sweetness perfectly. These cupcakes aren’t just good for Halloween. They’re good, period. The kind of good that makes you close your eyes after the first bite and forget about the mess in the kitchen.
This is comfort food reimagined for the holiday season. It’s familiar enough to satisfy picky eaters, but special enough to feel like a treat. And honestly? It’s the kind of recipe that makes you feel like a hero parent without actually having to work that hard.
What Ingredients You Will Need
This recipe uses simple, wholesome ingredients to deliver that soft, tender crumb and rich, creamy frosting. I’ve tested this with different brands and substitutions, so I’ll share what works best based on my experience. Most of these are pantry staples, which is exactly what you want when you’re baking with kids on a busy October afternoon.
For the Cupcakes
- 1 ½ cups all-purpose flour (I prefer Gold Medal or King Arthur for consistent results—cheaper brands can make the cake denser)
- 1 ½ teaspoons baking powder (make sure it’s fresh; expired baking powder is the number one reason cupcakes don’t rise)
- ¼ teaspoon salt (fine sea salt works best; it dissolves more evenly than kosher)
- ½ cup unsalted butter, softened to room temperature (I leave mine out for about an hour before starting—microwaving can make it too soft)
- ¾ cup granulated sugar (regular white sugar, nothing fancy)
- 2 large eggs, room temperature (if you forget to take them out, place them in a bowl of warm water for 5 minutes)
- 2 teaspoons vanilla extract (use pure vanilla if you can—imitation works, but the flavor is noticeably different)
- ½ cup whole milk, room temperature (2% works too, but whole milk gives a richer crumb)
For the Buttercream Frosting
- 1 cup unsalted butter, softened to room temperature (this is crucial—cold butter will give you lumpy frosting)
- 3 ½ cups powdered sugar, sifted (sifting prevents lumps; I know it’s an extra step, but it really makes a difference)
- 2 teaspoons vanilla extract (adds warmth and depth to the frosting)
- 2-3 tablespoons heavy cream (or whole milk if that’s what you have; heavy cream makes it extra luxurious)
- ¼ teaspoon salt (trust me on this—it cuts the sweetness and makes the vanilla flavor pop)
For Decorating
- Mini chocolate chips or black decorating gel (for the ghost faces—I’ve used both, and they each have their charm)
- Optional: White sanding sugar or edible glitter (for a sparkly effect, though my kids prefer them plain)
Ingredient Selection Tips: When buying butter for the frosting, look for a brand with at least 80% butterfat. I’ve found that generic store-brand butter sometimes has a higher water content, which can make the frosting separate. Land O’Lakes or Kerrygold are my go-to choices. For the vanilla, I actually keep two bottles in my pantry—a cheaper imitation for baking (since the vanilla gets cooked anyway) and a pure extract for the frosting where the flavor really shines.
Substitution Guidance: If you need a dairy-free option, you can substitute the butter with a high-quality vegan butter stick (not the spreadable kind in a tub) and use oat milk or almond milk. The texture will be slightly different, but it still works. For a gluten-free version, swap the all-purpose flour with a 1:1 gluten-free baking flour blend. I’ve tested this with Bob’s Red Mill, and the results were surprisingly good—just don’t overmix the batter.
Equipment Needed
You don’t need a professional bakery setup for these cupcakes. I’ve made them in three different kitchens over the years, including one where I had to hand-whisk the buttercream because my mixer broke. Here’s what you’ll actually need:
- Standard 12-cup muffin tin (any basic metal or non-stick pan works; I use a dark metal one that gives the bottoms a nice golden color)
- Paper cupcake liners (white ones look best for the ghost theme, but any color works—I once used orange ones and they looked surprisingly cute)
- Electric hand mixer or stand mixer (a hand mixer is totally fine; I actually prefer it for small batches because there’s less cleanup)
- Large mixing bowl (at least 4-quart capacity—you need room to cream the butter without it flying everywhere)
- Medium mixing bowl (for dry ingredients)
- Measuring cups and spoons (invest in a set of metal ones—plastic ones can warp over time and give inaccurate measurements)
- Rubber spatula (for scraping down the bowl—I have a favorite red one that’s been with me through dozens of batches)
- Piping bag with a round tip (or a sturdy zip-top bag with the corner snipped off—honestly, I use the zip-top method more often because my kids can squeeze it easier)
- Cooling rack (wire racks are best, but if you don’t have one, you can use a clean dish towel—just make sure the cupcakes get air circulation)
- Small offset spatula (optional but helpful for smoothing frosting; a butter knife works in a pinch)
Budget-Friendly Tip: Don’t run out and buy a fancy piping set if you’re just starting out. I used a gallon-sized zip-top bag for years before I finally bought a piping bag. Just fill the bag, seal it, snip a tiny corner, and you’re good to go. The ghosts actually look more charming when they’re slightly imperfect anyway.
Preparation Method
Alright, let’s get to the fun part. I’ve broken this down into clear steps with all the little details I’ve learned from making these cupcakes more times than I can count. Take your time with the creaming step—it’s where the magic happens.
Step 1: Preheat and Prep
Preheat your oven to 350°F (175°C). Line your muffin tin with 12 paper liners. I know it’s tempting to skip this step and just grease the pan, but the liners really do make a difference—they help the cupcakes rise evenly and make cleanup so much easier. While the oven is heating, take your eggs and milk out of the fridge so they can come to room temperature. This takes about 15 minutes, which is the perfect time to measure your dry ingredients.
Step 2: Mix the Dry Ingredients
In your medium mixing bowl, whisk together the flour, baking powder, and salt. Whisk for about 20 seconds—this aerates the flour and ensures the baking powder is evenly distributed. I used to skip this step and just dump everything into the wet ingredients, but I kept getting pockets of baking powder that left bitter spots in the cupcakes. Whisking prevents that.
Step 3: Cream the Butter and Sugar
In your large mixing bowl, beat the softened butter on medium speed for about 30 seconds until it’s smooth and creamy. Then add the granulated sugar and beat on medium-high speed for a full 3 minutes. Set a timer. Seriously. The mixture should look light, fluffy, and pale yellow. This step is non-negotiable—it creates air pockets that help the cupcakes rise and gives them that tender texture. If you stop too early, your cupcakes will be dense and heavy. I learned this the hard way when I was rushing before a school party.
Step 4: Add the Eggs and Vanilla
Add the eggs one at a time, beating well after each addition (about 30 seconds per egg). The batter might look slightly curdled at this point—that’s totally normal, especially if your eggs were a little cold. Don’t panic. Add the vanilla extract and beat for another 30 seconds. Scrape down the sides and bottom of the bowl with your rubber spatula to make sure everything is incorporated.
Step 5: Alternate the Dry and Wet Ingredients
With the mixer on low speed, add about one-third of the flour mixture to the butter mixture. Beat until just combined—about 10 seconds. Add half of the milk and beat until combined. Repeat with another third of the flour, then the remaining milk, then the final third of the flour. Stop mixing as soon as the flour disappears. Overmixing at this stage develops gluten and makes the cupcakes tough. I usually stop the mixer a few seconds early and finish folding with my spatula.
Step 6: Fill the Liners
Divide the batter evenly among the 12 cupcake liners. I use a cookie scoop for this—it makes the portions perfectly even and keeps the mess to a minimum. Each liner should be about two-thirds full. If you overfill, the cupcakes will mushroom over the top and lose that nice domed shape. Trust me on this one—I’ve scraped burnt batter off the bottom of my oven more times than I’d like to admit.
Step 7: Bake
Bake for 18-20 minutes, or until a toothpick inserted into the center of a cupcake comes out clean or with just a few moist crumbs. The tops should be lightly golden and spring back when you gently press them. Every oven is different—mine runs a little hot, so I start checking at 16 minutes. Rotate the pan halfway through baking if your oven has hot spots.
Step 8: Cool Completely
Let the cupcakes cool in the pan for 5 minutes, then transfer them to a wire cooling rack. This is important—if you leave them in the hot pan too long, they’ll continue cooking and dry out. Let them cool completely before frosting. I know it’s tempting to frost them while they’re still warm, but the buttercream will melt into a sad puddle. I’ve done it. It’s not pretty.
Step 9: Make the Buttercream
While the cupcakes are cooling, make the frosting. Beat the softened butter on medium speed for 2 minutes until it’s pale and creamy. Gradually add the sifted powdered sugar, about ½ cup at a time, beating on low speed until incorporated. Add the vanilla and salt, then add the heavy cream one tablespoon at a time until the frosting reaches your desired consistency. For piping ghost faces, you want it thick enough to hold its shape but soft enough to squeeze easily. Beat on medium-high speed for 2-3 minutes until light and fluffy. This extra beating time makes the frosting silky smooth.
Step 10: Decorate the Ghosts
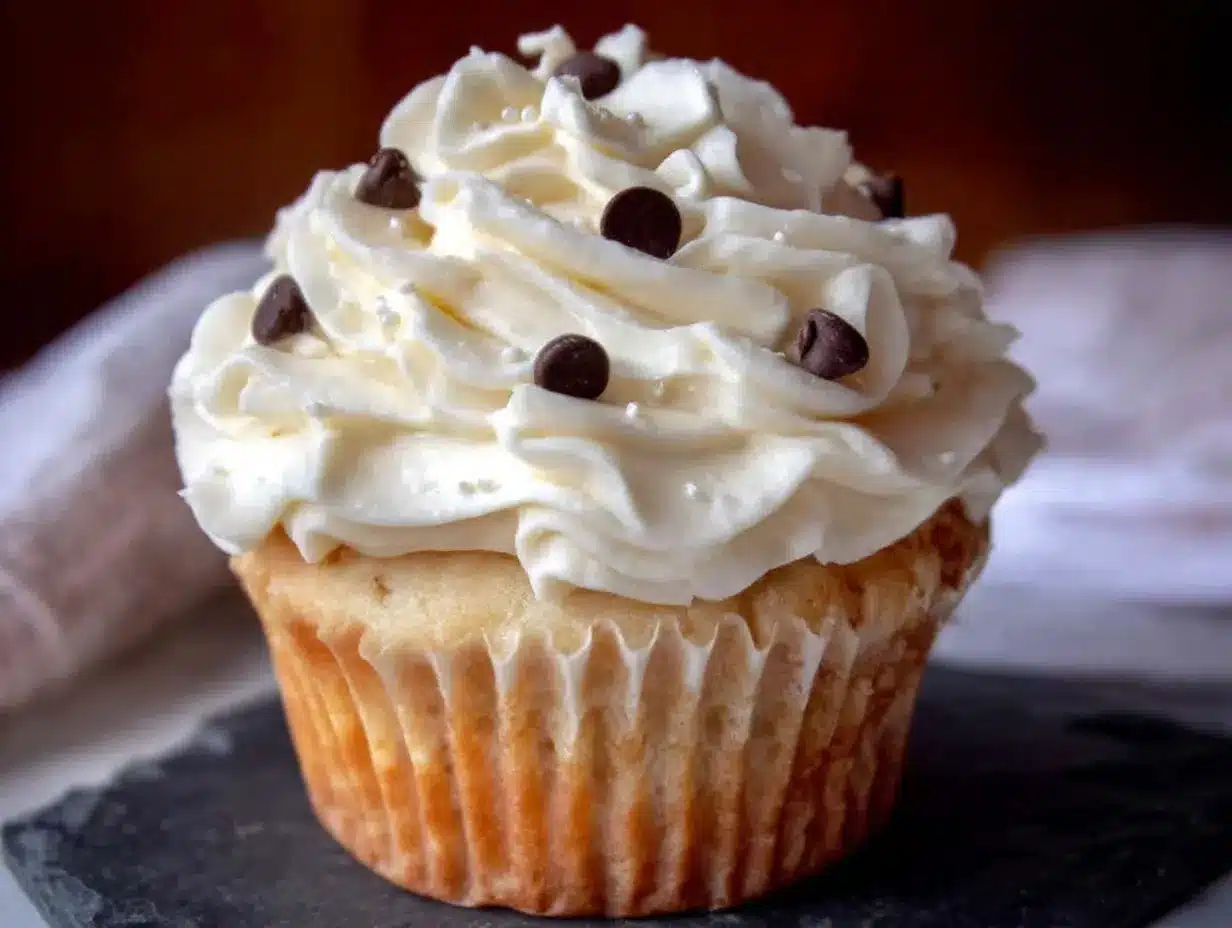
Transfer the buttercream to your piping bag or zip-top bag. Snip a small opening—about ¼ inch wide. Pipe a swirl onto each cupcake, starting from the outside and working inward, building up a little height in the center. Before the frosting sets, add mini chocolate chips for the eyes and mouth. I usually make two eyes and a little round “o” mouth, but my daughter prefers to make them look surprised with bigger eyes and a tiny mouth. There’s no wrong way to do it. If you’re using black decorating gel, you can draw the faces on after the frosting has set for a few minutes.
Cooking Tips & Techniques
After three years and dozens of batches, I’ve collected a few tricks that make these cupcakes turn out perfectly every time. Some of these I learned from my grandmother, some from trial and error, and some from those moments when everything went wrong and I had to figure out how to fix it.
The Room Temperature Rule is Real: I cannot stress this enough. Cold ingredients don’t emulsify properly. When you add cold eggs to creamed butter, the butter seizes up and your batter becomes lumpy. I’ve tested this side by side—room temperature ingredients produce a noticeably taller, more tender cupcake. If you forget to take your eggs out ahead of time, place them in a bowl of warm (not hot) water for 5 minutes. For the milk, microwave it for 15 seconds.
Don’t Overmix the Batter: This was my biggest mistake when I first started baking. I thought I needed to beat the batter until it was perfectly smooth. But overmixing develops gluten, which makes cupcakes tough and rubbery. Mix until the flour just disappears—a few small lumps are fine. They’ll bake out in the oven.
The Toothpick Test is Your Friend: I once pulled a batch out of the oven that looked perfect on top but was still raw in the middle. Now I always test with a toothpick, even when I’m sure they’re done. Insert it into the center of the tallest cupcake—if it comes out clean, they’re ready. If there’s wet batter, give them another 2 minutes.
Frosting Temperature Matters: If your buttercream seems too soft to pipe, pop it in the fridge for 10 minutes. If it’s too stiff, add another tablespoon of cream. The ideal temperature for piping is about 70°F—cool enough to hold its shape but warm enough to squeeze easily. I’ve ruined a batch of frosting by trying to pipe it straight from the fridge, and let me tell you, cold buttercream does not cooperate.
Let the Kids Make the Faces: This is more of a life tip than a cooking tip, but it’s worth mentioning. When you let kids decorate the ghosts, they’ll look imperfect, and that’s actually better. The wonky eyes and lopsided mouths give each ghost its own personality. My son once made a ghost that looked like it was screaming, and it was the most popular cupcake at the party.
Variations & Adaptations
One of the best things about this recipe is how flexible it is. Over the years, I’ve tried different variations based on what I had in the pantry or what my kids were craving. Here are a few of my favorites:
Chocolate Ghost Cupcakes: Replace ¼ cup of the all-purpose flour with ¼ cup of unsweetened cocoa powder. The chocolate version is richer and feels more indulgent. My husband actually prefers these, though he won’t admit it because he says the white ghosts are “more festive.” The chocolate batter is also slightly thicker, so you might need to add an extra tablespoon of milk.
Gluten-Free Version: As I mentioned earlier, a 1:1 gluten-free baking flour blend works beautifully here. I’ve tested this with Bob’s Red Mill and King Arthur Measure for Measure. The texture is slightly more crumbly, so be gentle when removing them from the pan. Let them cool completely before handling.
Pumpkin Spice Twist: Add 1 teaspoon of pumpkin pie spice and ½ teaspoon of cinnamon to the dry ingredients. This gives the cupcakes a warm, autumnal flavor that pairs beautifully with the vanilla buttercream. I made these for a Halloween potluck last year, and they were gone before the regular ones.
Dairy-Free Option: Use vegan butter sticks (not tub margarine) and oat milk in the cupcakes. For the frosting, vegan butter works surprisingly well—just make sure it’s softened properly. I’ve found that Country Crock Plant Butter gives the best texture. The frosting won’t be quite as fluffy, but it still tastes delicious.
Mini Ghost Cupcakes: Use a mini muffin tin and reduce the baking time to 10-12 minutes. These are perfect for classroom parties where you need to feed a crowd. Each mini cupcake gets one chocolate chip eye and a tiny smile. They’re almost too cute to eat. Almost.
Serving & Storage Suggestions
These cupcakes are best served at room temperature, which lets the buttercream soften slightly and the cake crumb stay tender. If you’ve refrigerated them, let them sit out for about 30 minutes before serving. The flavor actually improves after a few hours—the vanilla mellows out and the buttercream becomes more creamy.
How to Serve: Arrange the ghosts on a white platter or cake stand for maximum visual impact. I like to scatter a few candy pumpkins or candy corn around the base for a pop of color. If you’re serving these at a Halloween party, consider adding a few spooky decorations to the table—fake cobwebs or plastic spiders make the ghosts look even cuter by contrast.
Storage Instructions: Store unfrosted cupcakes in an airtight container at room temperature for up to 3 days. Frosted cupcakes should be stored in the refrigerator, but bring them to room temperature before serving. The buttercream will harden in the fridge, so don’t be alarmed if it looks different when you first pull them out.
Freezing Tips: These cupcakes freeze beautifully. Freeze unfrosted cupcakes in a single layer on a baking sheet, then transfer them to a freezer-safe bag for up to 3 months. When you’re ready to serve, thaw them at room temperature and frost them fresh. I actually prefer freezing the unfrosted cupcakes because the frosting always tastes best when it’s freshly made. For frozen frosted cupcakes, thaw them in the refrigerator overnight and let them sit at room temperature for 20 minutes before serving.
How Flavors Develop: The vanilla flavor in both the cake and the frosting actually deepens after a day or two. I’ve found that these cupcakes taste even better on day two, which makes them perfect for making ahead of a party. Just don’t frost them until the day you plan to serve them.
Nutritional Information & Benefits
Let’s be honest—these are cupcakes, not health food. But I do want to share some context about what’s in them and how you can make slightly more mindful choices if that matters to you.
Estimated Nutritional Values (per cupcake with frosting):
- Calories: 380
- Total Fat: 22g
- Saturated Fat: 14g
- Cholesterol: 85mg
- Sodium: 180mg
- Total Carbohydrates: 45g
- Sugar: 33g
- Protein: 3g
Health Benefits of Key Ingredients: The butter in this recipe provides fat-soluble vitamins A, D, E, and K, which are important for nutrient absorption. Eggs are a complete protein source and contain choline, which supports brain health. And while sugar should be enjoyed in moderation, it does provide quick energy—perfect for a post-trick-or-treating sugar rush.
Dietary Considerations: This recipe contains gluten, dairy, and eggs. For gluten-free and dairy-free options, refer to the variations section above. If you’re watching your sugar intake, you can reduce the sugar in the cupcake batter to ½ cup without significantly affecting the texture, though the cupcakes will be slightly less sweet.
Potential Allergens: This recipe contains wheat, milk, eggs, and (if using chocolate chips) soy. If you’re serving these at a school event, check with the teacher about any classroom allergies. I’ve made a batch with sunflower seed butter frosting for a nut-free classroom, and it worked beautifully.
My Personal Wellness Perspective: I believe in balance. These cupcakes are a treat, meant for special occasions and celebrations. I don’t stress about the sugar content on Halloween—it’s one day out of the year. What matters more to me is that we’re making memories in the kitchen, getting a little messy, and sharing something delicious with the people we love.
Conclusion
These Kid-Approved Ghost Vanilla Cupcakes with Buttercream Faces have become more than just a recipe in our house. They’re a tradition. Every October, my kids know that at some point, we’ll pull out the mixer and the white liners and spend an afternoon making ghosts. The faces get sillier every year—last year my daughter made one with three eyes, and my son insisted on making a ghost that looked like it was winking. Those imperfect, slightly ridiculous ghosts are exactly what Halloween should be about: fun, creativity, and a little bit of sugar.
I hope you’ll try these with your family. Don’t worry about making them perfect. Let the kids squeeze the piping bag, let the chocolate chips fall where they may, and embrace the wonky ghosts. Those are the ones with the most personality anyway. And if you come up with a variation I haven’t tried—maybe a sprinkle of cinnamon or a drizzle of caramel—please let me know in the comments. I’m always looking for new ideas.
Happy Halloween, and happy baking. Your kitchen is about to get a little spooky, a little messy, and a whole lot delicious.
Frequently Asked Questions
Can I make these cupcakes ahead of time?
Absolutely. You can bake the cupcakes up to 3 days in advance and store them unfrosted in an airtight container at room temperature. Frost them the day you plan to serve them for the best texture and appearance. You can also freeze the unfrosted cupcakes for up to 3 months.
Why did my cupcakes turn out dense instead of fluffy?
This usually happens for one of three reasons: you overmixed the batter, your baking powder was expired, or your ingredients were too cold. Make sure to mix until the flour just disappears, check that your baking powder is fresh (test it by adding a teaspoon to hot water—it should bubble vigorously), and let your eggs and milk come to room temperature before starting.
Can I use a different type of frosting?
Of course. Cream cheese frosting works beautifully with these cupcakes—just substitute 4 ounces of cream cheese for ½ cup of the butter in the frosting recipe. Chocolate buttercream is also a great option if you want a more dramatic color contrast. For a dairy-free version, use vegan butter and oat milk as described in the variations section.
How do I get the ghost faces to look right?
Practice makes perfect, but here’s a tip: use mini chocolate chips for the eyes and a slightly larger chip or a dot of black decorating gel for the mouth. If you’re using a piping bag for the frosting, hold it straight up and squeeze gently, lifting as you go to create a little peak on top. The faces don’t have to be perfect—slightly uneven ghosts have more character.
Can I make these cupcakes without a mixer?
Yes, you can make them by hand, but it will take some elbow grease. Use a wooden spoon to cream the butter and sugar—it will take about 5-6 minutes of vigorous stirring instead of 3 minutes with a mixer. Whisk the dry ingredients separately and fold them into the wet ingredients gently. The texture might be slightly denser, but they’ll still taste delicious.
Pin This Recipe!
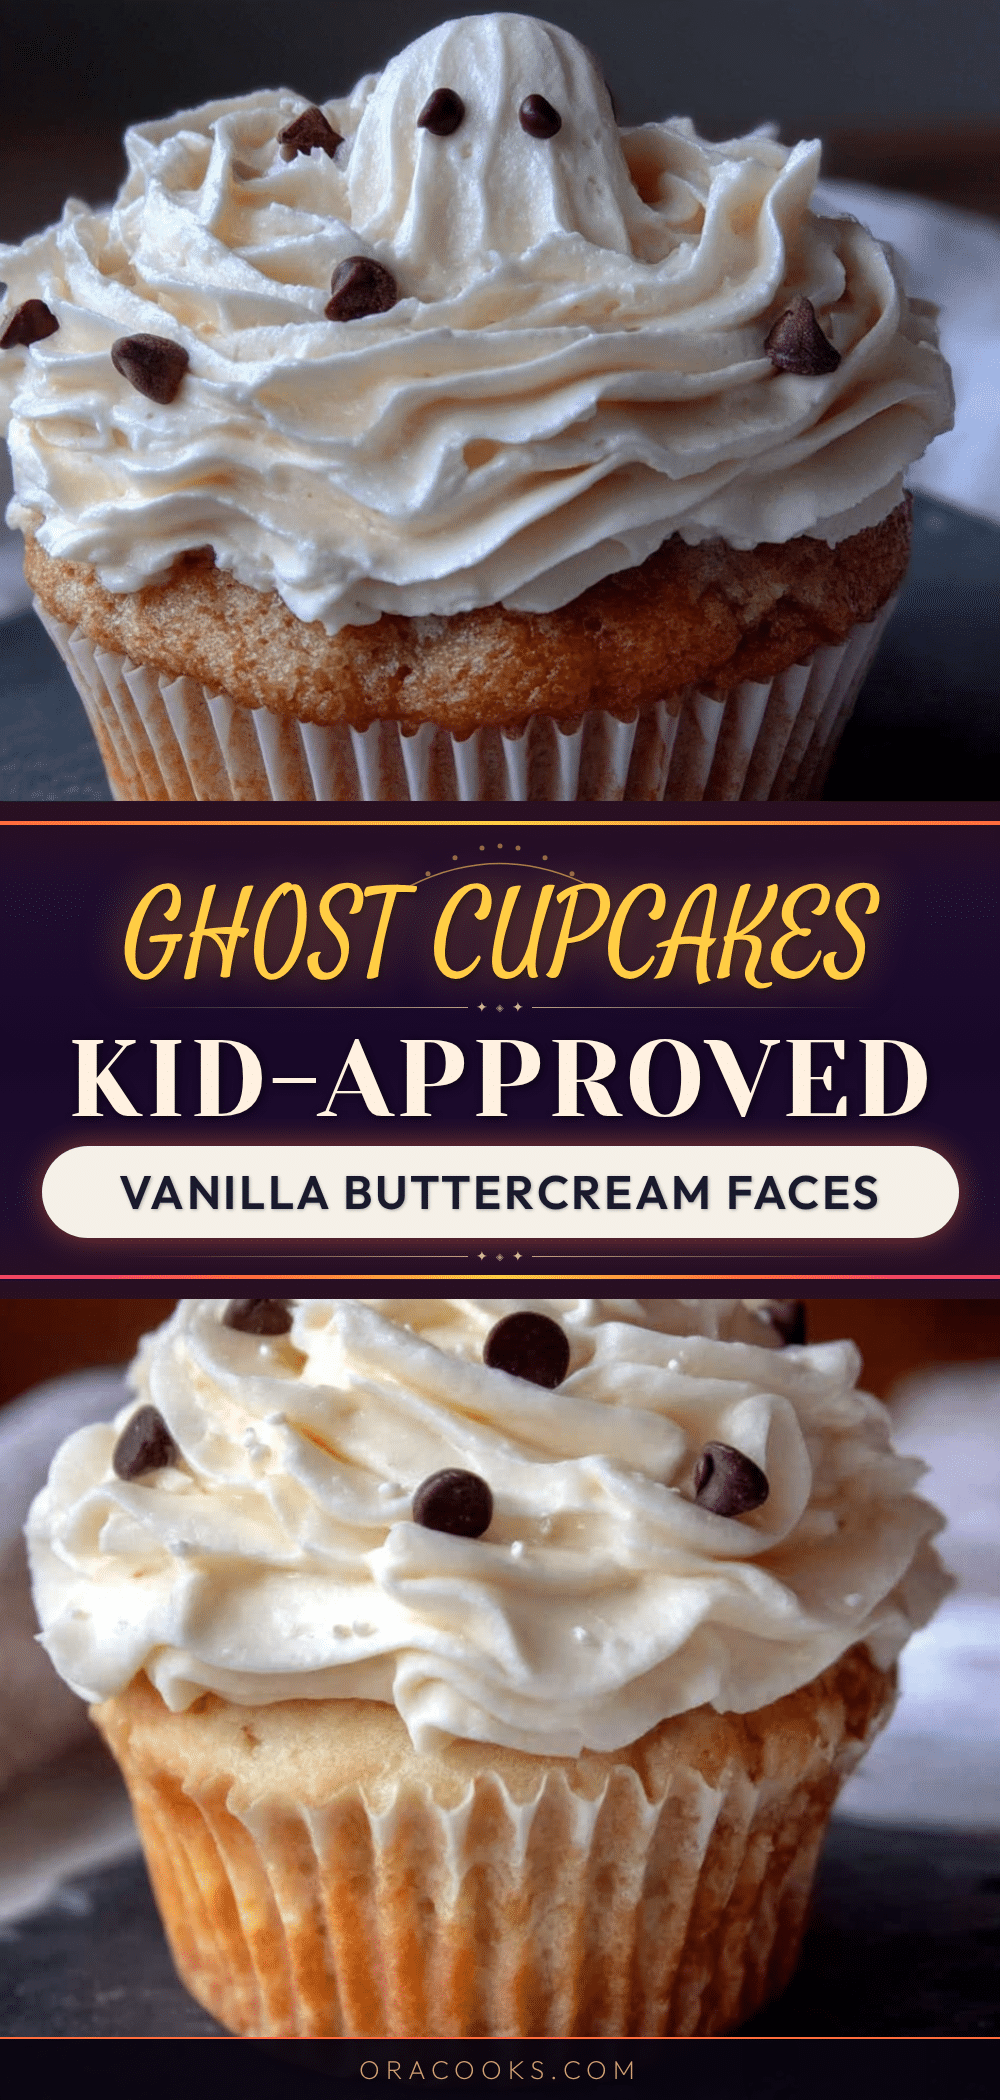
Kid-Approved Ghost Vanilla Cupcakes with Buttercream Faces – Easy Halloween Treat
These Kid-Approved Ghost Vanilla Cupcakes with Buttercream Faces are simple enough for a Tuesday afternoon and cute enough for any costume party. They’re forgiving, fun, and let kids help without losing your mind.
- Prep Time: 15 minutes
- Cook Time: 18-20 minutes
- Total Time: 45 minutes
- Yield: 12 cupcakes 1x
- Category: Dessert
- Cuisine: American
Ingredients
- 1 ½ cups all-purpose flour
- 1 ½ teaspoons baking powder
- ¼ teaspoon salt
- ½ cup unsalted butter, softened to room temperature
- ¾ cup granulated sugar
- 2 large eggs, room temperature
- 2 teaspoons vanilla extract
- ½ cup whole milk, room temperature
- 1 cup unsalted butter, softened to room temperature (for frosting)
- 3 ½ cups powdered sugar, sifted
- 2 teaspoons vanilla extract (for frosting)
- 2–3 tablespoons heavy cream
- ¼ teaspoon salt (for frosting)
- Mini chocolate chips or black decorating gel (for decorating)
- Optional: White sanding sugar or edible glitter
Instructions
- Preheat your oven to 350°F (175°C). Line your muffin tin with 12 paper liners.
- In a medium mixing bowl, whisk together the flour, baking powder, and salt for about 20 seconds.
- In a large mixing bowl, beat the softened butter on medium speed for about 30 seconds until smooth and creamy. Add the granulated sugar and beat on medium-high speed for a full 3 minutes until light, fluffy, and pale yellow.
- Add the eggs one at a time, beating well after each addition (about 30 seconds per egg). Add the vanilla extract and beat for another 30 seconds. Scrape down the sides and bottom of the bowl.
- With the mixer on low speed, add about one-third of the flour mixture to the butter mixture. Beat until just combined (about 10 seconds). Add half of the milk and beat until combined. Repeat with another third of the flour, then the remaining milk, then the final third of the flour. Stop mixing as soon as the flour disappears.
- Divide the batter evenly among the 12 cupcake liners, filling each about two-thirds full.
- Bake for 18-20 minutes, or until a toothpick inserted into the center comes out clean or with just a few moist crumbs. Rotate the pan halfway through if needed.
- Let the cupcakes cool in the pan for 5 minutes, then transfer them to a wire cooling rack to cool completely.
- While the cupcakes are cooling, make the buttercream: Beat the softened butter on medium speed for 2 minutes until pale and creamy. Gradually add the sifted powdered sugar, about ½ cup at a time, beating on low speed until incorporated. Add the vanilla and salt, then add the heavy cream one tablespoon at a time until the frosting reaches desired consistency. Beat on medium-high speed for 2-3 minutes until light and fluffy.
- Transfer the buttercream to a piping bag or zip-top bag. Snip a small opening (about ¼ inch wide). Pipe a swirl onto each cupcake, starting from the outside and working inward, building up a little height in the center. Before the frosting sets, add mini chocolate chips for the eyes and mouth.
Notes
The room temperature rule is crucial for tender cupcakes. Don’t overmix the batter. Let kids decorate the ghosts for imperfect but charming results. Frosting temperature matters: if too soft, refrigerate for 10 minutes; if too stiff, add more cream. These cupcakes taste even better on day two.
Nutrition
- Serving Size: 1 cupcake
- Calories: 380
- Sugar: 33
- Sodium: 180
- Fat: 22
- Saturated Fat: 14
- Carbohydrates: 45
- Protein: 3
Keywords: Halloween cupcakes, ghost cupcakes, vanilla cupcakes, buttercream frosting, easy Halloween treat, kid-friendly, spooky cupcakes


