Love this? Save it for later!
Share the inspiration with your friends
Jen wasn’t trying to impress anyone. I’d stopped by her place on a crisp Saturday afternoon to pick up a book I’d lent her months ago, and the smell of roasting nuts and something faintly cinnamon hit me before I even got through the front door. She was standing in her kitchen, barefoot, wearing an old flannel shirt, casually arranging apple slices on a wooden board like she was just putting away groceries. “Oh, you’re still here for that book?” she said, not even looking up. “Grab a plate. I’m just throwing stuff together for tomorrow.”
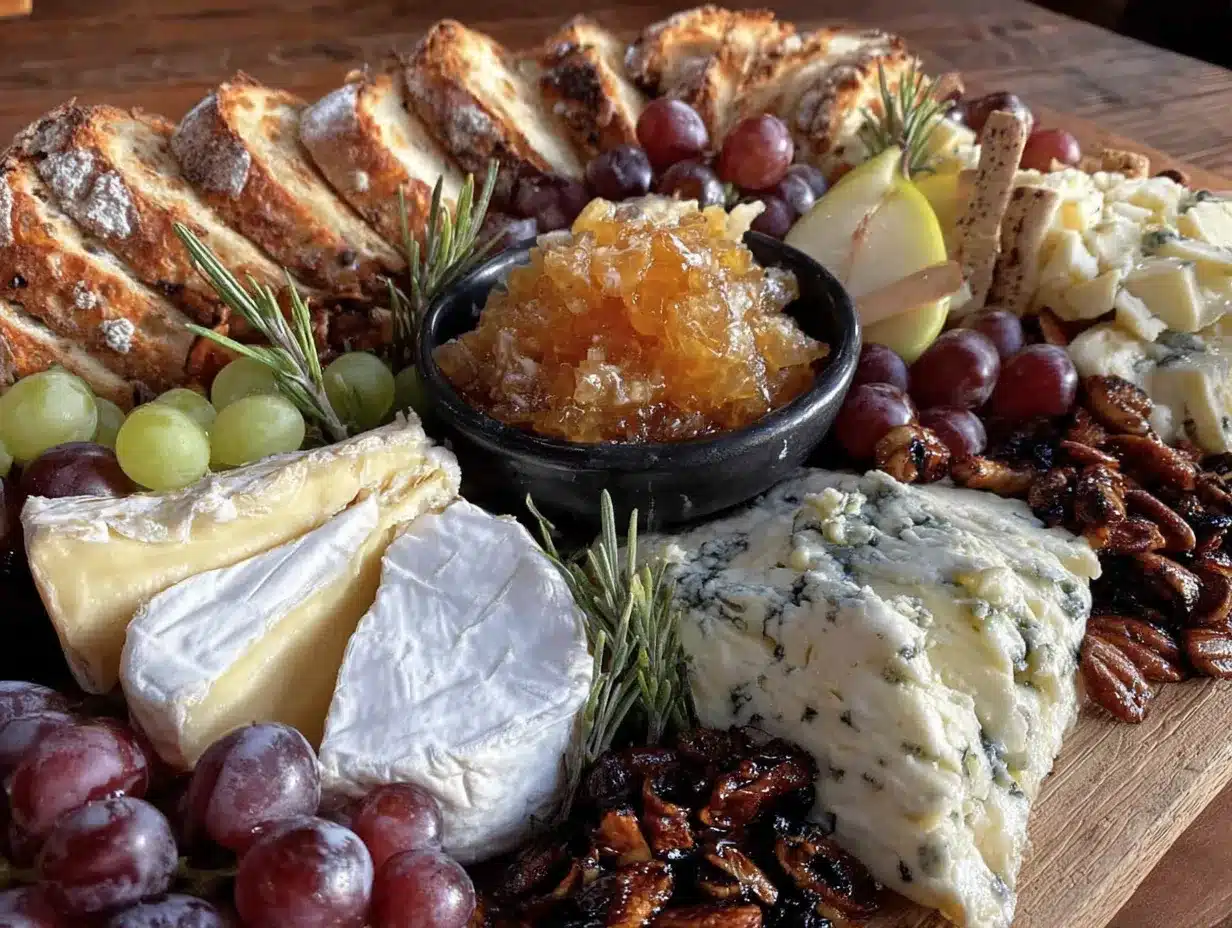
That “throwing stuff together” was, honest to goodness, the most beautiful spread I’d ever seen outside of a magazine. She had these little piles of dried figs, wedges of brie with a drizzle of honey, prosciutto folded like ribbons, and the most incredible roasted grapes I’d ever tasted. I stood there, holding my book, completely frozen by the sight of it. And she just shrugged and said, “It’s nothing. It’s just for Friendsgiving.”
Let me tell you, I’ve made a lot of charcuterie boards in my time. I’ve stressed over symmetry and color balance and whether the cheese should be sliced or whole. But watching Jen that afternoon taught me something important. The best boards aren’t the ones you stress over. They’re the ones you build with what looks good at the market, what the season gives you, and what your friends actually want to eat. Maybe you’ve been there, standing in the grocery aisle, wondering if you need three kinds of cheese or if people will judge you for buying pre-sliced salami. I get it. I’ve been that person.
So this Perfect Friendsgiving Charcuterie Board with Fall Fruit is my love letter to that afternoon at Jen’s house. It’s the board I’ve made for every gathering since, tweaked and tested and shared until it feels just right. It’s not fancy. It’s not fussy. It’s just really, really good food that makes people feel welcome the second they walk in the door. And honestly, isn’t that the whole point of Friendsgiving?
Why You’ll Love This Recipe
I’ve tested this board at least a dozen times over the last few years. For Friendsgiving dinners, for casual Sunday hangouts, even for a quiet night in when I just wanted something pretty to snack on. And every single time, it delivers. Here’s why this one is different from every other charcuterie board you’ve seen on Pinterest.
- Quick & Easy: This board comes together in about 20 minutes flat. No cooking required (except for the roasted grapes, which take 15 minutes but are totally worth it). Perfect for when your guests are about to walk through the door and you realize you forgot to make a snack.
- Simple Ingredients: Everything on this board is available at your regular grocery store. No fancy cheese shops or specialty meat counters required. I promise you can find everything you need without making three stops.
- Perfect for Friendsgiving: This board was literally born from a Friendsgiving gathering. It’s meant to be shared, picked at, and enjoyed while people are talking and laughing and spilling wine on the couch. It’s casual elegance at its finest.
- Crowd-Pleaser: I’ve watched people who claim they don’t like blue cheese go back for thirds of the gorgonzola with fig jam. There’s something for everyone here, from the meat lovers to the fruit fiends to the cheese snobs.
- Unbelievably Delicious: The combination of sweet roasted grapes, salty prosciutto, creamy brie, and crunchy candied pecans is honestly next-level. It’s the kind of board where people close their eyes after the first bite.
What makes this recipe special is the balance. Most charcuterie boards are just a pile of stuff thrown on a board. This one has a method to the madness. The roasted grapes add a warm, jammy sweetness that cuts through the richness of the cheese. The honeycrisp apples provide that essential crunch. And the candied pecans? They’re the surprise element that everyone asks about. It’s not just another board. It’s the best version of a fall charcuterie board you’ll ever make.
This is the kind of food that makes people feel taken care of. It’s comfort food reimagined for a crowd. And when your friends walk in and see this spread, they’ll know you put thought into it. Even if it only took you twenty minutes to throw together.
What Ingredients You Will Need
This recipe uses simple, seasonal ingredients to create a board that feels both abundant and intentional. Most of these are fall staples you can find at any grocery store or farmers market. I’ve included notes on substitutions where they work, because I know not everyone has access to the same ingredients.
For the Cheese
- Brie (8 ounces) – Go for a double or triple cream brie for maximum creaminess. I like the ones from Président or a local creamery if you can find one. Let it come to room temperature before serving for the best texture.
- Aged Gouda (6 ounces) – The little crunchy crystals in aged gouda are pure magic. Look for one that’s been aged at least 12 months. It adds a nutty, caramel-like flavor that pairs perfectly with the fruit.
- Gorgonzola Dolce (4 ounces) – This is the mild, creamy blue cheese that even blue cheese skeptics love. It’s much softer and sweeter than regular gorgonzola. If you can’t find it, use a mild cambozola instead.
- Sharp Cheddar (6 ounces) – A good sharp white cheddar adds a familiar, comforting element. Cabot Seriously Sharp is my go-to, but any sharp cheddar will work.
For the Meats
- Prosciutto (4 ounces) – Look for prosciutto that’s sliced thin but not so thin it falls apart. I prefer the ones from the deli counter rather than pre-packaged. Ask for it to be sliced just a touch thicker than usual so it holds up on the board.
- Genoa Salami (4 ounces) – Get a good quality salami and slice it yourself into thick rounds. The pre-sliced stuff is fine in a pinch, but hand-cut rounds look so much better.
- Soppressata (4 ounces) – This spicy Italian dry salami adds a nice kick. If you can’t find it, use any spicy salami or even pepperoni in a pinch.
For the Fall Fruit
- Honeycrisp Apples (2 large) – These are my favorite for boards because they’re sweet, crisp, and don’t brown too quickly. Slice them just before serving and toss with a little lemon juice if you want to prevent browning.
- Red Seedless Grapes (1 cup) – Roasting these brings out their natural sweetness and gives them a jammy texture. Trust me on this one. You’ll never go back to raw grapes on a board.
- Fresh Figs (4-6, depending on size) – When they’re in season, fresh figs are non-negotiable. Halve them lengthwise and arrange them cut-side up for a beautiful presentation.
- Dried Apricots (1/2 cup) – These add a chewy, concentrated sweetness that balances the salty meats. Look for Turkish apricots if you can find them.
- Dried Mission Figs (1/2 cup) – These are smaller and sweeter than fresh figs, with a rich, almost molasses-like flavor.
For the Accompaniments
- Candied Pecans (1 cup) – You can buy these or make them yourself. I’ll share my quick stovetop method in the tips section because homemade is always better.
- Fig Jam or Membrillo (1/2 cup) – Fig jam is classic, but membrillo (quince paste) is a Spanish specialty that pairs beautifully with manchego or aged gouda. Both work great here.
- Honey (for drizzling) – A good quality honey, preferably local, adds a finishing touch to the brie and gorgonzola.
- Olive Oil (for drizzling) – Use a good extra virgin olive oil for the roasted grapes. It makes a difference.
- Fresh Rosemary and Thyme (for garnish) – These aren’t just for looks. The herbs add a subtle fragrance that ties everything together.
For the Crackers and Bread
- Water Crackers (1 box) – These are neutral and let the cheese shine. Carr’s or any plain water cracker works.
- Baguette (1 small) – Slice it thin and toast it lightly if you want extra crunch. Or leave it soft for a more rustic feel.
- Fig and Olive Crackers (1 box) – These add a sweet-savory note that’s perfect with the gouda and cheddar.
Equipment Needed
You don’t need much to put this board together. Here’s what I use, along with some alternatives if you’re working with what you’ve got.
- Large Wooden Board or Slate Platter – I use a 20-inch round acacia wood board I found at HomeGoods for fifteen bucks. A large cutting board, a baking sheet lined with parchment paper, or even a clean countertop will work. The key is having enough surface area to spread everything out.
- Small Bowls or Ramekins – You’ll need 3-4 small bowls for the jam, honey, and any loose items like olives or nuts. I love the little ceramic pinch pots from Target. They’re cheap and come in cute colors.
- Cheese Knives – You don’t need a full set. One small knife for the soft cheeses and one for the hard cheeses is plenty. If you don’t have cheese knives, a butter knife and a paring knife work just fine.
- Baking Sheet – For roasting the grapes. Any rimmed baking sheet will do. Line it with parchment paper for easy cleanup.
- Paring Knife and Cutting Board – For slicing the apples, figs, and cheese. A sharp knife makes all the difference here.
- Small Skillet – If you’re making the candied pecans from scratch, you’ll need a small non-stick skillet. I use my trusty old Calphalon that’s seen better days but still gets the job done.
Honestly, the equipment is flexible. I’ve made this board at a friend’s cabin with a flimsy plastic cutting board and a butter knife, and it still came out beautiful. Don’t let the lack of fancy tools stop you.
Preparation Method
Here’s how I put this board together. I’ve broken it down into steps so you can follow along without feeling overwhelmed. The total active time is about 20 minutes, plus 15 minutes for roasting the grapes.
- Roast the grapes (15 minutes before you start assembling). Preheat your oven to 425°F. Rinse the grapes and pat them dry. Toss them with a tablespoon of olive oil, a pinch of salt, and a sprig of fresh rosemary. Spread them in a single layer on a lined baking sheet. Roast for 15 minutes, until the skins are slightly wrinkled and the grapes have softened. Let them cool while you prep everything else. The smell in your kitchen right now is going to be incredible. I mean, seriously incredible.
- Bring the cheese to room temperature. Take the brie, gouda, gorgonzola, and cheddar out of the fridge about 30 minutes before you start assembling. Room temperature cheese has so much more flavor and a better texture. I know it’s tempting to skip this step, but don’t. It really does make a difference.
- Prep the fruit. Slice the honeycrisp apples into thin wedges. I leave the skin on because it looks prettier and adds fiber. Halve the fresh figs lengthwise. If you’re using dried mission figs, leave them whole or halve them depending on their size. Set everything aside.
- Slice the hard cheeses. Cut the aged gouda and sharp cheddar into thin slices or small cubes. I like to do a mix of both shapes for visual interest. Leave the brie whole or cut it into wedges. The gorgonzola dolce can be left in a wedge shape that people can break apart.
- Prepare the meats. Fold the prosciutto slices into loose ribbons or simply drape them in waves on the board. Slice the genoa salami and soppressata into thick rounds. Don’t stack them neatly. Let them overlap and tumble over each other. It looks more inviting that way.
- Arrange the bowls first. Place your small bowls of fig jam, honey, and candied pecans on the board. I usually put them at the corners or scattered around so they break up the board visually. This gives you anchor points to work around.
- Place the cheeses. Position the cheeses around the board, spacing them out so there’s a cheese within reach from any angle. I put the brie near the honey, the gouda near the fig jam, and the gorgonzola near the grapes.
- Add the meats. Tuck the prosciutto, salami, and soppressata into the gaps between the cheeses. Let them drape over the edges of the board slightly for a more casual, abundant look.
- Fill in with fruit. Scatter the apple slices, fresh figs, dried apricots, and mission figs around the board. Cluster the roasted grapes in a few small piles rather than spreading them out evenly. This creates visual interest and makes the board feel more curated.
- Add the crackers and bread. Arrange the crackers and baguette slices in small groups around the board. Don’t line them up in neat rows. Clusters look more natural and inviting.
- Garnish and finish. Tuck small sprigs of fresh rosemary and thyme into the gaps. Drizzle a little honey over the brie and gorgonzola. Give the whole board a final look and adjust anything that feels off-balance. Step back and admire your work.
A few notes on timing: I usually roast the grapes first, then prep everything while they cool. The whole assembly process takes about 15 minutes once the grapes are done. If you’re making the candied pecans from scratch, do those before the grapes so they have time to cool and harden.
One thing I learned the hard way: don’t overcrowd the board. It’s tempting to pile everything on, but people need room to grab things without knocking over a bowl of jam. Leave a little breathing room between the elements. Your guests will thank you.
Cooking Tips & Techniques
I’ve made this board enough times to have learned a few things the hard way. Here are my best tips for getting it right every time.
Don’t skip the roasted grapes. I know it seems like an extra step, but roasted grapes are honestly the star of this board. They become jammy and sweet and almost wine-like. The first time I made them, I ate half the batch before the board was even assembled. They’re that good. Just don’t overcrowd the baking sheet, or they’ll steam instead of roast. Give them space to breathe.
Balance your textures. A great charcuterie board is all about contrast. You want something creamy (brie), something crumbly (gorgonzola), something crunchy (candied pecans), something chewy (dried apricots), and something crisp (apple slices). If you find your board feeling one-note, ask yourself what texture is missing and add it.
Let the cheese breathe. I cannot stress this enough. Cold cheese is sad cheese. Take everything out of the fridge at least 30 minutes before serving. An hour is even better. The difference in flavor and texture is night and day. I once served a board with cold brie and watched my friend struggle to spread it on a cracker. Never again.
Make the candied pecans yourself. Store-bought candied pecans are fine, but homemade ones are a game-changer. Here’s my quick method: In a small skillet over medium heat, melt 2 tablespoons of butter. Add 1 cup of pecan halves, 2 tablespoons of brown sugar, a pinch of cinnamon, and a pinch of salt. Stir constantly for 3-4 minutes until the sugar is melted and the pecans are toasted. Spread them on parchment paper to cool. They’ll be crunchy and caramelized and absolutely addictive. I always make a double batch because they disappear fast.
Think about color. Fall is all about warm, rich colors. Deep reds, oranges, golds, and browns. When you’re arranging your board, try to spread the colors out rather than clustering all the red things together or all the gold things together. It makes the board feel more balanced and intentional.
Prep ahead of time. You can roast the grapes and make the candied pecans a day ahead. Store them separately in airtight containers. Slice the apples and cheese just before serving. The meats can be arranged on a plate and covered in the fridge, then transferred to the board when you’re ready. This board is meant to be low-stress, so take advantage of any prep you can do in advance.
My biggest failure? The time I forgot the honey. I had this gorgeous board all set up, and I realized halfway through the party that I’d left the honey in the pantry. The brie was lonely without it. Now I keep a little jar of honey in my board-building kit so I never forget again.
Variations & Adaptations
One of the best things about a charcuterie board is how adaptable it is. Here are some variations I’ve tried and loved.
Vegetarian Version: Skip the meats and double up on the cheese and fruit. Add some marinated artichoke hearts, roasted red peppers, and a good quality olive tapenade. I’ve also added grilled halloumi for a salty, squeaky alternative to the prosciutto. It’s a hit with vegetarians and meat-eaters alike.
Dairy-Free Adaptation: Use dairy-free cheeses if you can find good ones. I’ve had luck with Miyoko’s brand for a brie alternative and Treeline for a soft, spreadable option. Load up on the fruit, nuts, and roasted vegetables to compensate. The roasted grapes and candied pecans are naturally dairy-free, so they’re still the stars.
Gluten-Free Option: Swap the crackers and baguette for gluten-free crackers or rice cakes. I like the simple mills almond flour crackers for this board. They’re sturdy enough to hold up to the cheese and have a nice nutty flavor that works with the fall theme.
Seasonal Swaps: In the summer, I swap the apples and figs for fresh peaches and plums. The roasted grapes work year-round, but I’ll sometimes use roasted cherries in the summer for a different vibe. In the winter, I add pomegranate seeds and persimmons for a pop of color and sweetness.
Spicy Twist: Add some spicy honey or hot pepper jam to the board for a sweet-heat kick. I’ve also added pickled jalapeños and a smear of nduja (spreadable spicy salami) for a bolder flavor profile. It’s not for everyone, but if you like a little heat, it’s fantastic.
Budget-Friendly Version: Skip the prosciutto and use a good quality ham instead. Swap the aged gouda for a regular gouda or even a mild cheddar. Use whatever fruit is on sale that week. The beauty of a charcuterie board is that it’s flexible. Don’t let the “perfect” ingredients list stop you from making something delicious with what you have.
My personal favorite variation is adding a small bowl of warm, spiced cider on the side. It ties the whole fall theme together and gives people something to sip while they’re picking at the board. Just a thought.
Serving & Storage Suggestions
This board is best served at room temperature, so let it sit out for about 15 minutes after assembly before your guests dig in. The flavors are more pronounced when nothing is straight from the fridge.
For presentation, I like to place the board in the center of the table where everyone can reach it. If you’re serving a crowd, consider making two smaller boards rather than one giant one. It’s easier for people to access and looks more abundant.
This board pairs beautifully with a crisp white wine like a Sauvignon Blanc or a dry Riesling. For red wine drinkers, a Pinot Noir or a lighter Zinfandel works well. And honestly, a good hard cider is maybe the perfect fall pairing. The apple notes complement the fruit on the board beautifully.
If you have leftovers (which is rare in my house, but it happens), here’s what to do. Store the cheeses wrapped in wax paper or cheese paper in the fridge. Don’t use plastic wrap, it makes cheese sweat and get slimy. The meats can be stored in an airtight container for up to 3 days. The fruit should be eaten within a day or two. The roasted grapes are actually delicious cold the next day, tossed into a salad or spread on toast.
Pro tip: the flavors actually get better over time as the cheeses and meats mingle on the board. If you’re making this for a party, assemble it an hour or two ahead and let it sit at room temperature. Just cover it loosely with a clean kitchen towel to keep any stray pets or kids from helping themselves too early.
One thing I’ve noticed is that the candied pecans lose their crunch after a day. If you have leftover pecans, pop them in a 300°F oven for 5 minutes to re-crisp them. They’ll be good as new.
Nutritional Information & Benefits
I’m not a nutritionist, but I can tell you what I’ve learned about the ingredients in this board. It’s not exactly health food, but it’s made with real, whole ingredients that have some genuine benefits.
A typical serving (about 2 ounces of cheese, 1 ounce of meat, and a handful of fruit and nuts) comes in around 350-400 calories. The exact numbers depend on your portions and choices. Here’s a rough breakdown for a single serving:
| Nutrient | Approximate Value |
|---|---|
| Calories | 380 |
| Protein | 18g |
| Fat | 26g |
| Carbohydrates | 22g |
| Fiber | 4g |
| Sugar | 14g |
| Sodium | 680mg |
The grapes are rich in antioxidants, especially when roasted. The nuts provide healthy fats and protein that keep you full. The cheese offers calcium and protein, though it’s also high in saturated fat, so moderation is key. The apples are a great source of fiber and vitamin C.
If you’re watching your sodium, go easy on the cured meats and opt for more fruit and nuts. If you’re limiting dairy, load up on the fruit and crackers. This board is flexible enough to accommodate most dietary preferences.
From a wellness perspective, I love that this board encourages grazing and mindful eating. You’re not sitting down to a heavy meal. You’re picking and choosing, listening to your body, and enjoying a variety of flavors. That’s a pretty healthy way to eat, if you ask me.
Conclusion
This Perfect Friendsgiving Charcuterie Board with Fall Fruit is the kind of recipe that makes you look like a hero without actually having to do much work. It’s beautiful, it’s delicious, and it’s the kind of thing that makes people feel welcome the moment they see it. I’ve made it for Friendsgiving dinners, for casual Sunday afternoons, and for quiet nights in when I just wanted something pretty to snack on while watching a movie. It never disappoints.
What I love most about this board is how forgiving it is. You don’t have to follow the ingredient list exactly. Swap in your favorite cheeses, use whatever fruit looks good at the market, add your own little touches. The whole point is to create something that feels like you, for the people you care about. That’s what Friendsgiving is all about, right?
So go ahead and give this board a try. Roast those grapes. Make the candied pecans. Arrange everything with love and a little bit of chaos. Your friends will thank you. And honestly, you’ll thank yourself when you’re sitting there, glass of wine in hand, watching everyone dig into something you made with your own two hands.
I’d love to hear how your board turns out. Drop a comment below and let me know what variations you tried, or tag me in your photos on social media. Happy Friendsgiving, friends!
Frequently Asked Questions
Can I make this board ahead of time?
Yes, you can prep most of the components a day ahead. Roast the grapes, make the candied pecans, and slice the hard cheeses. Store everything separately in the fridge. Assemble the board about an hour before serving so the cheese can come to room temperature.
How many people does this board serve?
This board serves about 8-10 people as an appetizer or snack. If you’re serving it as a main course for a casual gathering, it will feed 4-6. I usually double the recipe if I’m hosting a larger crowd.
Can I use different fruits?
Absolutely. Pears, persimmons, pomegranate seeds, and dried cherries all work beautifully. Just stick with fruits that are in season for the best flavor and texture. The roasted grapes are non-negotiable in my book, but everything else is flexible.
What if I can’t find fresh figs?
No problem. Dried figs work great, or you can substitute with sliced pears or apples. Fresh figs are lovely when they’re in season, but they’re not essential. The board will still be beautiful and delicious without them.
How do I keep the apple slices from turning brown?
Toss the apple slices in a little lemon juice or apple cider vinegar right after slicing. It adds a nice tang that complements the other flavors and keeps them looking fresh for hours. I also find that honeycrisp apples brown less quickly than other varieties.
Pin This Recipe!
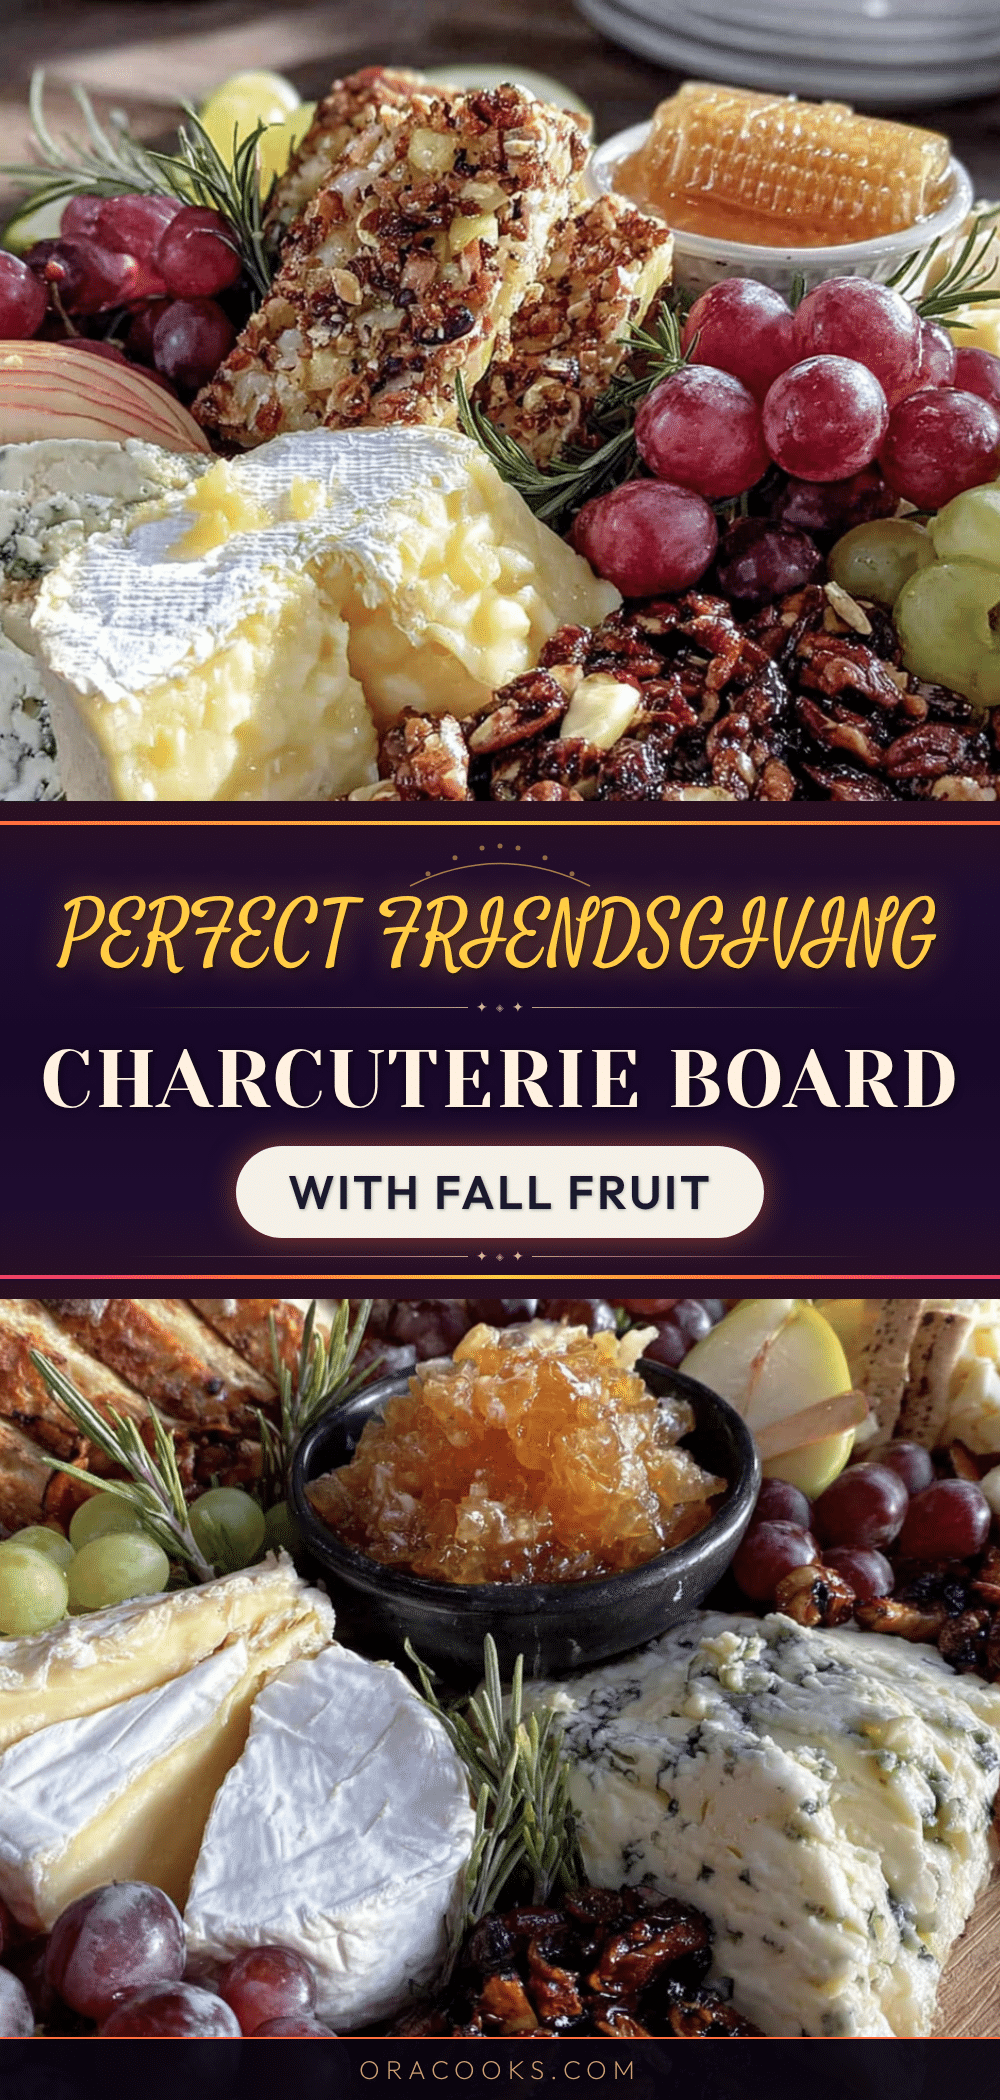
Perfect Friendsgiving Charcuterie Board with Fall Fruit
A beautiful and effortless charcuterie board featuring roasted grapes, creamy brie, aged gouda, prosciutto, and candied pecans, perfect for Friendsgiving gatherings.
- Prep Time: 20 minutes
- Cook Time: 15 minutes
- Total Time: 35 minutes
- Yield: 8-10 servings 1x
- Category: Appetizer
- Cuisine: American
Ingredients
- 8 ounces brie (double or triple cream)
- 6 ounces aged gouda (aged at least 12 months)
- 4 ounces gorgonzola dolce
- 6 ounces sharp white cheddar
- 4 ounces prosciutto (sliced slightly thicker)
- 4 ounces genoa salami
- 4 ounces soppressata
- 2 large honeycrisp apples
- 1 cup red seedless grapes
- 4–6 fresh figs
- 1/2 cup dried apricots
- 1/2 cup dried mission figs
- 1 cup candied pecans (store-bought or homemade)
- 1/2 cup fig jam or membrillo
- Honey for drizzling
- Olive oil for drizzling
- Fresh rosemary and thyme for garnish
- 1 box water crackers
- 1 small baguette (sliced)
- 1 box fig and olive crackers
Instructions
- Roast the grapes: Preheat oven to 425°F. Rinse and pat dry grapes. Toss with 1 tablespoon olive oil, a pinch of salt, and a sprig of fresh rosemary. Spread in a single layer on a lined baking sheet. Roast for 15 minutes until skins are wrinkled and grapes have softened. Let cool.
- Bring cheese to room temperature: Remove brie, gouda, gorgonzola, and cheddar from fridge 30 minutes before assembling.
- Prep the fruit: Slice honeycrisp apples into thin wedges. Halve fresh figs lengthwise. Leave dried mission figs whole or halve if large.
- Slice hard cheeses: Cut aged gouda and sharp cheddar into thin slices or small cubes. Leave brie whole or cut into wedges. Leave gorgonzola dolce in a wedge shape.
- Prepare meats: Fold prosciutto into loose ribbons or drape in waves. Slice genoa salami and soppressata into thick rounds.
- Arrange bowls first: Place small bowls of fig jam, honey, and candied pecans on the board, spaced out.
- Place cheeses: Position cheeses around the board, spacing them out. Put brie near honey, gouda near fig jam, gorgonzola near grapes.
- Add meats: Tuck prosciutto, salami, and soppressata into gaps between cheeses, letting them drape over edges.
- Fill in with fruit: Scatter apple slices, fresh figs, dried apricots, and mission figs. Cluster roasted grapes in small piles.
- Add crackers and bread: Arrange crackers and baguette slices in small groups around the board.
- Garnish and finish: Tuck fresh rosemary and thyme sprigs into gaps. Drizzle honey over brie and gorgonzola. Adjust balance as needed.
Notes
Roast grapes first, then prep everything while they cool. Don’t overcrowd the board; leave breathing room. Let cheese come to room temperature for best flavor. Candied pecans can be made ahead; re-crisp in a 300°F oven for 5 minutes if needed.
Nutrition
- Serving Size: 1 serving (approx. 2
- Calories: 380
- Sugar: 14
- Sodium: 680
- Fat: 26
- Saturated Fat: 12
- Carbohydrates: 22
- Fiber: 4
- Protein: 18
Keywords: charcuterie board, Friendsgiving, fall fruit, roasted grapes, cheese board, appetizer, party food


