Love this? Save it for later!
Share the inspiration with your friends
The office holiday party was in six hours, and I’d completely forgotten I was supposed to bring the drinks station. Everyone else was signing up for elaborate cookie platters and homemade mulled wine. I had a half-empty carton of milk in the fridge, a bag of chocolate chips from a baking project gone wrong, and maybe twenty minutes to pull something together before I had to pick up the kids. Let me tell you, that kind of panic is a real motivator.
I ran to the corner store, grabbed a few things, and threw together a hot cocoa bar on a folding table wedged between the photocopier and someone’s desk plant. Honestly, I felt a little embarrassed about it. But then people started pouring their own cups, adding their own toppings, and suddenly the photocopier line was forgotten. By the end of the night, my simple little table was the most popular spot in the room, and I was getting asked for the setup details. The woman who brought the three-tiered cookie tower looked at me with this mix of annoyance and curiosity. I just shrugged. I hadn’t meant to win the party, you know? It just sort of happened.
That’s the thing about a Quick Holiday Hot Cocoa Bar Setup. It doesn’t need to be fancy or planned for days. It just needs to be inviting. I’ve been doing this version for every holiday gathering since, and it never fails. Maybe you’ve been there—stressed, out of time, but still wanting to offer something special. This is your solution. It’s fast, it’s forgiving, and it makes people feel genuinely taken care of. And honestly, that’s the whole point of the season, right?
Why You’ll Love This Recipe
This isn’t just another hot chocolate station. After testing this setup at family gatherings, neighborhood cookie swaps, and even a surprisingly fancy book club meeting, I can tell you it works every single time. Here’s why this particular Quick Holiday Hot Cocoa Bar Setup is the one you’ll come back to year after year:
- Ready in Under 15 Minutes: No simmering, no complicated syrups, no stress. You can have this entire bar set up while your guests are still taking off their coats. It’s the perfect solution for those “oh no, I’m hosting tonight” moments.
- Uses Pantry Staples: You probably already have most of these ingredients. The base is simple, and the toppings are flexible. No special trips to three different stores required.
- Perfect for Any Holiday Gathering: Whether it’s a work party, a family brunch, or a casual get-together with neighbors, this bar scales up or down effortlessly. It works for a crowd of five or fifty.
- A Certified Crowd-Pleaser: Kids love the DIY aspect, adults appreciate the customizable options, and everyone loves a warm cup of cocoa. I’ve never seen leftovers at the end of a party.
- Unbelievably Delicious for the Effort: The secret is in the base recipe. It’s richer and creamier than a powder mix, but it doesn’t require you to stand over a stove. The texture is silky, the chocolate flavor is deep, and the toppings make it feel like a real treat.
What makes this setup different from every other hot cocoa bar you’ve seen online? It’s built around the idea that you don’t have time to be a perfectionist. This is the version for real life. The base is made with a simple microwave method that saves you from scrubbing a pot. The toppings are chosen for maximum visual impact with minimal prep work. It’s comfort food reimagined for a busy schedule—faster, easier, but with the same soul-soothing satisfaction of a classic winter drink.
What Ingredients You Will Need
This recipe uses simple, wholesome ingredients to deliver a rich, creamy hot cocoa base that feels luxurious without the fuss. The beauty of this setup is that the base is consistent and reliable, while the toppings are where you can get creative.
For the Hot Cocoa Base (Serves 8-10)
- Whole Milk, 6 cups (1.5 liters) – The key to a creamy texture. You can use 2% milk, but avoid skim milk as the result will be thinner. For a dairy-free version, oat milk works beautifully and adds a slight natural sweetness.
- Heavy Cream, 1 cup (240 ml) – This adds that extra richness that makes the cocoa feel indulgent. You can substitute with half-and-half in a pinch.
- Semi-Sweet Chocolate Chips, 1 ½ cups (270 grams) – I recommend Ghirardelli or Guittard for the best melt and flavor. They have a higher cocoa butter content, which makes the cocoa smoother. Avoid generic brands that sometimes contain stabilizers that prevent smooth melting.
- Unsweetened Cocoa Powder, ¼ cup (20 grams) – Use a high-quality brand like Hershey’s Special Dark or Valrhona for a deeper chocolate flavor. Sift it before adding to avoid lumps.
- Granulated Sugar, ¼ cup (50 grams) – Adjust to your taste. If you’re using sweetened chocolate chips, you might want to reduce this slightly.
- Vanilla Extract, 1 tablespoon – Pure vanilla extract makes a noticeable difference. Imitation vanilla will work, but the flavor will be less complex.
- Pinch of Sea Salt – This is non-negotiable. A tiny pinch enhances the chocolate flavor and balances the sweetness. I use Maldon sea salt for a delicate crunch if someone gets a little flake in their cup.
For the Toppings Bar
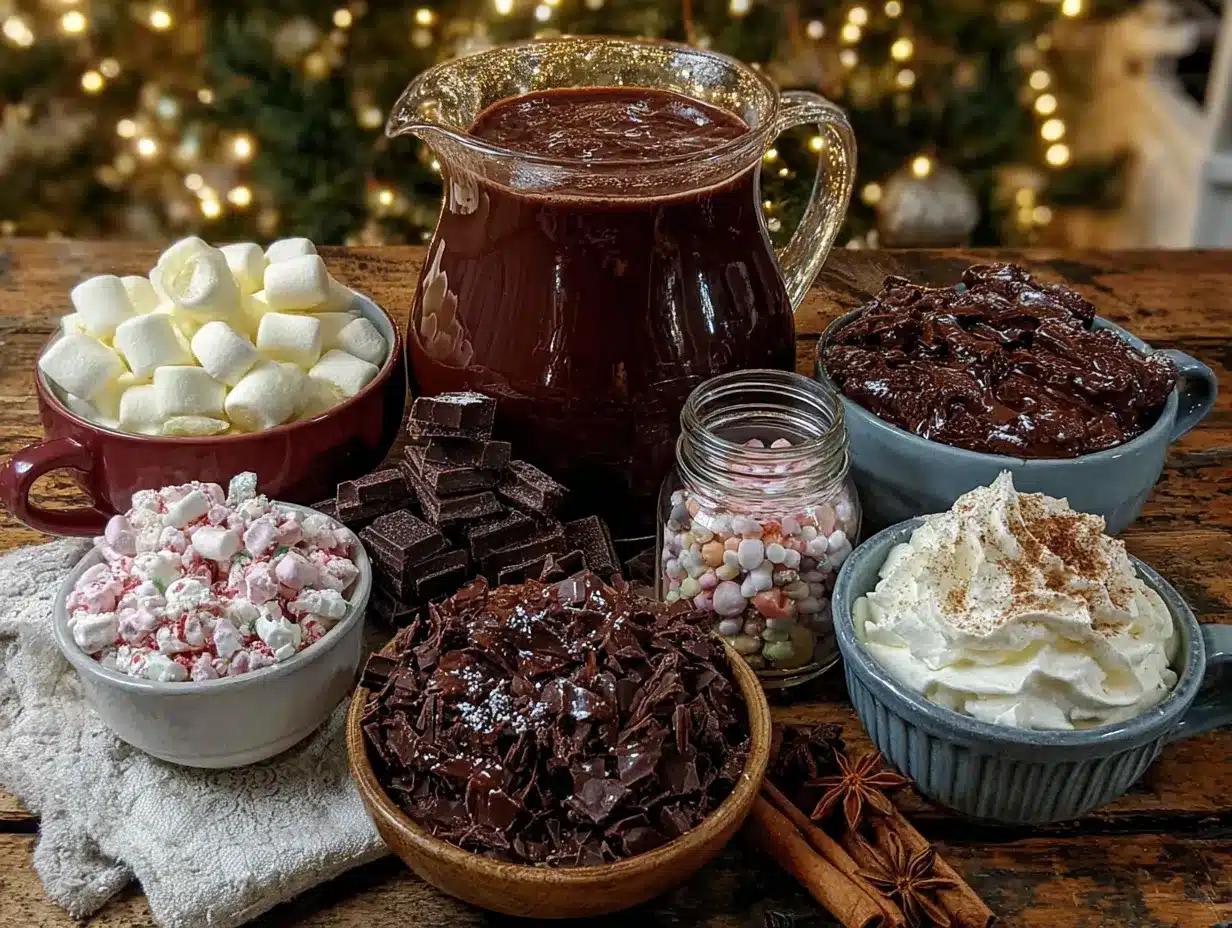
- Mini Marshmallows, 2 cups – The classic. Look for the mini ones; they melt faster and are easier to scoop.
- Whipped Cream, 1 can or 1 cup homemade – A can of Reddi-wip is perfectly fine for a quick setup. If you have a few extra minutes, homemade whipped cream (1 cup heavy cream + 2 tablespoons powdered sugar + ½ teaspoon vanilla) is a showstopper.
- Crushed Candy Canes, ½ cup – Unwrap about 6-8 candy canes, place them in a zip-top bag, and smash them with a rolling pin. It’s a great job for a kid who needs to burn off some pre-party energy.
- Chocolate Shavings, ½ cup – Use a vegetable peeler to shave a chocolate bar. Milk, dark, or white chocolate all work.
- Caramel Sauce, ½ cup – A drizzle of warmed caramel sauce takes this over the top. Use store-bought to save time.
- Sprinkles, ¼ cup – Festive holiday sprinkles add color and fun. Red, green, and gold are always a hit.
- Cinnamon Sticks, 4-5 – Great for stirring and adding a subtle spice note.
Equipment Needed
You don’t need a lot of fancy equipment for this Quick Holiday Hot Cocoa Bar Setup. In fact, keeping it simple is part of the charm.
- Large Microwave-Safe Bowl or Pitcher (at least 2-quart capacity) – This is for making the base. A Pyrex glass measuring cup with a spout works perfectly and makes pouring easy.
- Whisk – A standard wire whisk is best for smoothing out the cocoa powder.
- Slow Cooker or Insulated Carafe – To keep the cocoa warm for serving. A 2.5-quart slow cooker on the “warm” setting is ideal. If you don’t have one, a large thermos works well.
- Small Bowls and Ramekins – For holding the individual toppings. I like using mismatched bowls for a cozy, eclectic look.
- Mugs – Provide a stack of 8-10 mugs. Mix and match for a casual vibe, or use matching ones for a more polished look.
- Serving Spoons and Tongs – For each topping bowl. A small ladle for the caramel sauce is helpful.
- Labels or Chalk Markers – To label each topping. It helps guests identify everything quickly and looks cute.
If you don’t have a slow cooker, you can simply reheat the cocoa in the microwave in batches. I’ve done this many times, and it works just fine. The key is to stir it well between reheating.
Preparation Method
This method is designed for speed and minimal cleanup. You’ll have the base ready in under 10 minutes.
- Combine the liquids: In your large microwave-safe bowl or pitcher, pour in the 6 cups of whole milk and 1 cup of heavy cream. Do not fill the bowl more than halfway, as the liquid will expand a bit when hot.
- Microwave the milk mixture: Heat the milk and cream on high power for 3 minutes. It should be steaming but not boiling. If it starts to form a skin on top, that’s okay—just whisk it back in.
- Add the dry ingredients: Remove the bowl from the microwave (use oven mitts—it gets hot!). Add the 1 ½ cups of semi-sweet chocolate chips, ¼ cup of unsweetened cocoa powder (make sure it’s sifted), and ¼ cup of granulated sugar. Do not stir yet. Let it sit for 1 minute to allow the heat to start melting the chocolate.
- Whisk until smooth: After the minute is up, whisk everything together vigorously. Start slowly to avoid splashing, then increase speed. The chocolate chips should be completely melted, and the cocoa powder should be fully incorporated with no lumps. This takes about 45 seconds of steady whisking.
- Add the flavorings: Whisk in the 1 tablespoon of vanilla extract and the pinch of sea salt. Taste the cocoa at this point. If you prefer it sweeter, add another tablespoon of sugar. If you want a more intense chocolate flavor, add another tablespoon of cocoa powder.
- Final heating: Return the bowl to the microwave and heat for another 2 minutes on high. The cocoa should be hot and steaming. Whisk once more to ensure everything is combined.
- Transfer to serving vessel: Carefully pour the hot cocoa into your slow cooker or insulated carafe. Set the slow cooker to the “warm” setting. If using a carafe, pre-warm it by filling it with hot tap water for 2 minutes, then dumping it out before adding the cocoa.
- Prepare the toppings: While the cocoa is heating, set up your toppings bar. Arrange the small bowls on a tray or directly on the counter. Fill them with the mini marshmallows, crushed candy canes, chocolate shavings, sprinkles, and cinnamon sticks. Place the whipped cream and caramel sauce nearby with their respective serving utensils.
- Set up the station: Place the stack of mugs next to the slow cooker or carafe. Arrange the toppings in a logical order: mugs first, then cocoa, then toppings. This prevents traffic jams. Add your labels so guests know what everything is.
Pro tip: If you’re worried about the cocoa getting a skin on top in the slow cooker, give it a quick whisk every 30 minutes or so. Or, place a layer of plastic wrap directly on the surface of the cocoa before putting the lid on. It’s a little trick I learned from a chef friend.
Cooking Tips & Techniques
I’ve made this setup more times than I can count, and I’ve definitely learned a few things the hard way. Here are the tips that will save you time and trouble.
Don’t overheat the milk. This was my biggest mistake the first time. If the milk mixture boils, it can scorch and develop a burnt flavor that ruins the whole batch. Microwave in shorter bursts and check the temperature. It should be steaming, not bubbling. If you’re using a stovetop method, keep the heat on medium-low and stir constantly.
Sift your cocoa powder. I know, it’s an extra step, and you’re in a hurry. But unsifted cocoa powder forms stubborn lumps that are nearly impossible to whisk out once they’re in hot liquid. A quick sift over the bowl takes 10 seconds and saves you from serving lumpy cocoa. Trust me on this one.
Keep the toppings simple. It’s tempting to go wild with a dozen different toppings, but I’ve found that 5-6 well-chosen options are more effective than 10 mediocre ones. People get overwhelmed by too many choices, and the bar starts to look cluttered. Stick with the classics—marshmallows, crushed candy canes, whipped cream, chocolate shavings, and one sauce. That’s plenty.
Warm your mugs. This is a small touch that makes a big difference. If you’re using ceramic mugs, fill them with hot tap water for a minute or two while you’re setting up. Dump the water out just before guests arrive. The cocoa stays hot longer, and it just feels more luxurious.
Make a double batch if you’re hosting a crowd. This recipe serves 8-10 standard mugs. For a larger party, simply double the ingredients and use a larger slow cooker. I’ve found that a 4-quart slow cooker handles a double batch perfectly.
Variations & Adaptations
This Quick Holiday Hot Cocoa Bar Setup is incredibly flexible. Here are a few ways I’ve adapted it for different occasions and dietary needs.
Dairy-Free Version: I made this for a friend who’s lactose intolerant, and it was a hit. Substitute the whole milk with oat milk (it’s the creamiest alternative) and use a dairy-free heavy cream alternative like Silk’s dairy-free heavy whipping cream. Use dairy-free chocolate chips—Enjoy Life makes a great one. The texture is slightly less rich, but the flavor is still fantastic.
Spiked Adult Version: For an evening gathering, set out a small bottle of peppermint schnapps, bourbon, or Irish cream liqueur alongside the toppings. Let guests add a splash to their own mug. I’ve found that peppermint schnapps and the crushed candy canes are a match made in heaven. Just be sure to label it clearly so no one mistakes it for the vanilla extract.
Mexican Hot Chocolate Twist: Add 1 teaspoon of ground cinnamon and ¼ teaspoon of cayenne pepper to the dry ingredients when you’re making the base. The warmth from the spice pairs beautifully with the chocolate. Top with a cinnamon stick for stirring. This version is my personal favorite for a cozy night in.
White Chocolate Version: For a sweeter, more indulgent option, swap the semi-sweet chocolate chips for 1 ½ cups of high-quality white chocolate chips. Omit the cocoa powder entirely. The result is a creamy, vanilla-forward drink that pairs beautifully with raspberry or strawberry toppings.
Kid-Friendly Setup: If you’re hosting a party with young children, skip the hot cocoa base and set out individual packets of instant hot cocoa mix alongside a kettle of hot water. Let the kids (with supervision) make their own cups. Then they can go wild with the toppings. It’s a little less elegant, but it’s much safer and more fun for them.
Serving & Storage Suggestions
This setup is best enjoyed fresh, but there are a few tricks to keep things running smoothly.
Serving Temperature: Serve the cocoa piping hot. The slow cooker on the “warm” setting will keep it at the perfect temperature for up to 3 hours. If the cocoa starts to thicken after a while, stir in a splash of milk to thin it out.
Presentation Tips: Arrange the toppings bar in a logical flow. Start with the mugs, then the cocoa source, then the liquid toppings (caramel sauce), then the dry toppings (marshmallows, sprinkles, etc.), and finish with the stirrers (cinnamon sticks). This prevents guests from having to backtrack. Use a small tray or a lazy Susan for the toppings to make it easy to access everything.
Complementary Dishes: This cocoa bar pairs beautifully with a plate of gingerbread cookies, sugar cookies, or a simple loaf of banana bread. If you’re feeling ambitious, a batch of homemade marshmallows is a showstopper. For a savory balance, offer a cheese board with sharp cheddar and crackers.
Storage: Leftover cocoa can be stored in an airtight container in the refrigerator for up to 3 days. Reheat it gently on the stovetop over medium-low heat or in the microwave in 30-second bursts, stirring well between each. The texture might separate slightly, but a good whisk will bring it back together. Do not freeze the cocoa—the dairy will separate and become grainy.
Flavor Development: Honestly, the cocoa is best on the first day. The flavors are brightest and the texture is creamiest. If you do have leftovers, they’ll still be tasty, but the chocolate flavor will mellow out a bit.
Nutritional Information & Benefits
Let’s be real—this is a treat, not a health food. But that doesn’t mean it’s without its merits. Here’s the breakdown for one 8-ounce serving of the base cocoa (without toppings).
- Calories: Approximately 320
- Fat: 18g (11g saturated)
- Carbohydrates: 36g (28g sugar)
- Protein: 8g
- Calcium: 25% of the Daily Value
- Iron: 15% of the Daily Value
Health Benefits: Dark chocolate (from the semi-sweet chips and cocoa powder) is rich in flavonoids, which are antioxidants that can support heart health. The milk provides calcium and vitamin D for bone health. A warm drink can also have a soothing effect, helping to reduce stress during the busy holiday season. Of course, this is all in the context of an indulgent treat—balance is key.
Dietary Considerations: This recipe contains dairy and gluten (check your chocolate chips for gluten if that’s a concern). For a dairy-free version, see the variations section above. It is not suitable for a low-sugar or keto diet without significant modifications.
Allergen Note: Common allergens in this recipe include milk and soy (often found in chocolate chips). Always check labels if you’re serving guests with allergies.
Conclusion
Look, I know the holidays can be a whirlwind of stress and expectation. But this Quick Holiday Hot Cocoa Bar Setup is proof that you don’t need to be a perfectionist to be a great host. It’s fast, it’s forgiving, and it genuinely brings people together. I’ve seen strangers bond over crushed candy canes and heard some of the best conversations start with “Pass the marshmallows, please.”
I hope you make this your own. Add your favorite toppings, swap in your preferred milk, and don’t be afraid to let it be a little imperfect. The best parties are the ones where the host is actually enjoying themselves, and this setup gives you that gift of time. You can spend less time fussing and more time sipping cocoa with the people you care about.
If you try this setup, I’d love to hear about it. What toppings did your guests go crazy for? Did you try the spiked version? Drop a comment below and share your experience. And if you’re looking for more quick and easy holiday ideas, be sure to check out our easy holiday appetizers and no-bake desserts for more stress-free entertaining. Happy hosting, and enjoy every warm, chocolatey sip!
Frequently Asked Questions
Can I make the hot cocoa base ahead of time?
Yes, absolutely. You can make the base up to 2 days in advance. Store it in an airtight container in the refrigerator. When you’re ready to serve, reheat it gently on the stovetop or in the microwave, whisking well to bring it back to a smooth consistency. You may need to add a splash of milk to thin it out.
How do I keep the cocoa warm for a long party?
A slow cooker set to the “warm” setting is your best friend here. It will keep the cocoa at a safe serving temperature for 3-4 hours without burning it. Just give it a stir every 30 minutes to prevent a skin from forming. If you don’t have a slow cooker, an insulated carafe works well for about 2 hours.
Can I use water instead of milk?
Technically, yes, but I wouldn’t recommend it. The cocoa will be much thinner and less creamy. If you’re out of milk, try using half water and half heavy cream or half-and-half for a better texture. Oat milk is also a great dairy-free alternative that keeps the drink creamy.
How many people does this recipe serve?
This recipe makes about 8 cups of hot cocoa, which serves 8-10 people with standard 8-ounce mugs. If you’re serving a larger crowd, simply double the ingredients. For a party of 20 or more, I recommend making a double batch and using a 4-quart slow cooker.
What are the best toppings for a hot cocoa bar?
The classics are always a hit: mini marshmallows, whipped cream, and crushed candy canes. From there, you can get creative with chocolate shavings, caramel sauce, sprinkles, cinnamon sticks, and even small cookies for dipping. I recommend sticking to 5-6 toppings to keep it manageable and visually appealing. Too many options can overwhelm guests and clutter the table.
Pin This Recipe!
Quick & Easy Holiday Hot Cocoa Bar Setup

A fast, forgiving, and inviting hot cocoa bar setup that uses pantry staples and a simple microwave method. Perfect for holiday gatherings, it features a rich, creamy base and customizable toppings that make everyone feel taken care of.
- Prep Time: 10 minutes
- Cook Time: 5 minutes
- Total Time: 15 minutes
- Yield: 8-10 servings 1x
- Category: Beverage
- Cuisine: American
Ingredients
- 6 cups whole milk (1.5 liters)
- 1 cup heavy cream (240 ml)
- 1 ½ cups semi-sweet chocolate chips (270 grams)
- ¼ cup unsweetened cocoa powder (20 grams)
- ¼ cup granulated sugar (50 grams)
- 1 tablespoon vanilla extract
- Pinch of sea salt
- 2 cups mini marshmallows
- 1 can or 1 cup whipped cream
- ½ cup crushed candy canes (about 6–8 candy canes)
- ½ cup chocolate shavings
- ½ cup caramel sauce
- ¼ cup festive sprinkles
- 4–5 cinnamon sticks
Instructions
- In a large microwave-safe bowl or pitcher, combine 6 cups whole milk and 1 cup heavy cream. Do not fill more than halfway.
- Microwave on high for 3 minutes until steaming but not boiling.
- Remove from microwave (use oven mitts). Add 1 ½ cups semi-sweet chocolate chips, ¼ cup sifted unsweetened cocoa powder, and ¼ cup granulated sugar. Let sit for 1 minute.
- Whisk vigorously until smooth and chocolate is fully melted, about 45 seconds.
- Whisk in 1 tablespoon vanilla extract and a pinch of sea salt. Taste and adjust sweetness or chocolate intensity if desired.
- Return to microwave and heat for another 2 minutes on high. Whisk again.
- Pour hot cocoa into a slow cooker set to ‘warm’ or a pre-warmed insulated carafe.
- While cocoa heats, arrange toppings in small bowls: mini marshmallows, crushed candy canes, chocolate shavings, sprinkles, and cinnamon sticks. Place whipped cream and caramel sauce nearby with serving utensils.
- Set up the station: mugs first, then cocoa, then toppings in logical order. Add labels if desired.
Notes
For a dairy-free version, substitute whole milk with oat milk, use dairy-free heavy cream alternative, and dairy-free chocolate chips. For a spiked adult version, offer peppermint schnapps, bourbon, or Irish cream liqueur. To prevent a skin from forming on the cocoa in the slow cooker, whisk every 30 minutes or place plastic wrap directly on the surface before covering.
Nutrition
- Serving Size: 1 cup (8 ounces)
- Calories: 320
- Sugar: 28
- Sodium: 150
- Fat: 18
- Saturated Fat: 11
- Carbohydrates: 36
- Fiber: 2
- Protein: 8
Keywords: hot cocoa, hot chocolate, holiday, party, quick, easy, cocoa bar, toppings, Christmas, winter


