Love this? Save it for later!
Share the inspiration with your friends
It was 11:47 PM on a random Wednesday in October, and I had the most ridiculous craving for something that looked like fall but tasted like summer. I’d been scrolling through Pinterest for way too long, seeing all these elaborate charcuterie boards that looked like works of art—but let’s be honest, nobody has time for that on a weeknight. I wanted pumpkins. I wanted fruit. I wanted that honey yogurt dip I’d been dreaming about since my neighbor Karen mentioned it at the school pickup line.
Here’s the thing—I didn’t have any fancy cookie cutters or those little pumpkin-shaped molds everyone uses. What I did have was a paring knife, a cutting board, and a very specific vision. I grabbed a cantaloupe from the fridge that was probably past its prime for eating plain but perfect for carving. My kitchen looked like a fruit massacre for about twenty minutes, but when I stepped back, I had this gorgeous little pumpkin patch sitting on my grandmother’s old wooden tray. Honestly, I surprised myself.
The honey yogurt dip came together in like two minutes—I mean, it’s basically just yogurt, honey, and a pinch of cinnamon, but something about that combo is pure magic. I ate half of it standing over the counter at midnight, dipping apple slices and telling myself it was basically a health food. Maybe you’ve been there, right? When a recipe idea hits you and you just have to make it happen, no matter the hour?
That night, I learned something important: you don’t need special equipment or a ton of time to make something that feels special. This Wholesome Pumpkin Patch Fruit Tray with Easy Honey Yogurt Dip has become my go-to for everything from Halloween parties to lazy Sunday afternoons. It’s the kind of thing that makes people smile before they even take a bite.
Why You’ll Love This Recipe
Let me tell you why this fruit tray is different from every other fruit platter you’ve seen. I’ve tested this at family gatherings, school events, and even a book club meeting where everyone was supposedly “not eating sugar.” Spoiler alert: the tray was empty in twenty minutes.
- Quick & Easy: This whole thing comes together in under 30 minutes, most of which is just washing and cutting fruit. The dip takes literally 60 seconds.
- Simple Ingredients: You probably have everything in your kitchen right now. Honey, yogurt, cinnamon—that’s it for the dip. For the fruit, whatever’s in season works perfectly.
- Perfect for Fall Gatherings: Whether it’s a Halloween party, Thanksgiving appetizer, or just a fun weekend snack, this tray fits right in. It’s festive without being fussy.
- Crowd-Pleaser: Kids go wild for the pumpkin shapes, and adults appreciate something that feels indulgent but is actually pretty healthy. I’ve seen people fight over the last cantaloupe pumpkin.
- Unbelievably Delicious: The combination of cold, juicy fruit with that creamy, slightly tangy honey yogurt dip is next-level. I’m not exaggerating when I say I’ve made this three times in one week.
What makes this recipe stand out from the hundreds of fruit trays on Pinterest? It’s the technique. Instead of just arranging fruit on a plate, you’re creating little pumpkin shapes that make people do a double-take. And that dip? I’ve tried a dozen variations, but this ratio of yogurt to honey to cinnamon is absolutely perfect. It’s not too sweet, not too tangy—just right.
This isn’t just another fruit platter. It’s the kind of recipe that makes you feel like you’ve got your life together, even if you threw it together at 11 PM on a Wednesday. It’s comfort food that’s actually good for you, and honestly, we all need more of that.
What Ingredients You Will Need
This recipe uses simple, wholesome ingredients that work together to create something that looks impressive but is secretly super easy. The fruit provides natural sweetness and vibrant color, while the honey yogurt dip adds a creamy, tangy contrast that ties everything together.
For the Pumpkin Patch Fruit Tray
- Cantaloupe or Orange Melon – 1 large, firm but ripe (this will be your pumpkins; look for one that’s oval-shaped for the best pumpkin silhouette)
- Green Grapes – 2 cups, washed and separated into small clusters (these become the “vines” and leaves around your pumpkins)
- Apple Slices – 2 medium apples (I prefer Honeycrisp or Fuji for sweetness and crunch; slice them thin and toss with a little lemon juice to prevent browning)
- Pear Slices – 2 medium pears (Bosc or Bartlett work well; slice just before serving)
- Fresh Strawberries – 1 cup, halved or quartered depending on size
- Blueberries – 1/2 cup (adds a nice pop of color and antioxidants)
- Fresh Mint Leaves – A handful, for garnish (optional but makes it look professional)
- Pumpkin Seeds (Pepitas) – 2 tablespoons, for sprinkling (adds crunch and fits the pumpkin theme)
For the Honey Yogurt Dip
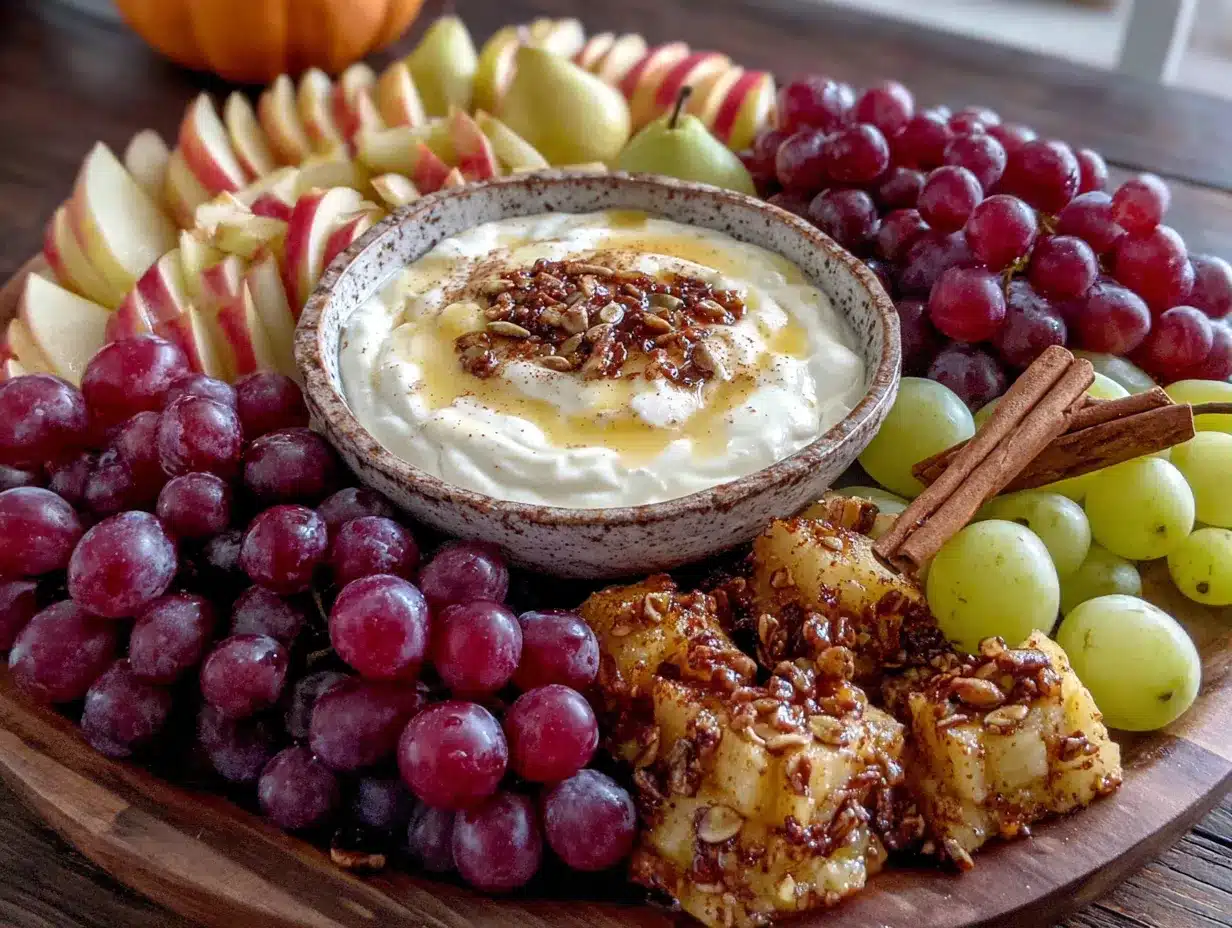
- Plain Greek Yogurt – 1 cup (I recommend Fage or Chobani for thickness; full-fat gives the best texture, but 2% works fine)
- Honey – 3 tablespoons (local honey is best for flavor and seasonal allergy benefits, but any good honey works)
- Ground Cinnamon – 1/2 teaspoon (adds warmth and pairs beautifully with the fruit)
- Vanilla Extract – 1/2 teaspoon (pure vanilla is worth the splurge here)
- Pinch of Salt – Just a tiny pinch (trust me on this—it balances the sweetness and makes the flavors pop)
Ingredient Selection Tips: For the best pumpkin shapes, choose a cantaloupe that’s slightly underripe—it’ll be firmer and easier to carve. If cantaloupe isn’t in season, honeydew melon works too, though the color won’t be as pumpkin-like. For the yogurt dip, Greek yogurt is non-negotiable for thickness; regular yogurt will be too runny. I’ve tried this with dairy-free coconut yogurt and it works, but the texture is a bit looser.
Substitution Guidance: No cantaloupe? Use a large orange bell pepper and carve it into pumpkin shapes—it’s a fun savory twist. For a vegan dip, swap the Greek yogurt for coconut cream and use maple syrup instead of honey. If you’re avoiding sugar, a sugar-free maple syrup works, but the flavor won’t be quite as rich.
Equipment Needed
You don’t need much for this recipe, which is part of what makes it so great. Here’s what you’ll want to have on hand:
- Large Wooden or Slate Serving Board – At least 12×16 inches to give your pumpkins room to shine. I use a reclaimed wood board my husband made, but any large platter works.
- Sharp Paring Knife – This is crucial for carving the pumpkin shapes. A dull knife will make the process frustrating and the results messy.
- Melon Baller or Small Spoon – For scooping out the cantaloupe seeds and creating clean edges. I use a melon baller my mom gave me, but a regular spoon works fine.
- Cutting Board – A large one with a groove to catch juice is ideal. Trust me, melon juice gets everywhere.
- Small Bowl for the Dip – A cute little ramekin or small ceramic bowl works perfectly. I use a tiny pumpkin-shaped bowl I found at a thrift store.
- Vegetable Peeler – Optional, but helpful if you want to create ribbon-like apple decorations.
- Paper Towels – For drying the fruit after washing. Wet fruit makes the board slippery and can dilute the dip.
If you don’t have a melon baller, don’t stress—I’ve made this with just a knife and a spoon and it turned out fine. The key is having a sharp knife for those pumpkin details. A small cookie cutter in a pumpkin shape would make this even easier, but it’s definitely not necessary.
Preparation Method
Alright, let’s get to the fun part. I’m going to walk you through this step by step, including all the little tricks I’ve learned from making this about a dozen times.
- Make the Honey Yogurt Dip First (5 minutes)
In a small bowl, combine 1 cup plain Greek yogurt, 3 tablespoons honey, 1/2 teaspoon cinnamon, 1/2 teaspoon vanilla extract, and a tiny pinch of salt. Whisk until smooth and creamy. Taste it—I always add a little more honey if the fruit I’m using is tart. Cover and refrigerate while you prep the fruit. This gives the flavors time to meld together, and honestly, it gets better after sitting for 15-20 minutes. - Prepare Your Cantaloupe Pumpkins (10 minutes)
Cut the cantaloupe in half and scoop out the seeds with your melon baller or spoon. Now, here’s the trick: instead of trying to carve individual pumpkins from the whole melon, cut it into 1-inch thick half-moon slices. Then, using your paring knife, cut each slice into a pumpkin shape—round on top, slightly flattened on the bottom, with a little stem at the top. You’ll get about 8-10 pumpkin shapes from one medium cantaloupe. Don’t worry if they’re not perfect; imperfect pumpkins look more natural anyway. Use a small knife to carve little vertical lines on each pumpkin to mimic the ridges of a real pumpkin. This takes practice, but even my first attempt looked cute. - Prep the Rest of Your Fruit (10 minutes)
Wash all your fruit thoroughly and pat it dry with paper towels. Core the apples and pears, then slice them thinly—about 1/4 inch thick. If you’re not serving immediately, toss the apple and pear slices with a little lemon juice to keep them from browning. I learned this the hard way when my beautiful tray turned brown before guests arrived. Wash and dry the grapes, keeping them in small clusters. Halve or quarter the strawberries depending on size. Rinse the blueberries and pat them dry. - Assemble the Pumpkin Patch (10 minutes)
Take your serving board and arrange the cantaloupe pumpkins in the center, clustering them together like a little pumpkin patch. I like to put 3-4 in the middle and then scatter the rest around. Place the small bowl of honey yogurt dip in the center of the pumpkins—it looks like a little pond or watering hole in the middle of the patch. Now, arrange the grapes, apple slices, pear slices, strawberries, and blueberries around the pumpkins. I like to create little “paths” of grapes leading away from the pumpkins. Tuck fresh mint leaves here and there to look like vines and leaves. Sprinkle pumpkin seeds (pepitas) over everything for texture and visual interest. - Add the Finishing Touches (2 minutes)
Take a step back and look at your tray. Fill in any empty spots with extra fruit or mint leaves. If you have any small rosemary sprigs, they make great “tree” decorations around the edge. I sometimes add a few cinnamon sticks for a rustic touch. The goal is to make it look abundant and inviting—like a little edible landscape. - Serve Immediately or Refrigerate
This tray is best served within an hour of assembly. If you need to make it ahead, prep all the fruit and the dip separately, store them in the fridge, and assemble just before serving. The cantaloupe pumpkins will hold their shape for a few hours, but the apple and pear slices will start to brown eventually. Pro tip: if you’re making this for a party, do all the cutting in advance and keep the fruit in separate containers in the fridge. Assembly takes only 10 minutes, so you can do it right before guests arrive.
Cooking Tips & Techniques
I’ve made this tray enough times to know exactly what can go wrong—and how to fix it. Here are my hard-earned tips:
The Cantaloupe Conundrum: The first time I made this, I used a super ripe cantaloupe that was soft and juicy. Big mistake. The pumpkins fell apart as soon as I tried to carve them. You want a cantaloupe that’s firm but fragrant—think the texture of a slightly underripe avocado. If you can only find soft cantaloupe, try honeydew melon instead. It’s firmer and holds its shape better, though the color is lighter.
Knife Safety: I once tried to get fancy and carve details with a dull knife. The knife slipped and I nearly cut my finger. Always use a sharp paring knife and cut away from your body. If you’re not comfortable carving, you can use small pumpkin-shaped cookie cutters to stamp out shapes from thick melon slices. It’s actually easier and more consistent.
The Dip Dilemma: The honey yogurt dip can get watery if you let it sit too long. To prevent this, make sure your fruit is completely dry before adding it to the tray. Also, keep the dip in a separate bowl rather than pouring it directly on the fruit. I learned this when I made a big batch for a party and the dip turned into soup after an hour.
Timing is Everything: This is a great recipe to multitask. While the dip is chilling, prep the fruit. While you’re carving the pumpkins, have the other fruit washing in a colander. I usually put on a podcast and just zone out while I’m cutting—it’s almost meditative.
Consistency is Key: For the best results, keep your pumpkin shapes similar in size. This makes the tray look more professional and ensures even dipping. I use the first pumpkin I cut as a template for the rest.
My Biggest Failure: I once forgot to add the honey to the yogurt dip. I served it, and everyone was like, “This is… fine?” It was just plain yogurt with cinnamon. Not terrible, but definitely not the star of the show. Now I always taste the dip before serving and adjust the sweetness.
Variations & Adaptations
One of the best things about this recipe is how flexible it is. Here are some variations I’ve tried and loved:
Seasonal Variations
- Summer Berry Patch: Swap the pumpkin shapes for star-shaped melon pieces using a cookie cutter. Use fresh berries—strawberries, blueberries, raspberries, blackberries—and add edible flowers for a garden vibe.
- Winter Citrus Grove: Use orange and grapefruit slices instead of melon. Arrange them in a sunburst pattern with pomegranate seeds scattered around. The honey yogurt dip pairs beautifully with citrus.
- Spring Flower Garden: Cut melon into flower shapes using a flower-shaped cookie cutter. Use kiwi slices for leaves and add edible pansies or violets for a gorgeous spring presentation.
Dietary Adaptations
- Vegan Version: Use coconut cream or cashew-based yogurt for the dip. Swap honey for maple syrup or agave. The rest of the recipe is naturally plant-based.
- Low-Sugar Option: Use a sugar-free maple syrup in the dip and focus on lower-sugar fruits like berries, green apples, and pears. Skip the honey and use a few drops of stevia instead.
- Nut-Free: This recipe is naturally nut-free, but if you’re serving someone with allergies, skip the pumpkin seeds or use sunflower seeds instead.
Flavor Twists
- Spiced Pumpkin Dip: Add 1/4 teaspoon pumpkin pie spice to the yogurt dip for extra fall flavor. It’s incredible with the cantaloupe pumpkins.
- Chocolate Lover’s Version: Drizzle melted dark chocolate over the fruit and add a tablespoon of cocoa powder to the yogurt dip. It’s less healthy but absolutely decadent.
- Savory Twist: Skip the honey and add garlic powder, herbs, and a squeeze of lemon to the yogurt for a savory dip. Use bell pepper pumpkins instead of cantaloupe for a veggie tray.
I personally love the spiced pumpkin dip variation—it makes the whole tray taste like fall in a bite. I’ve also tried using a mix of cantaloupe and honeydew to create different colored pumpkins, which looks really cute on the board.
Serving & Storage Suggestions
Serving Temperature: This tray is best served cold or at room temperature. I recommend taking it out of the fridge about 15 minutes before serving to take the chill off. The fruit tastes more flavorful at room temperature, and the dip softens slightly for easier dipping.
Presentation Tips: For a wow factor, arrange the fruit on a bed of fresh kale or lettuce leaves. It adds color and makes the fruit pop. I also like to add a few whole cinnamon sticks and star anise around the edge of the board for a rustic, autumnal look. If you’re serving this at a party, label the dip with a cute little tag—people always ask what’s in it.
Complementary Dishes: This fruit tray pairs beautifully with a cheese board featuring sharp cheddar and brie. It’s also great alongside warm apple cider or a pumpkin spice latte. For a full fall spread, serve it with pumpkin muffins or a slice of apple cake.
Storage Instructions: If you have leftovers (which is rare in my house), store the fruit and dip separately. The fruit will keep in an airtight container in the fridge for up to 2 days, though the apple and pear slices will brown. The dip keeps for up to 5 days in the fridge and actually gets better as the flavors meld. Do not freeze the dip—Greek yogurt gets grainy when thawed.
Reheating: You don’t need to reheat anything for this recipe, but if your dip has been in the fridge and gotten too thick, let it sit at room temperature for 10 minutes and give it a stir. If you want to serve it warm, microwave it for 15 seconds and whisk—it’s delicious warm, especially on a cold day.
Flavor Development: The honey yogurt dip is actually better after a few hours in the fridge. The honey and cinnamon infuse the yogurt, creating a deeper, more complex flavor. I always make the dip the night before if I’m serving this for an event.
Nutritional Information & Benefits
This recipe is packed with nutrients and is a great way to get your daily fruit intake while feeling like you’re having a treat. Here’s the estimated nutritional breakdown per serving (about 1 cup of fruit with 2 tablespoons of dip):
| Nutrient | Amount |
|---|---|
| Calories | 185 |
| Total Fat | 3g |
| Saturated Fat | 1g |
| Cholesterol | 5mg |
| Sodium | 45mg |
| Total Carbohydrates | 36g |
| Dietary Fiber | 4g |
| Sugars | 28g |
| Protein | 8g |
| Vitamin C | 65% DV |
| Calcium | 10% DV |
Health Benefits: Cantaloupe is rich in vitamin A and C, which support immune health and eye health. Greek yogurt provides probiotics for gut health and protein for satiety. Honey has antibacterial properties and is a natural energy source. The cinnamon in the dip may help regulate blood sugar levels.
Dietary Considerations: This recipe is naturally gluten-free, nut-free, and vegetarian. For a vegan option, use coconut yogurt and maple syrup. For a low-carb version, focus on berries and use a sugar-free sweetener in the dip. The main allergens to watch for are dairy (in the yogurt) and honey (which some people avoid for dietary reasons).
Personal Wellness Perspective: I love that this recipe lets me indulge in something that feels like dessert but is actually good for me. When I’m trying to eat healthier, having a beautiful fruit tray in the fridge makes it so much easier to reach for something nutritious instead of processed snacks. It’s a win-win.
Conclusion
This Wholesome Pumpkin Patch Fruit Tray with Easy Honey Yogurt Dip is more than just a pretty appetizer—it’s the recipe that proved to me you don’t need fancy tools or hours of prep to create something that feels special. It’s the kind of dish that makes people smile, that sparks conversation, that disappears before you’ve had a chance to take a photo for Instagram.
I love this recipe because it’s forgiving. Your pumpkins don’t have to be perfect. Your fruit arrangement doesn’t have to be symmetrical. The dip comes together in seconds and tastes like you spent hours on it. It’s the perfect example of how simple ingredients, when treated with a little creativity, can become something extraordinary.
I encourage you to make this your own. Use whatever fruit is in season. Experiment with different dip flavors. Arrange it in a way that feels right to you. The best recipes are the ones that evolve with the cook, and this one has so much room for personal touches.
So go ahead—give it a try. Carve some pumpkins, whip up that dip, and watch how something so simple can bring so much joy. And when you do, I’d love to hear about it. Drop a comment below and tell me how your pumpkin patch turned out. Did you try a variation? Did your kids help? Did you eat the whole thing standing over the counter like I did that first night? Share your story—I’m genuinely curious.
Happy carving, friends. Here’s to creating beauty with what we have, right where we are.
Frequently Asked Questions
Can I make this fruit tray ahead of time?
Yes, but with some planning. You can prep all the fruit and the dip up to 24 hours in advance and store them separately in the fridge. Assemble the tray no more than 2 hours before serving for the best appearance. The apple and pear slices should be tossed with lemon juice to prevent browning if prepped ahead.
What’s the best melon for carving pumpkin shapes?
Cantaloupe is my top choice because of its orange color and firm texture. Honeydew melon works too, though the color is lighter. For a more realistic pumpkin look, choose a cantaloupe that’s slightly underripe—it’ll be firmer and easier to carve. Avoid watermelon as it’s too soft and watery.
Can I use frozen fruit for this recipe?
I don’t recommend it. Frozen fruit releases water as it thaws, which will make your tray soggy and dilute the dip. Fresh fruit is really the way to go here. If fresh fruit isn’t available, consider using dried fruit like apricots, dates, or dried apple rings instead.
How do I keep the dip from getting watery?
The key is to make sure your fruit is completely dry before adding it to the tray. After washing, pat each piece of fruit with a paper towel. Also, keep the dip in a separate bowl rather than pouring it over the fruit. If your dip does get watery, whisk in a tablespoon of additional Greek yogurt to thicken it back up.
What can I use instead of cantaloupe for the pumpkin shapes?
If cantaloupe isn’t available or you want to try something different, here are some great alternatives: orange bell peppers (slice and carve into small pumpkin shapes), butternut squash (roast first until tender but firm), or large carrot slices (cut into thick rounds and carve). Each gives a different flavor and texture, but all work beautifully for the pumpkin patch theme.
Pin This Recipe!
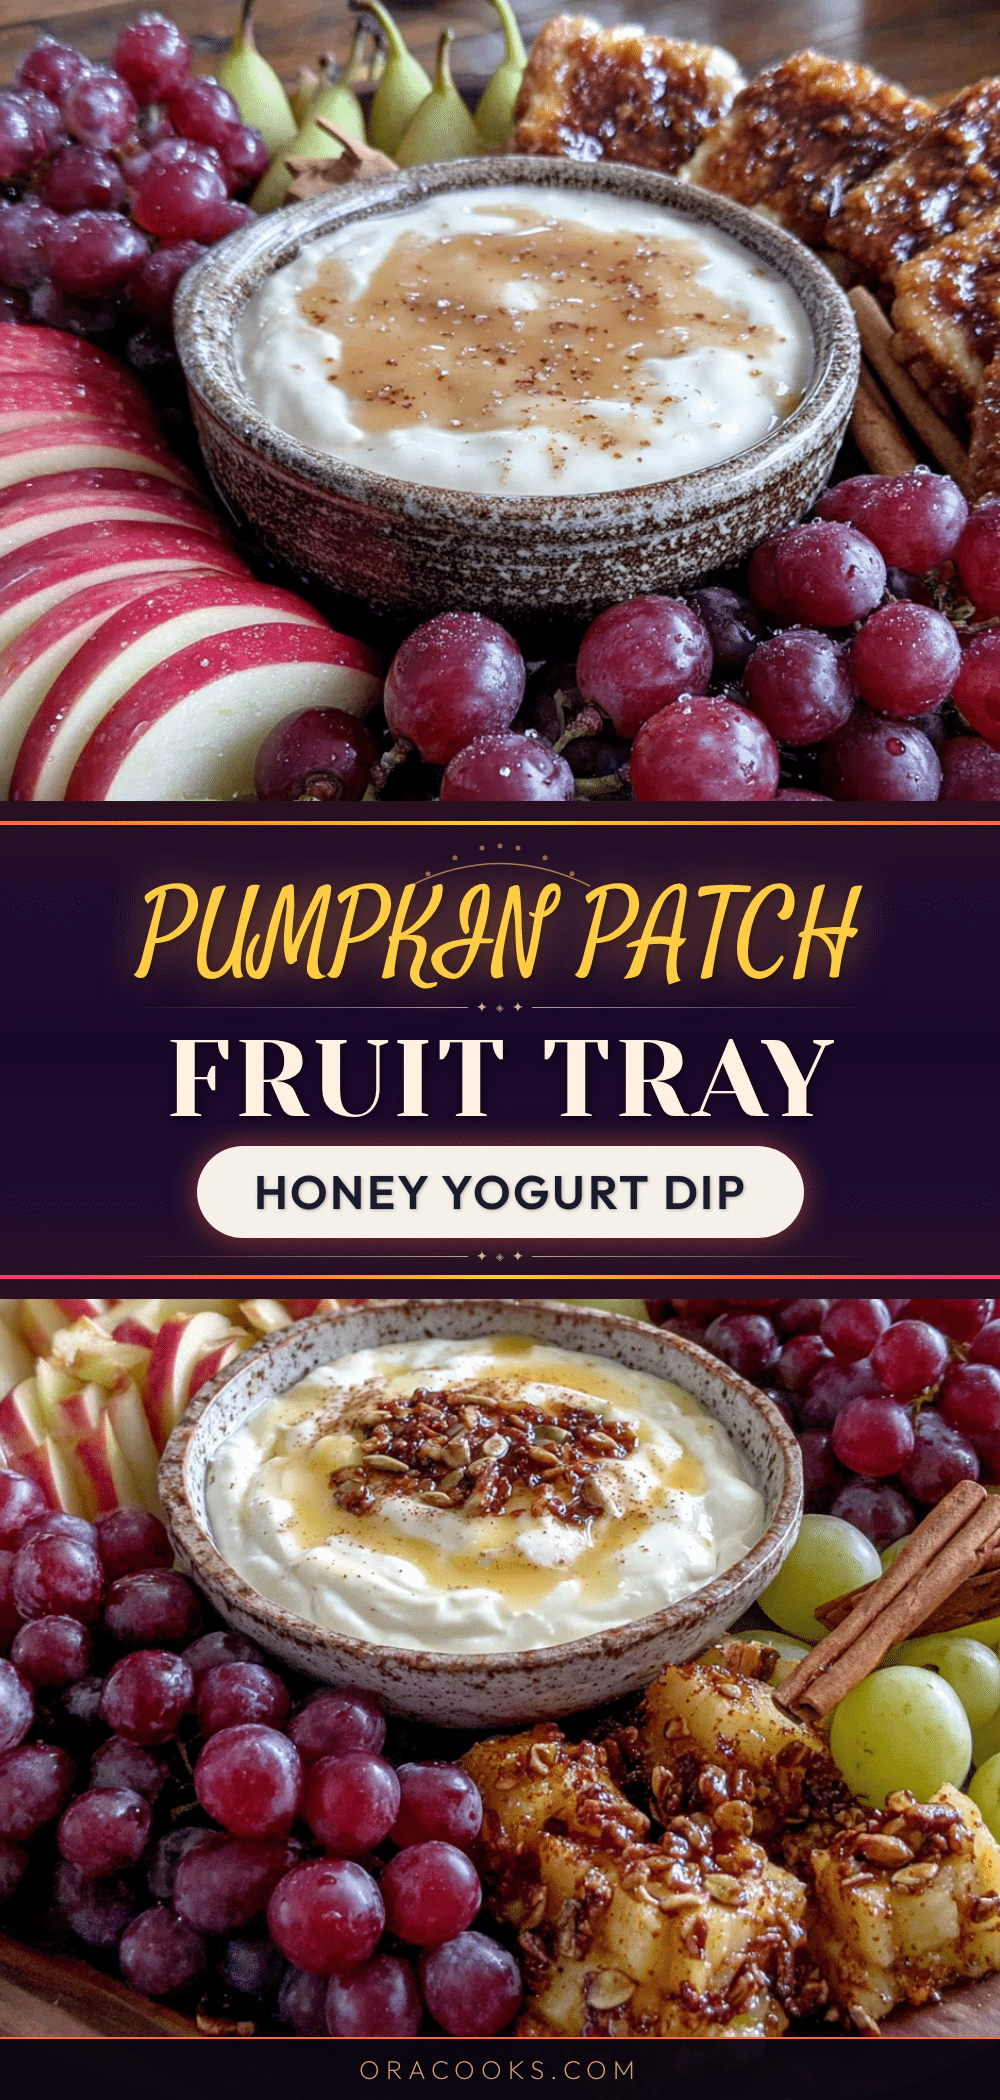
Wholesome Pumpkin Patch Fruit Tray with Easy Honey Yogurt Dip
A festive and fun fruit tray featuring cantaloupe carved into pumpkin shapes, served with a creamy honey yogurt dip. Perfect for fall gatherings, this healthy appetizer comes together in under 30 minutes.
- Prep Time: 20 minutes
- Cook Time: 0 minutes
- Total Time: 30 minutes
- Yield: 8 servings 1x
- Category: Appetizer
- Cuisine: American
Ingredients
- 1 large cantaloupe or orange melon, firm but ripe
- 2 cups green grapes, washed and separated into small clusters
- 2 medium apples (Honeycrisp or Fuji), sliced thin and tossed with lemon juice
- 2 medium pears (Bosc or Bartlett), sliced thin
- 1 cup fresh strawberries, halved or quartered
- 1/2 cup blueberries
- A handful of fresh mint leaves, for garnish
- 2 tablespoons pumpkin seeds (pepitas), for sprinkling
- 1 cup plain Greek yogurt (Fage or Chobani recommended)
- 3 tablespoons honey
- 1/2 teaspoon ground cinnamon
- 1/2 teaspoon vanilla extract
- Pinch of salt
Instructions
- Make the Honey Yogurt Dip: In a small bowl, combine 1 cup plain Greek yogurt, 3 tablespoons honey, 1/2 teaspoon cinnamon, 1/2 teaspoon vanilla extract, and a tiny pinch of salt. Whisk until smooth and creamy. Taste and adjust sweetness if needed. Cover and refrigerate while you prep the fruit.
- Prepare the Cantaloupe Pumpkins: Cut the cantaloupe in half and scoop out the seeds. Cut into 1-inch thick half-moon slices. Using a sharp paring knife, cut each slice into a pumpkin shape—round on top, slightly flattened on the bottom, with a little stem at the top. Carve small vertical lines to mimic pumpkin ridges. You should get about 8-10 pumpkin shapes.
- Prep the Rest of the Fruit: Wash all fruit thoroughly and pat dry. Core and slice apples and pears thinly (about 1/4 inch thick). Toss apple and pear slices with lemon juice to prevent browning if not serving immediately. Keep grapes in small clusters. Halve or quarter strawberries. Rinse blueberries and pat dry.
- Assemble the Pumpkin Patch: On a large serving board, arrange the cantaloupe pumpkins in the center, clustering them together. Place the small bowl of honey yogurt dip in the center of the pumpkins. Arrange grapes, apple slices, pear slices, strawberries, and blueberries around the pumpkins, creating little ‘paths’ of grapes. Tuck fresh mint leaves here and there to look like vines and leaves. Sprinkle pumpkin seeds over everything.
- Add Finishing Touches: Fill in any empty spots with extra fruit or mint leaves. Optionally, add small rosemary sprigs or cinnamon sticks for a rustic touch. Serve immediately or refrigerate until ready to serve.
Notes
For best pumpkin shapes, choose a slightly underripe cantaloupe—it’s firmer and easier to carve. If cantaloupe isn’t available, honeydew melon works too. The honey yogurt dip can be made a day ahead for better flavor. Keep fruit dry to prevent the dip from becoming watery. Apple and pear slices should be tossed with lemon juice if prepped ahead to prevent browning.
Nutrition
- Serving Size: 1 cup of fruit with
- Calories: 185
- Sugar: 28
- Sodium: 45
- Fat: 3
- Saturated Fat: 1
- Carbohydrates: 36
- Fiber: 4
- Protein: 8
Keywords: fruit tray, pumpkin patch, honey yogurt dip, fall appetizer, healthy snack, Halloween, Thanksgiving, cantaloupe pumpkins


